Tyo’s grad dress is finished, worn, and a great success. Someday, I’ll manage to blog about it. In the meantime: Syo made a rice-stuffed teddy bear.
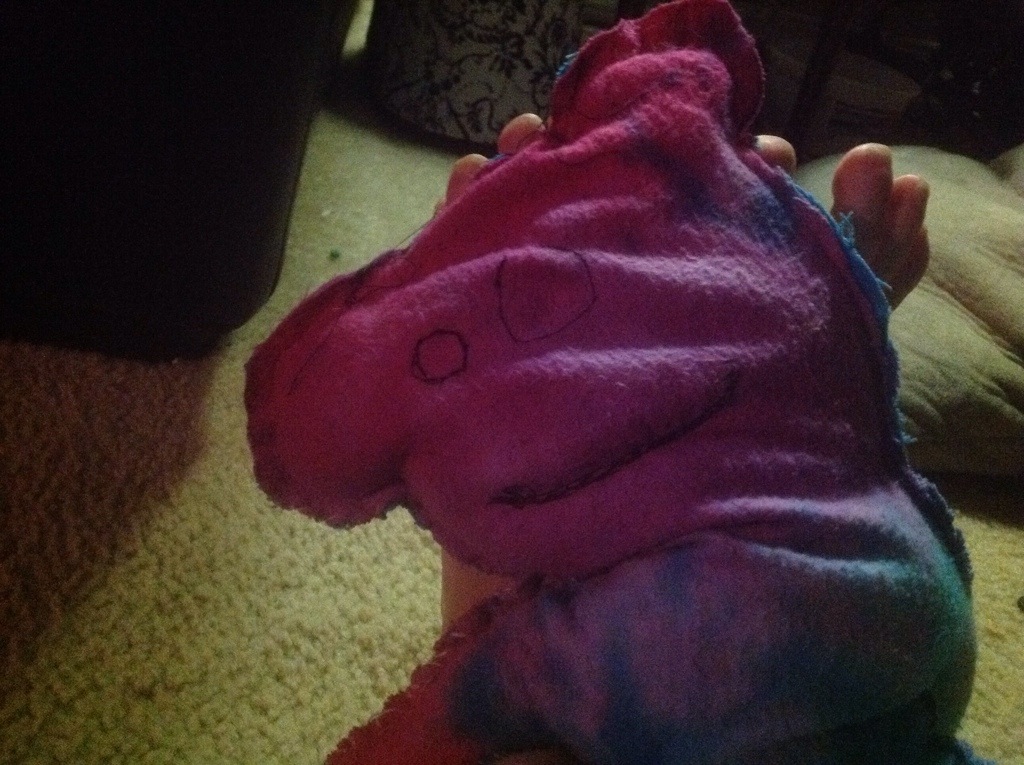
Aside from the rice all over the kitchen, I’d say it was a reasonable success. 🙂
Tyo’s grad dress is finished, worn, and a great success. Someday, I’ll manage to blog about it. In the meantime: Syo made a rice-stuffed teddy bear.
Aside from the rice all over the kitchen, I’d say it was a reasonable success. 🙂

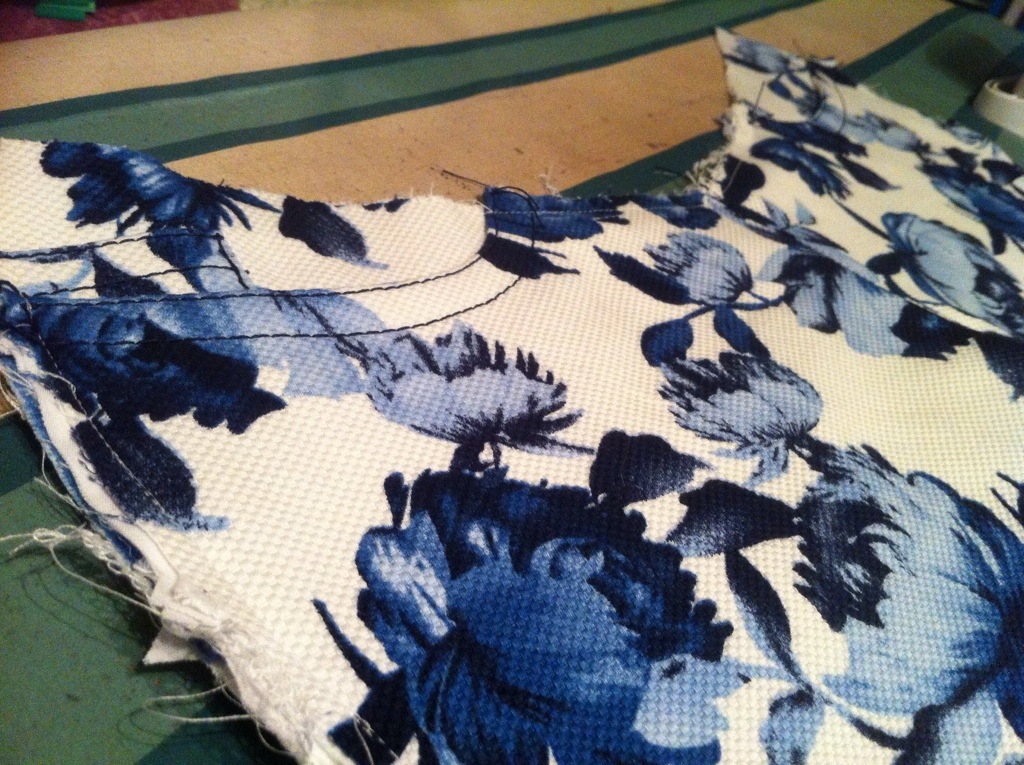
Blue. Rose. Pique.
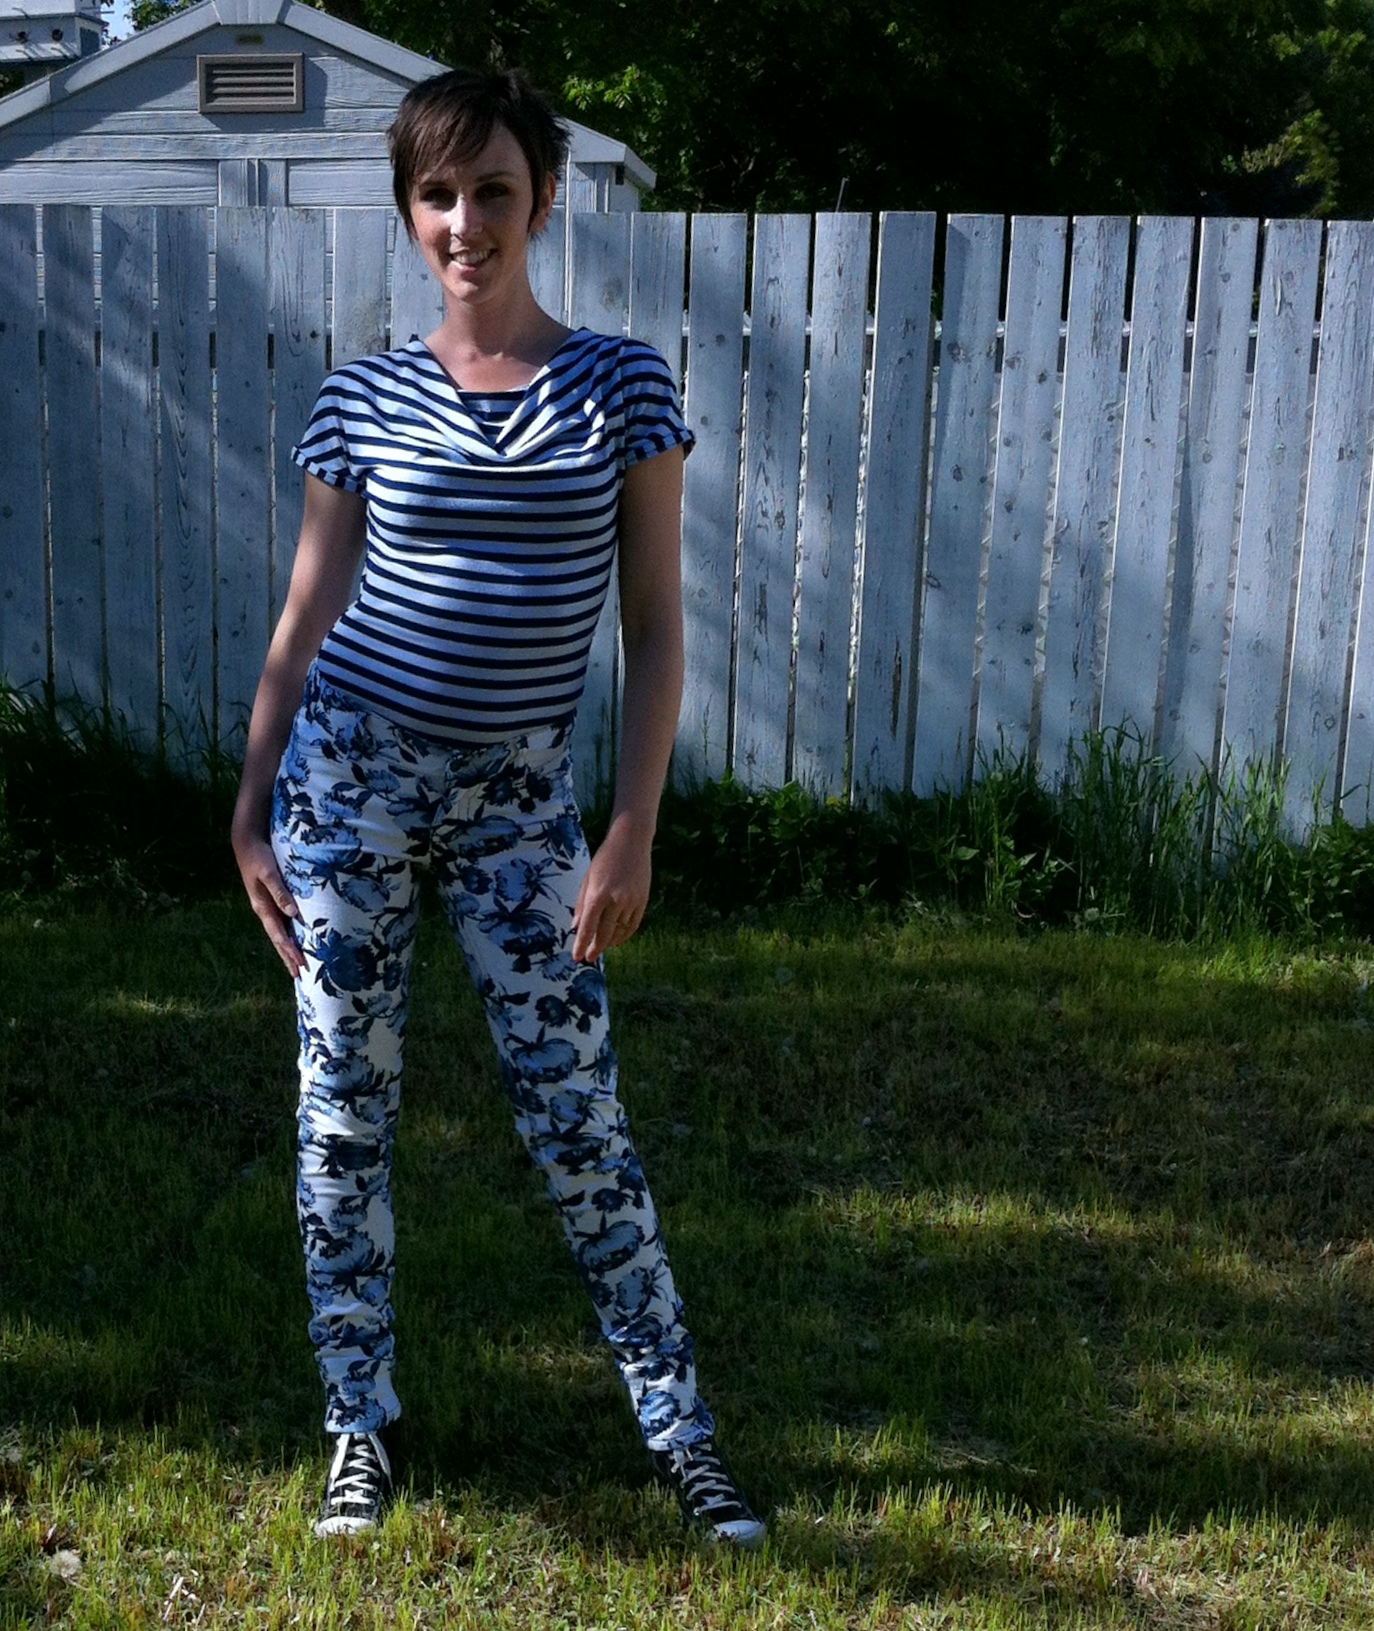
There are few prints that make me as weak in the knees as blue florals. I talk myself out of buying them all the time. (I should perhaps note that most of the ones I haven’t talked myself out of buying, I also haven’t sewn up yet. I think this is the first blue floral that has made it onto the blog.) I’ve also been loving the wild print jeans that have been on trend. Actually, maybe that trend is past now? Oh, well.
So, since I actually had an entire weekend free last week (enough time to tackle a serious project), well, I finally succumbed to this blue rose stretch pique that has been taunting me at my local Fabricland for a couple of months now.
I’ve never used (heard of) pique before, but the waffly texture is neat and the weight and stretch seemed about right for jeans, although the stretch was on the low side of what I like. Being rather paranoid of white jeans (I have to be very careful underwear wise with this pair, for example), I wanted to line, or rather underline, them. Fortunately for me, there was also stretch cotton poplin available at Fabricland (not always the case)—so away I went.
So, it’s been a while since I sewed jeans. And there’s been a reason for that. Namely, that the Jalie 2908 pattern I traced off years ago now, and have used for every single pair of jeans I have made for me ever (OK, except one.), was getting pretty tattered. It had also always had some issues—notches that didn’t line up, alteration after alteration, some of them to fix previous alteration mistakes (all of which were my fault, I hasten to add, not Jalie’s). And, in a coup de grace, I had cut it intentionally small, for fabrics with c. 25% stretch. This fabric was in the 10% stretch range, tops—so I figured it was high time to trace off a new version that would work for low-stretch fabrics. And this time, I wanted it to be durable.

Freshly-traced pattern
So, I shelled out four whole bucks for a couple of metres of “Trace-A-Pattern,” which is basically a wide, non-fusible non-woven medium-ish weight interfacing. I did have to re-create my personal alterations, which I did rather differently this time, although the goal was the same; the first time I did a lot of switching between sizes at different lines; this time, I traced “my” size and just altered that. I made six changes:
I also use a curved waistband, self-drafted with no particular method, but I didn’t actually redo that piece.
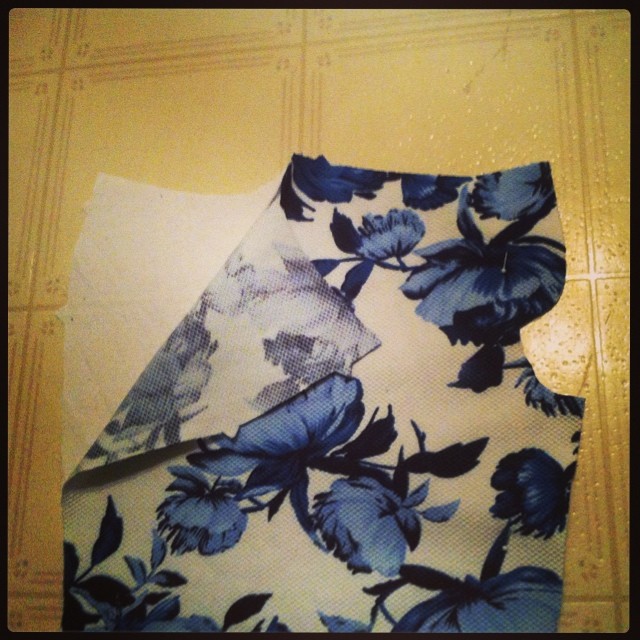
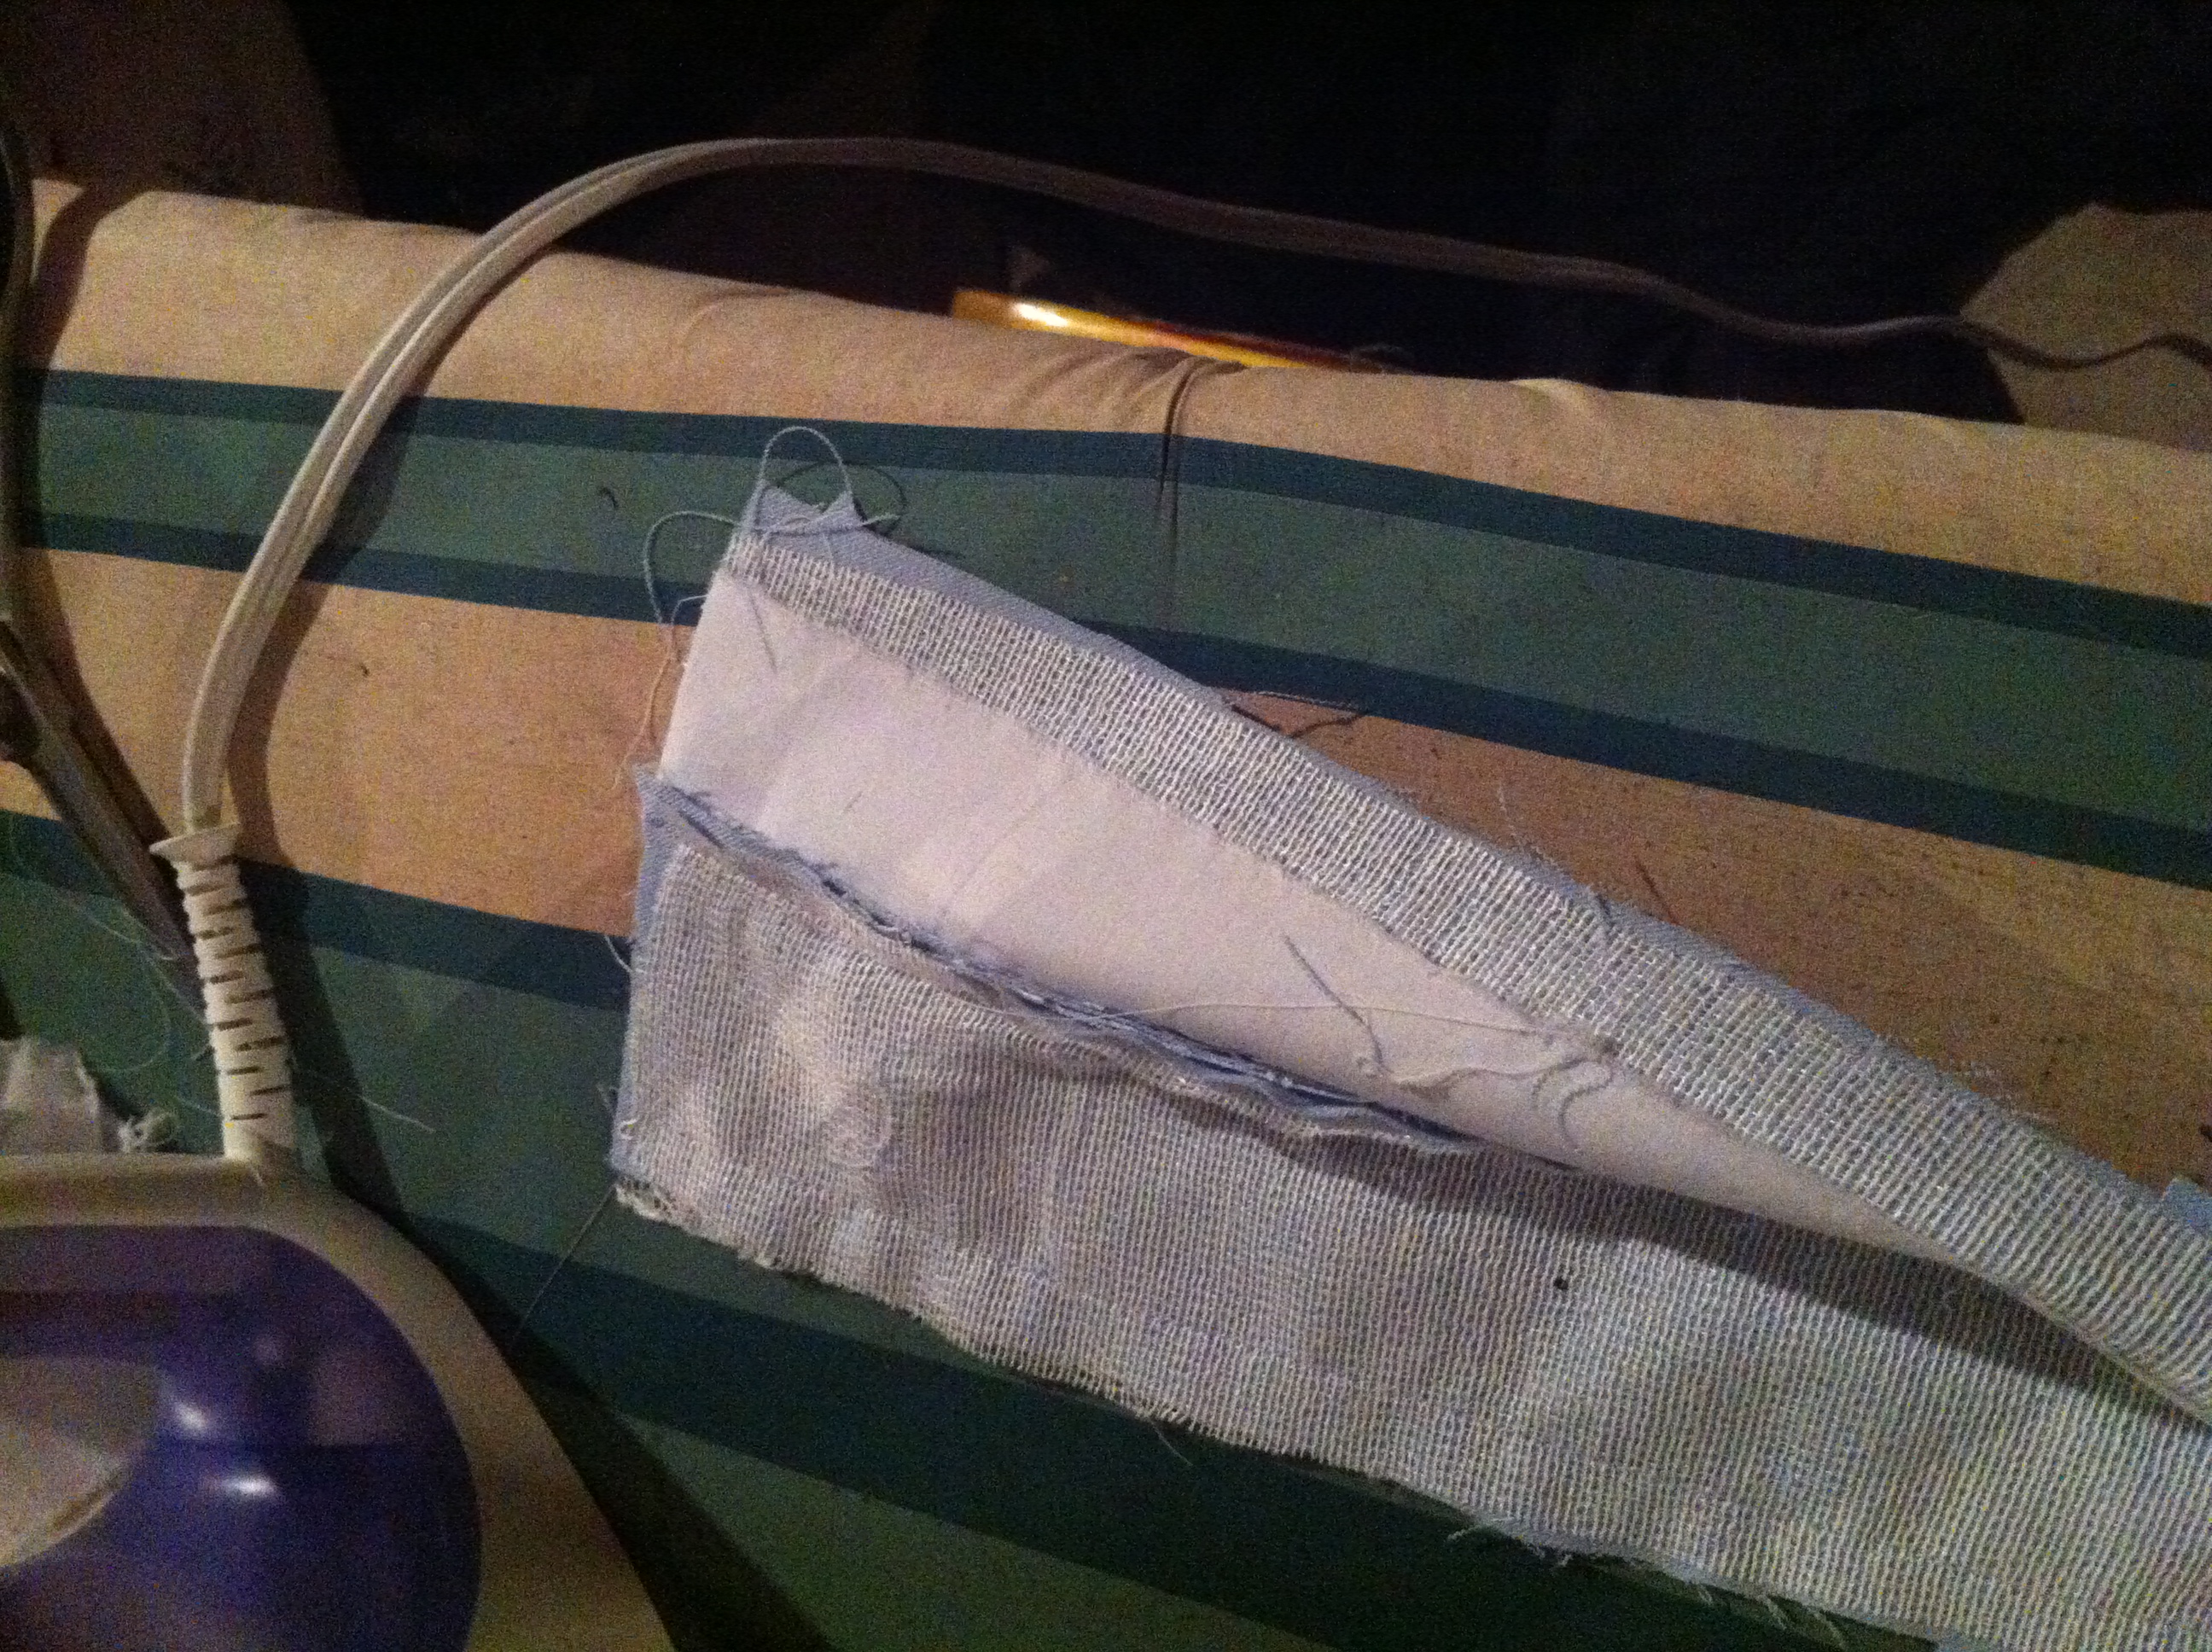
Underlining
I cut pretty much everything (except the waistband… we’ll get back to that) out of both the pique and the poplin, slapped the two together and treated them as one. Which made for a nice, beefy fabric, and the poplin is a lot smoother against the skin than the pique would have been. So I call that a win. (Oh, I was also completely Instagram-happy while sewing these so the construction process is remarkably well-documented. Well, sorta.)

Rear view
So, pockets. In my previous pattern, I used a really tiny, child-sized pocket, in the theory that small pockets make your butt look bigger. (Yes, this is a goal in my world.) But, I thought a bit bigger wouldn’t hurt. I still cut a couple of sizes smaller than my “official” size. I didn’t try to print-match their position on the butt, but I did cut them out singly, trying to get one nice, big flower sorta-semi-centred on the pocket. Since I was lining everything, I figured I’d take the opportunity to to try making my pockets lined patches, so I didn’t have to fuss with folding the edges under evenly or making a template.

Lined patch pockets
Seems very simple in theory, right? Stitch wrong sides together, leave a little gap, turn. Except, I knew I didn’t want the lining to show on the outside. So, trim the lining a little smaller, plus a good bit shorter so the 1.5 cm seam allowance at the top of of the pocket will be folded over. And, then you go to sew it and you have to ease the pique to the lining and oh, crap, those didn’t line up and what was my seam allowance again? And, let’s just say it was a nerve-wracking ten minutes until I got them turned right-side-in and realized they were, pretty well, still symmetrical and the same size. Whew. So in the end I’m actually really happy with how they turned out.

Turned pockets
pockets

Back detail
I had a lot of fun topstitching these on my Pfaff. I usually use my Featherweight, but it’s been living at my sister-in-law’s since last fall sometime, which is tragic but really useful on the rare occasions we do manage to get together to sew over there. (I don’t invite people to come sew at my house, the setup is kinda ridiculous. There’s machines in the computer room, one in the living room, cutting must be done on the kitchen floor, and the ironing board generally lives in the basement, although I did bring it up to the kitchen for this project, once I had the cutting-out done.) Anyway—I use a minimum of three machines when I’m making jeans, one for construction, one for topstitching, and the serger for finishing.

Topstitching the waistband
Normally I follow Peter’s advice and use a straight-stitch foot for topstitching. But, the Pfaff has this really cool edge-stitching blade that just slips in onto the presser foot, and its regular zig-zag presser foot has a really great shape:
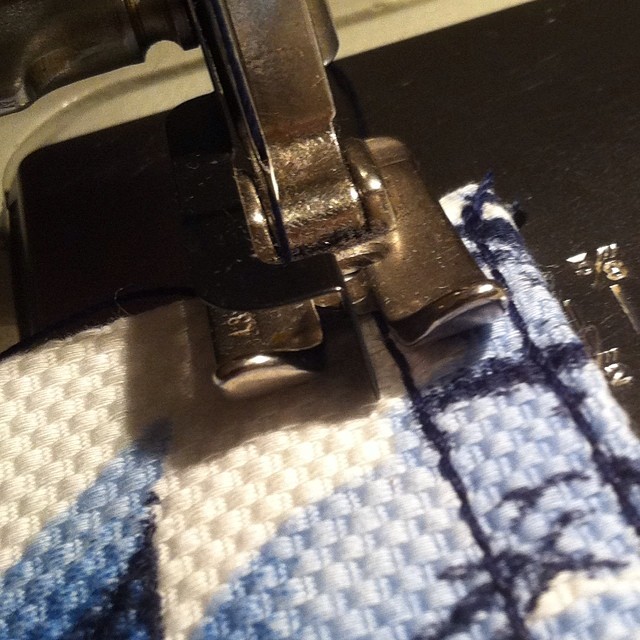
Pfaff presser foot
It all comes down to the shape of the toes: the inner sides go straight front and back, which means you can follow a line of stitching right up them, as I’m doing in the photo above. My biggest problem in topstitching is usually “falling off” the edge of the seam, usually due to small variations in how tightly I’m holding the fabric. Using the stitch-in-the-ditch attachment, with the needle set off-centre, made it really easy to stay “on track” during that first edge-stitching pass. Of course, the fabric was lovely to handle, too, but then most denims are.

Front detail
I went for quite a wide spread between the lines, rather than my usual 1/4.” I really like it, although I did occasionally “fall off” the seam allowance, since this pattern only has 1 cm seam allowances. I did three lines of topstitching on the top of the pockets (because it looked cool) and on the belt-loops; I’d like to say I did it on the belt loops to echo the design detail on the pockets, but actually my edge-stitching wasn’t catching the edge of the folded-under fabric, leaving me with floppy serged edges on the underside of the belt loops. I really like the three lines, though. I may do that always.

Fit?
Fitting is the eternal question, especially since in jeans you can’t try on until you’re pretty far along in the process, and I was re-vamping my pattern. And with stretch jeans so much comes down to the individual fabric and construction. I was pretty worried about whether this pique would have enough stretch. On the other hand, on the waistband of the last jeans I made, I intentionally made the waistband non-stretchy, but I didn’t stretch the pants beneath when putting the waistband on, so the waistband is kinda uncomfortably tight. (though it stays up without a belt, which is nice.) This time, I think I went too far the other way—I didn’t do any stabilizing to the waistband, though I did cut it with a back seam, so that the front portion would be on the cross-grain. This = maximum stretch. As a result the jeans are very comfy, but will need a belt to stay up. Which means I’ll have to find a belt that works with them—all of mine are pretty scruffy-looking. I may end up moving the button over some more, too—as it is the stretchiness allows the the fly to gape a bit.
There’s no gaping at the back, but I feel like I could still add a bit more height; it still seems like there’s just a little bit of a dip at the middle back.

Mini-flares
As I said, I traced my pattern with legs straight below the knee, but what I actually wanted (which I tweaked in the cut fabric) was a bit of a skinny taper with a mini-flare at the bottom. Also slouchy ankle wrinkles. I always envy other people’s slouchy ankle wrinkles, but when I’m making skinnies for myself I keep cutting them off to the “proper” height, = no slouchy ankle wrinkles.) It took some serious self-control not to do that here, too, especially as when I first tried them on the legs were too wide and the mini-flare didn’t really show at all. Once I got it taken in along the outseam, from just above knee to the ankle, though, life got much better. And I *think* I quite enjoy the slouchy-ankle-slipping-over-my-shoes look, although I’ll get back to you after they’ve been worn out and about more.
Happy.
All in all, I’m going to call these a success, although they were bloody hard to photograph for everything but the fine details. The trick is going to be wearing them—I think I like them with a white top, but I don’t have that many options. I’m not loving it with the navy stripes in the photo above, although the colours are ok.

Styling?
Still, they were a fun experiment.
Filed under Sewing
I’ve been flicking through my photos for over a week now, and I keep thinking “I can do better!”
But the question, really, is will I do better? Or will that perfect photo-op keep receding into tomorrow, next week, next month?

Sewaholic Gabriola Skirt
So, in the interest of removing obstacles, to blogging and sewing, here is my sweet and lovely, if not particularly well-photographed, Sewaholic Gabriola skirt.
So, I like sweet. I do. I’m good with cute, too. But I may have overdone it a bit with this project. This skirt is so sweet it almost makes my teeth hurt. It’s also a bit fancy, to the point where I kinda wonder where I will wear it, as my summer is surprisingly wedding-less thus far. I’ll have to get back to you on that front. I was going to wear it with a lacey Nettie, but that’s been put on hold while I contemplate a) whether I actually can (will) wear anything high-waisted over something tucked in (even a bodysuit) and b) whether I can figure out the stretch-interaction of two layers of body-suit fabric. (Because so far this is eluding me.) In the meantime, I really like it with my lace-fronted bodice, though, which has largely languished for lack of appropriate bottoms in the two years since I made it. So it’s successful on the front of helping wardrobe orphans.

rear view
Arguably the scariest part about this project was grading between sizes so that something by Sewaholic would actually fit me. Especially with all those different pieces at the hips. However, it turns out this is really simple, and Caroline even has a post all about it on their Sewalong (which I did not follow in the least, by the way, /sniffle. I’m sure it’s excellent, though.) I needed to go from a size 2 at the hips (rounding up) to a size 6 at the waist (rounding down.) Now if you follow the link, she shows how to grade across both the lace pieces and the upper hip yokes; I did all my grading on the upper hip yoke only, none on the lower lace bits; your mileage may vary. Regardless, it was very simple. I also lengthened the snot out of the pattern—3 cm at the lengthen-shorten here line, and then cutting all the way to the longest size at the bottom. In the end I cut off pretty much all that bottom extra, so I suspect that the 3 cm was more than enough on its own; although, as you can see in the shots with the heels, I could’ve hemmed it longer if I just wanted to wear it with heels. I want to be able to wear it with flats, as experience has shown that heels-only clothing does not get worn around here, so shorter it is.

Matching up the points
The second-scariest part was matching those lace points at front, back, and sides. Some unpicking was called for, although I allowed myself only one un-pick per point, otherwise madness was a real possibility. As it is, I think the un-picking contributes to a bit of unevenness in the side-seams—probably a wee bit of hand-basting would not have gone awry here. Ah, well.
Waistband construction
I should perhaps mention that my fabric is a suit-weight, rayon-poly blend with a bit of lycra. I loved the weight and the drape of it—swishy rather than floaty, without being too heavy for summer. I should, however, have stabilized the waist of the skirt pieces a bit more (like, at all). As it is, with handling it grew to the point where I had to take the side-seams in an inch on each side, and the waist was still a bit big for the band, leading to not-enough-overlap in the button area (and a button that is strictly for show.)

Stitching in the ditch
After hand-picking the zipper (see below) I got lazy and did everything else by machine: stitching in the ditch on the waistband, hem by machine. The ditch-stitch actually turned out not too ugly on the inside! OMG! … and of course I forgot to take a photo. I love the stitch-in-the-ditch attachment for my old Pfaff. It’s not even a whole foot, just a little keel that fits into the regular presser foot, and it is the awesome.

Decorative button, not much overlap on the waistband.
I was going to do a functional button. But there wasn’t enough underlap for it to really look good, and also it was going to be tricky to do a nice buttonhole in my bulky waistband. Speaking of which, you can see here the biggest change I did make to the pattern: instead of doing a simple one-piece fold-over waistband, I added a top seam so I could have the lace overlay only on the outside. I thought it would be bulky and scratchy against the skin on the inside. Though the waistband is still kinda bulky with the seam.

Hand-picked zipper with imperfect fold at the bottom.
As I mentioned above, I hand-picked the zipper. It worked pretty well except for that little ripple at the bottom. Fortunately I don’t have to look at it myself. 😉
Machine-stitched hem. Boo, couture fail.
The zipper exhausted my couture-juice for this project, so I wimped out and did the hem by machine, using blind-hem technique with the same stitch-in-the-ditch foot, but just using the longest zig-zag the Pfaff can handle since it doesn’t have a proper blind-hem stitch and I was too lazy to swap it out with the White, which does but isn’t nearly so much fun to sew with.

Voila!
All in all? Fit is good (would’ve been better if my waistband were the intended size and not rather elongated); skirt is pretty. Wearability has yet to be determined.
Filed under Sewing

Value Village Haul
So this morning we went for breakfast with some old friends, and afterwards the female half of said friends (who is also sewy, although she’s been at it hardcore far longer than I) and I abandoned both spouses and all children and made for the wilds of the East Side Value Village. It was a fun trip, and got a trunkful of excess stuff out of my house, and I came home with a small but pleasant haul: a few patterns, some really cute and surprisingly comfy shoes that are totally not my usual colour scheme (my mom will be jealous, though, or rather she won’t because it would take far more than one pair of shoes to compete with her fabulous Collection.) The fabric section was mostly disappointing, but there was one, tantalizingly tiny piece of gorgeous black and white striped spandex—barely half a metre, for a $0.99.
For a dollar, how can you lose?
We bounced around ideas for swimsuits and booty shorts, but, by the time I was home with my prizes, I knew what I was going to do. The scrap of spandex was going to become a Nettie crop-top.
So, can we talk about crop tops? It seems like they’re all over the place* this year. Certainly they were all over the costumes at the kids’ dance competitions. Oona’s been wearing them, so they must be stylish. Usually with a high-waisted skirt this time, which I gotta admit throws me a bit.
Now, crop tops are a style that’s easy to hate, not least because they’re so unforgiving to the vast majority of us (although with the high-waisted bottom they’re arguably more forgiving). And I won’t blame anyone who does—I feel kind of ambivalent about their revival, if in fact they are experiencing a revival.

Bathroom selfie crop top love
But back in the day, oh, damn, crop tops were ME. From the age of fourteen until I was pregnant with Tyo, I was an early adopter and a long-term fanatic. From May until October, it was highly unlikely on any given day that my tummy would be covered. (Yes, I wore them while pregnant, usually with the giant Mickey-Mouse overalls…) I was so pissed off when, shortly after Tyo was born (and I recovered about 95% of the pre-baby tummy, yes I got off easy), fashion moved on and it was pretty much obligatory for a top to come at least to your waist or a little below. Just a sliver of flesh around the hip, not that wide canvas of tummy I had been so fond of.
Yeah, I know, y’all are full of sympathy, aren’t you?
Front view, with mudgie.**
Which brings us to the next conundrum, the part about if you wore it the first time around, you’re too old the second time. You see, my mostly-flat-if-not-actually-washboard tummy, after surviving two pregnancies, finally deserted me about five or six years ago, part of a combination of a more sedentary lifestyle (we moved to the Big City and I could no longer walk everywhere, plus I had my driver’s licence) and the transition from mid twenties to late twenties to early thirties. While I still wear a two-piece bathing suit, and I don’t have an issue with dance costumes (bellydance tends to bare a lot of belly), it’s not something I’m really comfortable with in my everyday wardrobe anymore. And I gotta tell ya, I’m not at all convinced I will wear this one for everyday life anyway—but I have been needing some cute and inspiring things to wear to dance class, and this will definitely fit that bill.
But I also wonder. Maybe a crop-top doesn’t have to be about flaunting that perfect beach-body. Maybe it can be about loving the tummy that you have already, jiggly bits and all?*** And why are those jiggly bits just fine with a bit of fabric over, but unacceptable without?
So, as soon as I got home, I tried on my new shoes (Yep! Comfy!) and set to cutting out a Nettie crop top. Yes, this may be the fastest turnaround from fabric purchase to finished object ever. I used the same size eight Nettie I’ve been playing with all week, cutting it off at the bottom “lengthen or shorten here” line on both front and back. This is actually below the waist of the pattern, but without a bottom half pulling it down, I was pretty sure the height would be about right for what I wanted—and it is.

Back!
So, I’ve been futzing with a lot of wriggly, thin, and otherwise annoying knits lately, and I have to say, sitting down with a really nice spandex to play with is so awesome. It’s beefy but not overly thick, it’s smooth yet stable, and it handles gorgeously. I sewed the entire thing by regular machine (my old Pfaff, actually); I wanted lots of control when sewing those stripes, which I wouldn’t have on the serger.

Binding
I cut the neck binding lengthwise. Actually, I made sure I cut out the binding strips first, from the longest part of my scrap. I still had to piece the neckline band, too. And I may have to take a sharpie to the stitches where they show on the black stripes, though.
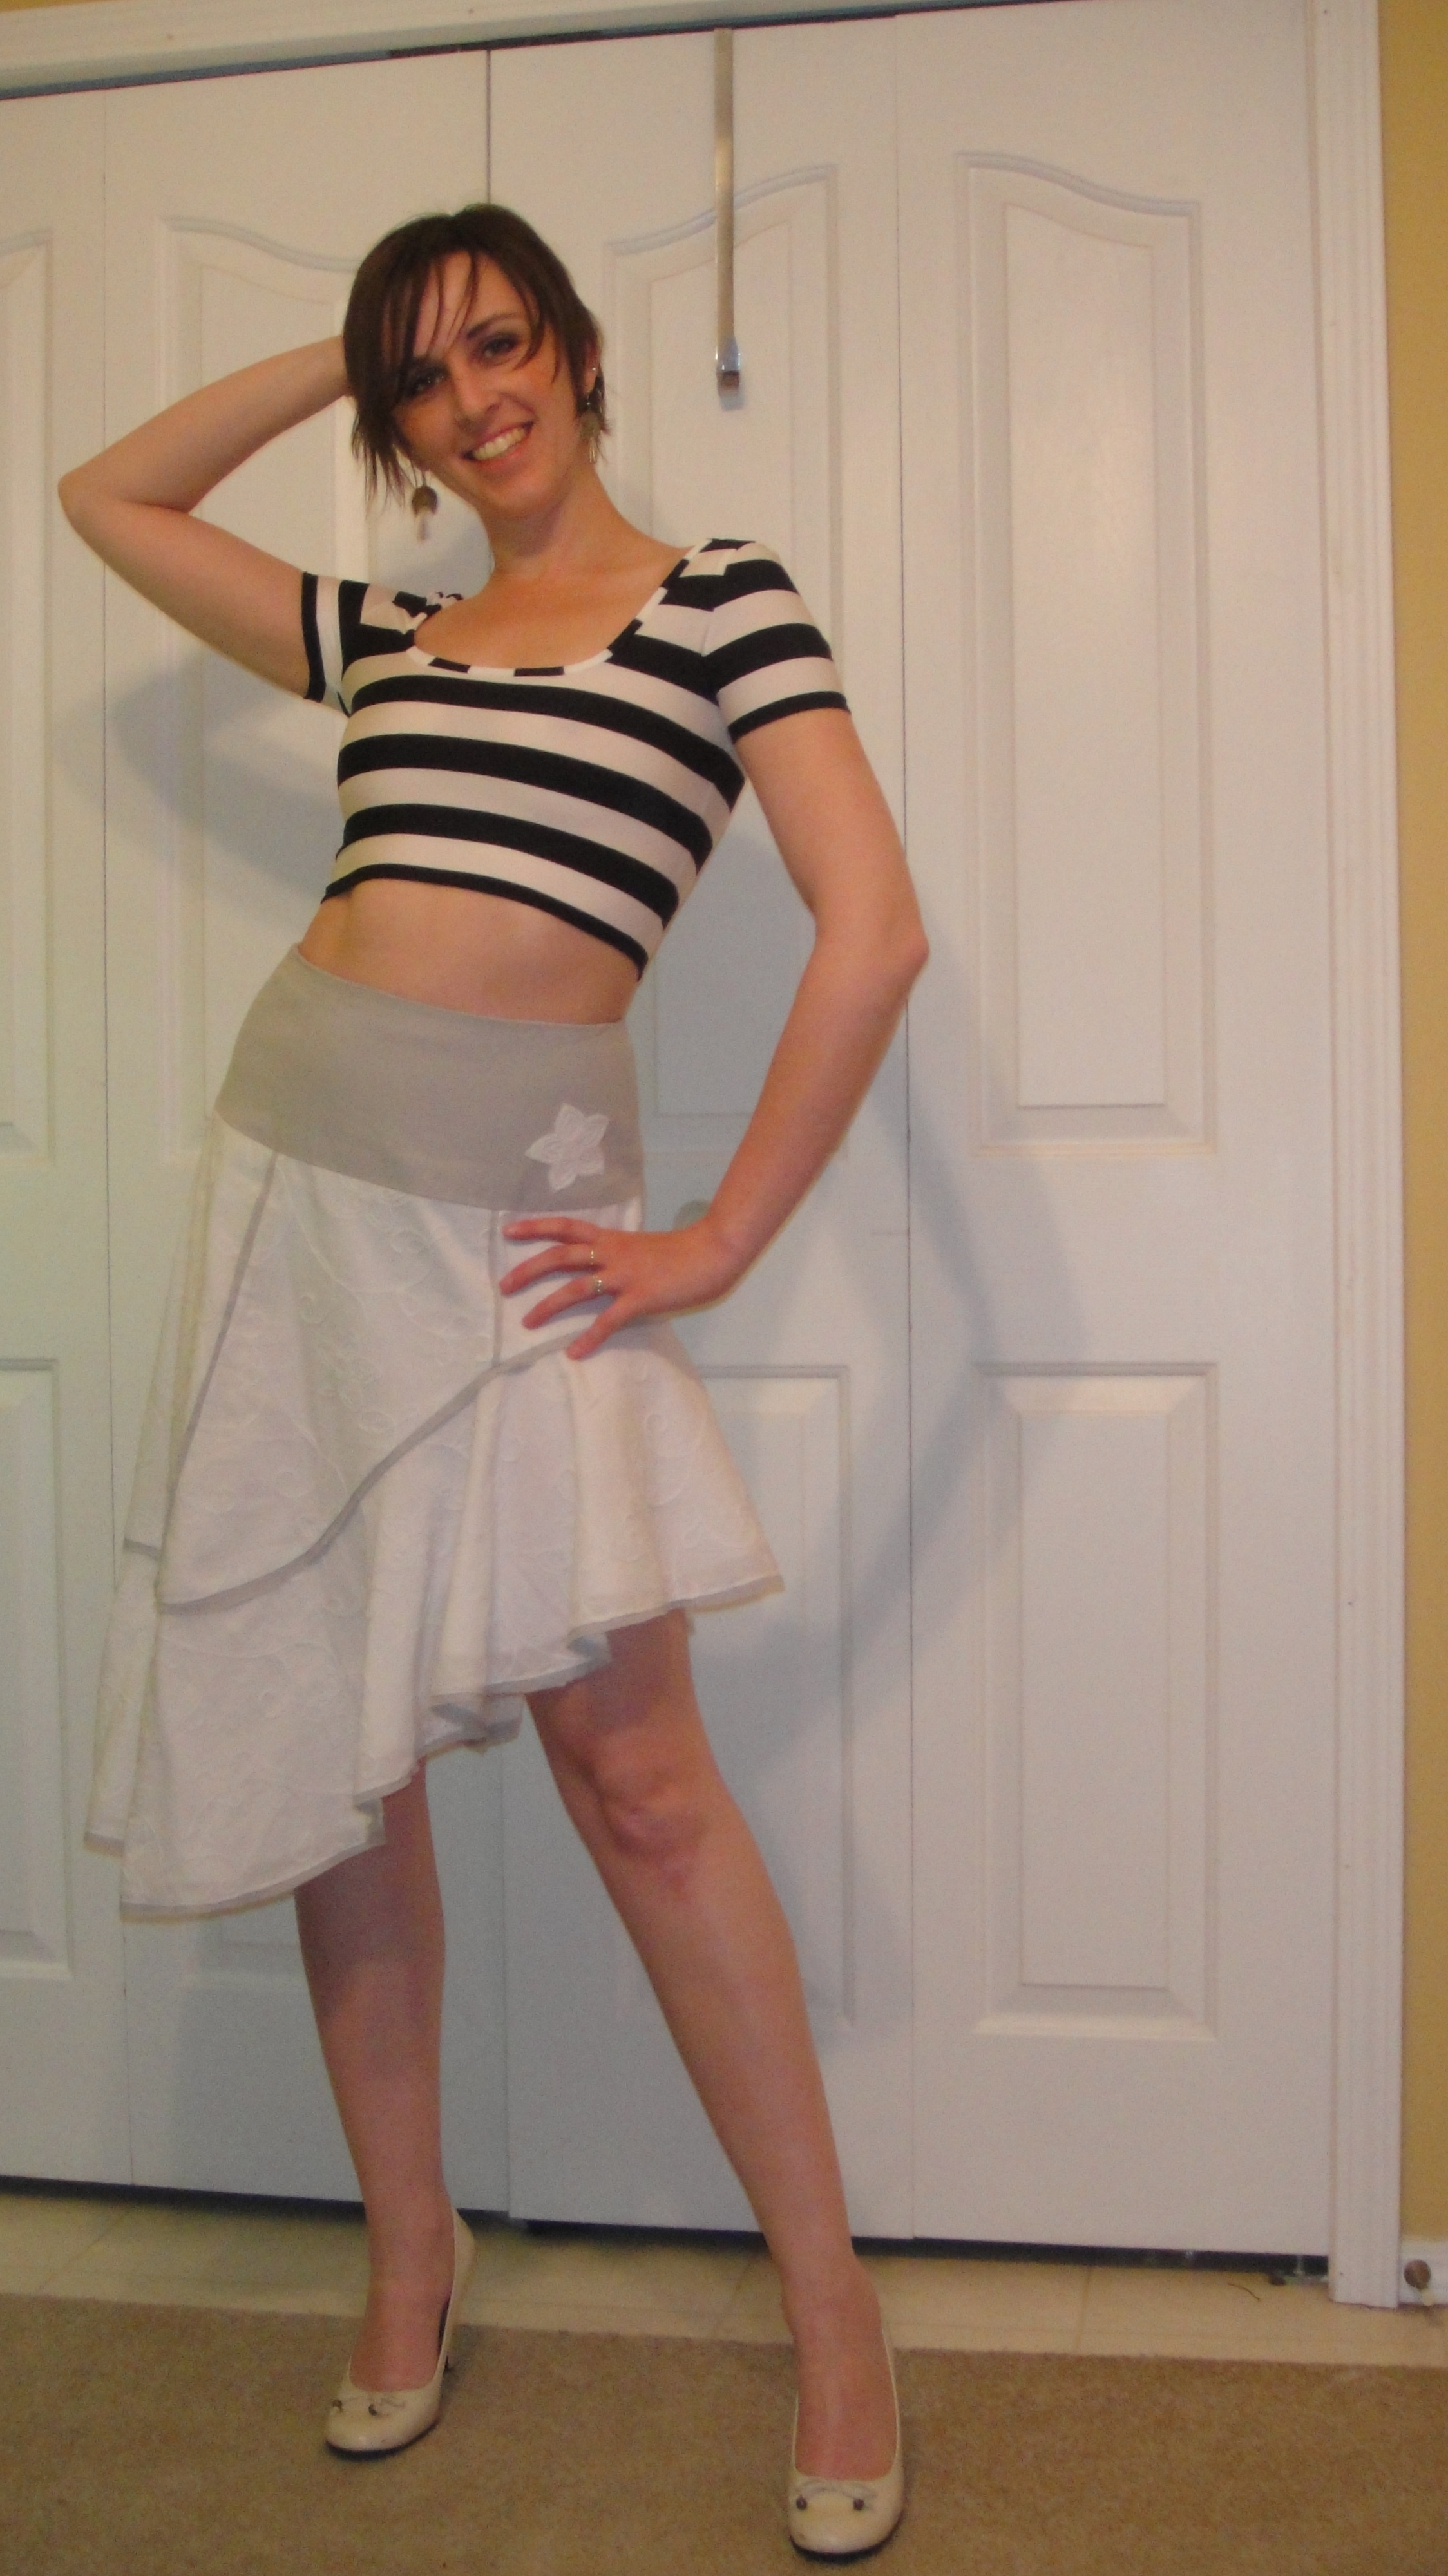
With high-waisted skirt. Not the right skirt, I know. I actually don’t hate this look as much as I thought I might, although this photo is probably as good as it gets.
I tried to match my seams as best I could without wasting more than an inch or two of fabric. I succeeded fairly well on the side-seams, not so much on the sleeves. Actually, we’ll call that a complete fail on the sleeves.
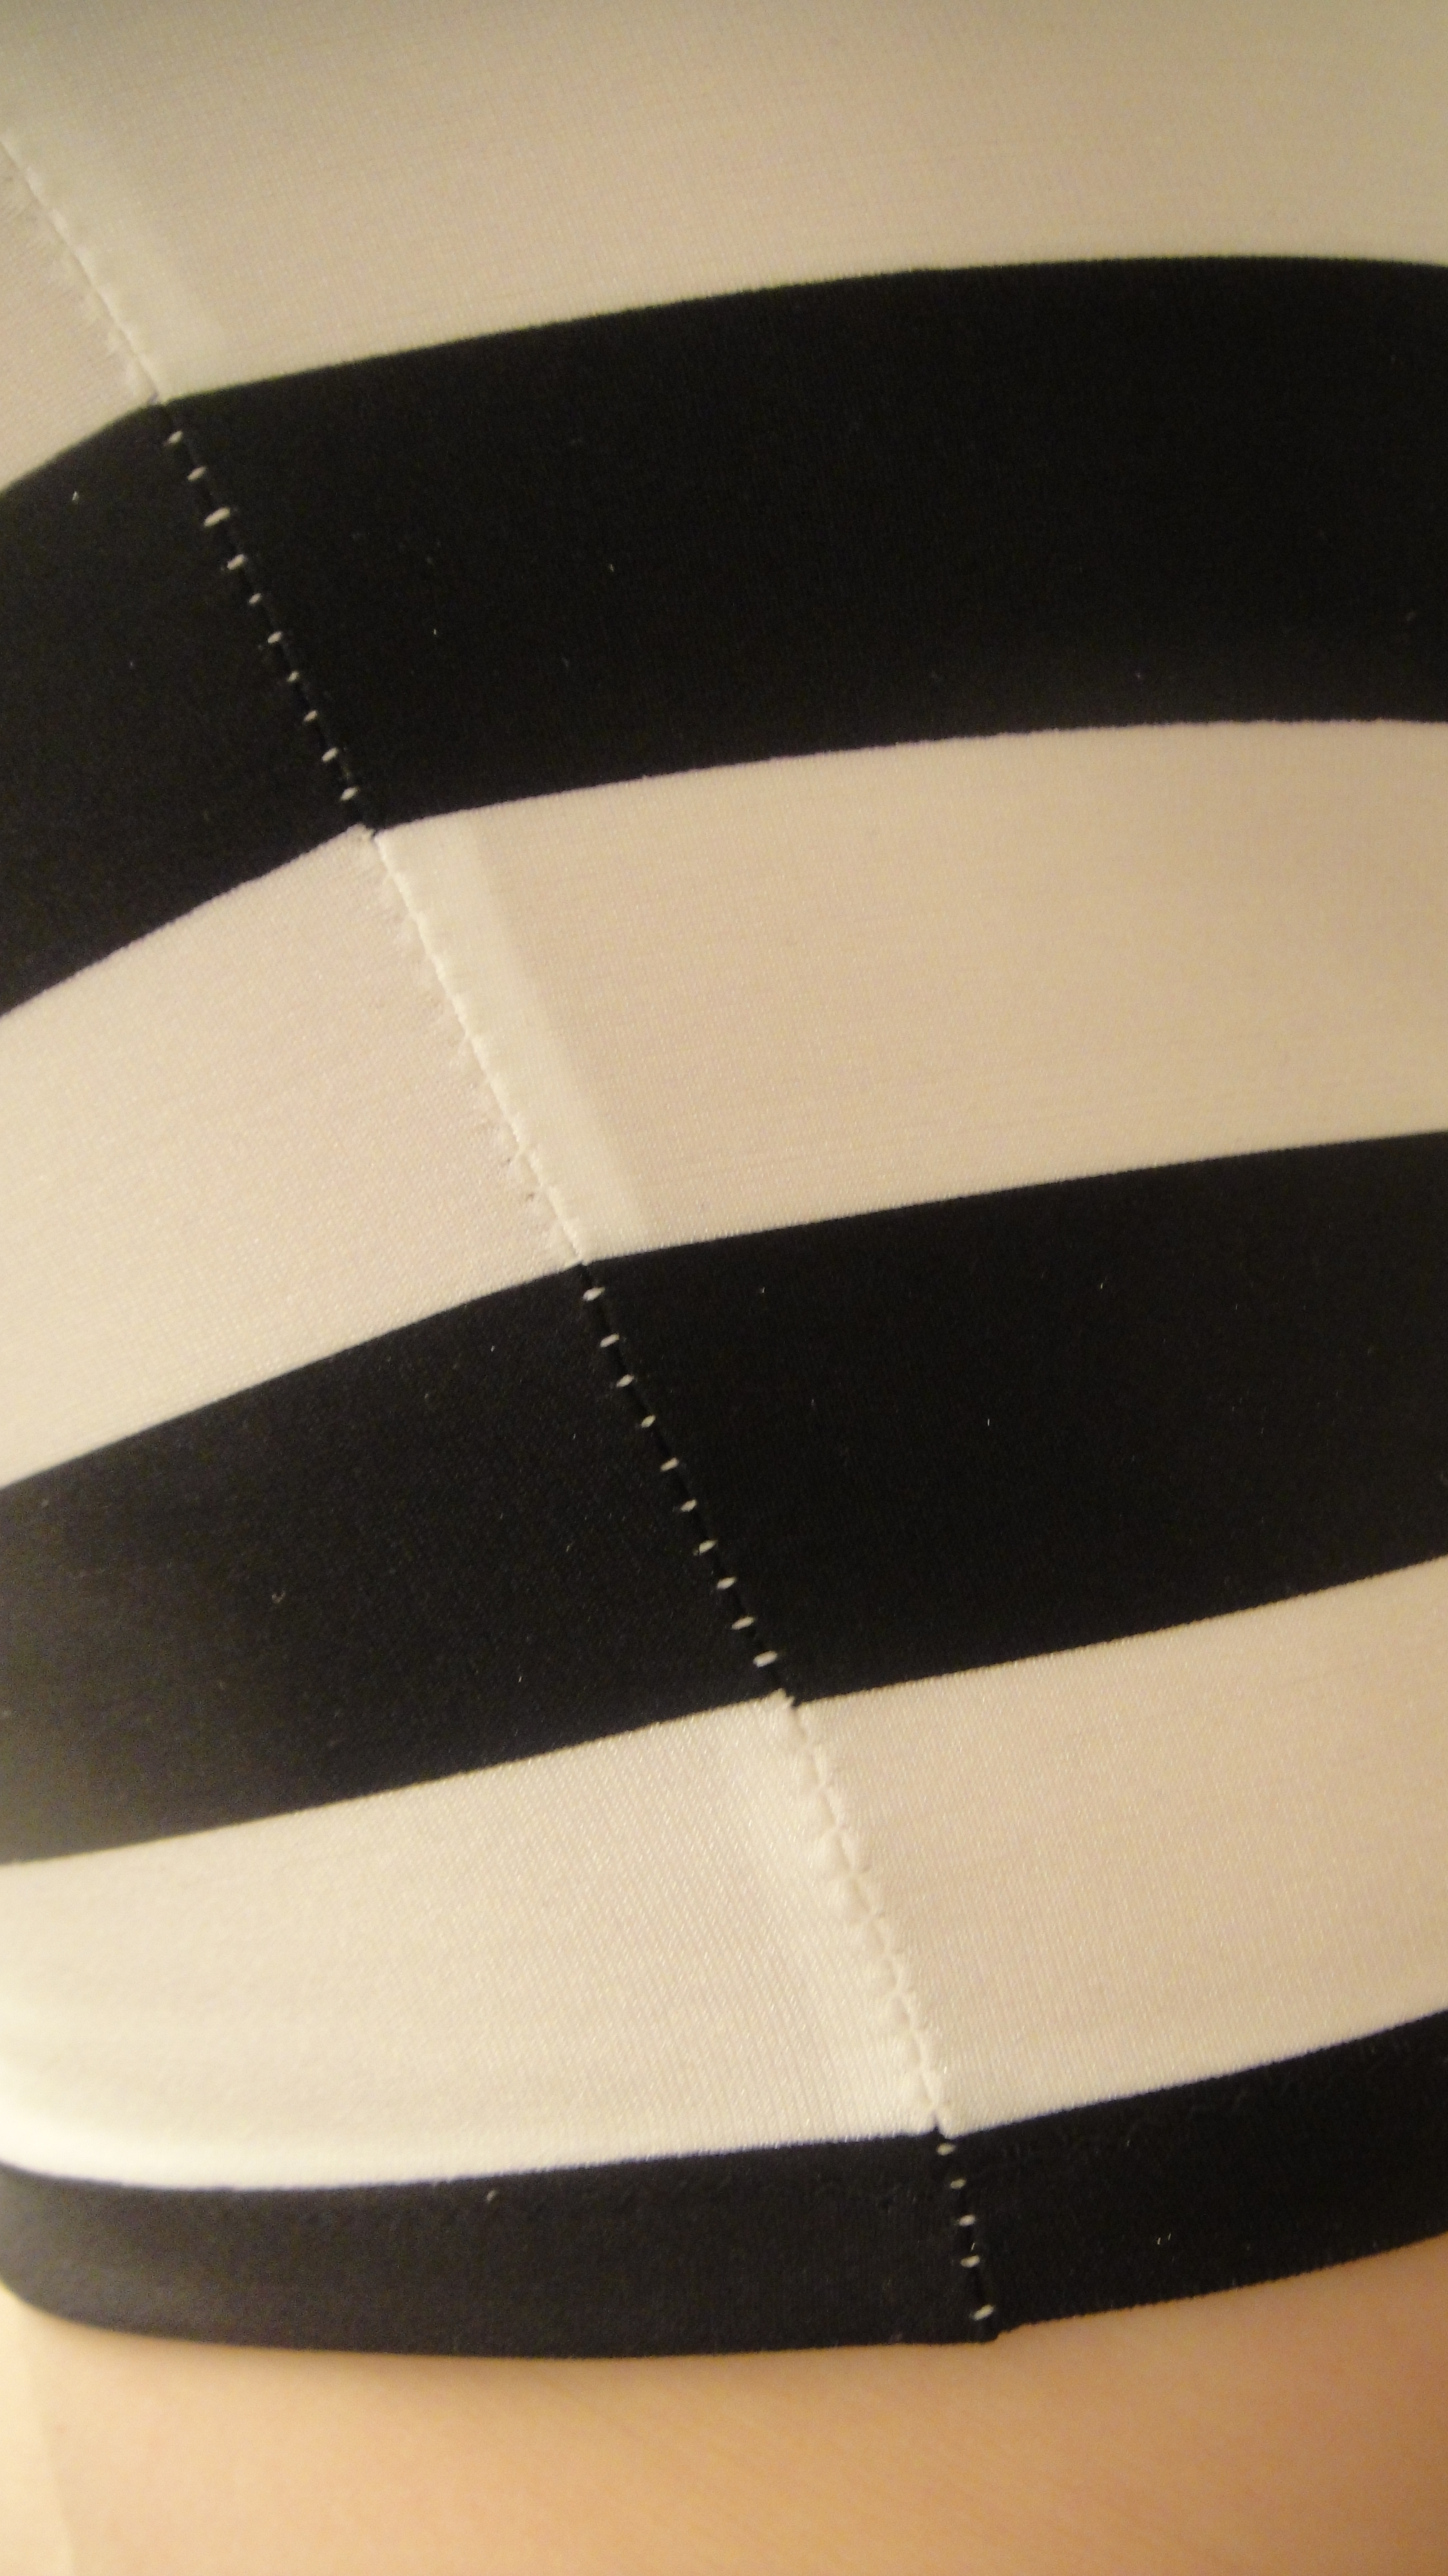
Stripe-matching
Not too bad for just pin-basting. Definitely need a sharpie. You can also just barely see the teeny zig-zag hem. I’m not sure how well that’ll hold up over time as the thread definitely has less give than the fabric there.

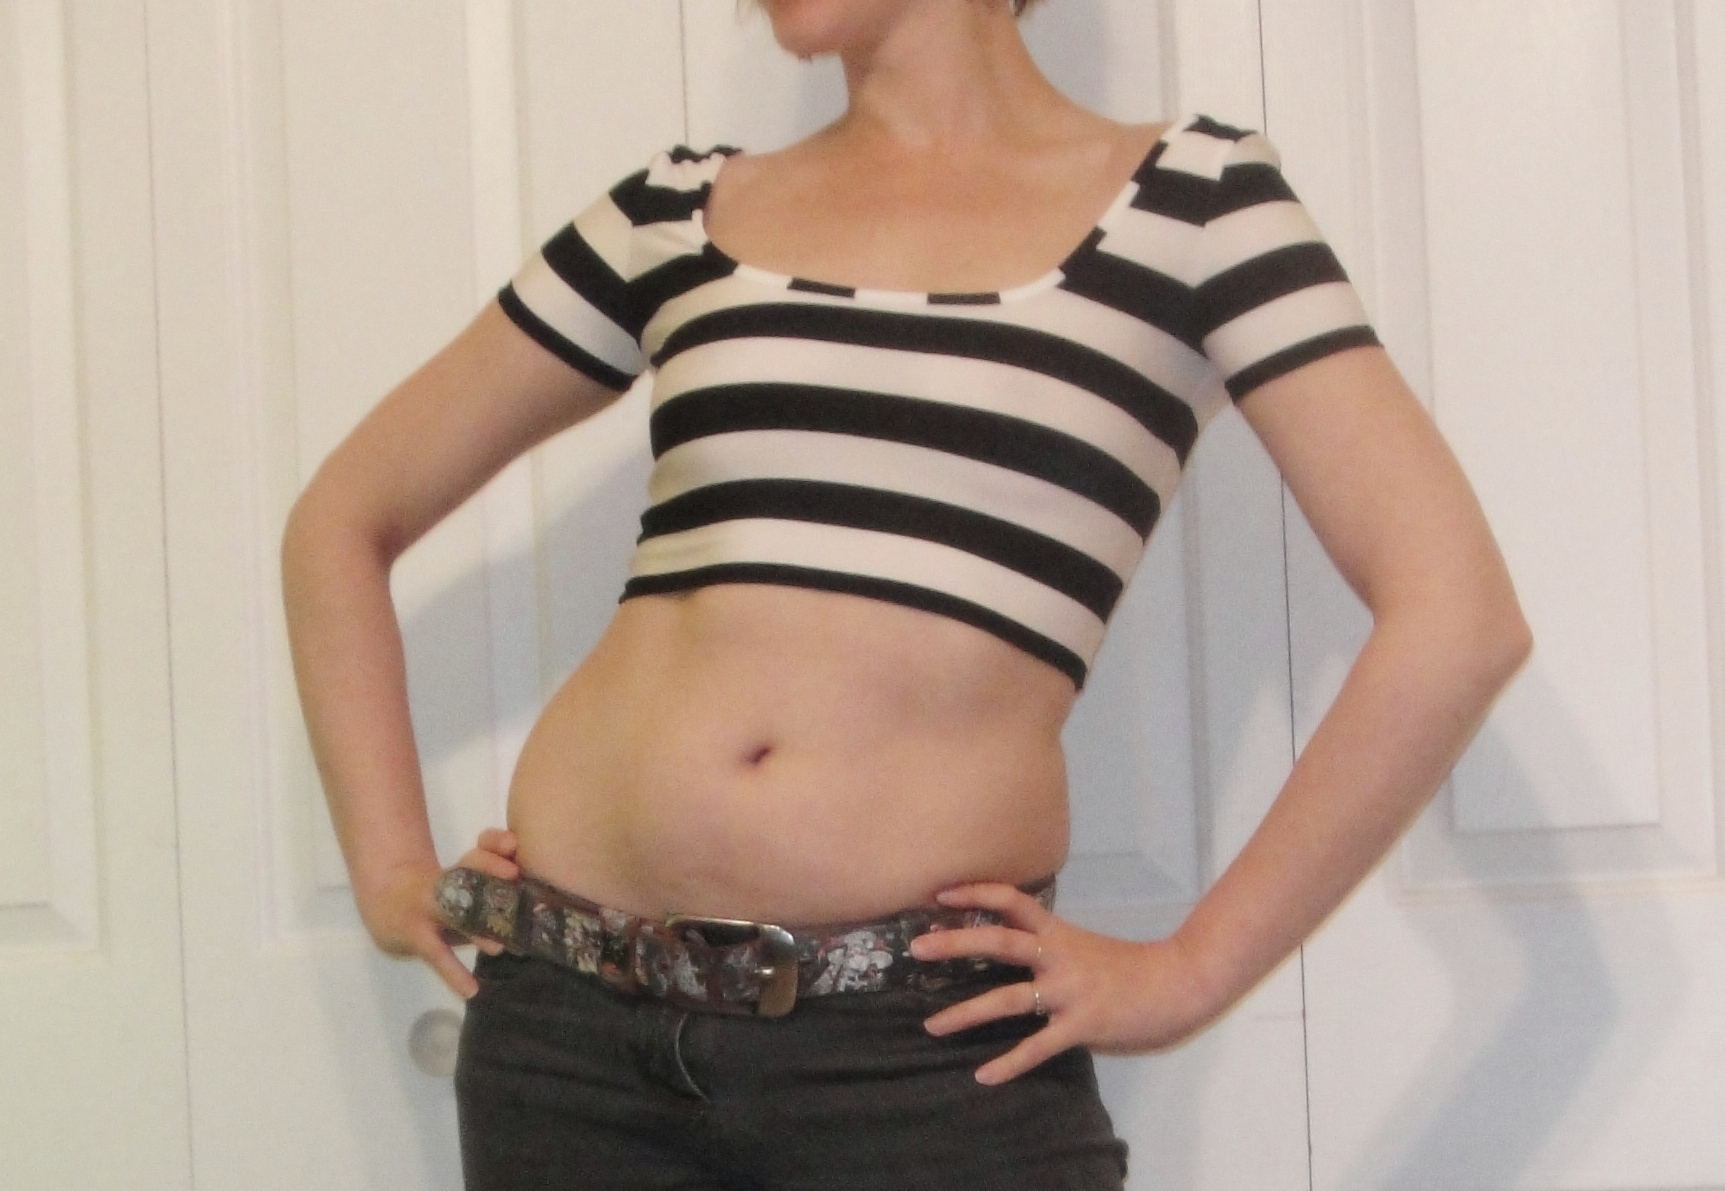
With jubbly tummy
So, out of my comfort zone? YES! Pushing things? YES! And yet, I feel totally cute, jubbly tummy bits and all.

Full view, with shoes
Also, I think I may have just fallen back in love with these jeans, which are my very first pair. I am loving how they look cuffed up with heels, even with the raggedy knees. Maybe especially with the raggedy knees.
So, I don’t know if I’ll be baring it all, or even a high-waisted sliver, this summer. My latent teenage self is screaming YES YES YES! while my more sedate thirty-something side is saying hmm, maybe leave that to the kids, Tanit. We’ll see who wins. And I have a new dance top in the meantime. So we’ll call that a win.
And, I just might have enough spandex left for some booty shorts…
*This link is not an endorsement, I have no particular familiarity with this site or its content, it was just the first hit that looked relevant on my google search, and it talked about the “current crop top trend.” Although, it’s talking about a trend from two years ago. Which might explain why it’s only now making it to my little backwater corner of the world, but anyway.
**mudgie is like pudge, but on a mommy, and is also, according to my husband, adorable.
***And, yes, I do know, in the grand scheme of things my jiggly bits are pretty minor. That doesn’t really change how I feel about them, though.
Filed under Sewing

Sewaholic Gabriola skirt.
I’ll subtitle this post, Sew Canadian.
It’s long past being interesting complaining about how busy I am. But, as if I didn’t have enough on my plate (like, oh, Avengers grad dress, long-delayed onesie for Syo, and about a half dozen other things I ought to be doing), two more projects threw themselves at me begging to be made. (And yes, I realize talking about them before they’re made is probably a Very Bad Idea.) Tasia’s Gabriola Skirt absolutely struck me dead the second I saw the line-drawing. Full, swishy maxi skirt with contrast bits? UM YES. The only thing that surprises me is that I haven’t made it yet. The part where I’m making myself trace it off is slowing me down. And the bit where it takes 3.5m fabric or more, and I didn’t have enough of anything both swishy and summery, so I had to actually get new fabric. You can imagine the quaking dread that fills my home when I say such things; the children groan and my husband hides his head under a cushion. But Gabriola WILL HAPPEN. I swear it.

Nettie body-suit, by Closet Case Files
I tried a little harder to resist Nettie. I mean, I haven’t worn leotards since high school. And I don’t tuck stuff in, like, ever. But. But. But.
Somehow the vision of a lacey Nettie to go with my Gabriola just took hold. Or maybe it was the real Nettie’s five million awesome versions. I couldn’t tell you, except there I was, printing and gluing happily a couple of days ago.
And here we are: big dreams, a new serger (which I’ll manage to talk about at some point) and not a lot of time. But May Long’s coming up—I have three whole days off and I plan to use them to the fullest. If I can just get through this week…
Avengers Grad Dress (almost done!!!!)
And finish the Avengers dress.
Filed under Sewing

Me and my girl.
Tyo is going to be 14 this summer. This means, and doesn’t mean, all kinds of things, but in particular, she’s finishing grade eight, which around here is the end of elementary school. Next year is high school, in all its iconic glory*. (I’m not sure who’s more scared, she or I. Okay, it’s her. I love watching my kids hit new milestones—it’s my favourite thing about parenting.)
Anyway. Tyo’s friends have been bugging her to wear a dress to grad. Tyo would just as soon go in jeans (preferably ripped), but she concocted a compromise. She would wear a dress, if I would make her one. Isn’t it great when our teenagers come up with a reasonable compromise? I know!
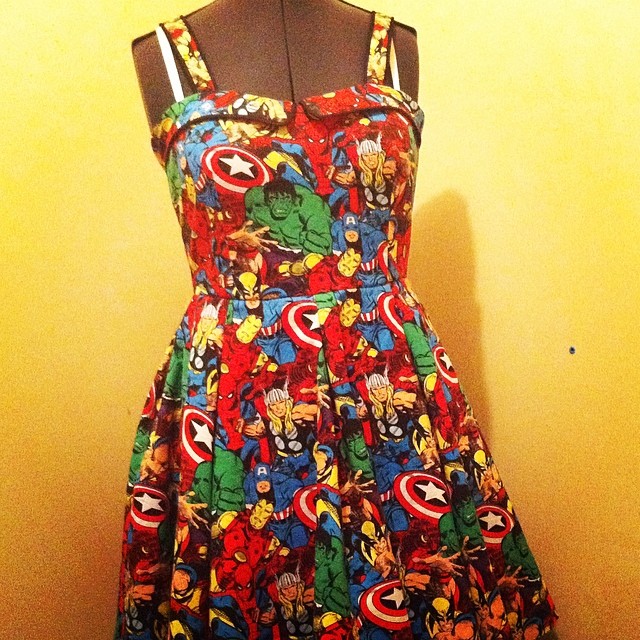
Oh, one more thing. It must be made out of Avengers fabric.
Challenge accepted. Confession: having never made a grad dress for myself**, I’m kinda excited to make one for my daughter anyway. Avengers fabric just puts it into the awesome category, though. The only downside is that I can’t, quite, steal her clothes yet.
Sadly, my local fabric stores are not hotbeds of superhero activity. Ok, the odd Batman fabric does show up. eBay, however, turned out to be a treasure trove. Tyo picked a very old-school, garish print. Perfect. The original price of 6.99/yard seemed quite reasonable, although shipping and that pesky conversion from American dollars nearly doubled it. Still not bad, though. What arrived is not the finest of quilting cottons, but perfectly respectable.

MMMM. Wolverine and Thor…
Next up: Pattern.

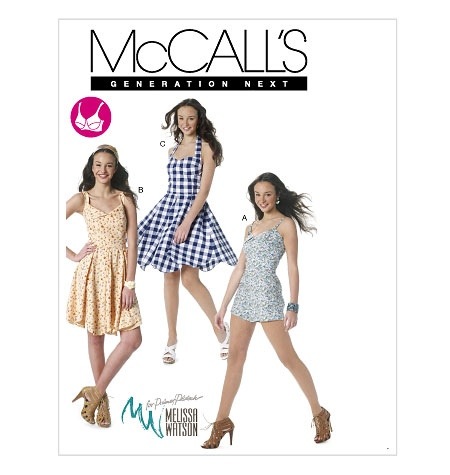
Tyo sent me this pic way back last summer as an example of a dress she wouldn’t mind wearing. So with that as our inspiration, we thumbed through my pattern database. Sadly, she was not going for McCall’s 4778.

No? Not even version B?
But she did eventually bite on McCall’s 6331:
McCall’s 6331
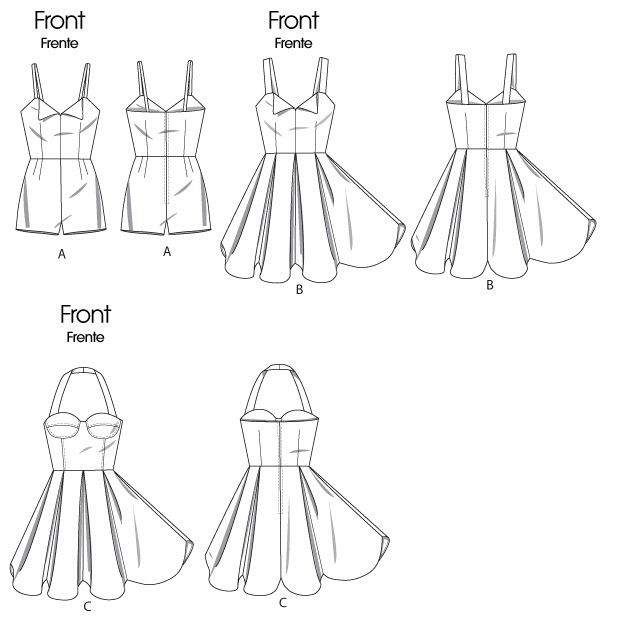
View B, without the bustier cups. Tyo may someday embrace things like bustier cups but, fortunately for my reflexively-prudish-parental-nerves, she hasn’t yet.
We finally made up the practice version last weekend. I say finally because I have literally heard nothing but “When are we making my dress?” for like a month straight.
You will note some changes have been made.
In terms of fit, I traced off the Misses’ size 8, to match her bust, in the A/B cup size, and shortened the bodice by a good 3 cm, since her back length is nowhere near the 16″ the patterns are drafted for. Then I added that length back on at CF, in a kind of a reverse swayback adjustment, lengthening the front rather than shortening the back. This is my daughter, after all, even if the booty is all from her dad’s side of the family. I won’t exactly say the waist is level with the floor, but at least it’s closer.
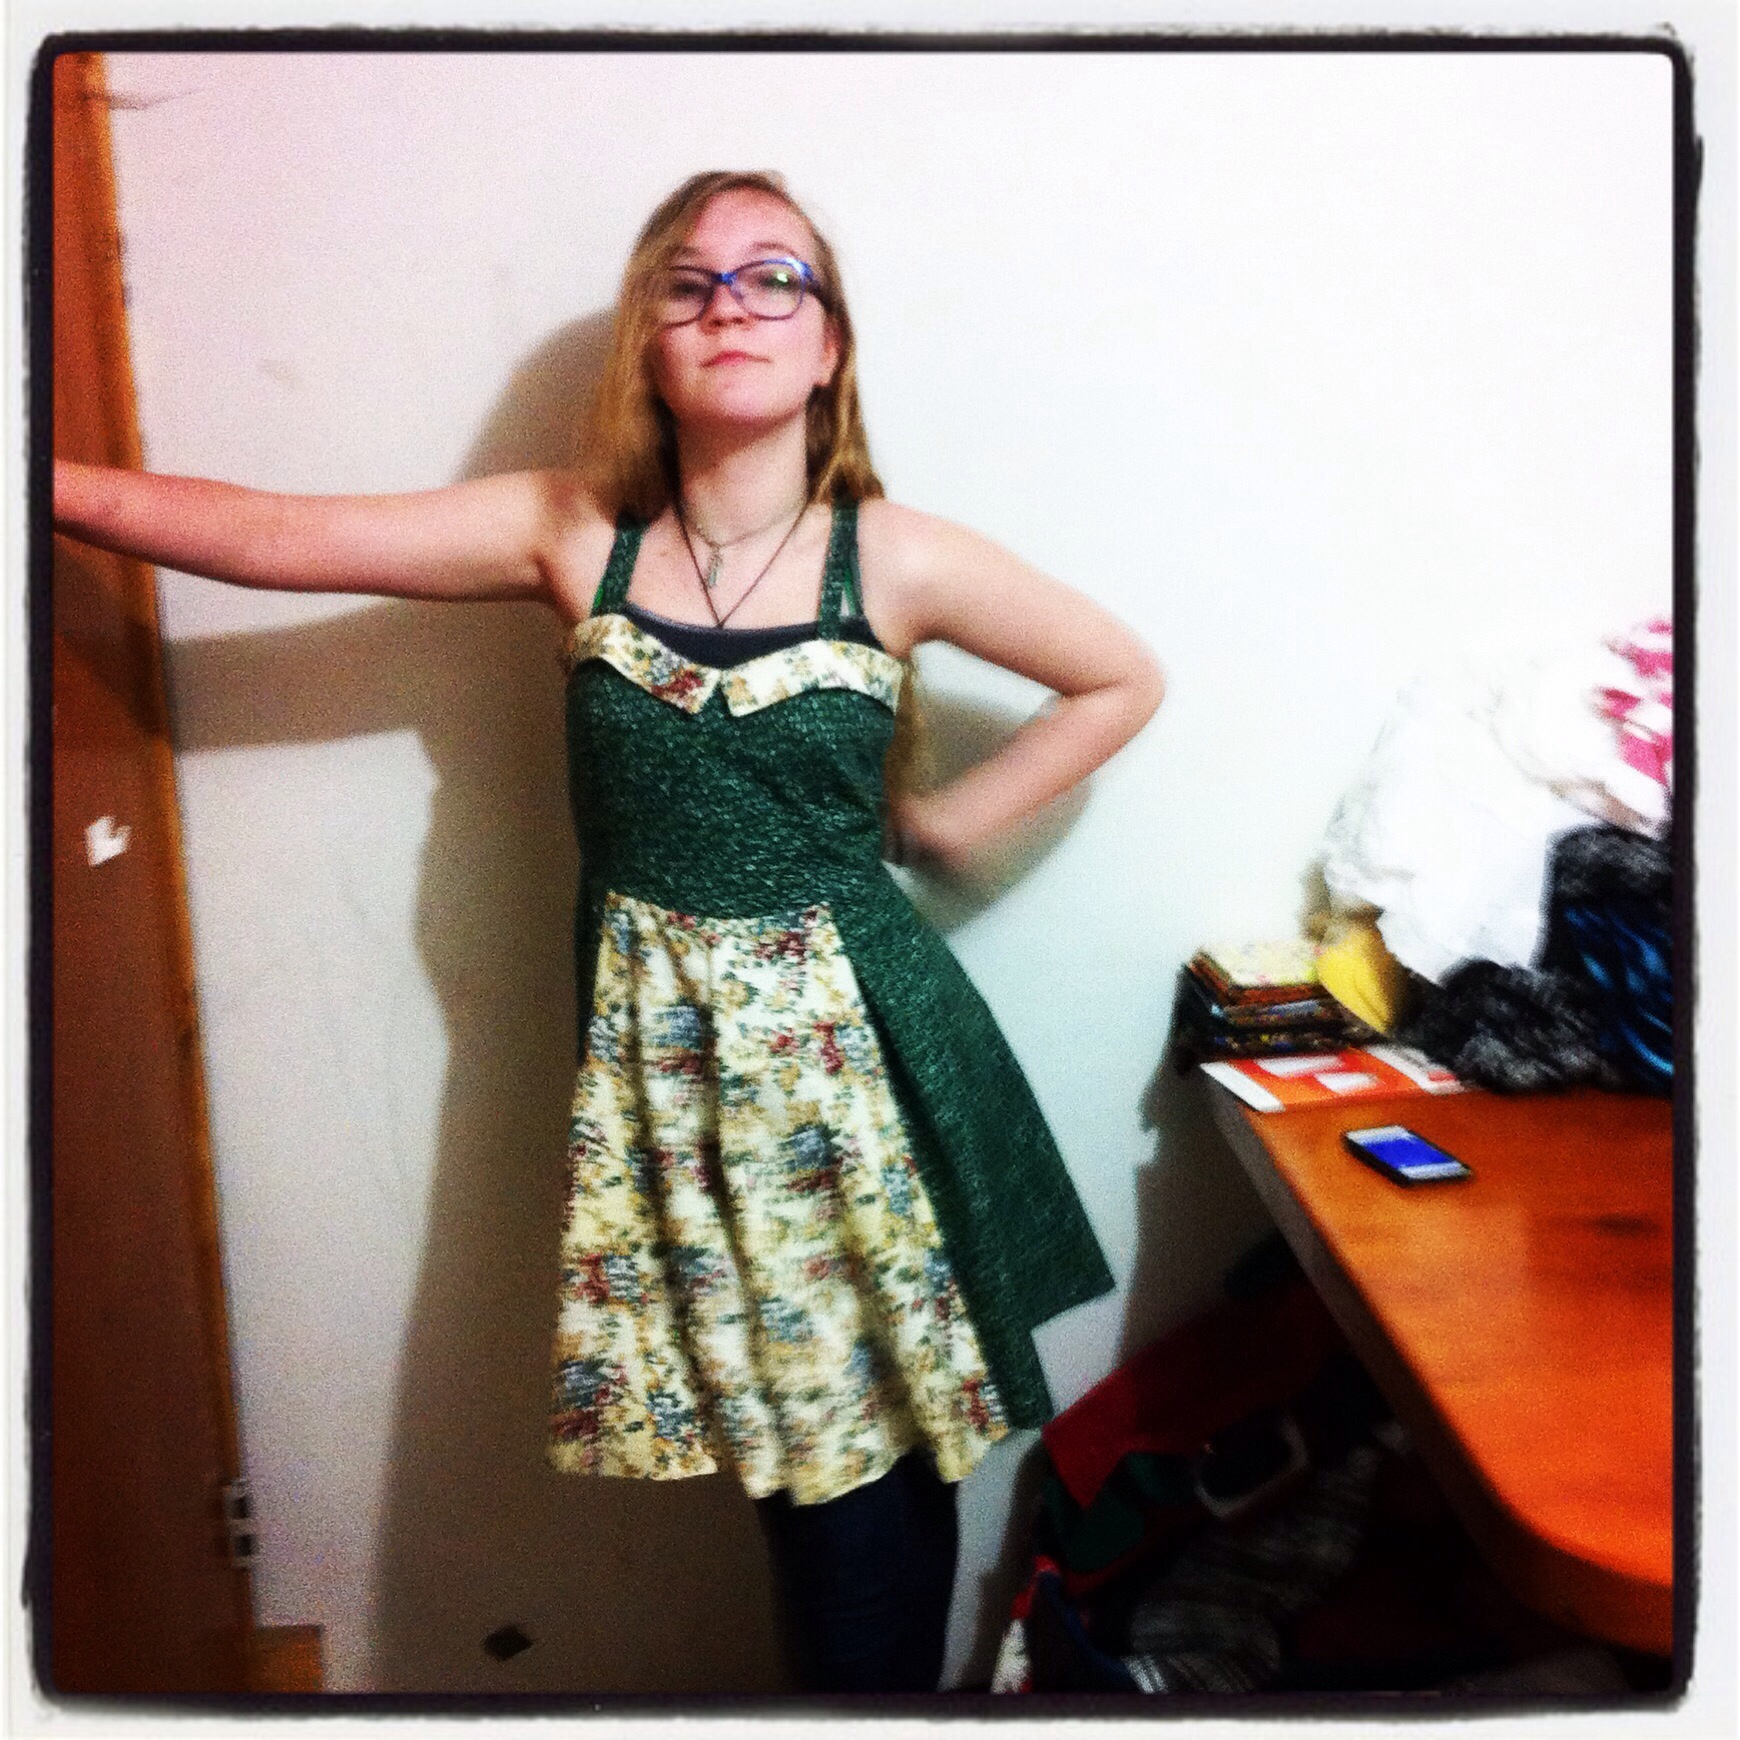
The practice dress.
Originally we were going to keep the cute little collar-like flaps on the front of the McCall’s pattern; not quite the inspiration dress, but it seemed like a neat detail to me. But when it came time to test the straps, it was clear that they were too far set for her narrow shoulders (those she does NOT get from me. OK, really the list of things she doesn’t get from me is much longer than the things she does.) And because of the nature of the fold-over, moving that point inward shrank down and threw off the shape of the little triangle and it just wasn’t working. Grum. So, back to the drawing-board. Or the cutting table… a few snips and the folds were eliminated, the points reduced to a gentle curve. Bonus: without the fold-over, it became much easier to cut the front on the fold, eliminating a seam. I must admit, the little sundress-collar-thingies are just about my favourite detail for a sundress. I probably over-use them, like an indifferent novelist who has the same character recurring under different names in every book.
Oh, and the original skirt pattern has these cute scallops to each panel. Yeah, that ain’t happening.
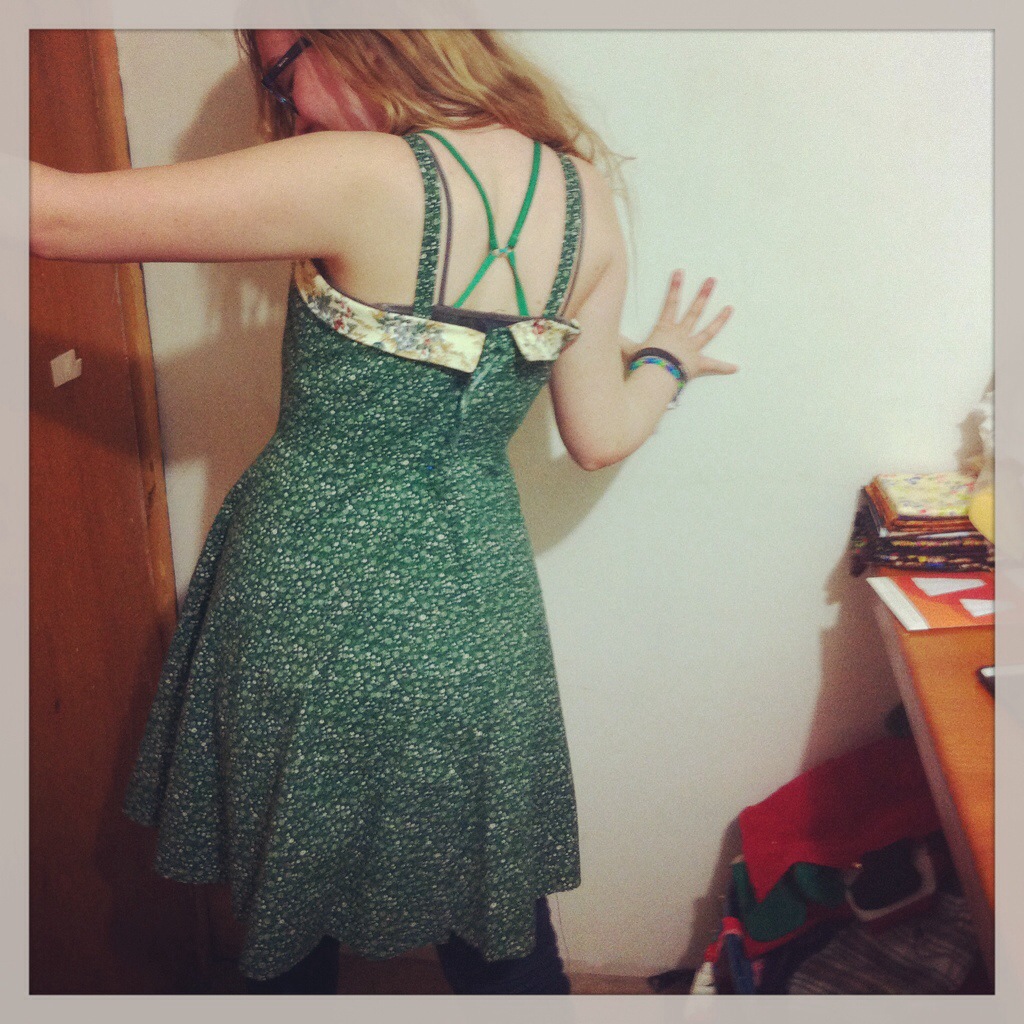
Did I mention Tyo sewed the skirt seams herself? So helpful! Anyway, since I was using my Featherweight for the first time in months (it spent the winter at my Stylish sister-in-law’s house, in anticipation of coat-making that we never… quite… got to. 😦 ), and I had the nifty attachments like the adjustable hemmer, I thought I’d give it ago. With a little bit of adjustment and practice, I made a remarkably neat hem, just a touch over 1/4″ wide. Honestly, I’m pretty darn preening. I used all the tips people suggested in comments on my rolled-hemmer post, and they were very helpful—especially the trimming the seam-allowance when crossing seams one.
I actually kinda love how this practice dress turned out, even in the two different fabrics. I’m inclined to finish it (I need to practice my lapped zipper skills, anyway). Tyo assures me she will even wear it… next time someone has a garden party.
Although I suspect that is teenager-speak for “Never in a million billion years, mom.”
Next up will be the real dress. Plus red crinoline. I’m jealous already—I think I just might need a red crinoline. >_<
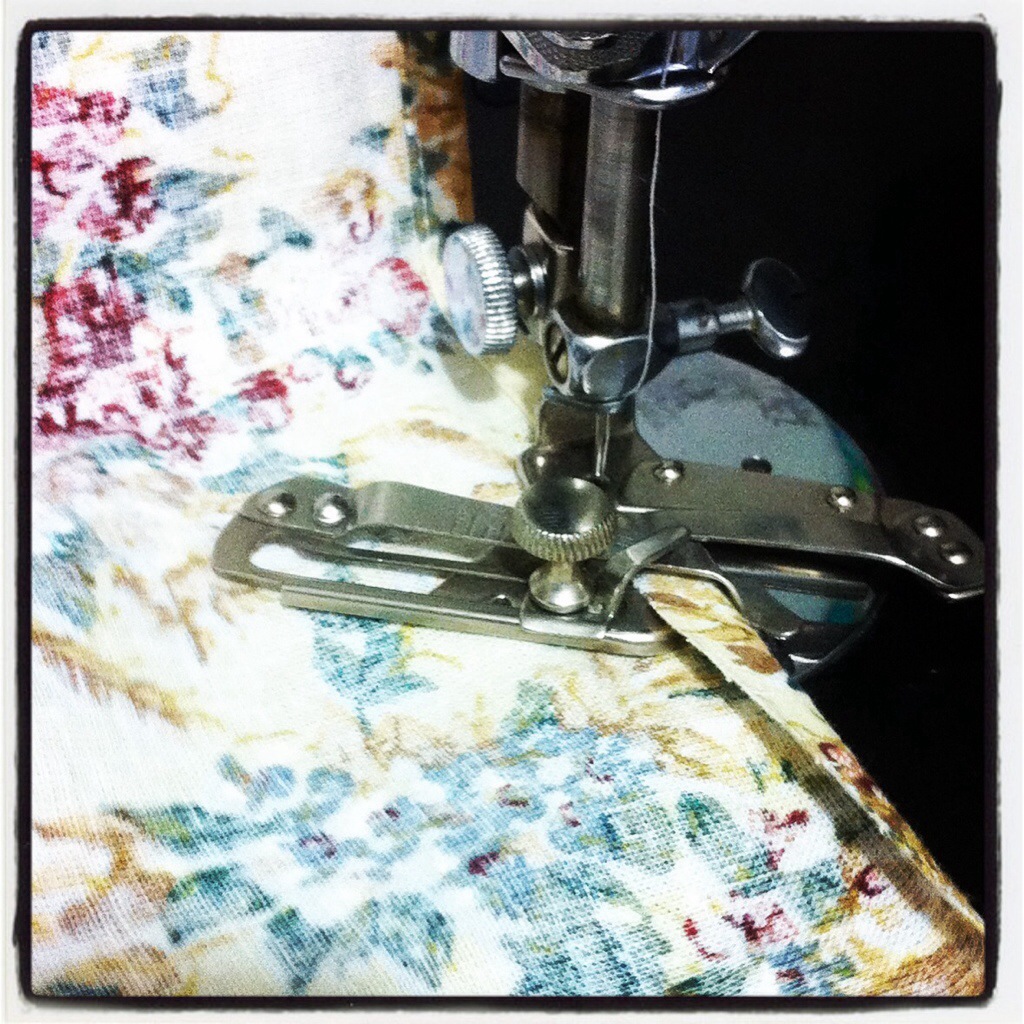
Adjustable hemmer foot. Scary Sewing Machine Attachments rating: 7/10.
*Yes, the Breakfast Club has been watched.>
**I blogged about my gr. 12 grad dress, here. Spoiler: my mom made it. In 1970. My gr.8 grad, on the other hand, did not involve home-stitched anything. I wore a souvenir blouse my father brought back from a trip to Montreal (a foreign and exotic land,) and one of those lightweight cotton broomstick skirts that were all the rage in the early nineties. It was a beautiful skirt, and I held on to it for years after, until, early in blog-hood, it became a part of this dress.
Filed under Sewing

Almost an Easter dress
I made another dress. If we need an excuse, let’s call it an Easter dress, though it wasn’t done in time for Easter, nor was it dress weather.

Butterick 5317
The pattern is Butterick 5317, which is reminiscent in silhouette to the Danielle Dress of yore. Or at least reminiscent of my version of it, which had an extra pleat in the front. Or maybe they’re only reminiscent in my head… The skirt on this one is more full (more pleats). I must admit, although this style ticks a lot of my boxes—scoop neck! Empire waist! Just-above-knee-length!—the pleats had me a bit worried. That sudden release right at the waist seamed like it would be T-R-O-U-B-L-E. Which wasn’t enough to keep me from tackling this dress ind fairly-stiff cotton sheeting and sateen. Sensible, I am not always.
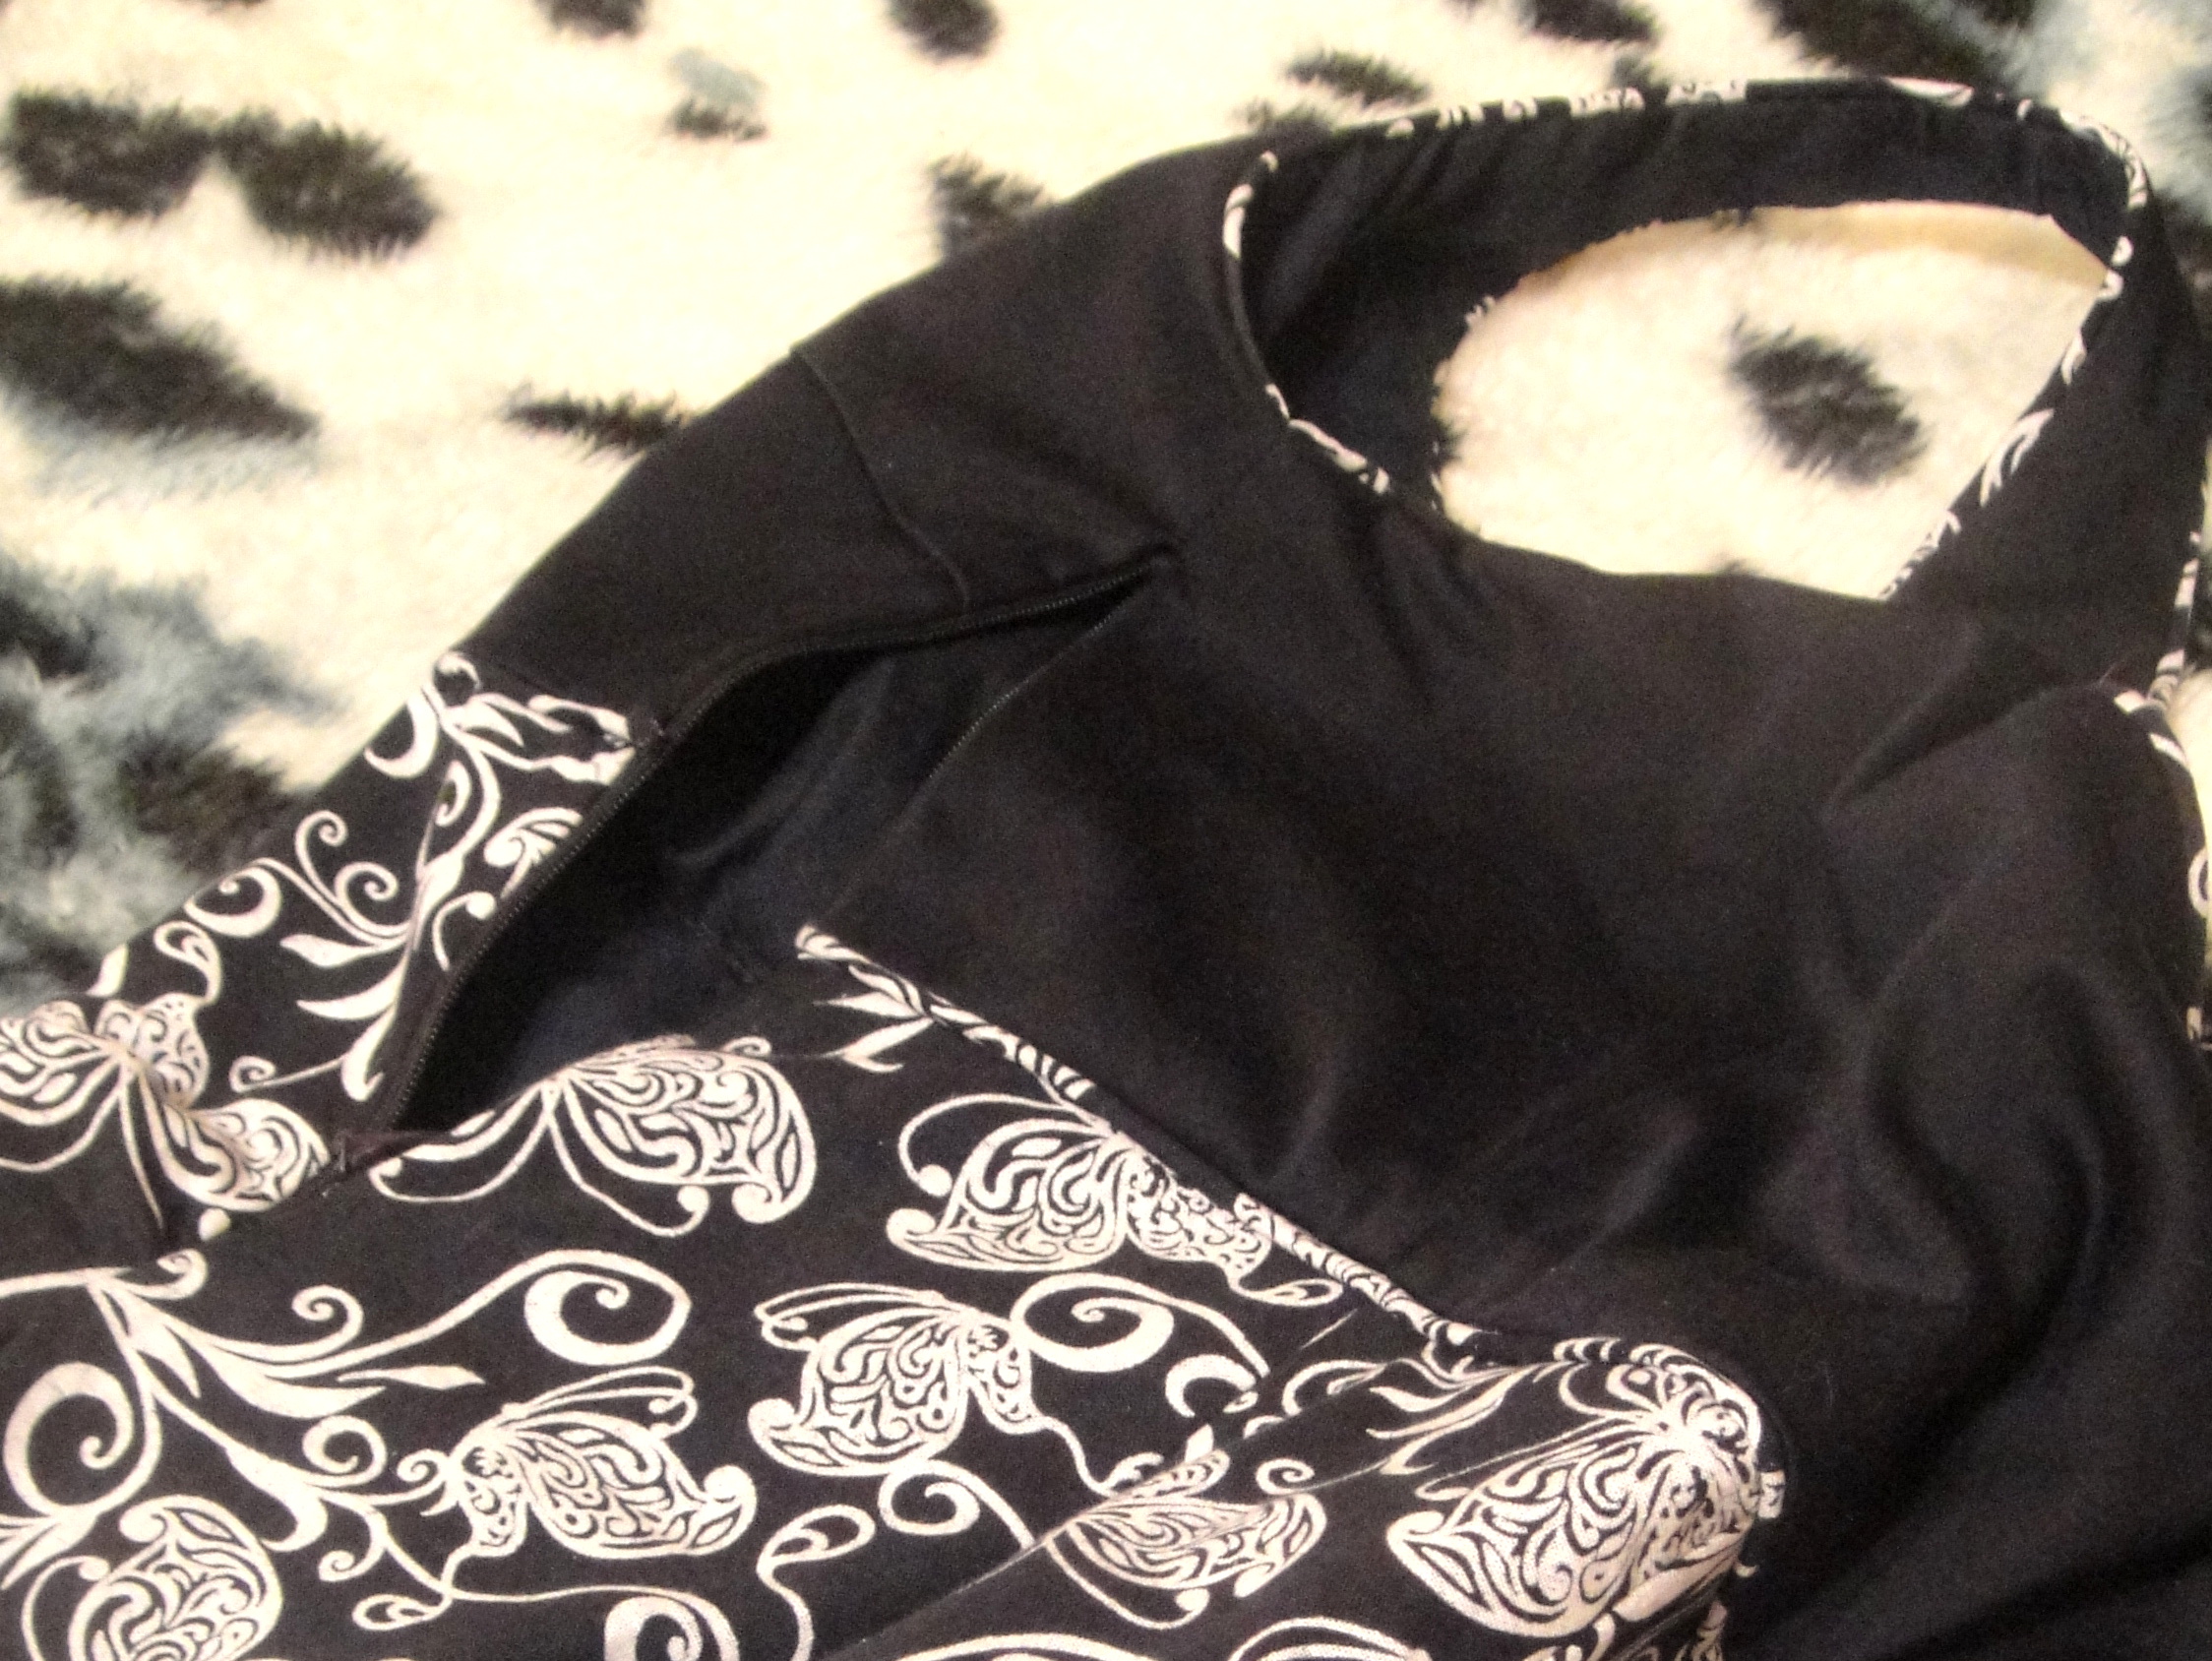
Side zip (very short… long story) and piping. Did I mention I love piping?
There is no back seam, so I presume the pattern expects you to insert a side zip. You may presume, from my presumption, that I did not actually read the instructions. Probably this would’ve been a good idea, as it probably covered how to insert both the satisfyingly giant pockets and a side zip in the same seam. I know this can be done, but I’ve never done it, and didn’t feel up to the challenge of figuring it out myself. Or the challenge of reading, apparently. So I just made my zip really short, ending above the pocket bag, which is approximately level with the waist. This works because a) my waist is pretty big, and b) my fabrics, even the 100% cotton print, had quite a lot of give.

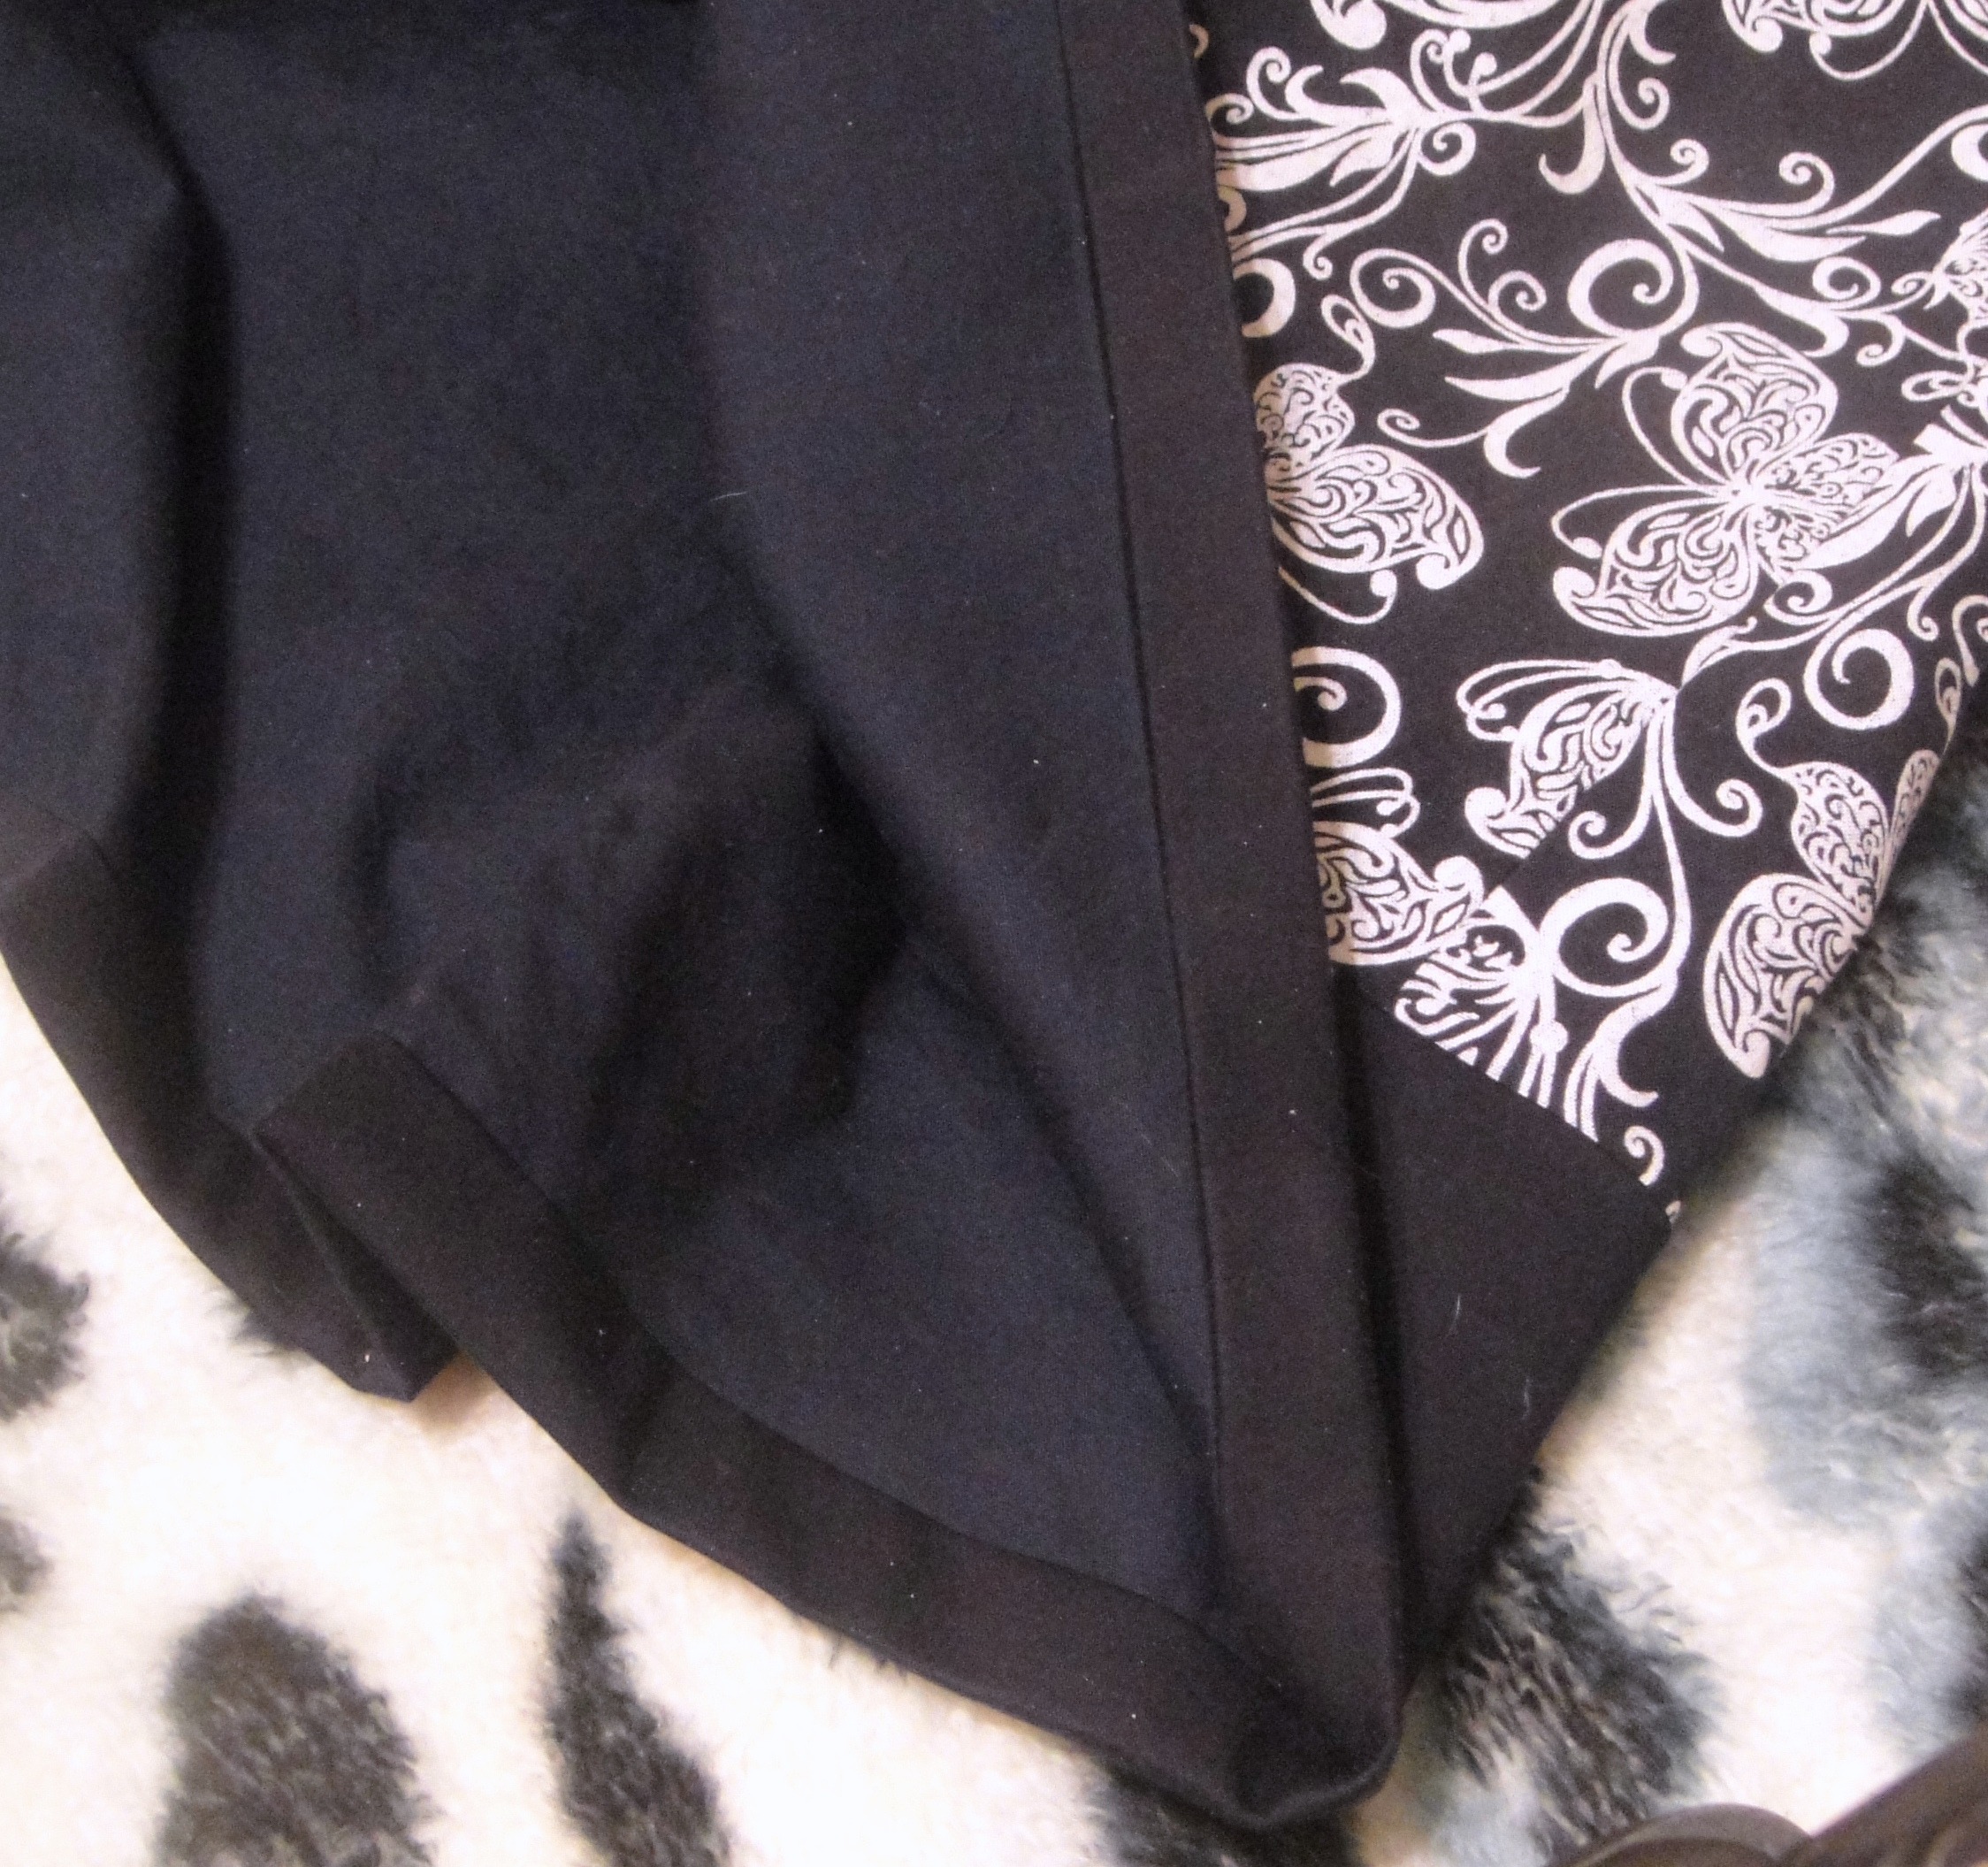
Hem band. I was kinda surprised this wasn’t doubled. If I hadn’t decided to line the entire skirt, I would definitely double it.
I do love the hem band.

Can you see the pleats here?
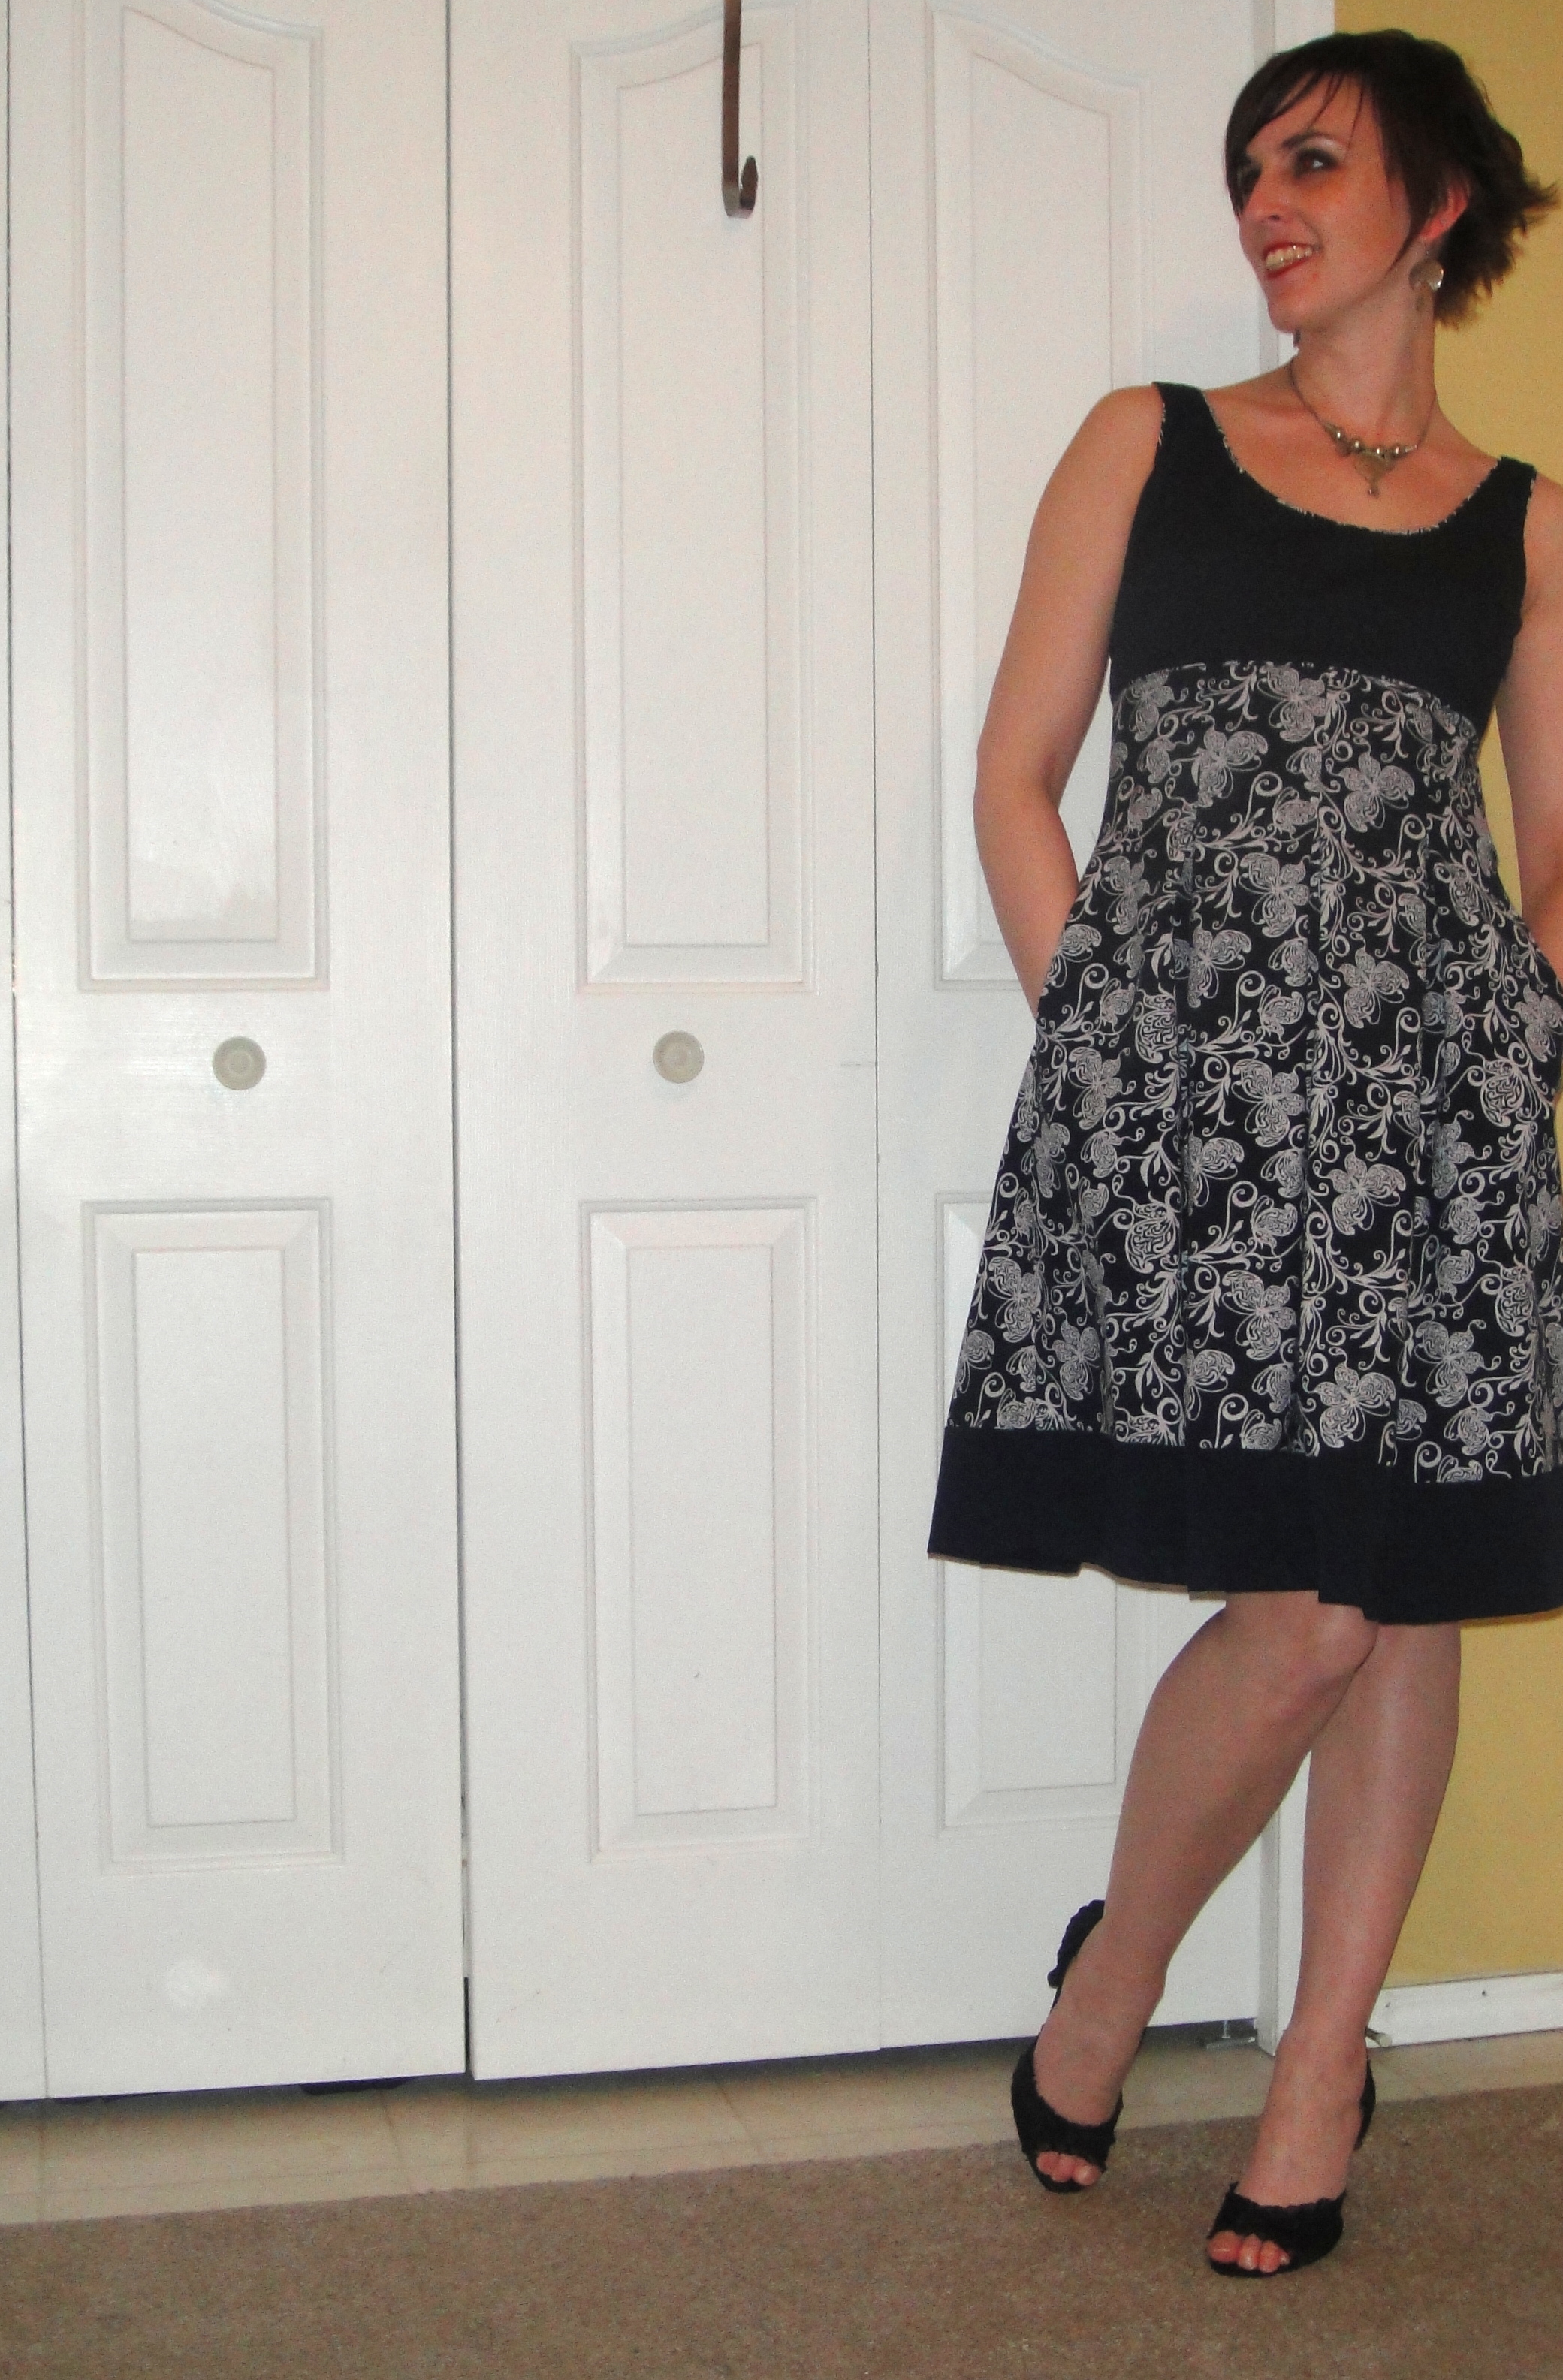
I made my usual suite of alterations—shortening both the straps and between underbust and waist. The strap thing may have been unnecessary, as it’s quite high under the arm, and while the waist does sit in a good spot, the “waist” on this dress is defined much more by where you release the pleats than by the slight shaping at the side-seam. Although I do think that slight shaping is quite helpful. After an initial try-on, I lengthened the stitching on all the pleats by about 4 cm, and I like it much better where it is now. I think it contains the poof nicely. I should add before I forget that the straps sit a bit wide, and I don’t have narrow shoulders. VBS chic is a real probability.

I tried to get a shot that showed the pleats, but it was very hard. I guess that’s the goal?
I decided early on I wanted to line the skirt, not just the bodice. Not long after that, I realized that I would have to stitch the pleats in lining and top skirt as one, or languish in bulk forever. (Bulk at the waist is what we are trying to avoid here, peeps.) The way to do it, obviously, was to construct the cylinder of each skirt, sew them together at the hem, fold the lining to the inside, and then add the pleats. I did accomplish this, although there was definitely some head-scratching about the pockets and the zip.
Hem.
I wrangled with myself about doing a swayback alteration, since there is no back seam and no waist-seam; I did in the end shave some off top and bottom at the raised waist seam, and there is very little tendency to wrinkle in the back, so I’ll call it a win, and the under-bust seam is more “level” than it would’ve been without.

Back view, just like the front view.
Did I mention I went down a size? The pattern has a full 2″ of ease at the bust, which isn’t bad but is a touch more than I like for a fitted style. I think my down-sizing was successful in the fabrics I chose, stretch cotton sateen for the bodice and stretch poplin for the lining, but would’ve been uncomfortable in more stable fabrics. I did grade back up to a size 12 at the hips, although I suspect given the volume of the skirt in that area that it didn’t make a lick of difference.
The pockets are large and functional, although somewhat hampered by my decision to sandwich them between the two layers of the skirt.
But those really are some excellent pockets.

I am content.
I must admit, I’m kinda curious what the pattern would look like in a softer, flowing fabric; the example on the envelope is very similar to mine, crisp and rather blocky. Which isn’t necessarily bad, especially with those pleats, but I think it just might be really lovely in a soft satin or something else equally evil to sew with. For now, though, I’ll just be happy if we can get weather that actually allows me to wear it outside!
(Also, I feel like I should add, the dress is navy, not black. I was attempting to kick my black-and-white-with-occasional-red kick. Probably this is futile, especially when I keep choosing colours that read as black half the time…)
Filed under Sewing
I made another version of Kwik Sew 717, this one with absolutely no lace. Plain jane, pure function. I think I’m almost done with the slips. Almost. Although there’s still a couple of patterns I’d like to try and Funnygrrl sent me some great skin-tone fabric it’d be awesome to use. Cuz she’s awesome that way. Especially her latest post on body image and negative self talk.

There isn’t much to say about it. I made a slight small-bust adjustment, removing about half a cm from the width of each cup, and shaving about the same amount off the bottom. I should’ve left out the two funny little darts and kept the gathers, but I didn’t think about this until after the darts were cut and sewn. So the cups aren’t as pretty as they might be otherwise. They do seem to fit better than the first ones, at least sans bra.
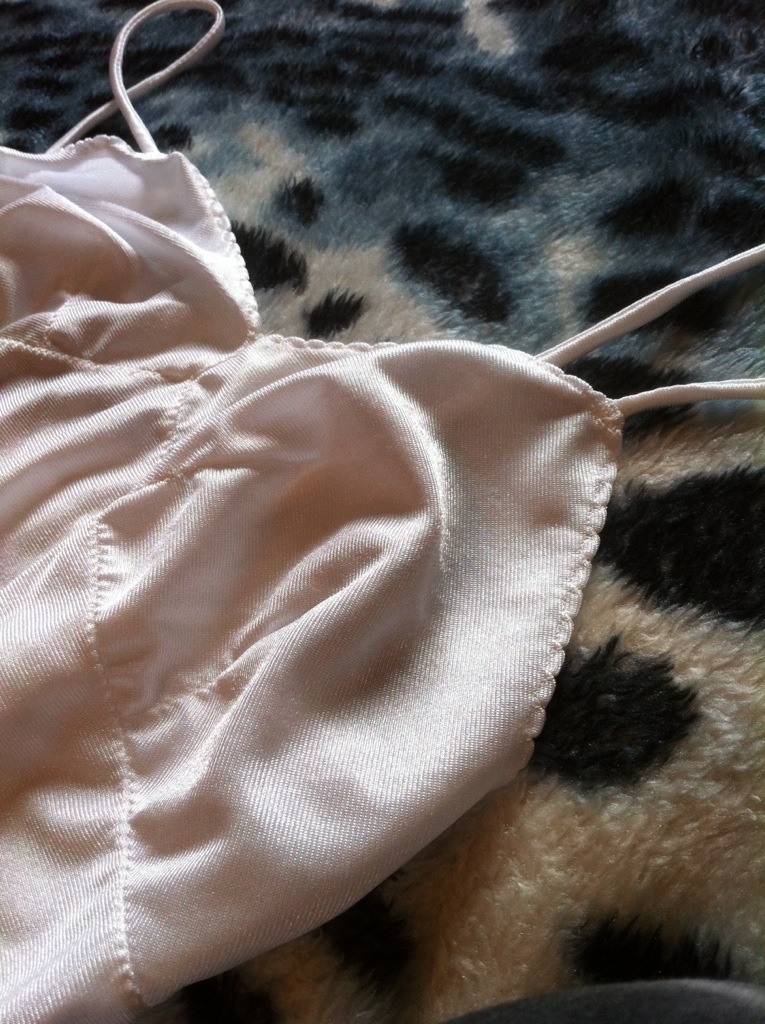
I used the shell hem, top and bottom. I might be getting good at it.
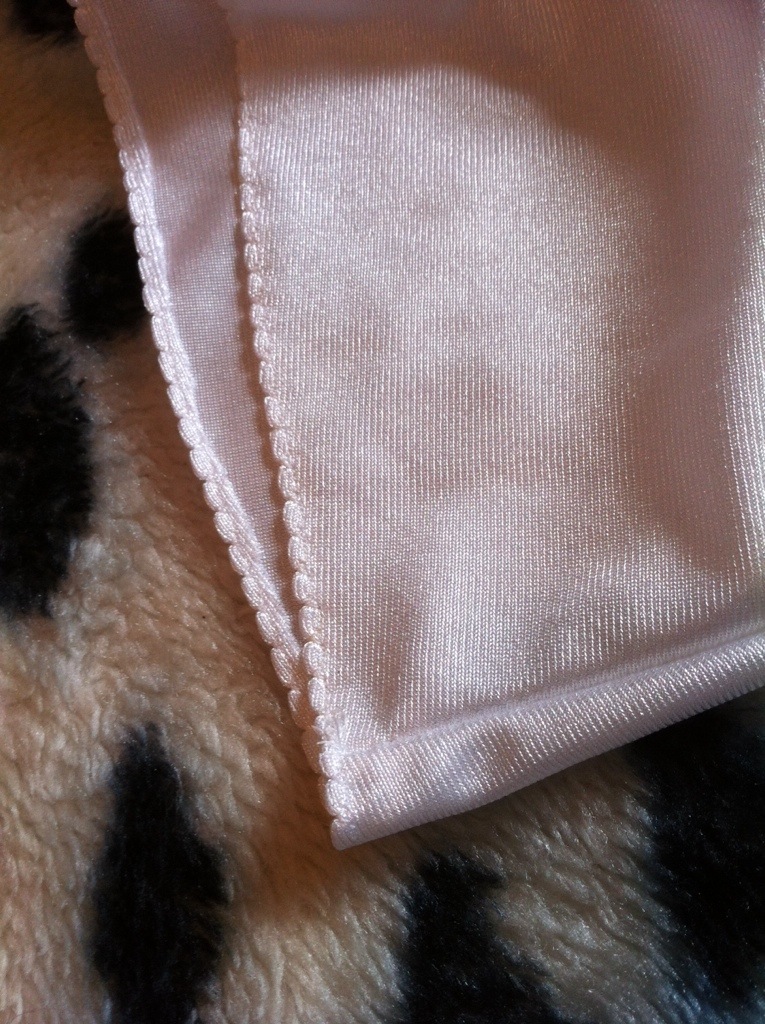
The first slip I had lengthened about four inches; this one I made the original length, just for variety. I didn’t need to take in the side seams on this one. Maybe because the fabric is less stretchy than the lace, maybe because the cups fit better so I didn’t feel the need to pull it as tight to get “fit”. You can still see some puckering on the side seam—I didn’t stretch quite enough, I guess, while sewing them. The Rocketeer is a workhorse, but she may have a few tension issues. Probably a machine spa day would be in order…

And you get arty modeled photos because that’s the only filter that didn’t show anything under the slip. Not great but better than dressform pics. I hope.
Happy eggs ‘n bunnies day! We’re off to the farm to enjoy “spring,” which in the last few days has included about four inches of snow and freezing rain, which I think is actually worse than a full-blown blizzard. But hopefully we’ve turned a corner now. Because I have springy dresses to wear with my slip, dammit!
Filed under Sewing
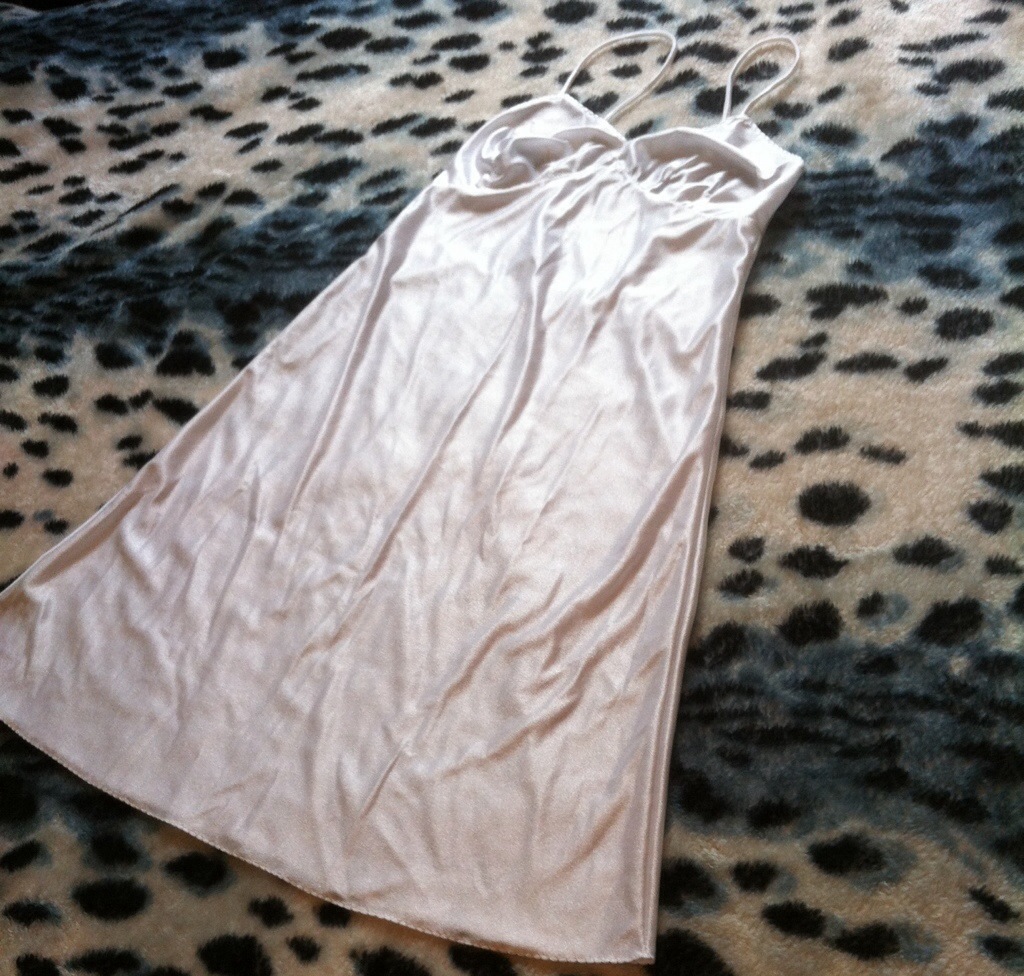
I am definitely on a roll. Or perhaps just avoiding other, less fun, projects. Regardless of the reasons, I got up last Sunday, and cut out two more slips from my nylon tricot, finishing one before breakfast.
In my defense, it was a half-slip, and a rather late breakfast.
A half slip is sorta like diet food, I think. All the right elements seem to be there, yet somehow the good stuff is missing. This slip doesn’t exactly make me wriggle with delight, nor does it ooze demure sexiness.
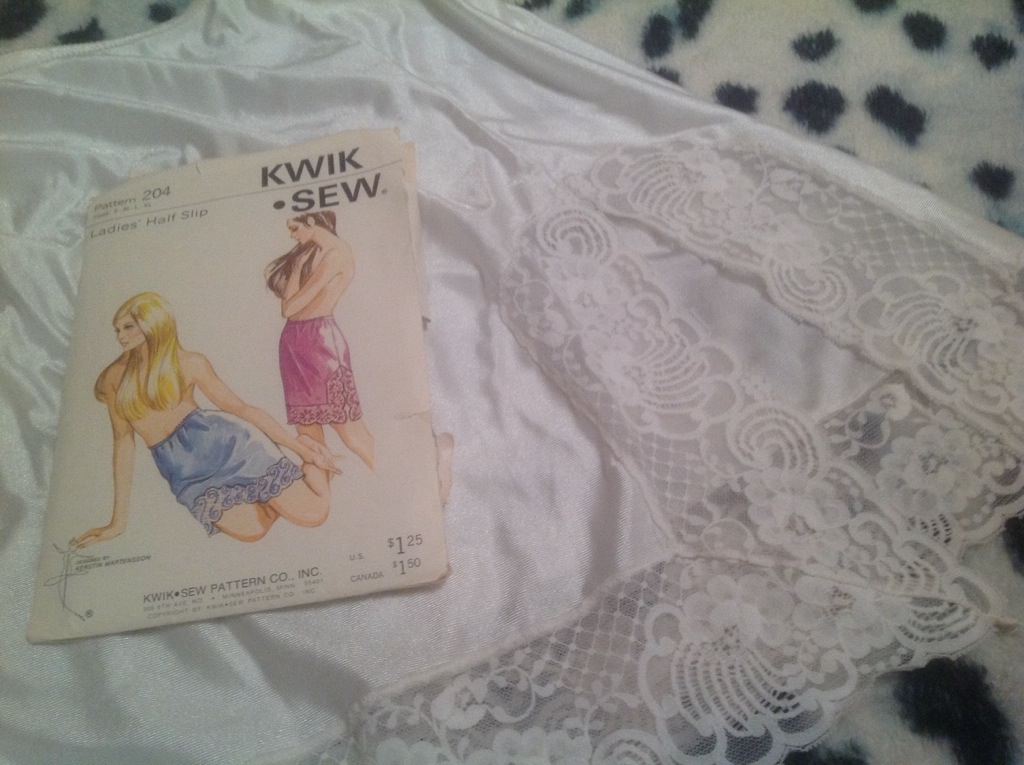
This is another early Kwik Sew pattern, if you can call a trapezoid with a slight curve over the hip a pattern. I had a bit of a scare when I opened the envelope (I’m very lax about checking through my vintage patterns—I’ve only had one or two severe disappointments, so I don’t feel very motivated to improve my care)—what came out first was a Sew-Knit-n-Stretch girls’ slip pattern and instructions (actually a pattern I also have… I will have to check and see if it has its contents.) Fortunately, KS204 was tucked inside, too. There’s lots of room—it takes up about as much space as a couple of sheets of looselesaf.

It had been cut to size small, which was fine for me, at least about the hips. Around the waist, well, the pattern sizing is for a 25 1/5″ waist. I haven’t had one of those since I was 15. I added a bit, although it turned out it probably wasn’t necessary. Though the amount of ease seems about right throughout, so maybe it was a good idea.

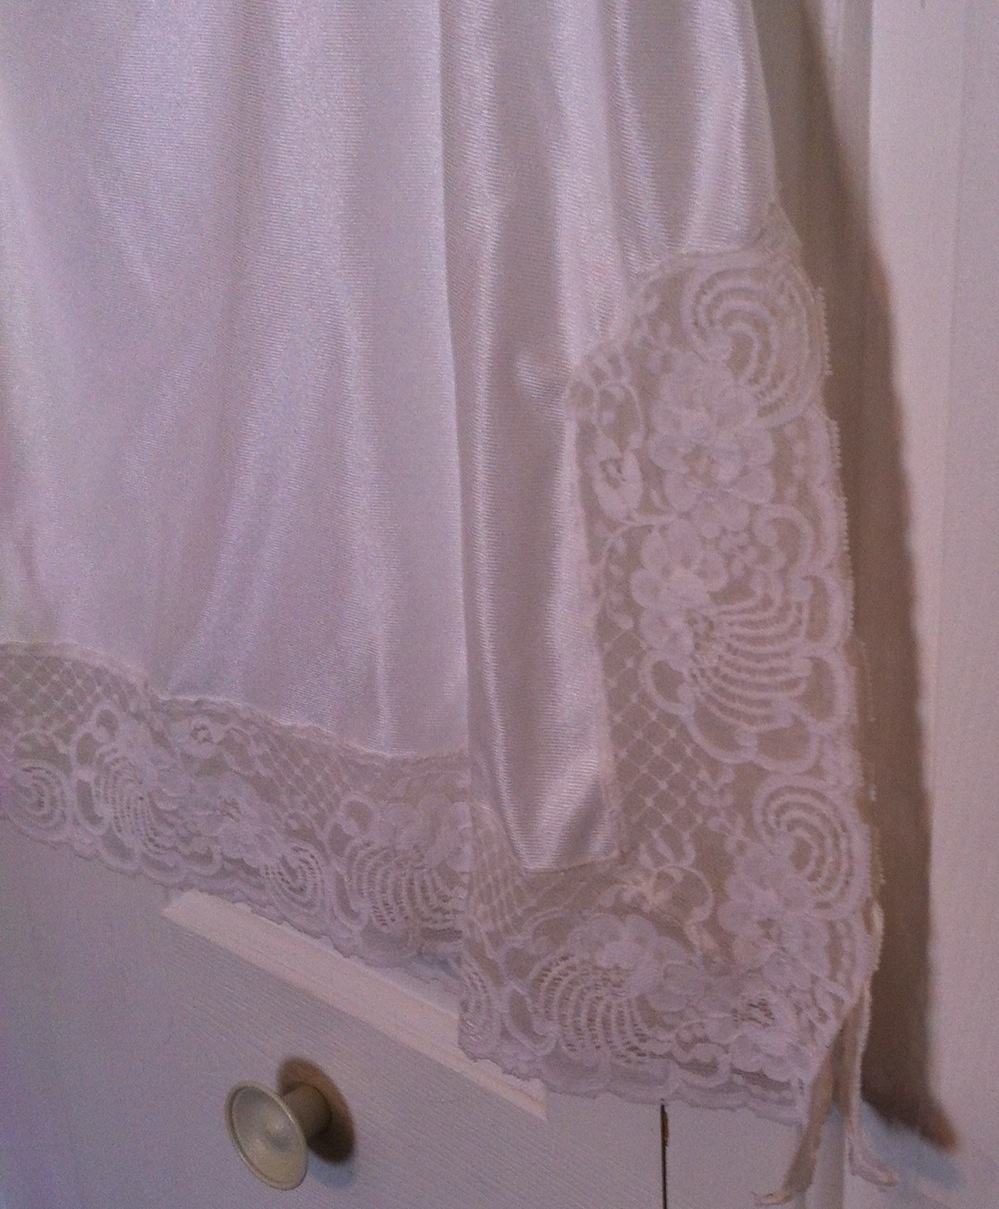
The lace is (yet another) stretch-lace from my stash. It’s one I’ve been coddling for years, because I absolutely adore it—and after looking at lace pretty much non-stop for the last few weeks (ok, whenever I was sewing, which once you subtract work and a modicum of family time, is not much), I have to say I really, really, really like this motif even more than I thought I did. Anyway, I’d been thinking I was saving it for the hem of a cami or tee, but when I was digging around for lace for this project, I realized that the elastic is getting that feel. The one where you’re afraid to stretch it because it may not go back again. So I opted to use it for something where the elasticity isn’t key. (And, if it becomes completely misshapen and gross when the elastic dies, I’ve only wasted a few square feet of material. And at least this way I can enjoy it for a short while.)

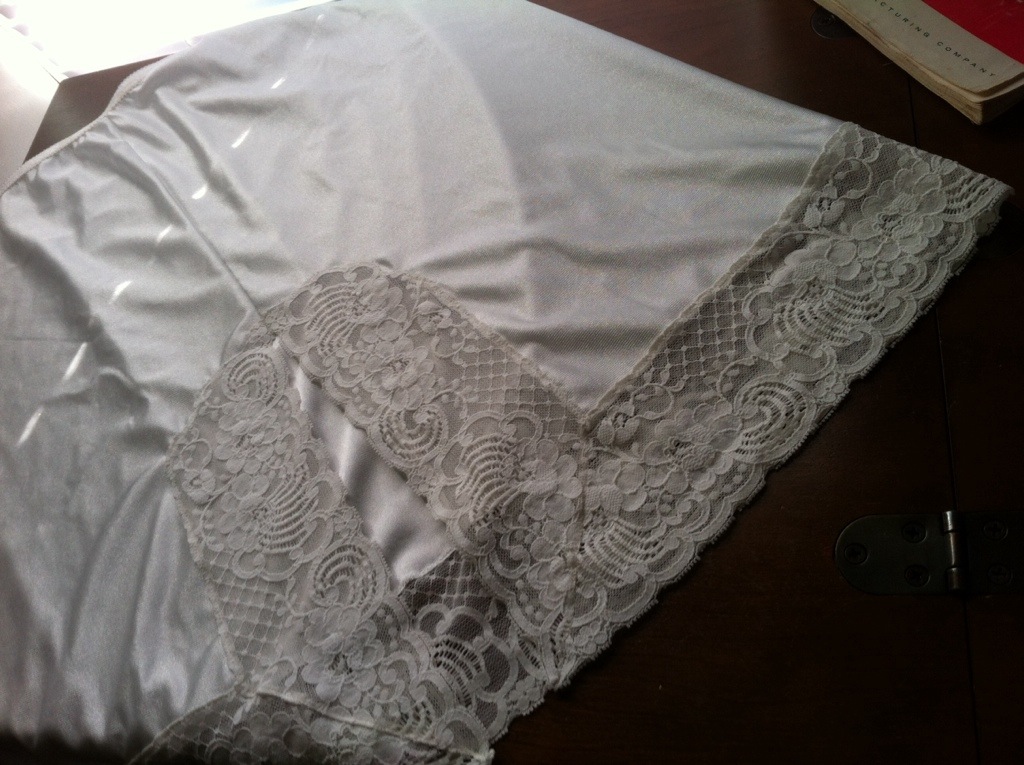
While there was not much to the pattern (one piece cut on the fold, identical for front and back), the instructions were nice to have, if only so I didn’t have to actually think about anything. I determined I had enough of the lace to surround the bottom and do a nice “slit” piece up the side; I spent probably more time arranging the lace to get the motifs to match up, as best they could (not being symmetrical) across the top of the slip. The pattern suggested cutting the lace; of course, I wanted to try and trim around my motifs. Which only sorta works since they aren’t symmetrical, but I think I managed to get close enough. Although the sharp, symmetrical top might’ve been more striking.
I have to admit, my first thought on trying it on was “…. eh.” Not exactly sexy. Give me a full slip any day. And it sits at my natural waist, which is never a good look for me. But I think it will have a place in my wardrobe, and once the clothes are on top the little hints of lace are as much fun as any regular slip.
Filed under Sewing
Sewing is what I do when I'm cheating on all my other hobbies...