
I confess, I haven’t really had time to read this chapter over. I wasn’t even aware that drawers required fitting other than the most basic does-this-go-around-me kind. Do they cover trouser fit for men and boys? Does yoke mean the yoke of a skirt, or any kind of yoke or something completely different? You’ll have to read to find out!
Author Archives: Tanit-Isis
Prezzies! (4)

Thank you, Meadowsweet Child! I can’t wait to try some of these out. Except that everything I own is in a box right now, so I have to wait. Also, packing vintage sewing machines with the old cases totally beats packing modern, caseless machines, but moving them is still the pits. 🙂
August 27, 2012 · 7:10 am
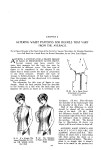
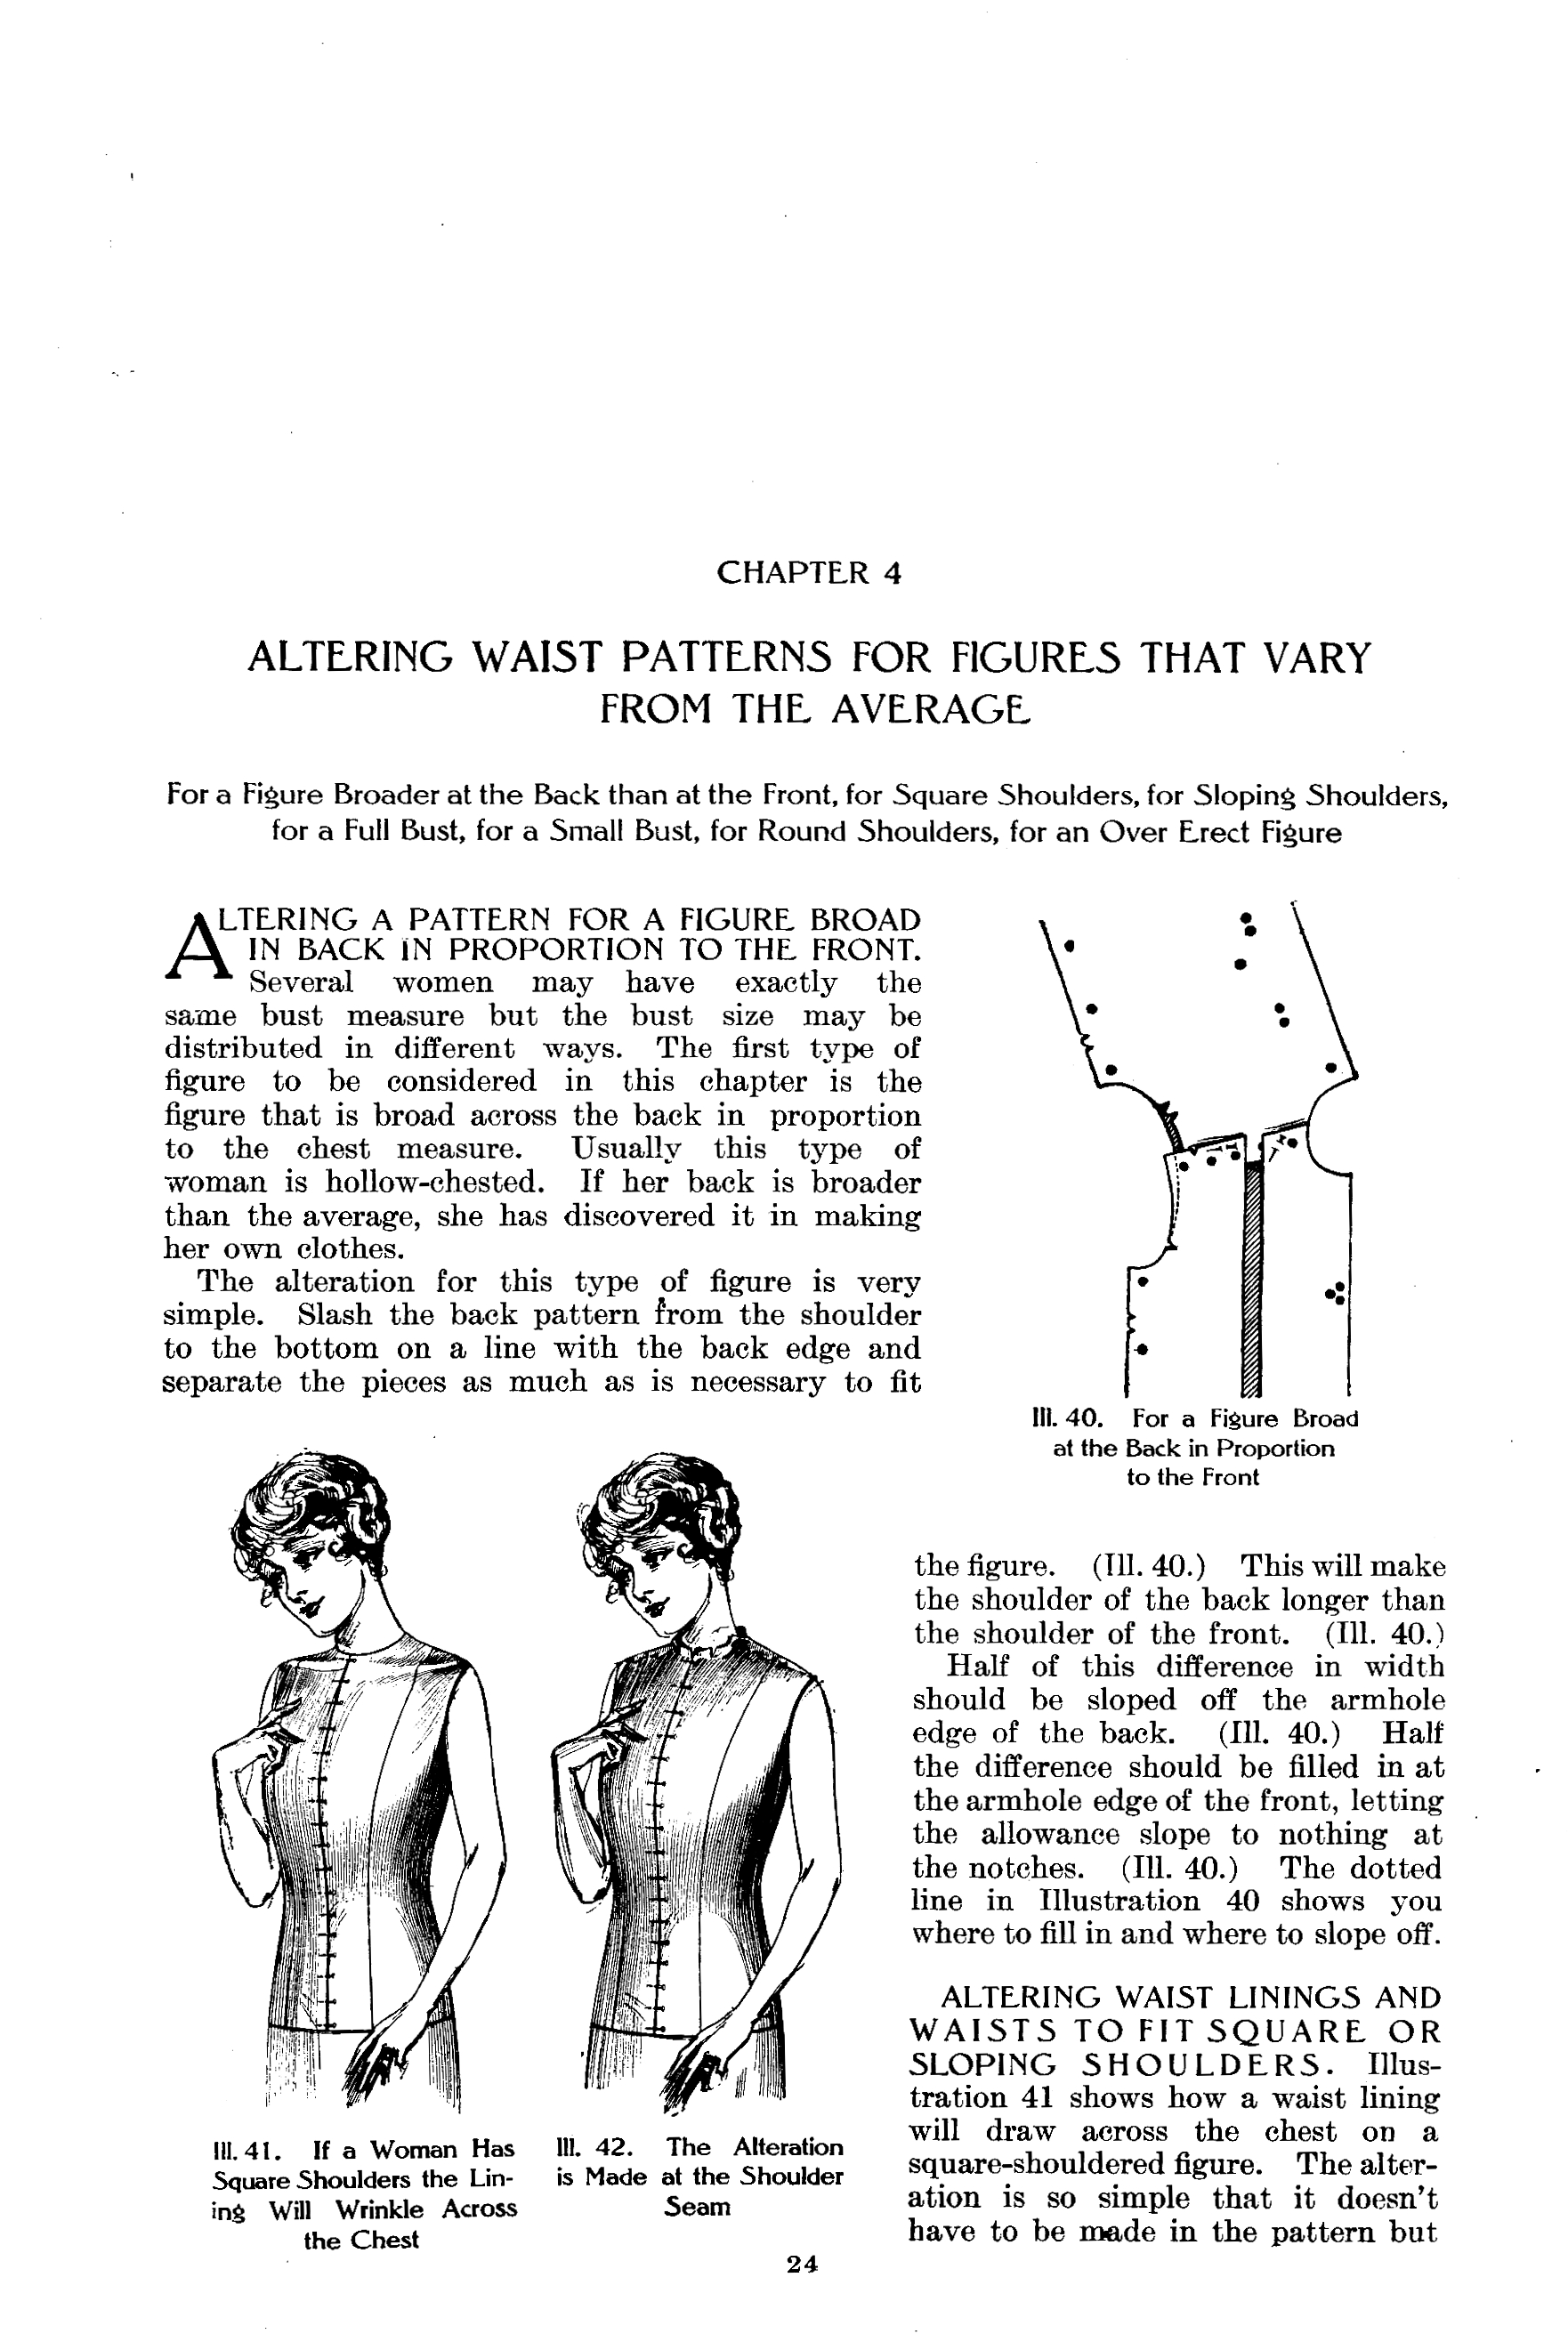
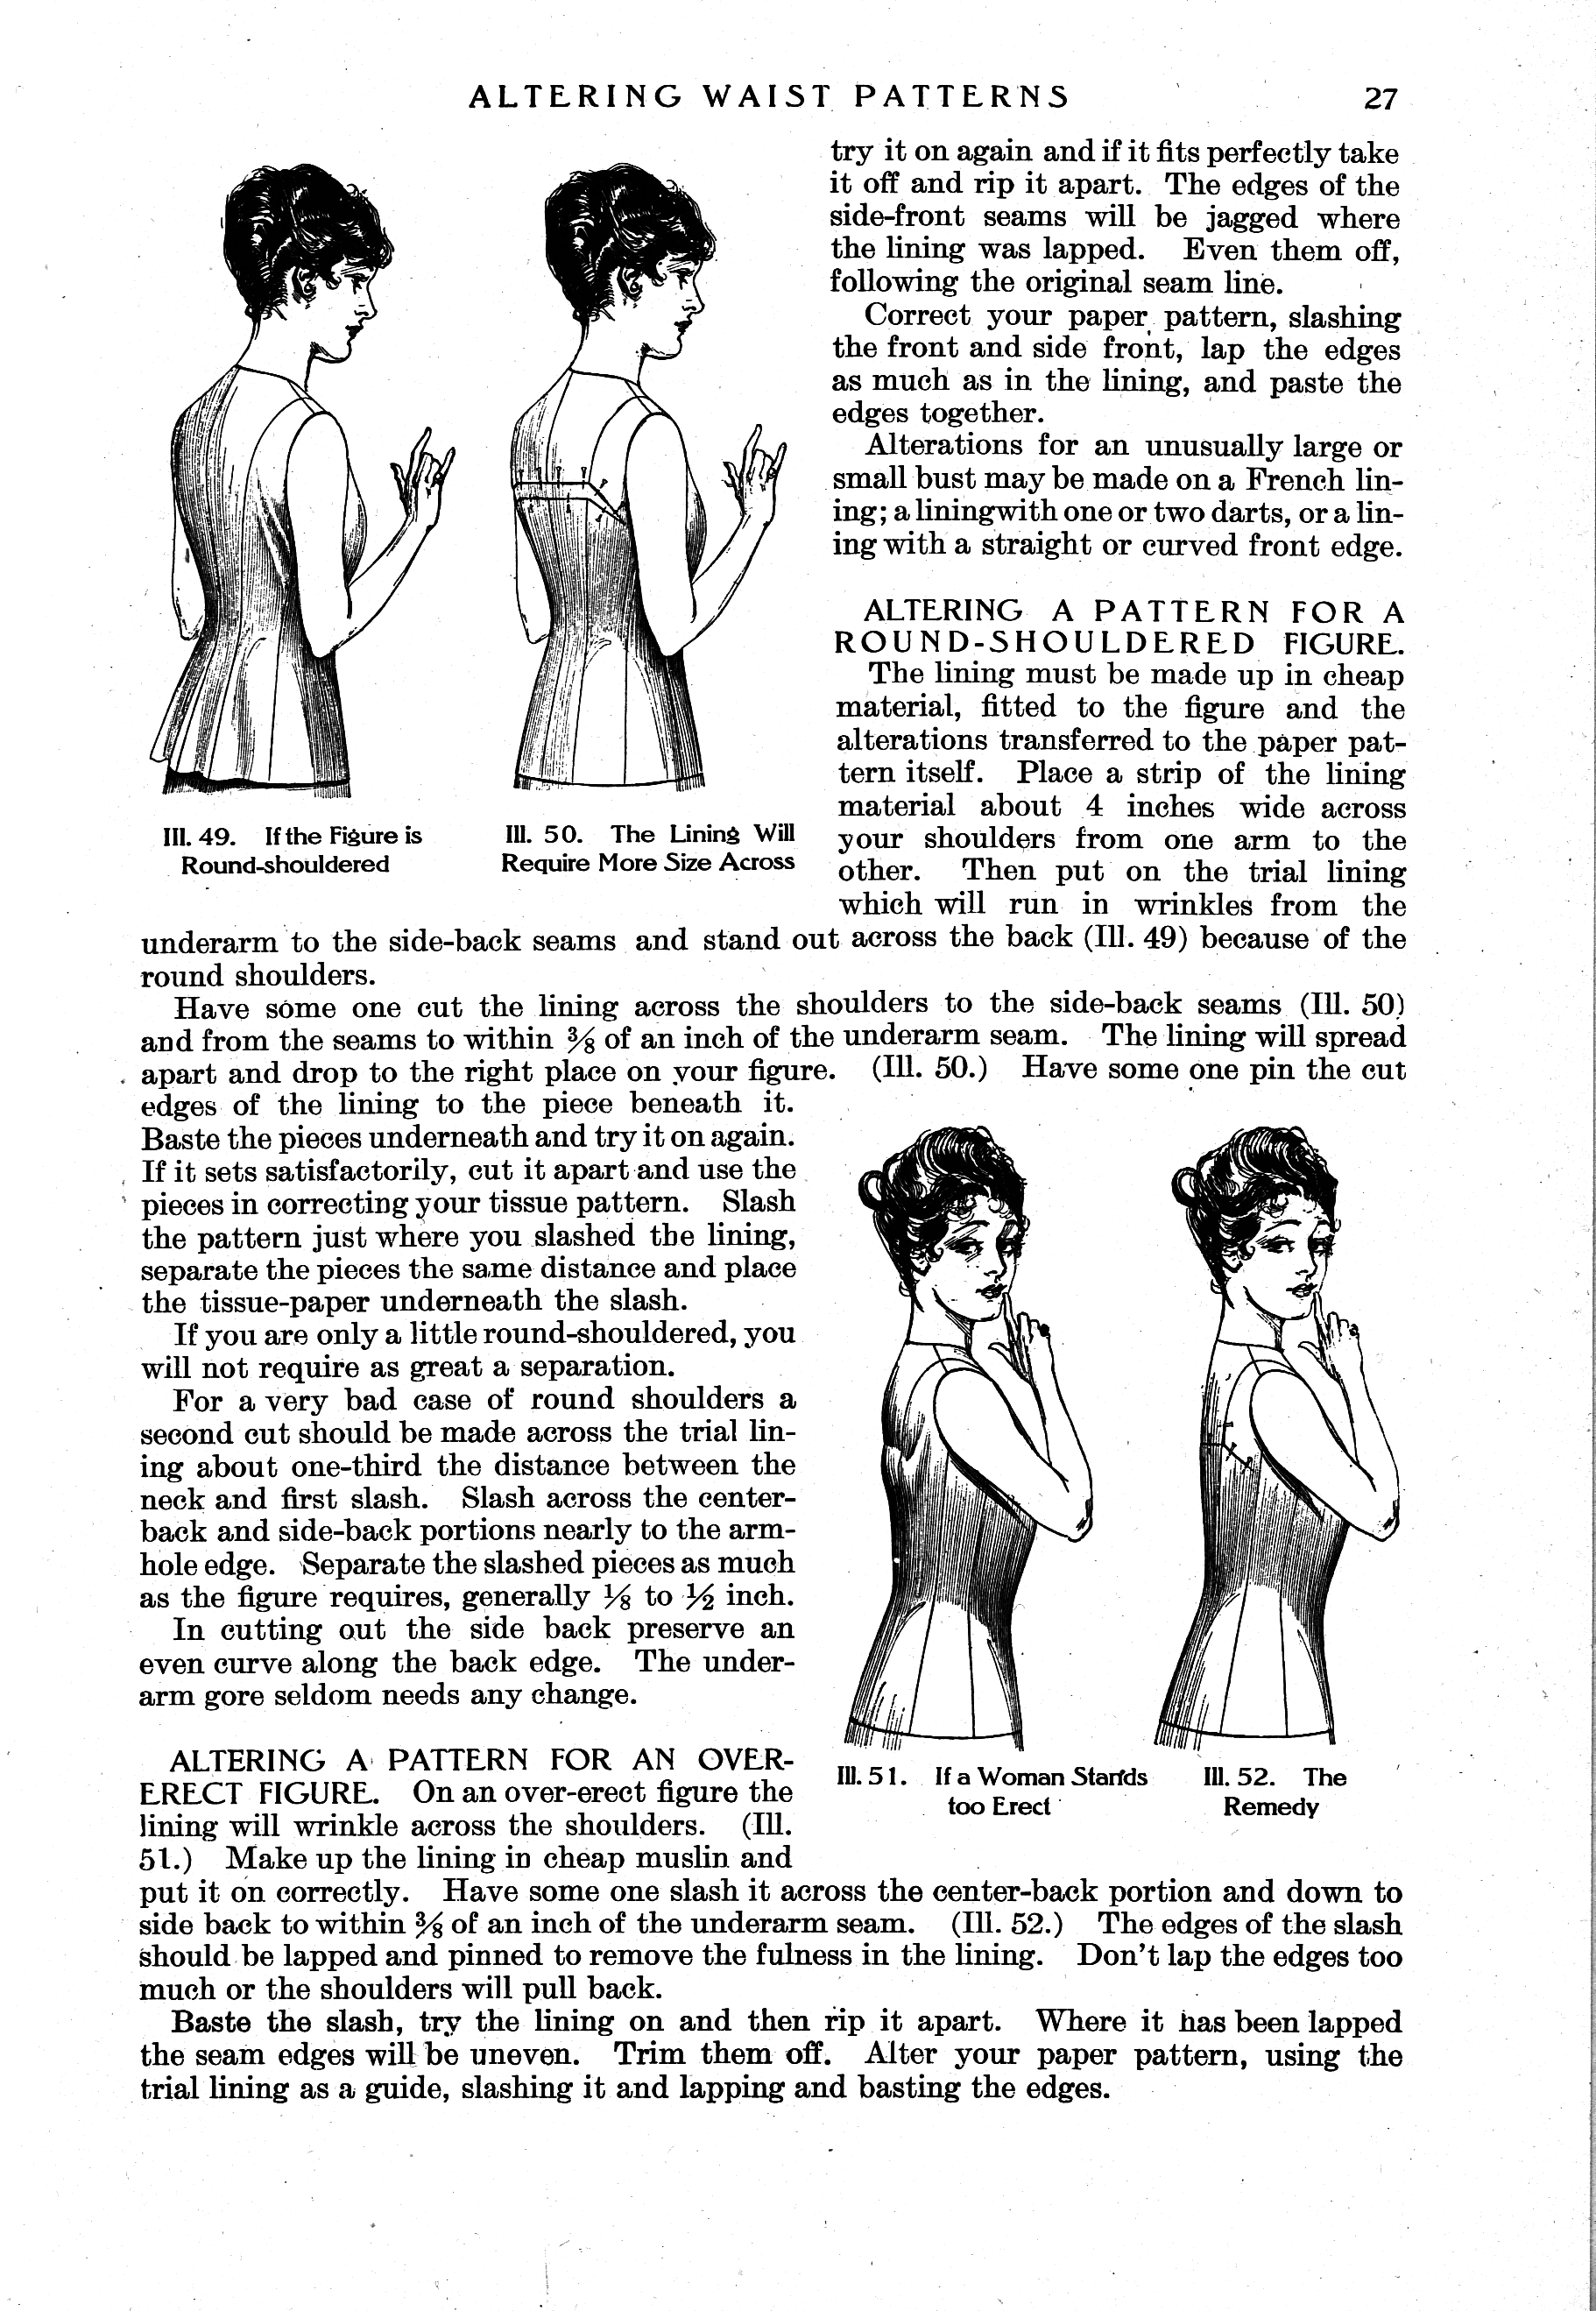
The New Dressmaker: Altering Waist Patterns
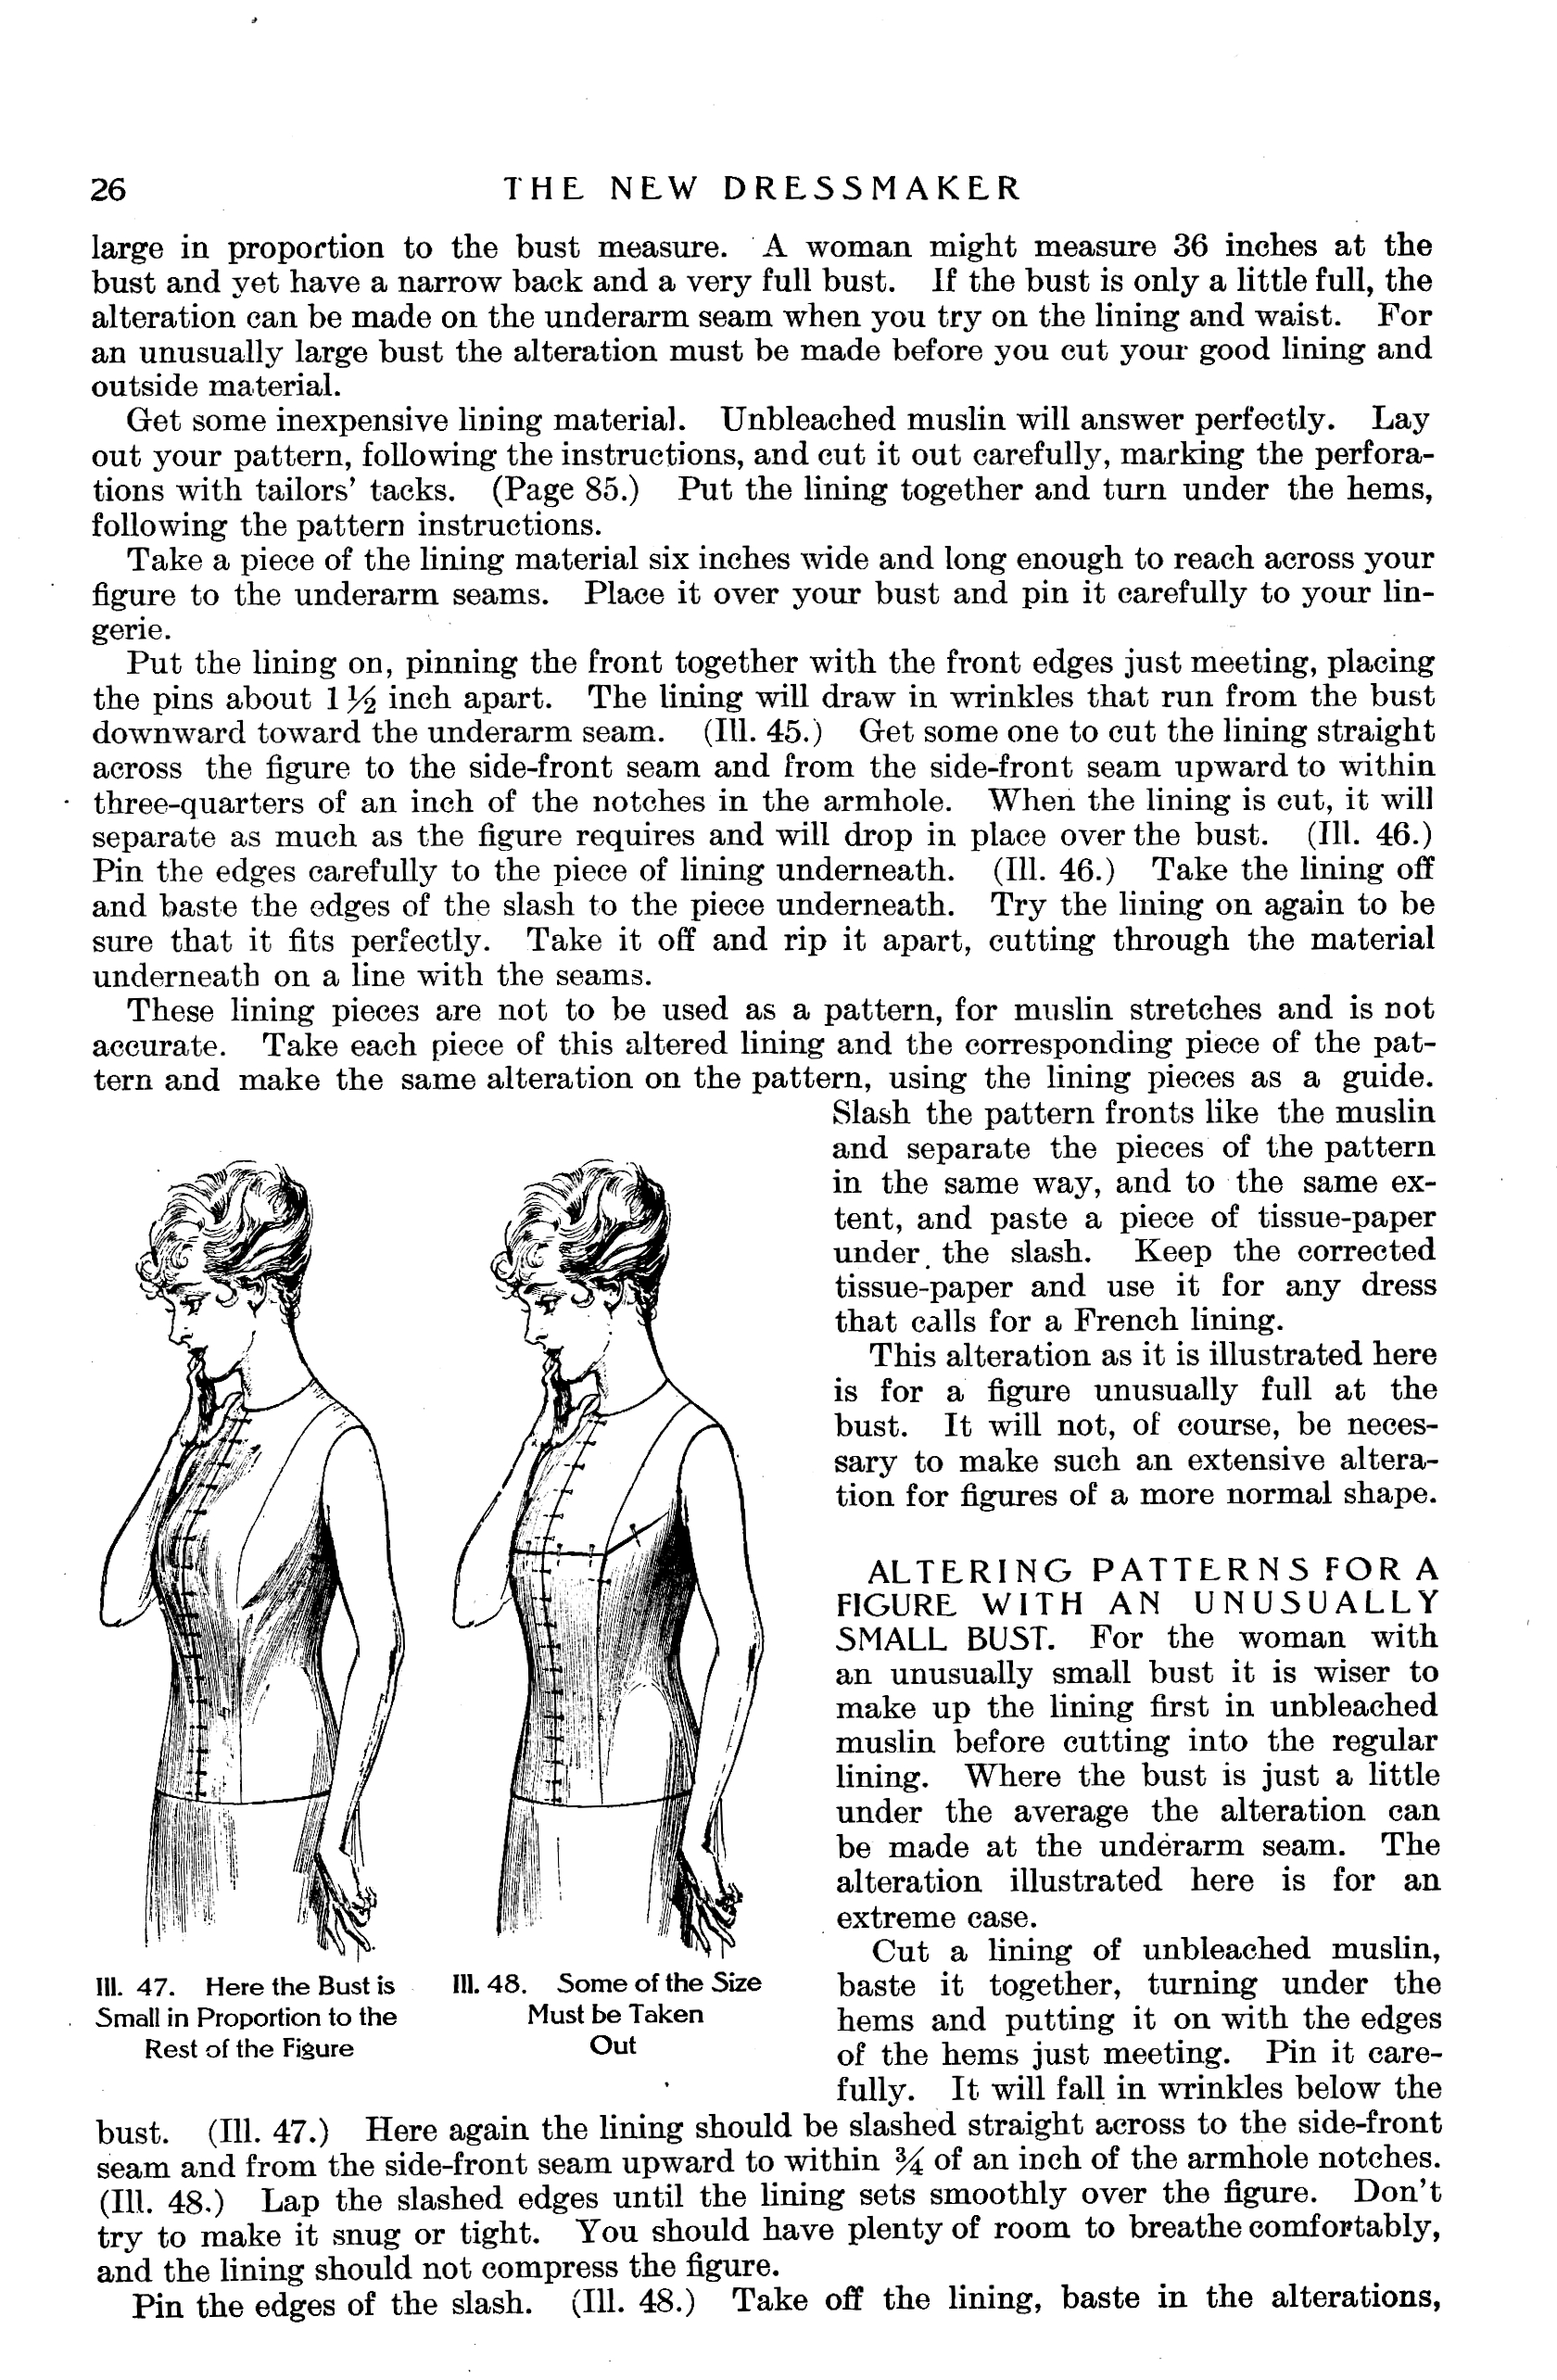
Once you’ve altered the length of your pattern, according to the New Dressmaker, the next step is to do fitting in a muslin.
Ah, terminology. As I mentioned last post, “Waist” means, as far as I can tell, “bodice.” The focus is on making the changes in the muslin. And, it appears that (quelle surprise!) women in the early 20th century had the same figure issues we’re always talking about today: large or small bust, square or sloped shoulders, straight or curved back… The only one they don’t much go into is waist. I guess the corsets were still taking care of that.
-
- 1
-
- 2

-
- 3
-

- 4
Voila!
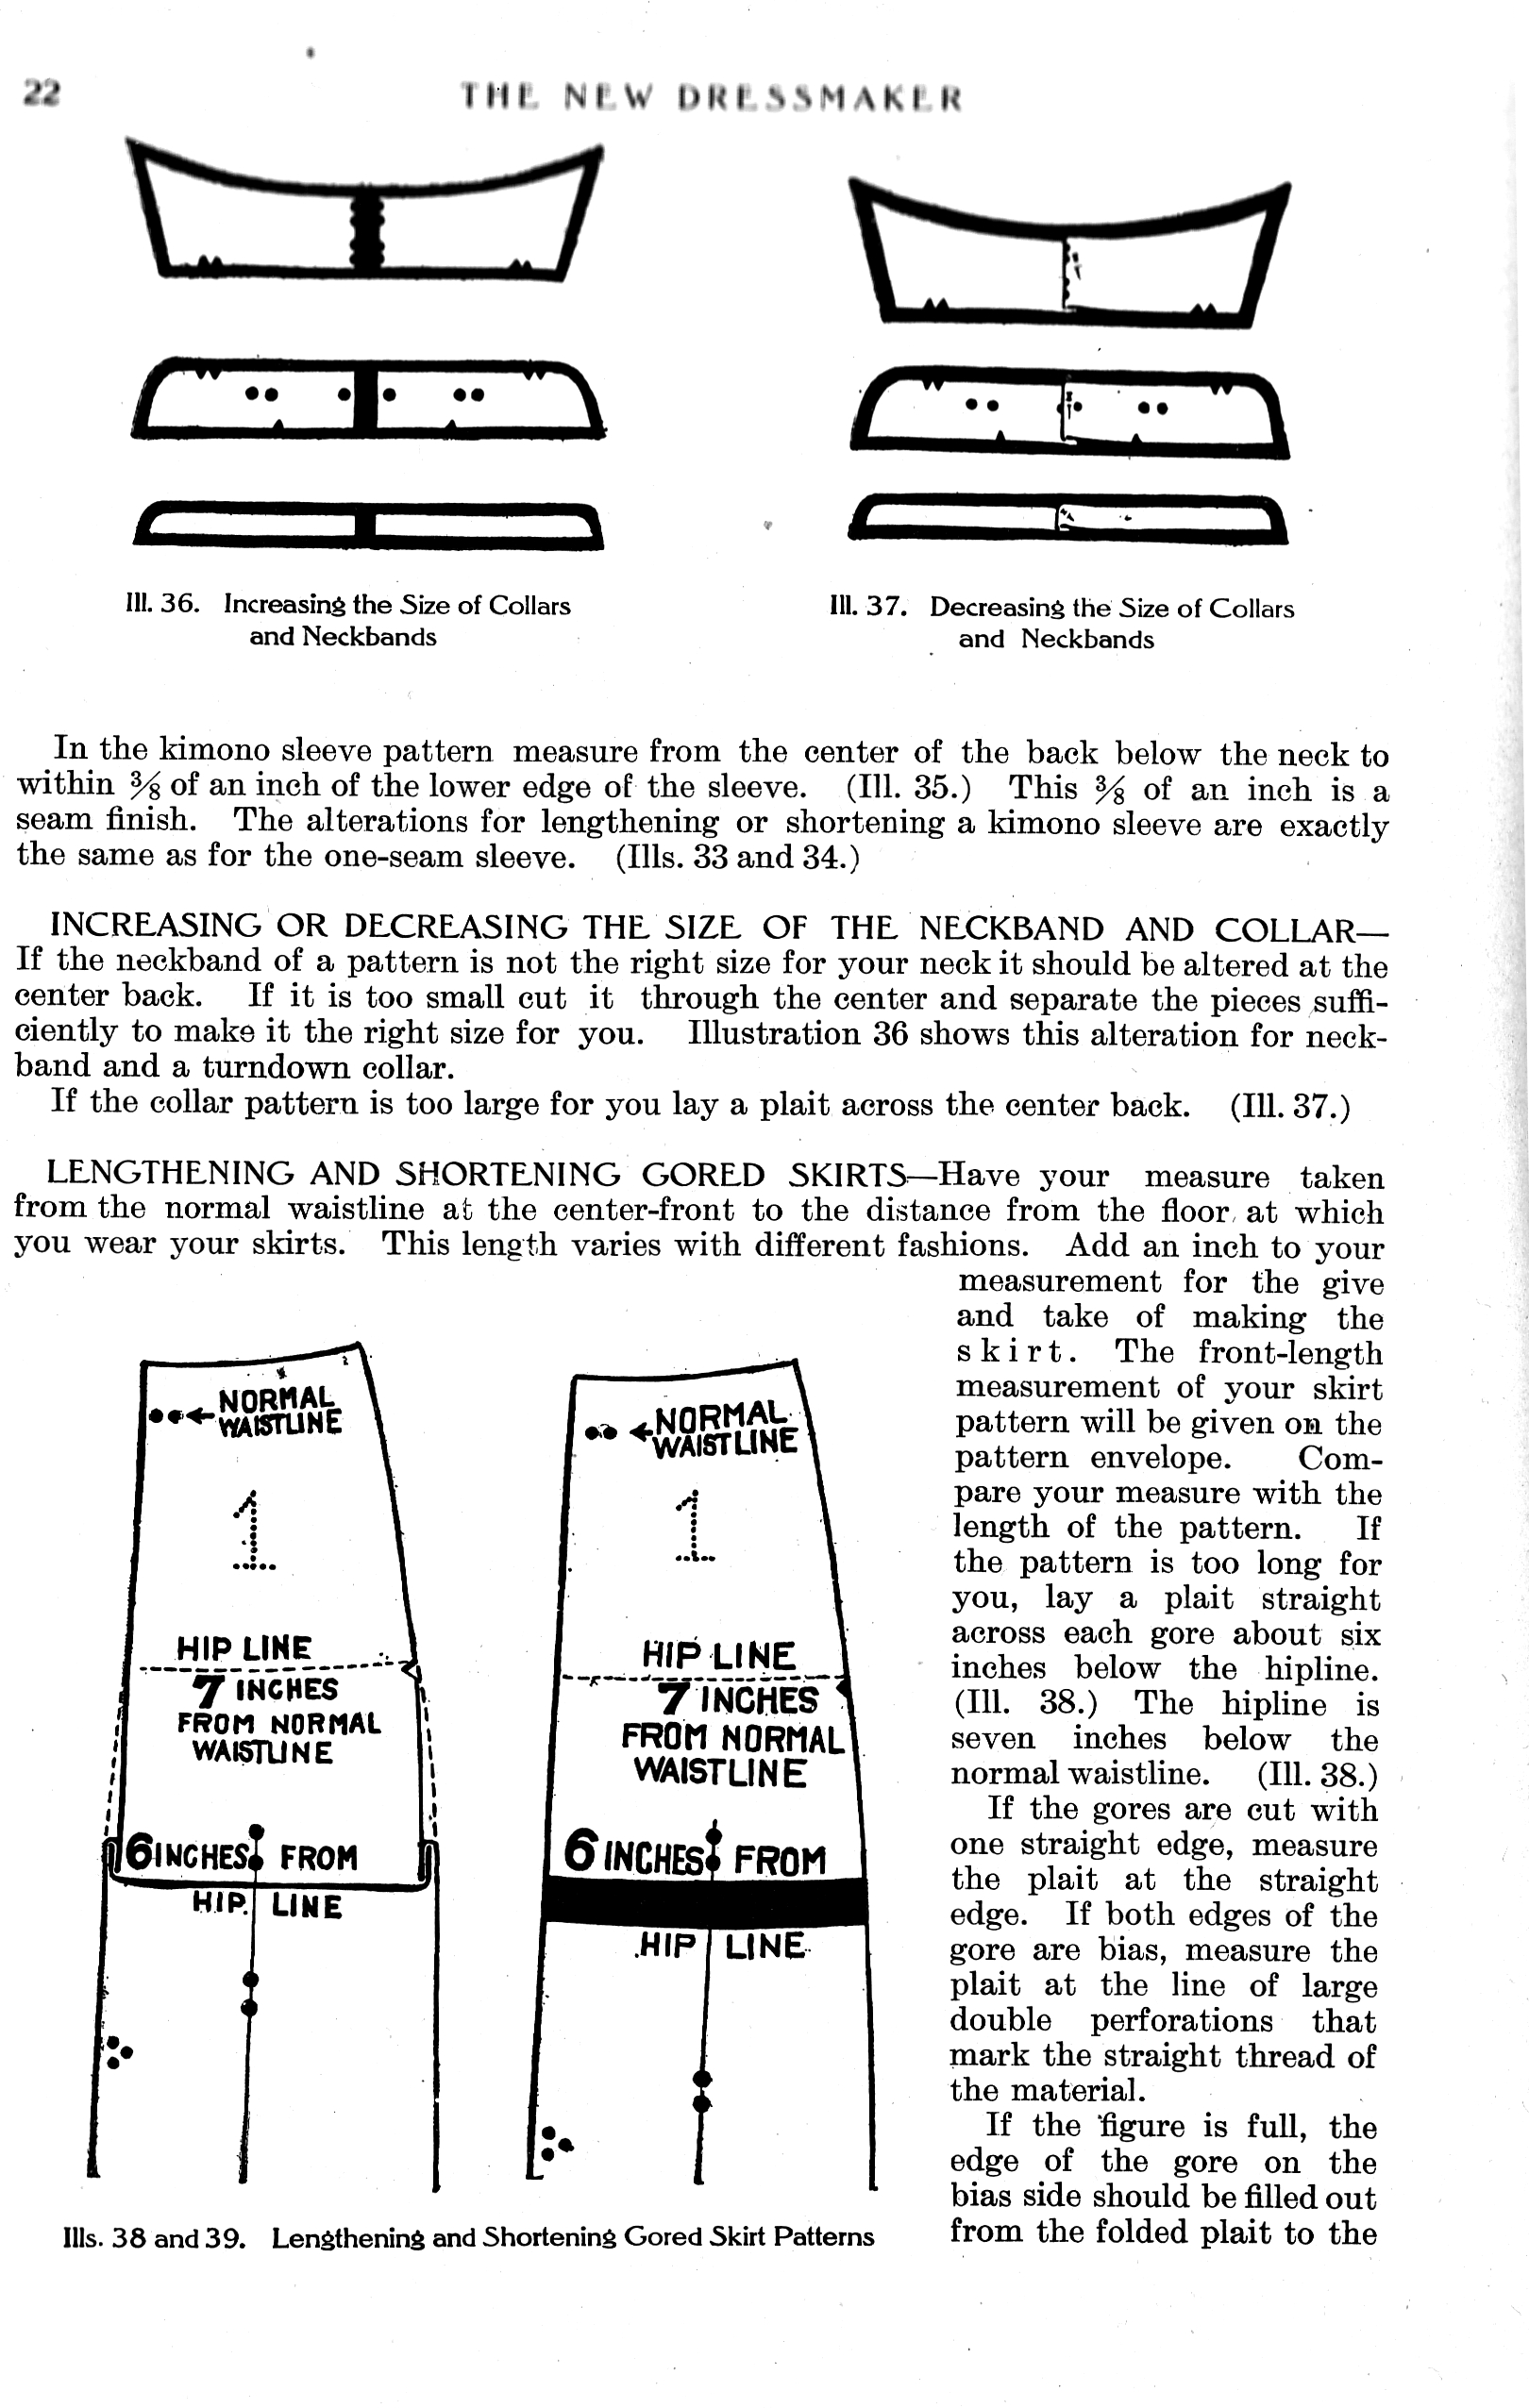
The New Dressmaker
A while back, my mother (antiquer and thriftarian par excellence) presented me with several vintage-to-antique sewing related books. I thought I’d try to feature a few things from (at least one of) them while I’m In Transition from one city (and province) to another.

The New Dressmaker
Meet The New Dressmaker—Copyright 1921, but with illustrations that hint at their earlier origin.
I like several things about the New Dressmaker—for one thing, it’s very well-illustrated. I’ve read (or tried to read) several early-20th-century sewing books and between the terminology differences (“plait”=pleat, “waist”=bodice) and the lack of illustrations it can be fairly flummoxing. And while it doesn’t have much in the way of pattern-drafting information (it is, after all, produced by a pattern company), it has lots on sewing techniques, and everyone’s favourite—fitting. 😉 So I figured I’d share the various fitting chapters over the next few posts.


-

- The New Dressmaker
This first fitting chapter discusses making basic length adjustments to the pattern itself.
See what you think
Filed under Sewing
Prezzies! (3)

K these ones were for me. 😉 Thanks, Quiet & Small Adventures!
Too bad I can’t use any of it until after the move… 😦
August 22, 2012 · 9:05 am
Prezzies (2)

Simplicity 1149
More fun, although considerably more time-intensive than Style 2304, was Simplicity 1149. This is probably in the running for cutest little pattern ever. I was a little concerned about the width vs. length ratio, and obviously that kind of horizontal skirt poof isn’t going to happen without intense crinolining of a type I’m not keen to subject my nieces to, but I’m hopeful the sheer cuteness will make up for it.
Damn, this is cute.

Dress & Bolero
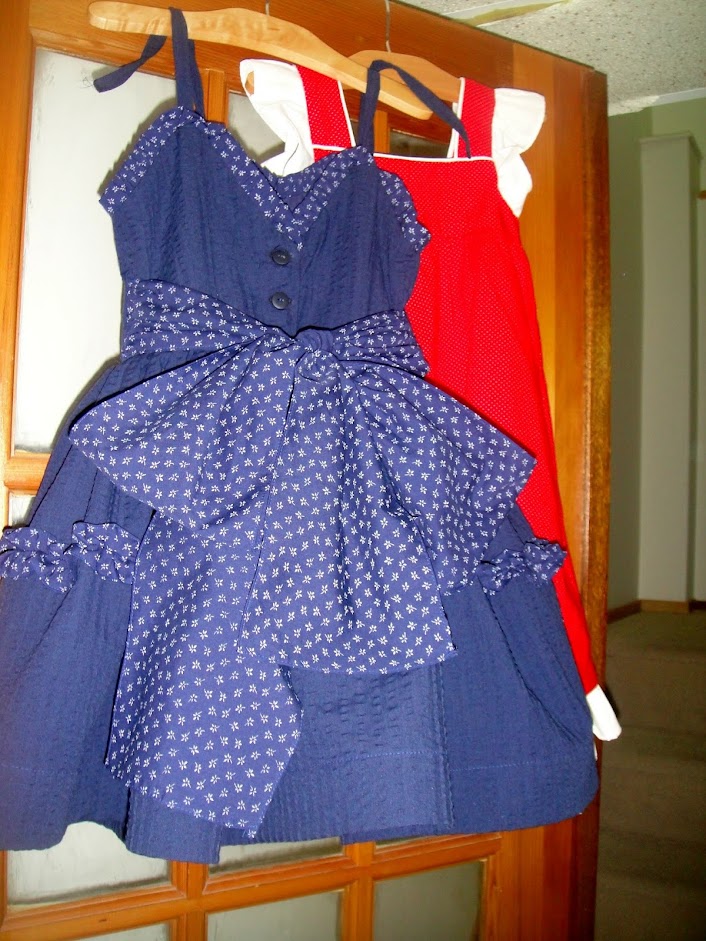
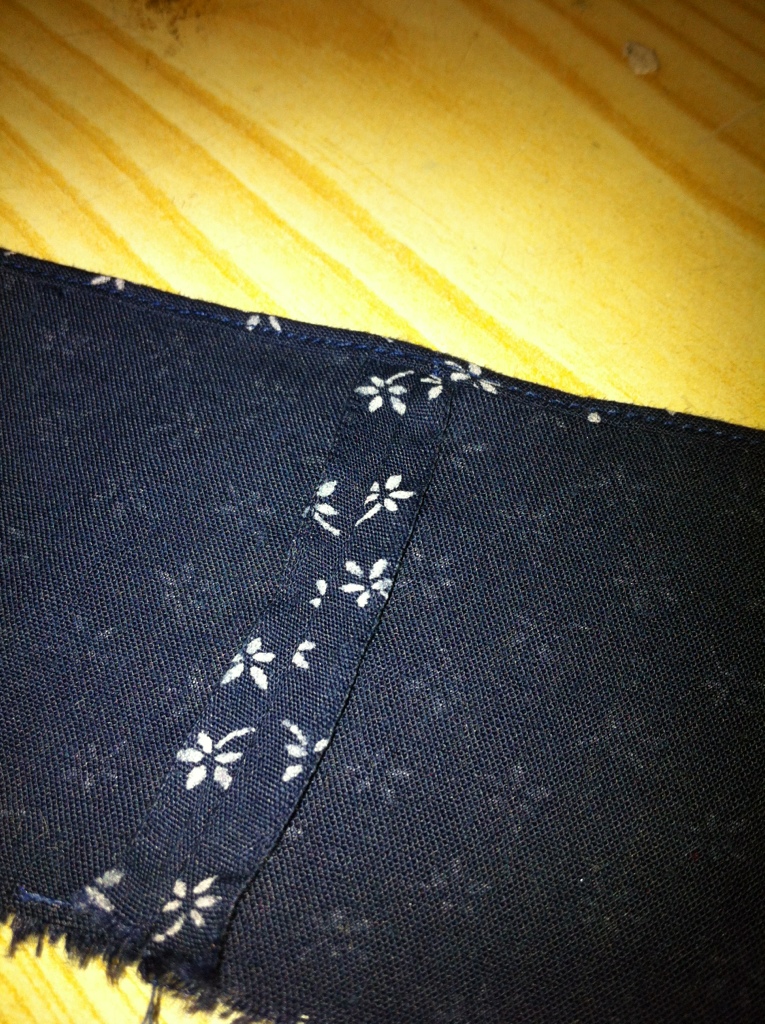
My older niece, Fyon (who is five), loves having dresses that match mine (well, loves it more than my kids do, anyway), so I thought I would use up the rest of my navy seersucker from the Cambie on a dress for her. I looked through my patterns for something close in style to the Cambie, but the closest I could find was actually the dress I made her last year, and I didn’t want to re-use a pattern where there are so many other crazy fun ones to try. So, Simplicity 1149. And I thought this navy cotton (cotton poly?) with the little white flowers would be the perfect complementary fabric. It originally came from my Grandmother’s stash, and Tyo had sorta earmarked it to make boxers out of, but hopefully she’s forgiven me for putting it to a more immediate use. I used it for the sash, the lining of the little jacket, and, most importantly, the ruffle ornament.
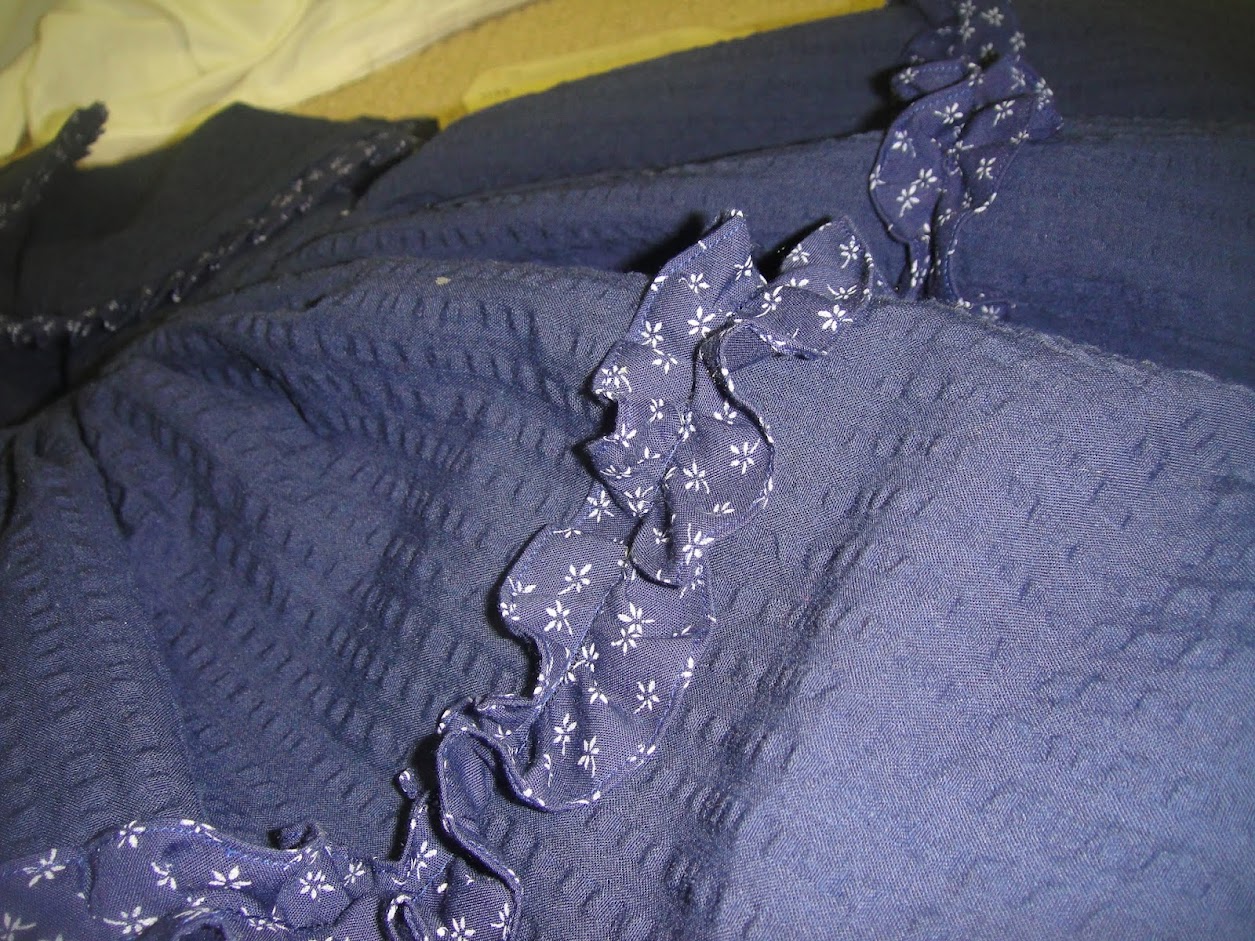
Ruffles!
There are two kinds of “ruffle” on this dress, both of which were pleated using the ruffler that came with my Pfaff, attached to my singer Featherweight. I have three ruffler feet now, but one only works with the army machine (which is put away and not really reliable) and the other works with the quick-snap foot on my modern machine, and has driven my absolutely fucking nuts in the past.* I set it to pleat (gathering every five stitches, rather than with every stitch) although really there are plenty of places where it screwed that up. It looks fine, though—half the battle with ruffles is not to sweat the small stuff, in my opinion.
Anyway, for the skirt ruffle, I ripped on-grain strips, stitched them all together, and finished the edges with the rolled hemmer. For the edging, I pressed the strips in half lengthwise and basted down the open edge—I find if you don’t baste it closed, the ruffler tries to ruffle just the top layer and Bad Things Happen.

A very blurry attempt at a closeup. 😦 Showing edge-pleats and back buttons and bow.
Syo was eerily enthused when she came home after a quick mom-free vacation and discovered this little thing lying around the house. The first thing she had to do was try it on. (I’ll remind you that Syo just turned nine, while the pattern alleges itself to be a “size 5”.) It’s absolutely not the sort of thing she would be willing to wear in public—but some latent toddler in her just couldn’t resist trying it on to twirl around the house. It’s SNUG—she has to exhale a bit to get the waist button closed (These fifties pattern that assume that children have waists. Pfft.) But it’s still on her.

You cannot resist the Cute. You will be assimilated.
The skirt is obviously very short on my nine-year-old. Fortunately Fyon is a little narrower than Syo, and significantly shorter, so I’m thinking the fit should be great.
I finished the skirt hem with the last of my 2″ horsehair braid (actually, I was about 2″ short, and had to patch in a little section of hem with bits of 1″ horsehair braid. It is Not Pretty, but it’s all covered by fabric now and doesn’t seem to show. And combined with the double-tiered lining I added (made of stiff cotton-poly blend broadcloth) it really had a surprising amount of loft.
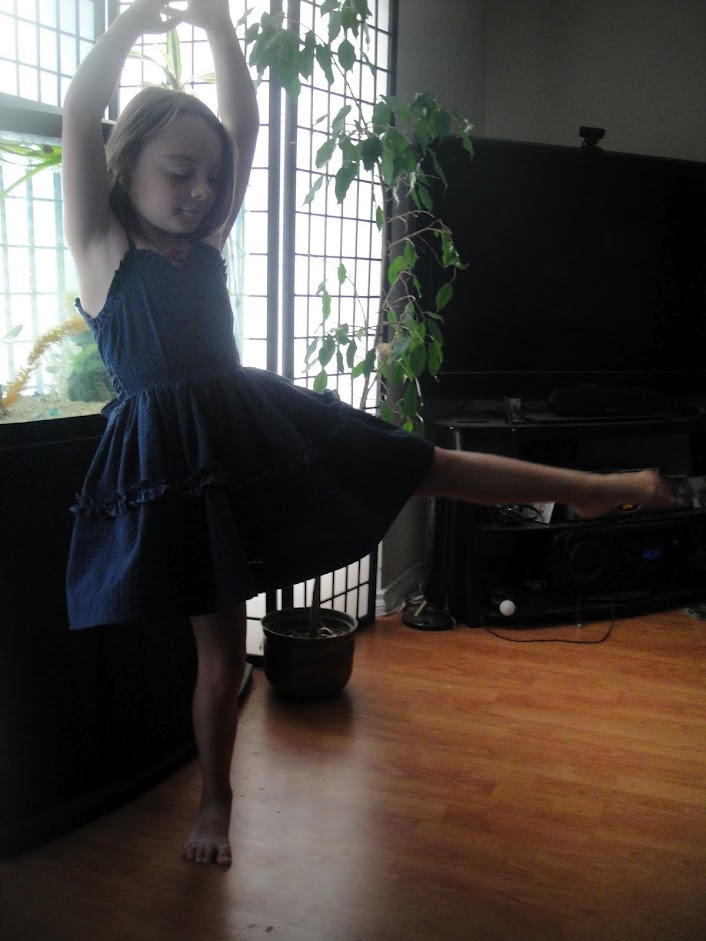
Bringing out the Inner Ballerina
We are so cute
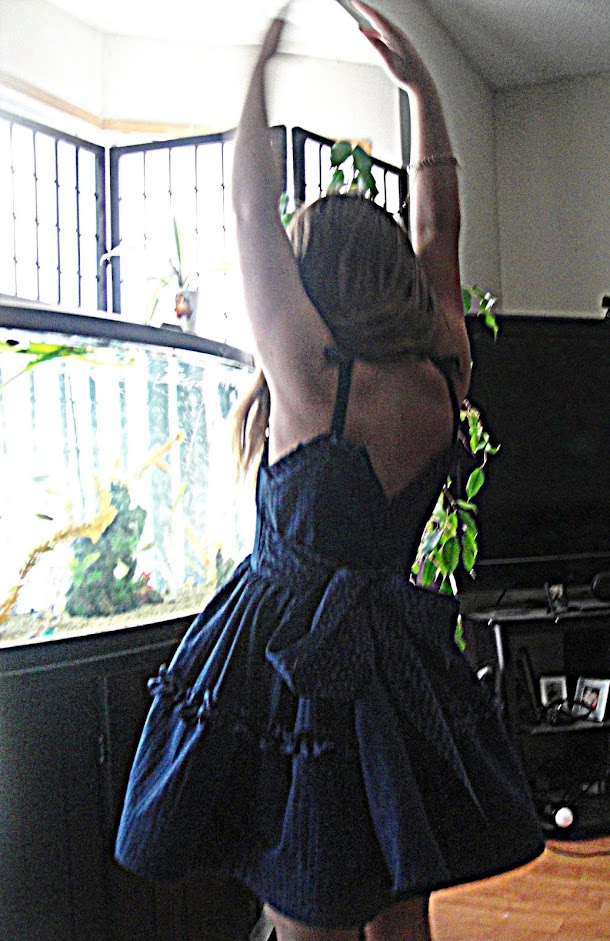
Back view
Yes Yes We are.
Oh, wait. What. You’re still reading? Sorry, I kind of succumbed to The Cute there for a minute. Insidious stuff, that. Sorry for the grainy photos—this was the best light we could find in the five minutes we had before I went off to work that morning, and the camera did not like it.

Back, with buttons
Here, have a quick closeup of the back buttons (buttonholes made using my Greist buttonholer, ). I guess I shoulda taken a photo without the sash tied, too. /sigh.
but sooooo cute…
*possibly because there’s just too much vibration and movement on the light-weight, modern plastic machine, but anyway, I don’t trust it and didn’t feel like taking the time to experiment, when I have a perfectly good Pfaff ruffler foot anyway.
Filed under Sewing
Prezzies (1)
Tiny sundresses
I confess: I finished up my Last Sundress, and what did I do?
Turned around and made two more.
At least these ones aren’t for me—they’re for my little nieces. And they give me a chance to use some of the really insanely cute vintage kids’ patterns I’ve picked up, that my kids are just not going to go for.

Style 2304
Let’s start with Style 2304, which is intended for my younger niece. Is that not the epitome of 70s-kid-cute?
So I was a little worried about starting with a regular size 4 pattern; this is the Waif we’re talking about, who is four but probably still newborn in width. I decided, upon cutting it out, that it was way too wide, and shaved a couple of inches off by adding a pleat at CF and taking a bit off at the back. Because the yoke was now narrower, I narrowed the straps by a similar amount. So the look is a bit different—longer relative to its width, and more delicate—than I think I was really going for. And I didn’t want to shorten the length because I know my stylish sister-in-law doesn’t really like how short a lot of the vintage kids patterns are, but combined with the narrowed-ness and the ruffles, I kinda feel like it looks a bit more little-house-on-the-prairie than I had intended. Not quite my favourite look. I suppose I can always shorten it later if desired.

Buttons
I went with buttons in the back. I had three not-exactly-matching red buttons fished out from the random button stash, but when I went to stitch them on the plastic between the the holes of one was, ah, missing. Meaning the thread fell straight through. Not exactly a useful button to hold on to, button stasher. So now I’m a button short; I’ll have to go through and see what else I can come up with.
I must admit, I kind of broke my brain adding the piping and the little ruffle sleevelets on this one. In the end I resorted to finishing the inside of the armscye by hand.
I like that the amount of gathering under the yoke is really minimal (even with me lopping a couple of inches off the yoke and leaving the skirt piece the same.).
And I think that is about as much as I have to say about that dress. Under the fine old academic principle of the Minimum Publishable Unit, I’ll tell you about the even-cuter Simplicity 1149… next time!
Filed under Sewing
The Black Leather Dress

Black leather dress.
Once upon a time, in the dying days of the 20th century, I bought, at the local vintage clothing store, a dress that was not vintage, nor really classic any way at all, but that was homemade.
Far more important to me at the time, of course, was that it was black and it was leather. Looking back on it, I have the sinking feeling that it was someone’s idea of a costume for Xena, Warrior Princess. Either that or it’s fetish-wear escaped from someone’s personal dungeon. Regardless, it was an absolute delight to my teenage sensibilities, and has never lost its place in my closet since, despite the situations calling for it being about as common as hen’s teeth in my life these days.

C’mon, you can’t model a Xena dress without a sword.*
I keep trying to come up with a quick description, you know, such as might be printed on the pattern for such a dress. Halter-type, open backed dress has princess seams, boning, and Roman Legionary skirt?
Like so many of our home-stitched garments, it has a few quirks. Although, it’s hard to say where design ends and quirk begins, and then there’s the issue that it was probably perfectly-tailored to the original wearer. Or maybe not.

Repurposed?
So, the obvious: plenty of interesting seaming, perfect for using small scraps of (possibly reclaimed) leather. At least one of the gladiator-strips at the bottom has a previous stitching line crossing it, suggesting it has been repurposed. I do wish these bottom strips were a bit more substantial—double-layered or at least topstitched. They look kind of unfinished and cheap.

Unzipped
The straps are an odd combination-halter-type I’ve never seen elsewhere: the main strap is a simple halter, snapping behind the neck, but then there’s this accessory strap that rungs from under the arm up the back of the shoulder, and attaches to the halter just on either side of the snap.

Back view
This strap sits at a bit of an odd angle, and has always folded a little awkwardly on me at the back of the arm, unless I slouch significantly. Does this mean that the original owner had a more rounded, stooped, or slant-shouldered posture than I? Or was it just some quirk of imperfect or inexperienced drafting?

Snap and straps
The snap is not exactly perfectly-applied, but is less mangled than mine usually are, and let’s face it, anyone who sets snaps through that many layers of leather by hand has my kudos.

Back zipper.
The entire dress zips open at the back with a separating zipper that, oddly, opens from the bottom. Was this planned, or did our seamstress mess up and then decide to keep it since, well, unpicking leather? I can’t say it makes the dress any easier to get into, although it’s certainly quick to get out of. Hmm. Is that another point for the fetish-gear argument?

Lining
The inside is lined with a thin stretch lining of some kind, with all the same piecing as the outside. I think I would’ve wanted to simplify for the lining, personally. It is very short. In fact, I hadn’t quite appreciated just how short the whole thing is from the back until taking photos this time. Which is why the back view photo is only from the hips up. Hmm. And this is not the dress that caused my mother to declare I looked like a hooker when she first saw me wear it.

Lining attachment
The lining appears to have been hand-stitched in place all along the top edge, where there is a narrow leather facing; the hand-stitching continues up the insides of the narrow straps, which also kind of makes sense—I think turning straps in leather would be a pain in the butt.

Boning in front.
Something I only noticed just now (now that I’m finally looking at it with a stitcher’s eye is the presence of two pieces of flexible plastic boning stitched to the seam-allowances in the front. Along only one edge of the boning, since the seam allowance isn’t wide enough for both. They took the time to tip the bones with leather, though, so they wouldn’t poke through.
There’s no internal seam finishing on the leather or the lining, not that anything’s in danger of ravelling, and the hem on the lining is made with a simple zig-zag.

Luv
/sigh. For all its weirdness (and impracticality), I still love this dress.

Back in the day.
And, just to prove its antiquity, here’s a shot of it in actual use, from New Years Y2K itself. With Osiris, and though you can’t really tell, an itty-bitty Tyo bump.
*What, you mean you don’t have swords lying around the house? C’mon. I mean, some of you probably have guns in the house—now that’s whack.
Filed under Sewing
Rolled hemmer triumph.
The war is not over, but a small battle has been won.
I trimmed the seam allowance from the hem area just before stitching across it. SO MUCH easier.
August 11, 2012 · 1:19 pm
Wads of wadders.

Wadders can be cute, too.
I’ve been trying to make myself into a better skeptic, the last few years. Critical thinking and all that. Evidence. So generally, I’m skeptical of the idea of curses.
But right now, dear readers, my (admittedly anecdotal) evidence is that drapey, clingy, stretchy red jersey is, indeed, cursed. This is the second piece I’ve thoroughly demolished (the first was briefly figured here, which top never really grew on me, and the one I made from the rest of that piece was so horrific it never even got blogged.)
So, this is not my favourite kind of knit. But it is one I’ve successfully worked with on occasion. My cowl-neck shirt, for one. My friggin tunic top I made the pattern for, for another. The slinky maxi fabric I used just recently was a little beefier, but not much.
So why did this fabric defeat me so?

Closeup. Aieee.
Partly, I guess, the answer is laziness. What I wanted was a quick knit top to whip up in the hour or so I had before bed. And to trial Jalie 2788, the twist top. Not so much for it’s own sake (although it’s cute), but because what I *really* want to make is a cute dress like this Burda one, but I don’t want to pay five bucks for a download pattern when I already have a twist-front pattern on hand. Albeit a slightly different twist, but anyway. Yes, I’m a cheapskate. Anyway, because I wanted quick, (and I had cut out the shirt before and tossed the scraps) I didn’t want to sit around practicing neckline finishes.

(More blog shoes)
Sometimes, I manage to get away with this kind of half-assery. Just, not this time. The pattern suggests folding over and topstitching. I first attempted to do this straight; Not going to happen. Cut that off, put on my usual binding, but it was fiddly and wound up stretched not enough in some spots, too much in others. And I think it’s really a bit heavy for this style of top.. Then decided to use Steam a Seam for the arms and hems. This worked much better, and is what I should’ve done for the neck, too.Why didn’t I? Well, partly because I’ve run out of (or misplaced) my Steam a Seam strip/roll, so all I have left is the wide stuff for applique, and I get really tired of just cutting little slices off of it. I need to get another twin-needle for topstitching, too.

Back view. Could use more swayback adjustment.
And then when I got it to try-on stage, it was too big—baggy and saggy in unflattering ways. The measurements for my size are, seriously, *perfect*—the only alteration I made was to add a little swayback adjustment, since there’s already a back seam. But, the fabric is pretty darn stretchy, so I’m going to blame that on the fabric. So I took it in a couple cm on each side and at the shoulder seam. Now the length to the bust is pretty good, and things are a lot less saggy-baggy except right around the neck binding, Except apparently I should’ve kept the ease below the waist, because AIEE that is too tight to be flattering. Not my best area, there, upper hips and lower belly. /sigh. Must work on that, soon.
And then I tried to make panties, from a pattern traced off one of my fave pair of boy-cuts, from the remnant

Undies. Fail.
Also fail. Partly for shoddy construction, but mostly because this elastic, which I bought more for its cuteness than any practical plans, is not nearly stretchy enough.
Just for the record, this is probably the third pair of underwear I’ve attempted that didn’t end up wearable.
I’m going to bed now.
Filed under Sewing


