Tag Archives: kids’ clothes

Little white dresses (encore)

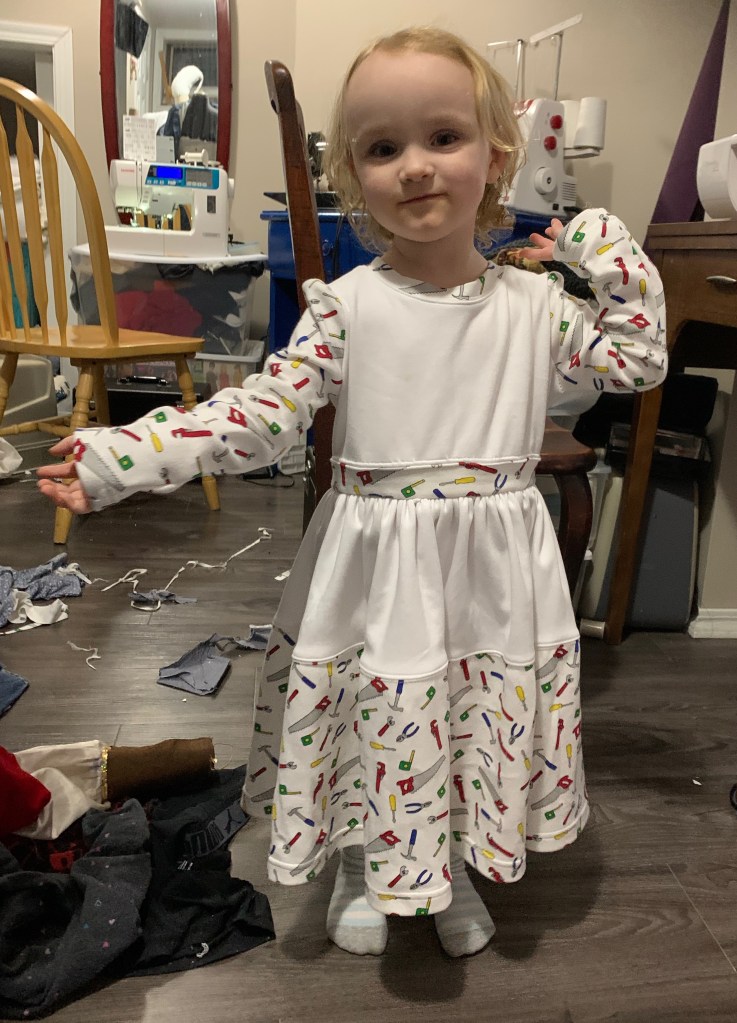
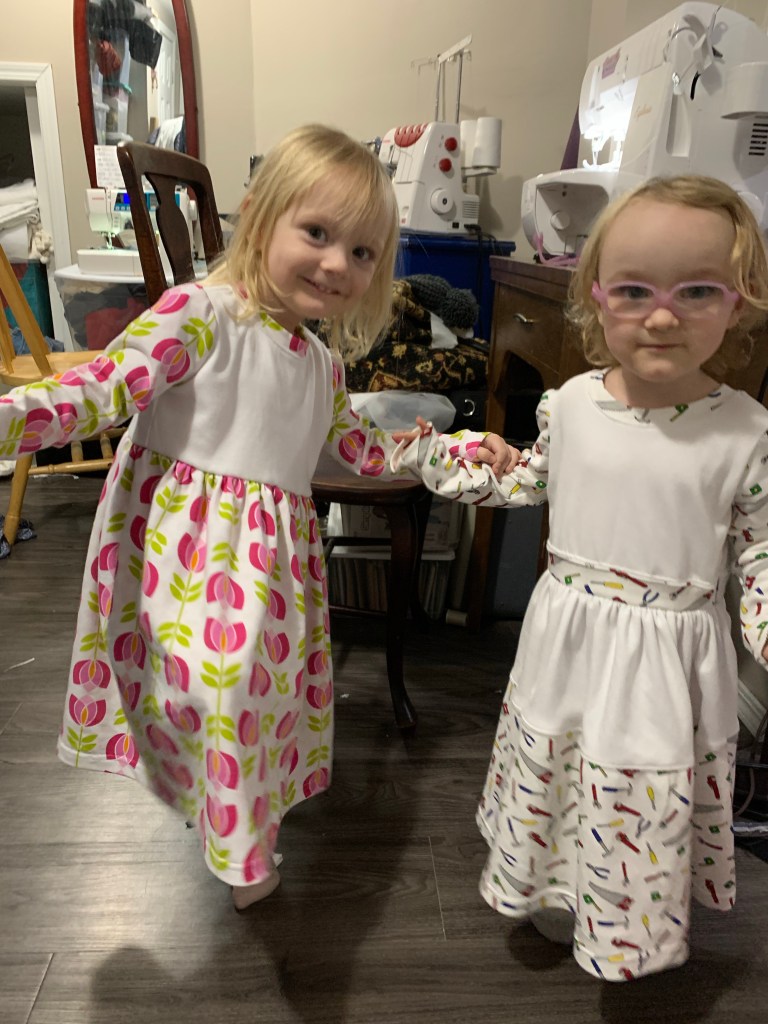
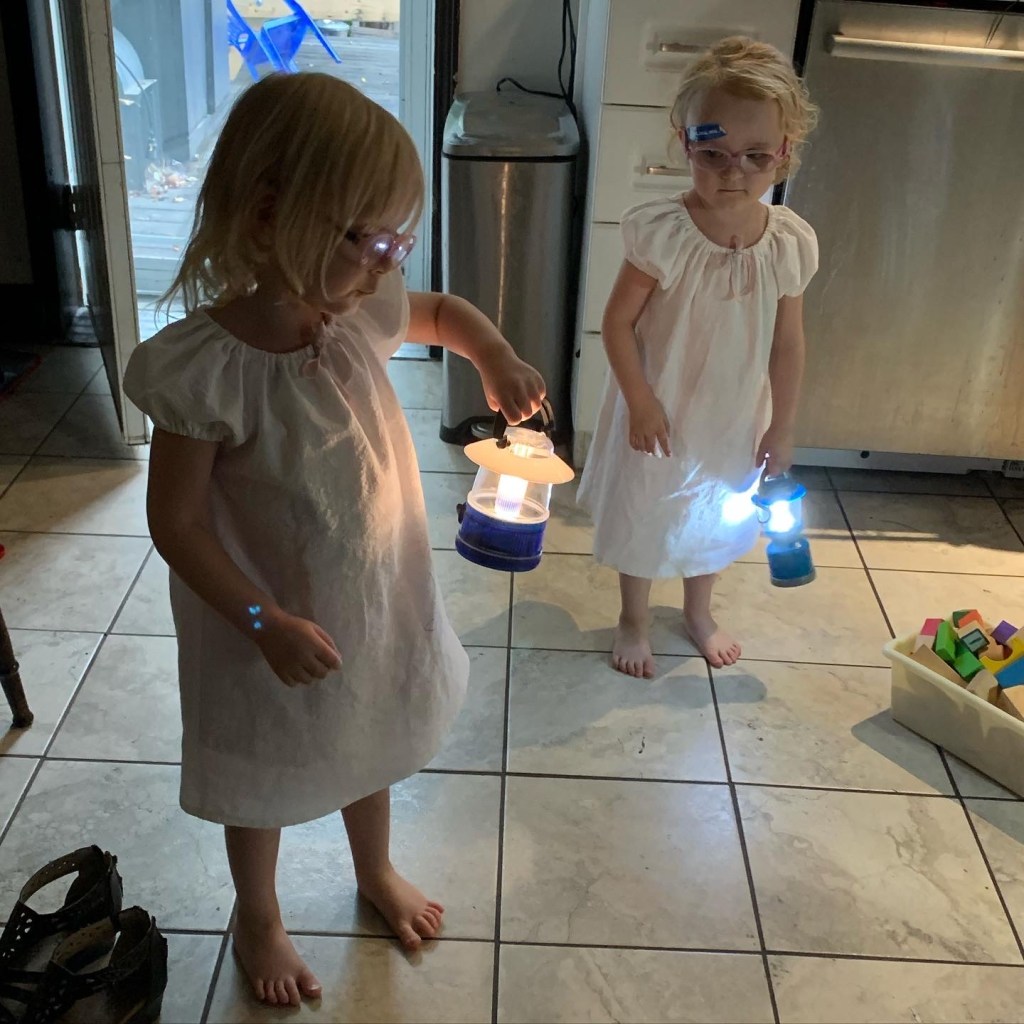
I have a long history of putting my kids in impractically white dresses (and other outfits).

It started with the older girls, but for brevity I’ll stick with the twins.

Apparently I have an unhealthy relationship with the laundry.

This isn’t even all of them.

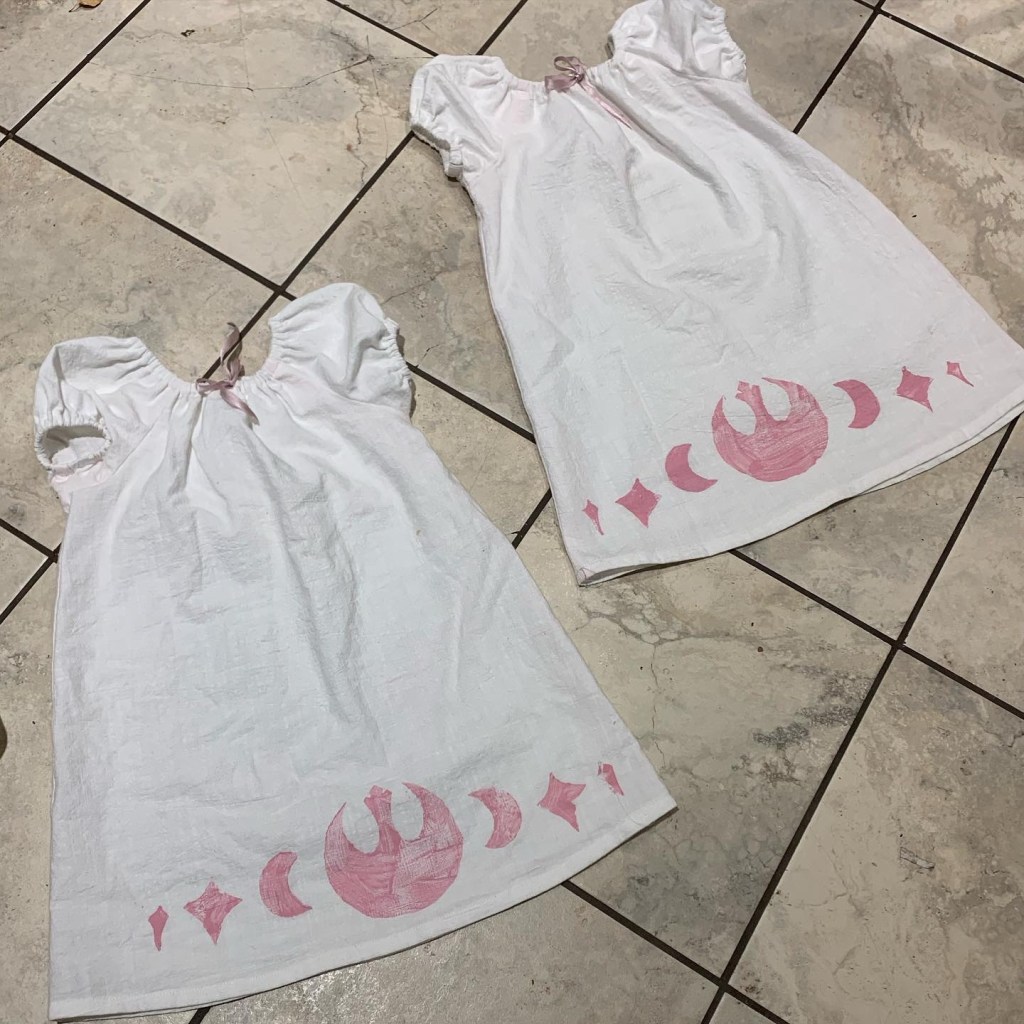
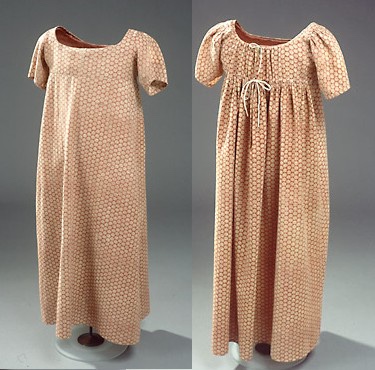
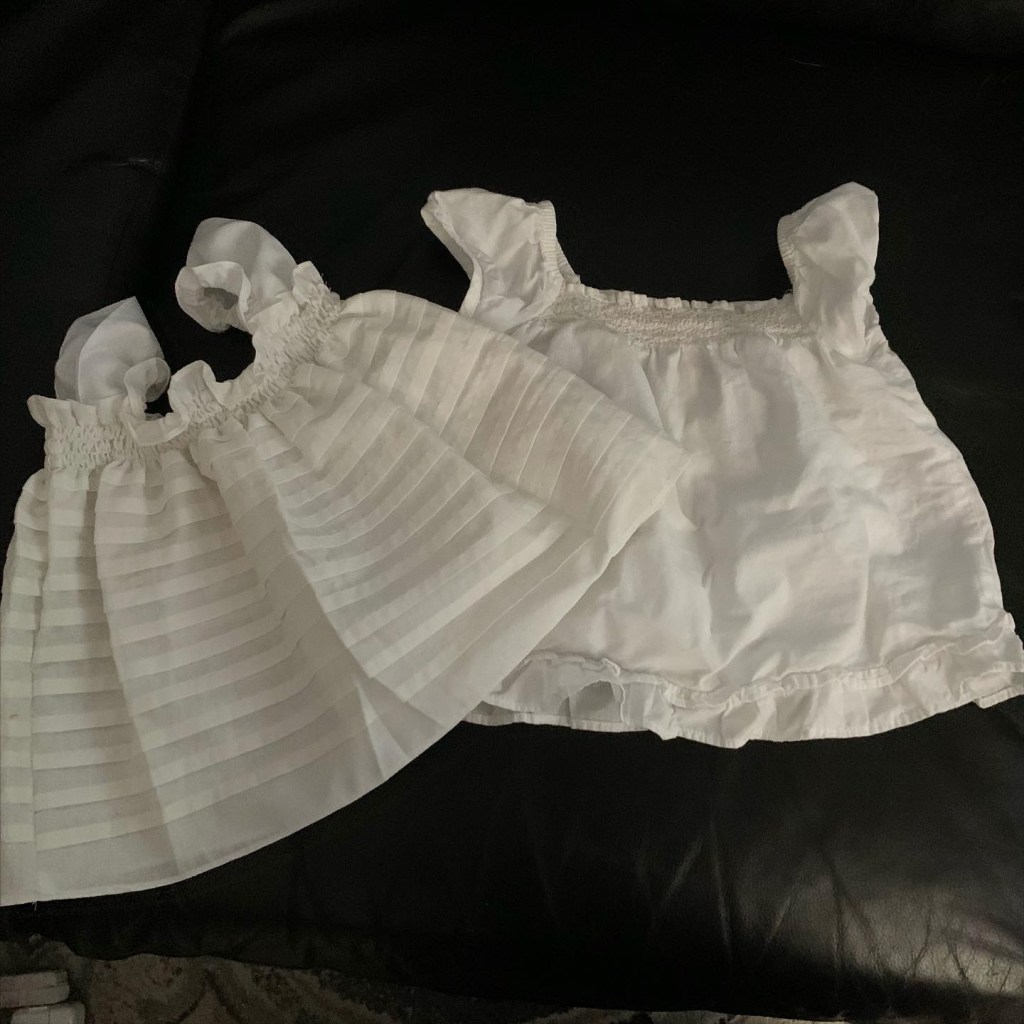
Anyway, back when I made this dress, I had a wee bit of amazing border-lace fabric left over. I made it into a a little shirred-top sundress thinking it might fit my youngest niece, who was a very petite 13 at the time, but I neglected to add a lining, so the skirt portion was quite see-through, and the sizing was a bit optimistic, and it just never made it to her.

(Oh yeah, the twins got pink hair for the last week of school.)

Well, after a bout of housecleaning a little while ago, the twins found it. And, by some miracle, it actually fits Tris (who is at this point substantially taller than River), much to River’s dismay. So obviously I needed to make something similar for River.

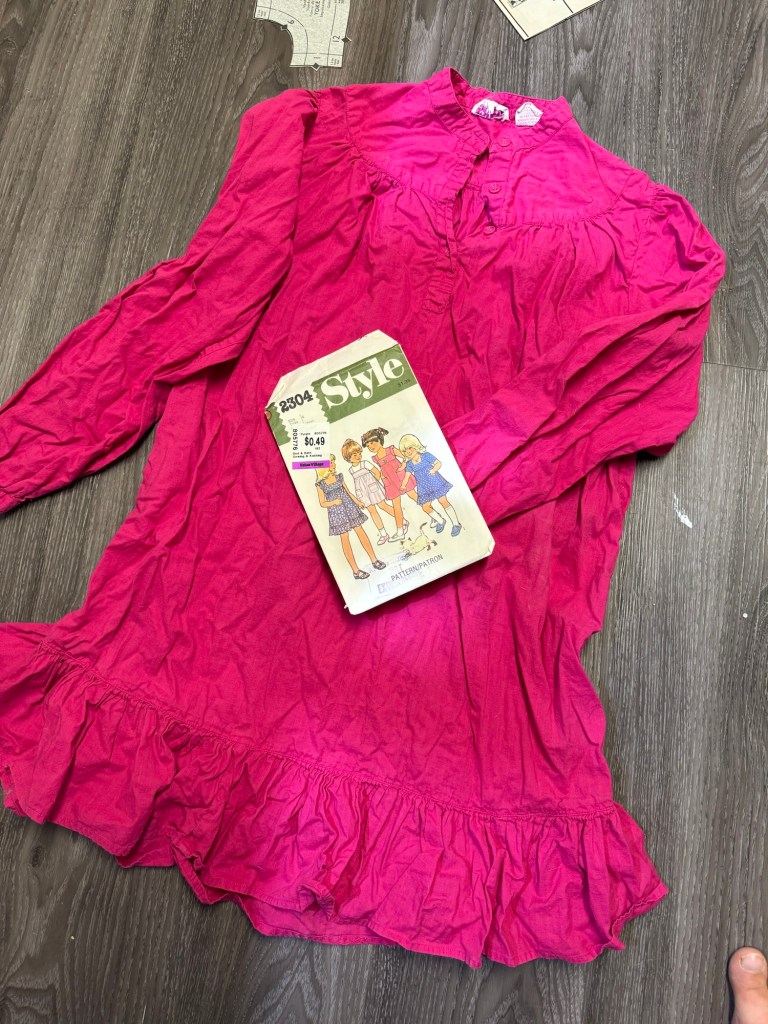
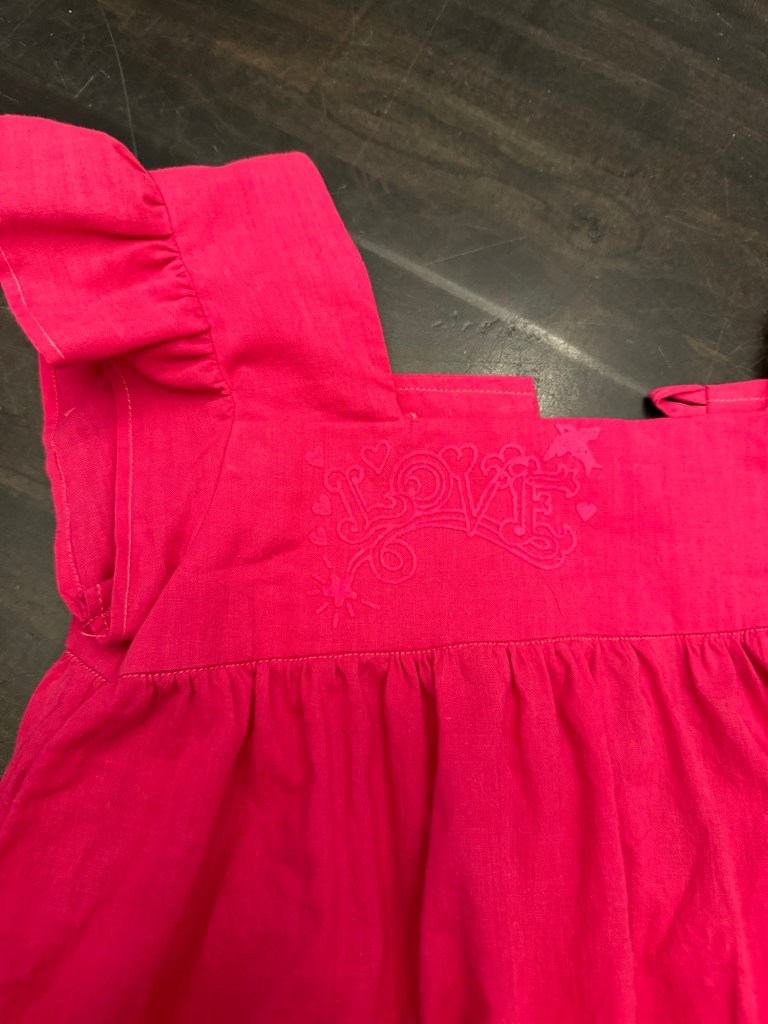
Anyway, rather than do the rational thing and look for something suitable in stash, I found myself at Fabricland over a long weekend sale and succumbed to the lure of a whole new piece of border embroidered fabric. (Among other sins that will be spilled here eventually, I imagine.)

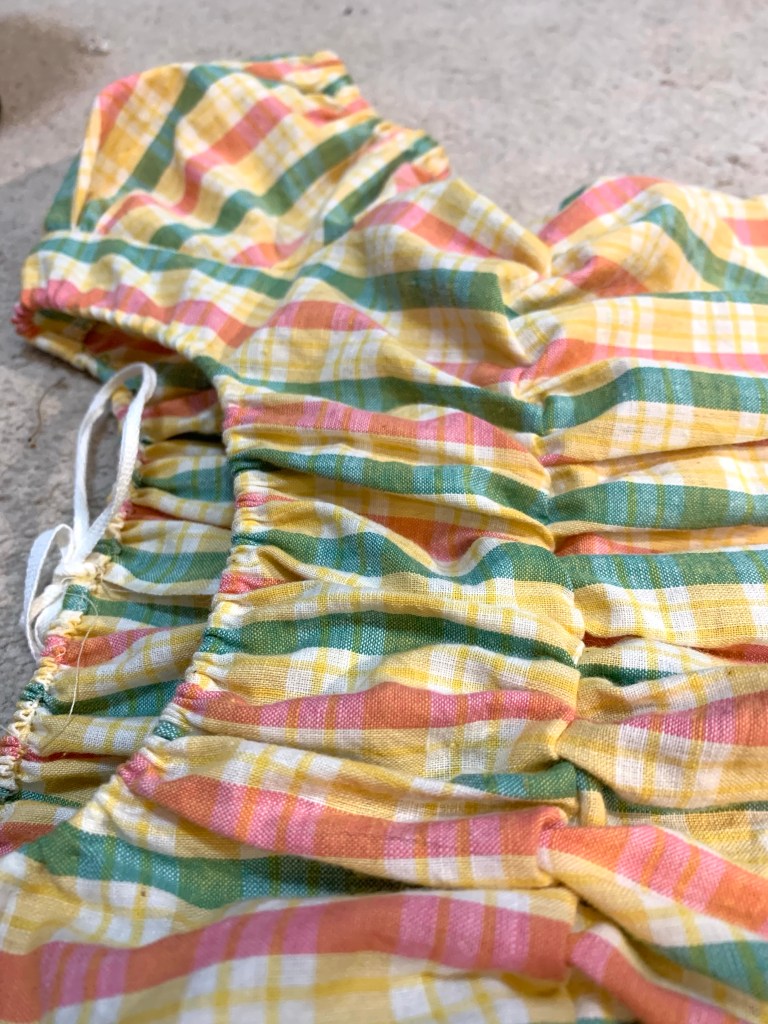
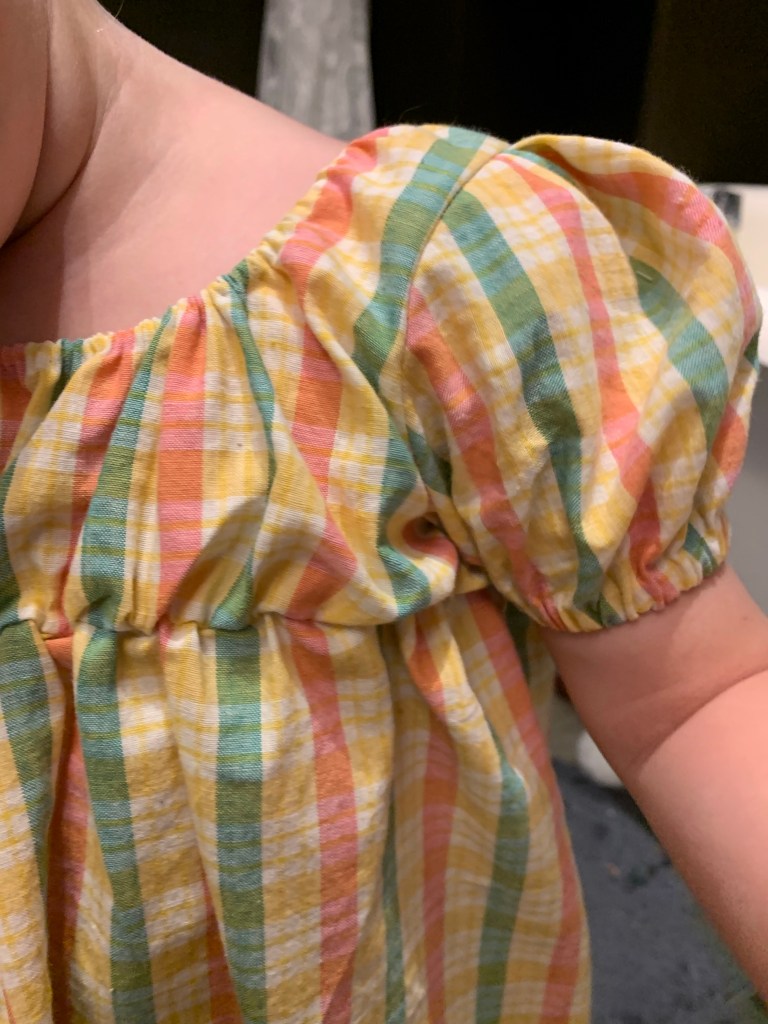
And I set about making another shirred dress.

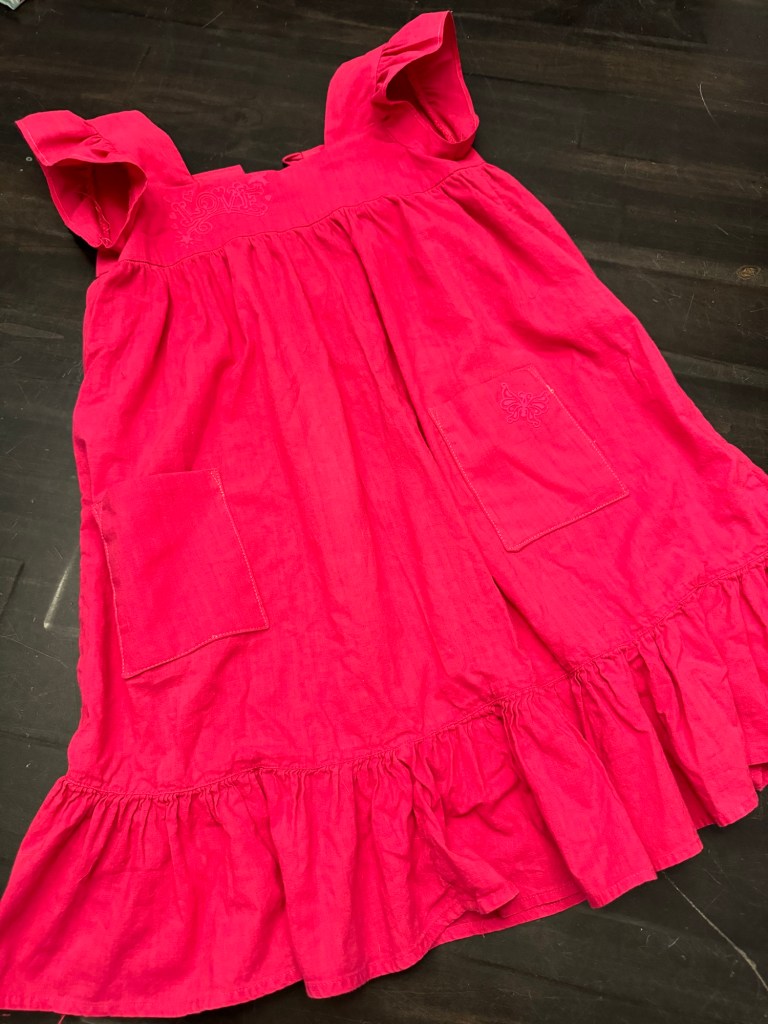
The first dress had been made from a scrap, with very limited fabric. I only bought a metre and a half of the new fabric, but it had the border embroidery on both edges. So I cut off both of them to make a wide, extra-full ruffle for the bottom of the skirt. I also added a waist seam, thinking I would need to gather the skirt onto a smaller bodice piece… which I didn’t end up doing, so the seam is basically useless, but I should have done since the bodice ended up too big and I had to make a big pleat in the back… anyway.

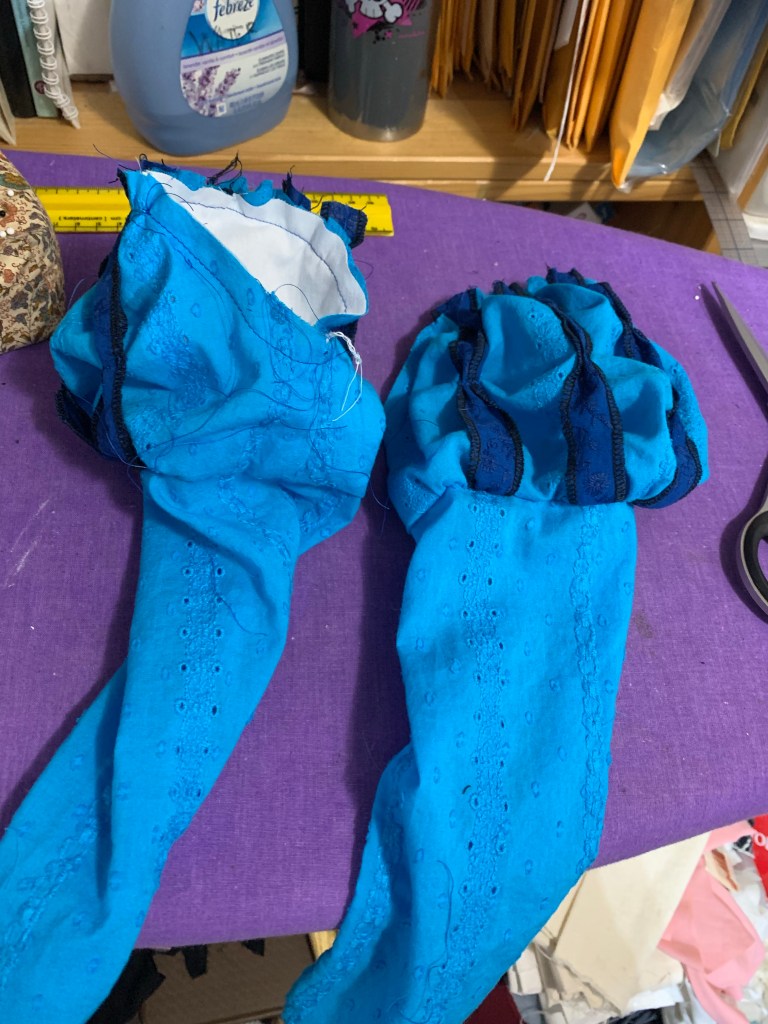
Alas, I didn’t take any construction photos, as the process was very quick and also frequently interrupted. Once I had the outer dress constructed as a series of tiers, I sewed the lining to the top, flipped it to the inside, and started off the shirring with a row of regular stitching over stretched clear elastic to give the top a bit more stability.

I used my ruffler foot to gather the bottom tier. I once again experimented with using my coverstitch machine to do the shirring as a chain stitch, as I’ve seen this on many RTW shirred sundresses. As with the last time, it worked well when I wasn’t having odd issues with the elastic thread breaking. It is a nice technique because you don’t have to hand-wind the elastic onto a bobbin, and it’s easier to adjust the looper tension on the coverstitch than the bobbin tension on my machine. But it does use up significantly more elastic per shirred inch, and even though I had two spools of elastic thread, between the shirring and everything I lost to the initial testing and thread-breaking issues, I wound up running out before even this very short bodice was finished.

The breaking issues, this time at least, seemed to have more to do with my top thread getting tangled around the spool I was using, and then cutting through the elastic looper thread, rather than the elastic thread breaking spontaneously. Once I got the upper thread tangling sorted, I didn’t have any more issues, though I did try to keep my stitching pace measured. I was even able to tie on the thread of my second spool with a small knot and just keep going without a hitch, which was lovely. I still ran out about an inch and a half short of the waist seam, which was frustrating.

Then I remembered I had a bobbin wound with elastic (presumably left over from when I sewed up the first little dress since I haven’t done any other shirring since then). So I did the last several rows of shirring using that elastic. The tension isn’t identical but after a bit of steaming the difference isn’t noticeable, and not at all once the fabric is stretched.

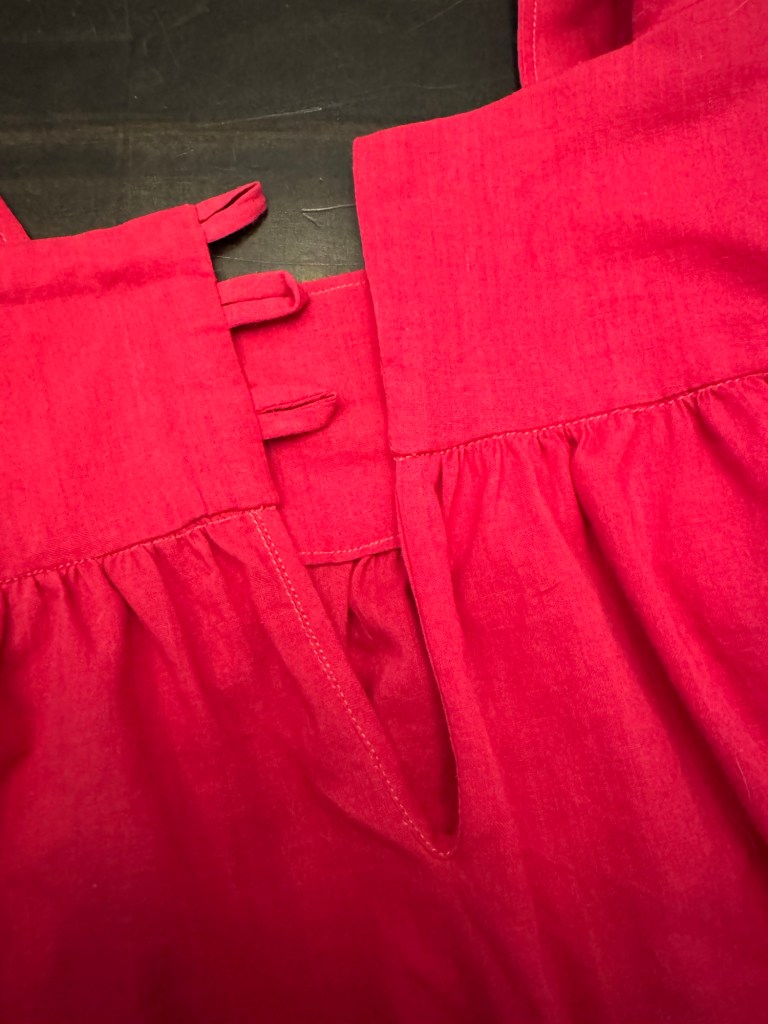
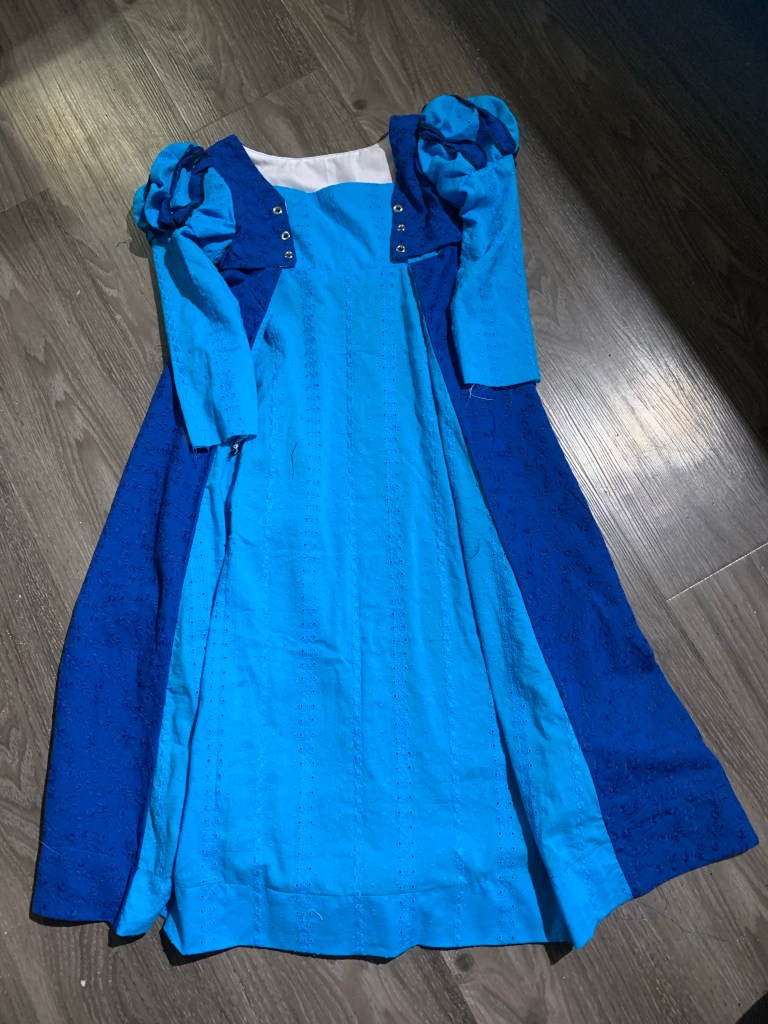
Once I had the shirring done, I serged the edges, hemmed the lining side, and sewed up the back seam of the dress. Then I had to take a 2” chunk (so about 4” of shirring, probably at least twice that of actual flat fabric) out to make the bodice smaller. I left the skirt, so there’s a weird pleat at the bottom of the bodice in the back, but again with all the gathering it isn’t noticeable. I had just enough scraps of the fabric left to make little tie straps, although it’s such a soft, mushy fabric it did not work at all putting them through my bias binding folder, and I really didn’t want to fuss with stitching and turning them. Anyway they’re fine.

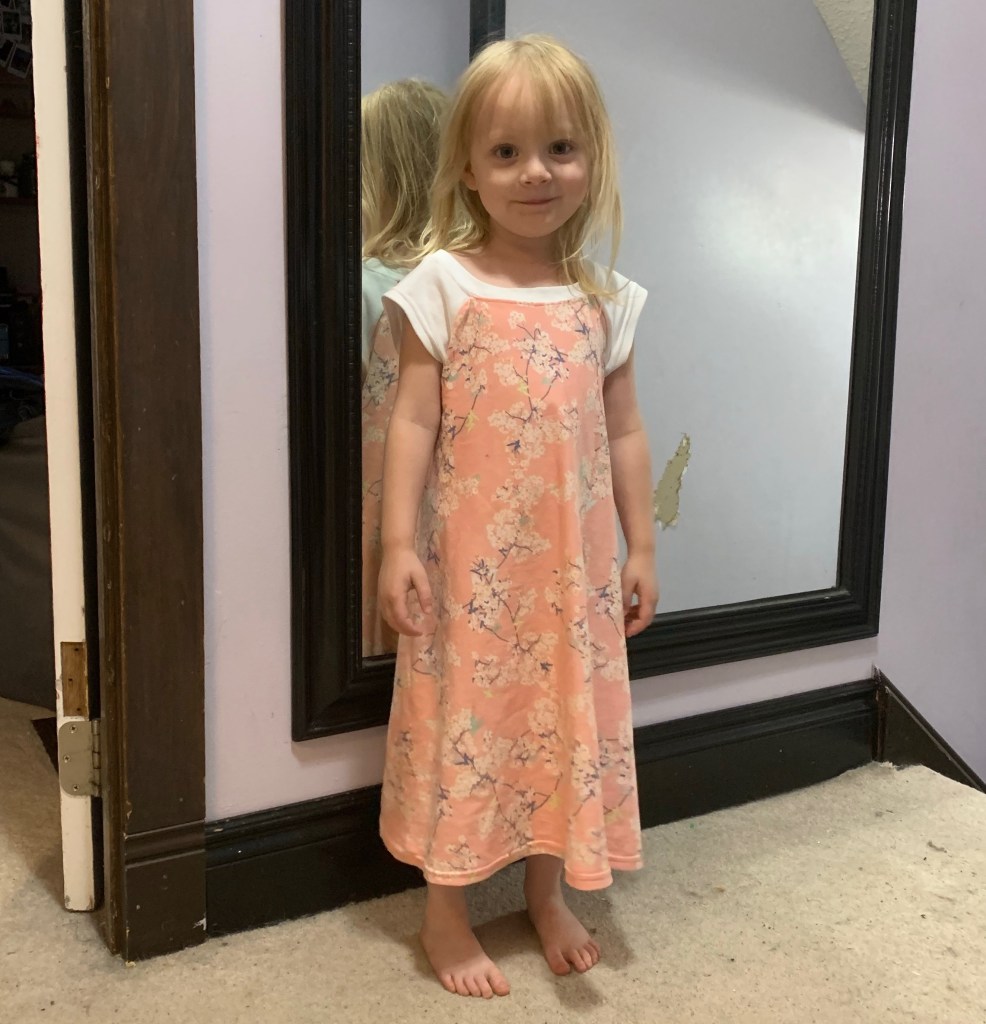
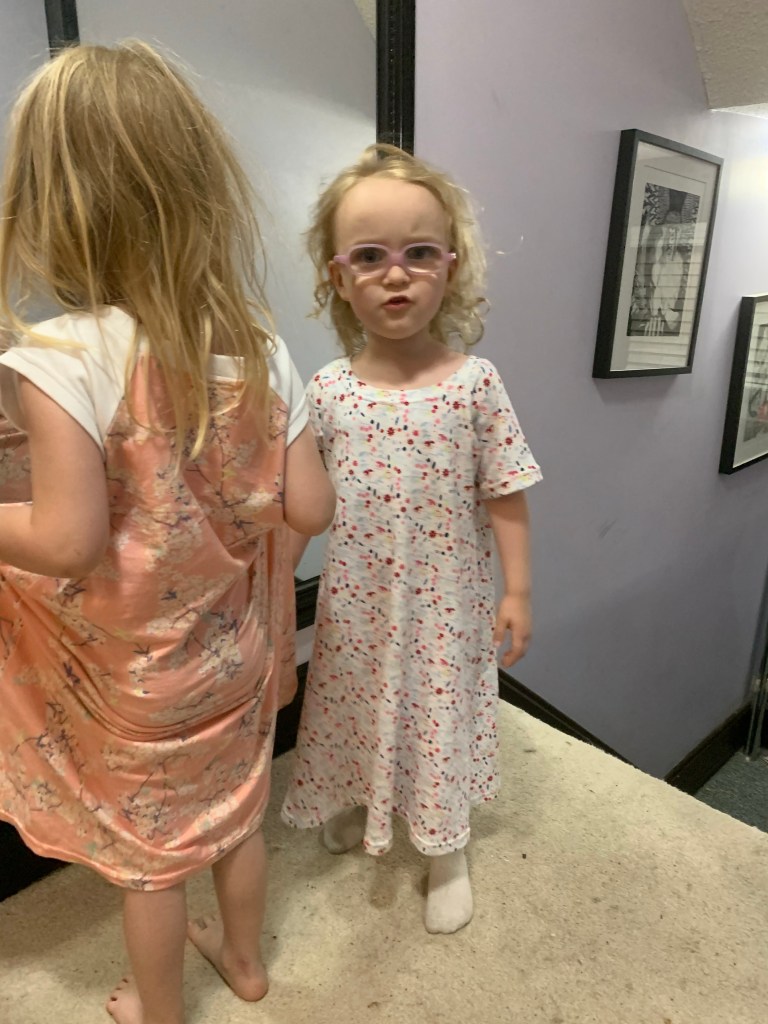
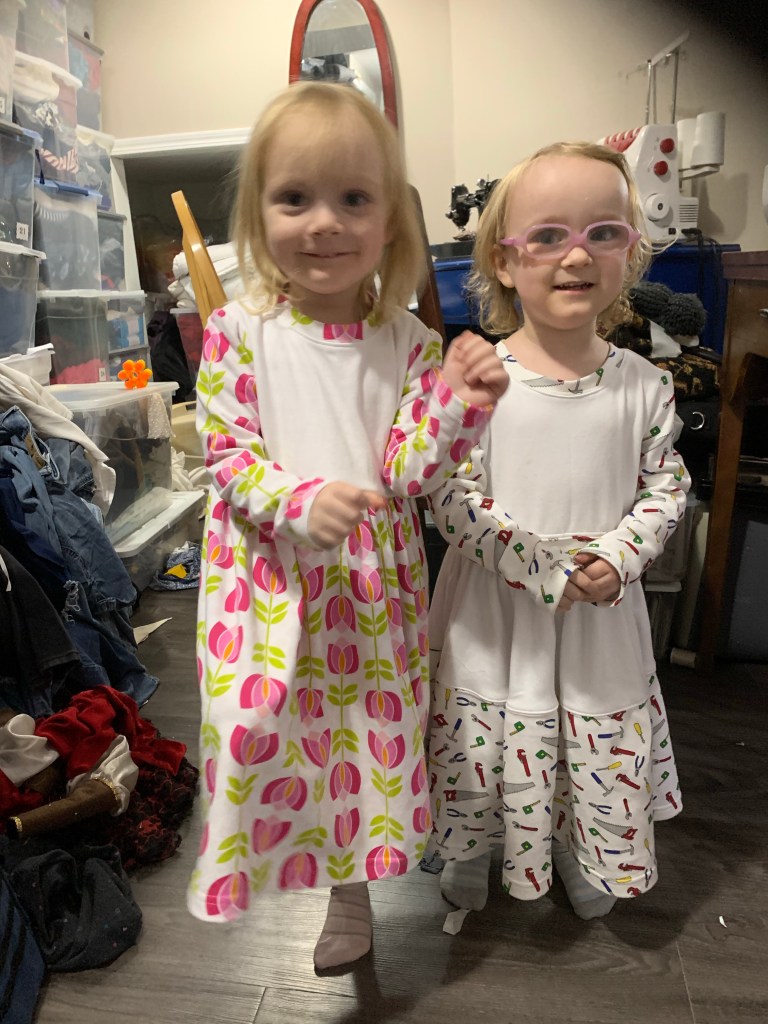
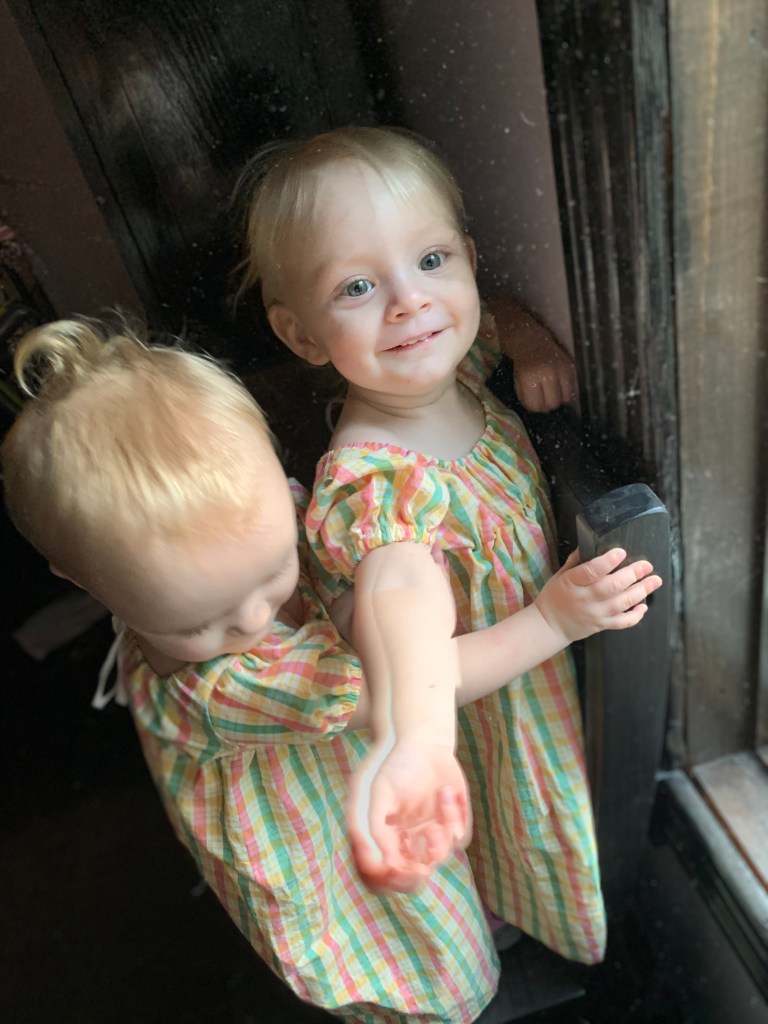
I will add that throughout this whole process, River was highly unenthusiastic and repeatedly told me that she would NOT wear the dress, and wanted the original one (which is too long for her, but then this one is pretty long too, I guess). The dress was “too fat,” which I guess meant full-skirted and ruffly? So when I first finished it, she wouldn’t even try it on. Fortunately, Tris is much more accommodating, and was happy to swap dresses. Unfortunately, once River saw it on Tris she came around and wanted it back, which led to a whole other round of bickering, and I finally told them that both dresses belonged to both of them and they had to share.

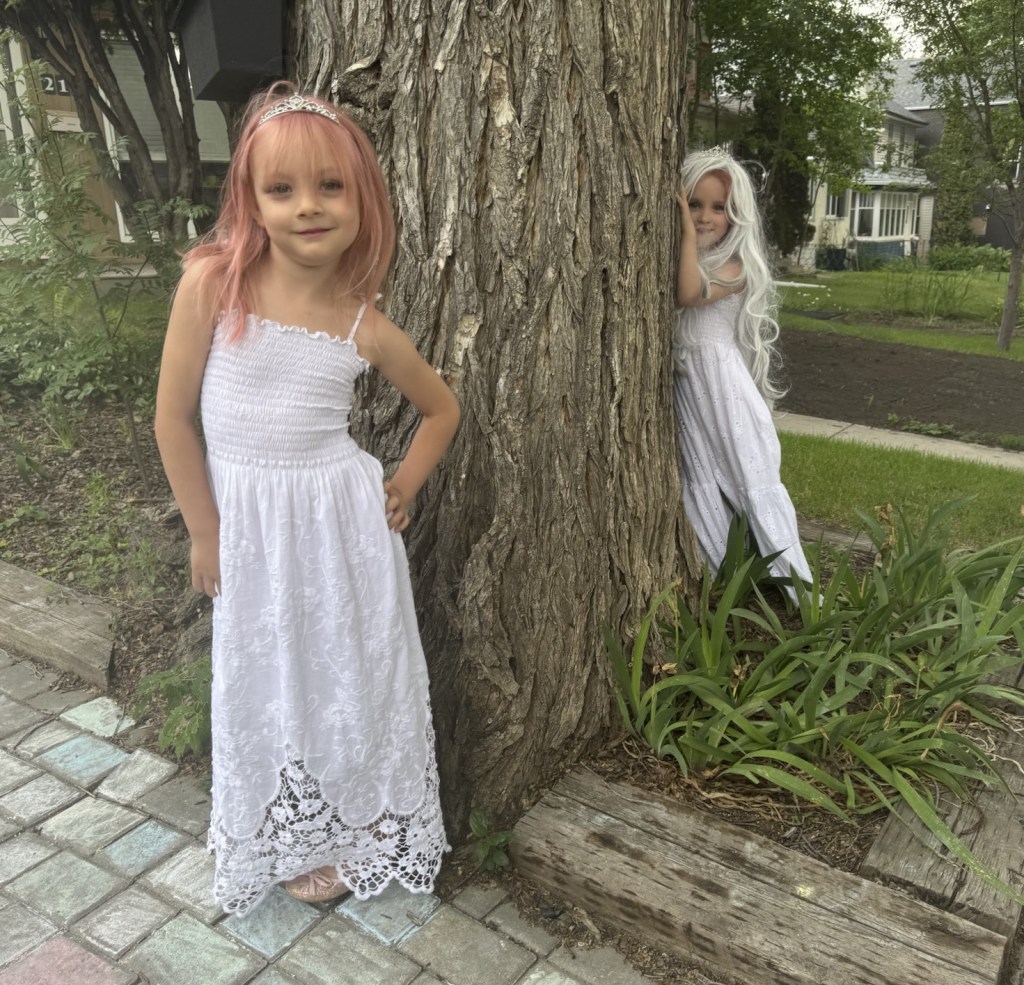
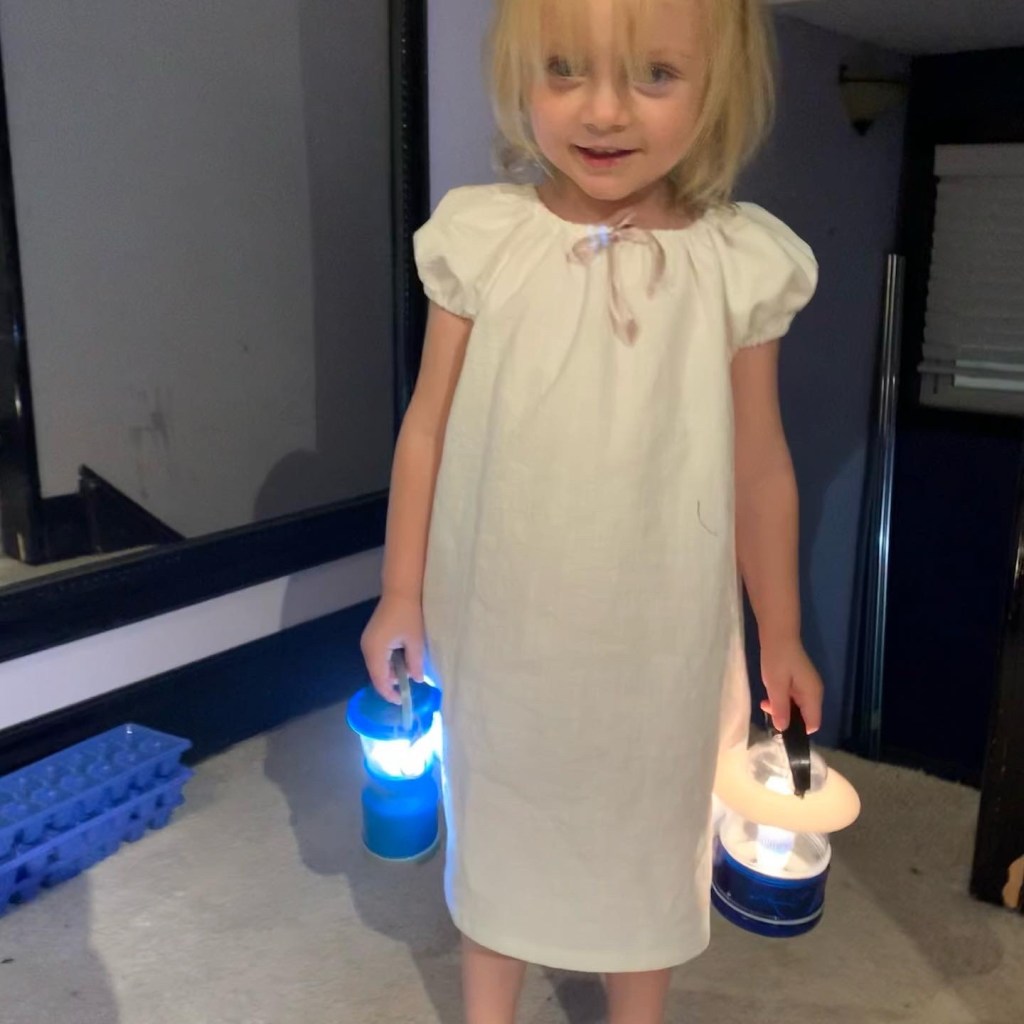
I did find a few moments, right before we took the pictures for this post, to add a very quick lining to the older dress. It meant I had to add a visible line of stitching in around the bottom row of the shirring, but again it’s not really noticeable at any distance and makes the dress so much more wearable.

And then we all threw on our dresses and had the quickest front yard photo shoot you could imagine. The twins insisted I join in the tiara wearing, by the way. And we won’t discuss how many times I’ve had to spot-wash catsup and chocolate milk out of the dresses this week, either. It’s sundress season, and we’re going to enjoy it!

4 Comments

Filed under Sewing

Sunglasses recommended

A few weeks ago, I had to entice Tris back from her auntie’s house with the bribe of sewing.

We settled, after much wrangling (four year olds are highly creative in their project concepts, but very low on practicality and, well, taste) on transforming this old, eye-wateringly hot pink, blouse (donated to the cause of children’s wear by my aunt), via a 1970s Style pattern:

I thank that long-ago pattern illustrator for including a bright pink version otherwise I would not have gotten her to go for it, I think.

I started by cutting the blouse off just below the armpits. This gave me a nice chunk for the skirt, with ruffle already attached! All I had to do was cut the bodice pieces out of the sleeves and remaining portion of the upper shirt. The fabric, by the way, is a really lovely soft light cotton, otherwise I would be far less excited about tackling this project. It was lovely to work with.

The colour hurts my camera sensor

It’s been a while since I sewed a 70s pattern and they really are the peak of pattern making. A zillion notches to keep everything lined up perfectly. Meticulously detailed instructions. (Can you tell I’ve been sewing with Victorian-grade instructions for a bit?) This pattern even has each seam numbered on the pattern pieces so you can sew them in order.

If you look close you can just barely see the hot-pink iron-on flocking motif on the bodice.

Now, I won’t say I followed all those instructions, but it’s lovely to have them. I spent a bit too much time trying to settle on the best way to line the bodice with the little ruffle sleevelets, which I originally thought were just shoulder ruffles but actually go all around the arm. In the end I did mostly follow the pattern, except for adding the button loops to the back instead of a zipper.

And, since my skirt didn’t have the back seam, I cut a little slit with a tiny bias placket to give it a little more opening room.

And then when I tried it on Tris (who is nearly five!) this size 4 pattern was massive! So to bring it in just a bit, I sewed the buttons on way over to the side, overlapping the back panels substantially. This looks a bit funny but the improved fit is worth it so it’s not constantly slipping off her shoulders.

Offset buttons create a bit of a pleat in the back. Worth it. And theoretically I can move them over as she gets bigger.

Also the button selection process was contentious. Tris was campaigning for purple buttons. I was looking for some cute little sugar skull buttons a friend gave me eons ago, that I think I may have foolishly destashed in last summer’s sewing room purge. In the end we settled on these sparkly white buttons. I didn’t have three in the larger size so the middle one is a bit smaller. Fortunately this dress is for Tris and she isn’t fussed.

More flocking!

I was able to just squeeze in the double-layered pocket pieces. It’s not my favourite method of making a patch pocket as they’re harder to get square, but double layering this fine fabric seemed like a good idea. You can, alas, see how my use of whatever thread we have on hand becomes a bit more of a problem when there is topstitching to be done.

At any rate, the recipient is happy with it and I’m not going to fuss over it any more. The pattern is used. The long-neglected shirt is living life as a functional garment again. Some of the iron-on novelty flocking got used. (Hopefully it holds up and doesn’t come off in patches on the first wash). And now I can move on to more fun projects for ME!

4 Comments

Filed under Sewing

Birthday Princesses

Once upon a time, long, long ago, back around the beginning of summer, the twins stumbled on McCall’s M6141 in my collection. Why did I show it to them? I’m not at all sure. I think I had just watched Angela Clayton’s video about a “historically accurate Rapunzel” outfit and thought they might enjoy it, as that is one of their favourite princesses, after Elsa and Anna of course.

At any rate, the demands were instant. Tris wanted the pink version and River wanted the blue. They haven’t really figured out that pattern envelopes are just a jumping-off point. Anyway.

By some miracle, we found fabric more-or-less appropriate for each look, from a variety of remnants and ends in stash. Note: despite the small size and contrast elements, this is not a remnant-friendly pattern. The skirt is large and sweeping and so are those sleeves. River’s fabric was a couple of different cottons with embroidery (why I picked up those pieces when I never wear those colours, I couldn’t tell you). For Tris, I pulled the last of the fabric from this costume of Ebi’s for the contrast, and then cried a little as I cut into an assortment of pink satin remnants for the main fabric, because man I hate sewing with satin. (Please note:: most of these remnants were actually pieces given to me, which I had hemmed and kept in the twins’ dress up box, where they served any number of impromptu functions. I do not stash pink satin if I can avoid it.) I used white broadcloth for the lining, because I have a ton of it purchased for just such uses.

I set to work tracing out the pattern, since I needed the smallest size. Except. Have I mentioned how much I hate Big 4 costume patterns? I generally hate all their costume patterns. Not for the designs, obviously, but for the shortcuts they almost always take in their drafting. Halfway through my dutiful tracing out I realized that the shortcut the company had made with this pattern was to completely bypass grading the skirt and the larger pattern pieces of the sleeves, relying instead on the gathering to have the same size pieces fit from a kids size 3 to 8. Not even “cut here” lines for separate lengths—just instructions to use the lengthen/shorten lines to get the right length.

Not impressed, McCall’s.

Anyway, once my irritation had passed, I moved on to cutting out. I wanted to make the dress considerably more adjustable than intended, so I modified the front quite a bit. Instead of cutting the princess seams, I made the side front piece into an over-layer with grommets for lacing at the front, and then Frankensteined a single-piece under layer from the contrast fabric.

I ran into some hard limitations on fabric for River’s and had to omit one of the back panels of the skirt. Thanks to the fact that the skirt was drafted in a size 8, though, this worked just fine, though she doesn’t have much gathering in the back. I did take up a little bit of fullness by adding a pleat where the contrast fabric joins the regular fabric, to hopefully add to that over layer/underlayer illusion.

The rest of the construction didn’t irk me too much. The pattern calls for lacing up the back. I was not going to do that. So they are pull on at the moment but may get back zippers added at some point. The puff sleeve was constructed pretty much as expected, though I did modify the length of the “ribbons” to make them a little shorter than the layer they are on top of.

The puff also made setting in the sleeve easy. I also skipped lining the lower sleeve. Due to fabric limitations I had to cut the sleeves from the “contrast” fabric, but I think the look works fine this way.

Tris’s dress was all the same except on hard mode: slippery satin (some of which is terrible quality) that frays at the slightest touch.

I had a remnant of pink jacquard with this black and gold pattern in stash—only enough for the bodice, however. The skirt is cut from two different satin pieces, one of which was a pretty decent crepe back satin but the other one (the back of the skirt) is that crappy and terrible Hallowe’en satin that makes me want to cry. Maybe I’ll replace it someday. (Not likely)

I had hopes of finishing these in time for their birthday at the end of summer, and I came close, but then the day of their birthday we took them to Costco and they saw the princess dresses there and were super excited and their dad is a pushover and bought them four. And despite all being made of nasty polyester they are actually really intricate and well made, and I’m pretty angry on behalf of whatever skilled seamstresses (because it’s almost certainly women) who were paid a pittance so that Costco could sell the dresses for $40. But anyway, that’s a different rant. I was a bit annoyed that the purchase basically undercut my hard work on their dresses, but also I’m not sure what the theoretical maximum number of princess dresses the twins would wear if they could is… it’s definitely higher than six. I did, however, give myself permission to not push to get the dresses finished. So it took until, um, not quite Hallowe’em. Except not really because River’s dress is still lacking trim, but I think she’s forgotten that’s a problem so I’m not going to bring it up.

Anyway, they are pretty happy with the dresses, though I doubt they’ll fully displace the beloved Elsa and Anna dresses. I, of course, prefer River’s since it isn’t polyester, but they each seem to like theirs best which is always the hope now that they don’t like wearing the same thing.

I was not about to do back lacing as the pattern called for, but I probably should have added a back zipper. Because they were pretty oversized (even cutting the size 3 for my four year olds), I just made them pull on and then tighten with the lacing, but it takes some wiggling. Tris’s is “zipper ready” in that it has a back seam I finished and just zig-zagged up. River’s, though, due to my fabric shortage is cut on the fold. But that’s problem for future Tanit.

I also didn’t hem River’s dress quite as ridiculously deep. I cut the full length as drafted in the pattern, which as I mentioned didn’t grade the skirt length, figuring it would be better to be able to lengthen the hem as they grow. Which is true, in the theoretical case where I actually do it. We’ll see how that plays out. Anyway.

I am definitely glad I added the front lacing, as it makes the fit so much nicer and more adjustable, though it doesn’t really play well with the necklines of the under-layer. You can see some of the size difference between Tris and River, even in bone structure, in the fact that Tris has a nice wide gap in her lacing, while River’s still laces closed.

So, were they worth it? I’m glad to have used some scraps from stash, especially the pink brocade. They were a LOT of work, to still end up less fancy than the ones from the store. But I’m also glad we purchased the other dresses. Because I really don’t want to create a whole wardrobe of princess dresses.

Well, not for the twins. Maybe for me…

6 Comments

Filed under Sewing

Summer Jammies

It’s summer. It’s hot. We don’t have AC. And the twins are convinced it’s not bedtime without jammies… so we need jammies. All their jammies are, well, winter jammies. long sleeves, long legs.

We were going to buy them. But all the summer weight jammies at the second hand store were, well, underwhelming. A lot of pilled up polyester.

So when I had a couple of unexpected sewing hours this past weekend, I decided to try whipping up a couple of nighties. The twins each selected their favourite fabric from their fabric bin, and for a pattern I pulled out McCall’s M9565, which is apparently in my stash although I have no clue where I got it. My envelope tops out at a size three, which is technically the twins current size. McCall’s kids patterns tend to run big, but on the other hand the twins are almost four and starting to outgrow their RTW size three clothes, especially Tris (who is over 2” taller than River at this point). I also considered Jalie 3245, which would make a great raglan summer nightie in the tunic view, but I didn’t really want to trace and was comfortable just cutting out the size 3 of the McCall’s pattern.

Well, I needn’t have worried about the size. They came out HUGE. Falling off River’s (admittedly narrow) shoulders. Even Tris’s I took in at the side seams 5/8” on each side. For River’s, I had to cut off the original neckband, take each raglan sleeve in 5/8”, and then take in the side seams even more. And it’s still not exactly snug—they’ll be wearing these for a while.

They are also long. You’ll notice the pattern cover shows a ruffle at the bottom. I wasn’t sure about adding it, but when the dresses turned out just shy of ankle-length it became obvious that was not going to happen. Which is fine. River has been on a kick about long dresses lately.

The pattern was for a long-sleeved nightie, but obviously I wanted short sleeves for summer. I picked a fairly arbitrary length that wound up being just above elbow length. River liked this but Tris did not, wanting them extra short. So I modified hers into more of a cap-sleeve style.

There’s not much more to say. They were sewn very quickly on the not-so-good serger, and several times as I sat down I had to readjust all the tension settings because the twins just can’t resist fiddling with that. I hemmed them with the coverstitch and they’re certainly not my tidiest but also whatever—they’re summer sleepwear. At least the twins were excited and happy about them, which is better than those mermaid tails I made them, that they’ve played with all of twice. A new challenge did arise this time: keeping each twin from throwing shade on the other’s choices. Tris didn’t like River’s fabric. River didn’t like the white sleeves on Tris’s (a necessity since we didn’t have much of Tris’s fabric, but I always think contrast sleeves look better on a raglan sleeve). But both are happy with their own dresses, which is the most important part.

Not that I could convince them to pose together.

9 Comments

Filed under Sewing

Ungrateful Mermaids

Sometime around Christmas, Tris became obsessed with being an “Elsa Mermaid.” And, of course, convinced that I could help her with this transformation.

I was… less enthused. Partly because I was worried she expected me to make her a literal mermaid (and probably then provide a suitable ocean to explore). Mostly because I was pretty sure the confinement of the legs inherent to a “real” mermaid tail just wasn’t going to feel great after a max of five minutes.

So I dragged my feet.

River got in on the excitement, requesting a Rainbow Mermaid tail with only slightly less urgency.

After a fair bit of cogitating, I hit upon the (I thought) brilliant idea of a tail made as a wrap-around skirt, allowing the mermaid look while still running and playing. I even drew up a sketch to try to sell the idea to my three-year-old clients.

They were cautiously receptive, at least once I assured them I could make a pocket in the fin so they could also put their feet inside. So I took some measurements, drafted a couple of rough pattern pieces, and dug through the stash for suitable fabrics. Rainbow was easy, as my aunt gave me a couple of pieces of cheap rainbow-printed satin to make stuff for the twins. Ah, the gift of getting to sew one’s least favourite fabric for someone else. I also had some low-stretch slippery knit with an indistinct white and blue and silver pattern that has always reminded me of the Frozen aesthetic. For the tail fin itself, I opted to use the last of a spongy purple polyester sweater fleece that I had made into baby sweatpants at one point. Actually both fabrics featured in other projects on this post here. But I overlaid the fleece with translucent fabrics to get that iridescent fishy feeling.

For the rainbow tail fin, I picked a purple-y tulle with a bit of a silvery fish scale pattern to it, and intermittent clusters of beads. It had been kicking around stash for several years since one of Syo’s friends deconstructed a ball gown in our basement to make a Hallowe’en costume, and left giant swathes of shorn tulle behind. For Tris I chose a blue organza with random silvery dots, also from my aunt. I then quilted these overlays to each side of the tail separately, creating fish-tail rays. This was far and away the most time-consuming and annoying part of the whole thing.

I completed River’s tail first, as I figured she was going to be less devastated if she didn’t like the result than Tris was, and I could perhaps use its example to manage Tris’s expectations.

River was quite excited, and eager to put it on. However, she was completely unwilling to wear it as a skirt, only as a full tail with her feet tucked into the tail fin pocket.

And the frustration of being unable to walk properly like this got to her fairly quickly, so she hasn’t really worn it after the first day it was delivered. (Oh and I still should topstitch around the tail-fin so it holds its shape better, but my motivation is… low.)

Tris was distinctly lukewarm to River’s tail, and I contemplated just making it as a basic step in tail, but the pieces were already cut out and taking up room in the sewing room. So, eventually, I decided to finish sewing it up, if only to move them from the sewing room to the dress-up box.

When I showed it to her, all completed. Tris said, “no thank you, I’m a princess, not a mermaid.”

Anyway, while I take some deep breaths, I’m going to make something for me now.

19 Comments

Filed under Sewing

Tiny Princess Highjackers

Lately, the twins have had a breakthrough realization—Mommy MAKES clothes.

Which means she can make dresses

All dresses must be PRINCESS dresses.

Which means she can make PRINCESS dresses.

Tris in particular is super keen to sew by herself, diligently selecting a fabric (anything pink… yes, we’re in THAT phase) and shoving it through the under-arm space of the sewing machine in the hopes that it will magically come out the other side a dress. I also need to double check all my machine settings every time I sit down (we won’t go into the time she somehow changed all my server’s tension settings to 0 WHILE I was sewing with it)

Anyway, the result is that instead of a measured progression through my sewing queue, I keep getting side-tracked by adorable and insistent requests to make dresses out of THIS fabric. And they’re so excited it’s difficult to resist, and all of a sudden I’m highjacked.

It doesn’t help that my friend Temperence Swimwear Intimates, gave me a bunch of kid-print knit remnants, that I really need to use promptly lest they linger in stash beyond the twins’ interest in them.

Of course, the twins’ sense of what a suitable amount of fabric for a princess dress is a bit, ah, flexible. There was the day Tris was determined to make herself a pink princess dress out of a single small mitten. I was able to divert her only by digging out some of the fabric for Temperance (and I don’t have a lot of pink fabric at all, by the way…) It was really just scraps I think were supposed to become undies.

That resulted in the first highjack dress, a revisit of the same pattern I used for the little ghost girl dresses last summer. If this version looks more like a shirt in flat-lay, it’s because I decided to use a band for the neckline and then, instead of gathering the neckline and sewing it to the band, tried to rely on the band’s own recovery for the gathering. It’s a pretty beefy cotton-spandex with great recovery, but even so there are limits. As a result, the neck is pretty large. But she’ll be able to wear it as a shirt until she’s ten or something.

I did irresponsibly dodge my parental obligation to make River a dress next, well, until a couple of days ago when they were digging through the fabric again and she spotted this tool print cotton interlock… of which there was a scant half-mètre or so.

I did, however, also have plenty of plain white interlock, purchased in the days when I was fantasizing about making my husband T-shirts. I figured I could eke it out.

Now, long and long ago I made these cute little dresses for the twins, which are basically just a long-sleeve tee pattern, slightly cropped, with gathered skirt attached. And I really think that’s the best basic style for making a winter-friendly dress for a smallish kid. These are long since outgrown, and frankly were outgrown far too quickly, so I didn’t want to make anything that fit “just right”. My go-to pattern for kids tees is Jalie 2805, but I didn’t really want to use the size I traced out for these tees last year and I was much too lazy to trace a new size, so instead I dig through the mass of un-filed patterns sitting on my basement counter until I settled on the fairly forgettable McCall’s 3315, which stood out only in that it was a single size, 3, and was “for unbonded stretchable knits”.

Actually it’s a pretty cute, slightly flared turtleneck dress pattern with a non-knit jumper to go over top, but it’s also an early 70s knit pattern—designed for stuff without too much stretch, and with way too much ease in the sleeve cap. But, I wanted roomy, and a bit of a puffed sleeve cap just adds to the princess cred of the dress, so I went with it, or at least the portion above the waist. Since I didn’t want a turtleneck style, and did want to add a band, I cut the neckline down a good 3/4”. I ended my use of the pattern at the lengthen/shorten line, which created the slightly cropped length I was going for, and omitted the CB seam since no I’m not going to put a zipper in a knit.

For River’s dress, we had extremely limited print fabric. After I had cut the sleeves, I had wanted to use the remaining print for the square skirt, but it would’ve made a very scant, not very twirly princess skirt. So I cut the piece in two to make a bottom tier, and cut the upper tier out of the white interlock. I added a print “waistband” to the top, too, to break up the white, using a bit more of the stuff I had cut off for the band at the neck. I had been envisioning two gathered tiers, but it turned out that my two lengths of print put together was only slightly longer than the single length I had cut of the white. I could of course have reduced the amount of white in the skirt, but instead I just eased the two together. You can see that it gives a slightly more flared shape to the skirt. The most important part is that it twirls, though. I used a fair bit of coverstitch topstitching to flatten down the extra seams in this dress; this worked well for the tiers of the skirt, but I don’t like how it turned out on the waistband so I will likely rip that out.

I asked them for Princess poses. Apparently this meant standing on one foot.

Tris’s second dress was made after (trying to take turns) and under no such fabric limitations as I have a full 2m of this abstract rose print in stash, purchased way back when my nieces were small enough to enjoy it. I’m happy to get to use it on the twins, though this project didn’t come close to using it up. I did want to harmonize with River’s dress, though, so I asked Tris if I could make the bodice white like River’s, and she agreed. Part of me wishes I had done the tiered skirt part as well, but also that adds a butt ton more time to the project and this is cutting into my me-sewing time already, dammit. As it is, Tris’s dress came together in just over an hour thanks to all the machines being already set up (give or take having to check all the settings and occasionally rethreading things, thanks to my very helpful helpers.)

In the end, it was pretty fun to see these come together quickly and how excited the twins were by them. I didn’t really sew when my older girls were in the twirly-dresses stage; I did sew a few twirly dresses for my nieces when they were young, (like this one) but they were done as presents, not collaborations where they got to pick the fabric and “help” with the sewing.

I’m also wondering if this is the end of the era of twinning outfits. Since starting school the twins are much more vocal about their sartorial preferences, and they’re rarely wanting to wear the same thing at the same time. I already mentioned how Tris wants EVERYTHING pink right now. And thank goodness for the plethora of hand-me-down tights they’ve finally grown into because it’s all dresses all the time right now, so their adorable overalls and jeans and flannel shirts are getting less than no love.

Ultimate Princess Level unlocked.

So now I can get back to finishing boning my Victorian bodice. Except, um… I stumbled on this Butterick pattern while looking through the mess. Have you ever seen a more ultimate princess dress??? I’m loathe to give the decade of my birth credit for much, but they could do a princess dress like nobody’s business. Anyway. I’m exhausted just looking at it… but also… can I not? Maybe I’ll just read the instructions…

18 Comments

Filed under Sewing

White and whimsical

I’m not sure I can capture the train of thought that led to these little dresses. The pattern is the free Peasant Dress pattern from Scattered Thoughts of a Crafty Mom, which I acquired and printed out a while back after the twins got some hand-me-down dresses made from it by a friend who also sews. It’s been sitting waiting for a while while I fussed around with other things.

I wanted to make white shifts to go under their little regency dresses from last year… but then I wound up pulling out this wonderful textured white cotton (left over from a shirt I made my huband eons ago) and just went with it, except it was far too thick to fit under those little regency dresses, not to mention the neckline would have been wrong. But somehow I decided to go ahead and make up little white dresses anyway.

I cut the size three dress, which is different from the size two only in having an inch or so more length. They’re a bit long but our sundress season is coming rapidly to a close and I wanted to be sure they’d still fit next year.

The twins had a lot of fun wandering the house with their lanterns looking like little lost ghost girls.

There’s really nothing to these dresses, except for the time it takes to thread the elastic through the casings at neck and sleeve. I added some vintage ribbon to make little bows at the neck, but they were still quite plain and nightshirt-y.

Not creepy at all. Nope.

So to spruce them up, I pulled out some lino blocks and acrylic fabric paint and fabric medium (that you mix with the paint to turn regular acrylic paint into fabric paint) and played around until I got a result I liked.

And yes, the uneven, “home printed” look was intentional. And yes, I did geek out a bit and put my Rebel Alliance block front and centre.

So now my just-turned three year olds have, not only more white dresses, but white Star Wars dresses.

So yeah, now I want to block print everything. We’ll see. (And as usual I wish I had better pictures of the dresses being worn, but getting two three-year-olds to pose for anything but the goofiest pictures is pretty near impossible so, it is what it is.)

Comments Off on White and whimsical

Filed under Sewing

Wee dresses (2022 edition)

I’ve slowed down on sewing for the twins, if only because they really never need clothes and my sewing has been intermittent this year at best. But when I finished the 80s dress, I still had a bunch of the fabric left over. And I have been missing a pair of dresses I made for them their first summer, a no-pattern, pillowcase style with pleats and a wee bit of lace in the front and bias tape finishing the armscye and turning into shoulder ties.

Original dresses, long outgrown

The original pair was pretty much my favourite thing I made the twins ever, but unlike some of the dresses I made them that summer, weren’t wide enough to transition into tops as they grew taller.

Shot of the twins in the original dresses, from their first birthday.

I actually have lots more of the original fabric in stash, so it would’ve been perfectly possible to recreate them in the original blue fabric, but using this style with the border embroidery fabric was just too tempting.

Determined not to run into the same issue, I made sure the armscye width and depth on these new dresses was ample. Maybe you’ve noticed they look a bit wide? No? Well, yeah, I overshot massively. Actually, the first one I cut might’ve been fine, but when I cut the second I had a brain fart and cut the armscye about 3 cm deeper, and then dumbly re-cut the first one to match… anyway, as soon as the twins tried them on I realized I had to take a massive tuck in each side to make the armscye work even a little bit. Which isn’t a bad look in a pleated dress, but definitely annoys me.

There isn’t a whole lot more to say. I made these dresses each 50” at the hem, and wider might’ve been nicer. I made them long so that they will still fit next summer. They took longer to sew than they should have due to “help” from the twins, but that still isn’t exactly long in the grand scheme of things.

I just love the combo of the pleats with this cotton pom-pom trim. My trim was white and the embroidery is distinctly ivory, so I did the fastest possible tea dye on the lace to get the colour at least a bit closer, and I think it worked.

I’m kind of in love with these dresses, I gotta say, more than I am with my own version of this fabric. And there’s just a little bit left and I have plans!

2 Comments

Filed under Sewing

Further diversions

I’ve been fantasizing off and on about making the twins wee little Regency style dresses. I kept talking myself out of it, but the idea kept popping back up to the surface like an old beach ball that just won’t quite sink.

I do have some white fabric in mind possibly, but my mother recently destashed a piece of somewhat vintage cotton with a lovely woven check and (don’t laugh) tiny old-fashioned selvedges. With selvedges like those, it just had to become something quasi-historical, and these aren’t the kind of colours I would wear myself. So.

Although my fantasies kept taking me over to this pattern from Virgil’s Fine Goods, in the end I went ahead and drafted my own, based on the Danish example linked in this post from the Oregon Regency Society. Partly because I was impatient but mainly I’m also cheap. Although I would love the period instructions for hand-sewing that would come with the Virgil’s pattern, which would I’m sure explain that everything I did here is wrong. But I knew I didn’t have time or inclination to fully hand-sew these dresses.

Gorgeous neckline. Less gorgeous waistline.

Anyway, I followed the pattern for the above dress pretty roughly, with several modifications due to the small scale and rapid growth rate of small children. I added gathering via drawstrings to both the front neck and the “waist” of the dress, for maximum adjustability.

Due to fabric limitations, I made the skirts from a single width of the vintage cotton, which in the end didn’t leave much extra gathering at the back, unfortunately. I really wish I’d had enough fabric to do at least two full-width panels for the skirts.

In theory, as the twins grow the drawstrings are loosened and the dresses keep fitting for a lot longer. If I’d had more fabric I would’ve added more length and put in some tucks for growth, too, but as it is they’re already ankle skimming on Tris. Which, I’m not really sure what the correct length for Regency children’s dresses should be—I’ve seen paintings with the dresses very long and others fairly short. Given the nature of children’s growth, I suppose some variation is inevitable anyway. I could also make drawers for underneath as they get taller.

I also made the sleeves puffy, again to accommodate future growth.

My “plan” was to have one version be as historically accurate as I can handle (meaning machine-sewn seams but everything else done by hand, and the other a quick ‘n dirty version with serged seam finish. In the end this actually doesn’t make much of a difference since the bodice seams are the least of the hand-sewing that was involved. But I did hand-overcast them in the second dress.

The most unexpectedly labor-intensive part was rolling the casing for the top drawstring. I knew I wanted to use the 1/4” stay tape for my drawstring, but I wanted to keep the casing as narrow as possible, and if I didn’t want visible machine stitching on the outside I definitely had to roll it by hand. It turned out that this was doable, but required sewing the casing with the tape already in place, and due to the narrowness, I had to check at EACH stitch that I hadn’t caught the tape with my needle. This took forever. And ever. That being said, I’m very pleased with the look it created.

First dress on the right with bulky waist gathering. Second dress on the left, less bulk but very high on the bodice.

I was a lot less pleased with the casing for the waist seam of the first dress, which I machine-stitched to the seam allowance since it didn’t show. I’m not sure if it was just that my casing fabric was a bit stiff, or if it was too many layers of machine stitching, but the whole seam is stiff and doesn’t gather nicely. I can’t imagine it’s too comfortable against the skin, either, but the twins are fairly stoic about their clothes for the most part, thankfully, and haven’t seemed bothered. For the second dress I used a lighter fabric for the casing, with one edge stitched to the seam allowance and the other to the bodice. This is a bit nicer feeling but does shift the gathering a little higher on the bodice—only by the 5/8” width of the casing, but when your bodice is less than 3” long that’s a fairly big shift.

The dress opens in the back and I cut the edges of the back bodice on the selvedge, and of course the skirt is the full width of the fabric again so the entire back seam was selvedge as well—yay to no finishing required, and an opportunity to show off that lovely vintage selvedge, although I have no idea if it’s actually accurate for a Regency time period. This is an easy closure for a kids’ style, but it does tend to leave a bit of a gap at the back, so I should probably make them some kind of little shifts to go underneath. Feel free to place bets on whether that actually happens.

My biggest departure from historical accuracy (other than the machine sewn seams) would probably be that I decided to put elastic in the hems of the sleeves. I considered both gathering to a band (harder to adjust) and adding drawstrings again, but I also wanted these dresses to be comfy to wear for toddlers accustomed to modern clothing, so I went with elastic. It doesn’t show and doesn’t look particularly different than a drawstring would, I think.

After all this work to make the dresses adjustable, I wound up having not quite as much fabric for the skirt length as I had hoped. While they’re long enough now, I had hoped to have a few extra inches of length to put tucks in that could be let out later. I also would’ve liked to have more fullness for the back of the skirt. But, such is life, and I think I made pretty good use of the two yards of fabric.

While they’re not as long or as full or as “historically accurate” as I might have hoped, I think they still turned out pretty cute. And Tris has actually requested to wear one instead of regular clothes at least once, so I’ll call that a major win!

9 Comments

Filed under Sewing

Pre-Christmas presents

A few weeks ago my husband started cooking with the twins, and since then he’s been badgering by me to make little aprons and chef’s hats for them.

Since I ended up with a free Saturday afternoon when the older girls took the twins to spend time with their Auntie, I figured I could whip up a couple of chef’s hats and aprons for Christmas presents. Some digging in the stash unearthed the rest of the white poly-cotton twill I used to make the twins these pants, so I got to work.

Of course, since the twins were gone I didn’t have them around to take measurements. I did Google around and found a diagram for a kids’ apron (size 4-7) and basically took an inch off everywhere.

They are pretty basic aprons, but the size turned out PERFECT for my rather runty two year olds, and they’re just what I wanted. My husband would’ve preferred a loop around the neck to the ties, but I wanted them to be adjustable and also a loop big enough to go over baby heads would put the bib quite low on their chests.

The angles edges are finished with double-fold binding (made of the same fabric, so they’re a bit bulky… twill tape would’ve been a nice alternative in hindsight). The top has a teeny facing, which I stitched on the right side, which fortuitously turned out almost the same width as the waist band/ties and the bottom hem. The other edges I just turned under twice and hemmed. For the waist ties, I knew I wanted them wider but less bulky, so I serged the edges and just turned them under once and topstitched down. Then I topstitched them onto the front of the apron. I like it.

The hats were even more slapdash. I did Google “size 2 hat” to get a circumference for the band, but other than that I just kinda made it up. The circles are about 30” each since I cut 2 from a 60” wide fabric.

They’re pretty extra, but I was pretty sure that ridiculously oversized would still be ridiculously cute, and I was not wrong, if I do say so myself.

Ready to start their own cooking show.

For the bands (stands? Brims?) I was going through my box of interfacings when I found the remains of a package of thin bag-making foam, and I think it was perfect: soft, cushy, and unlikely to be damaged by two-year-olds mashing it around.

I decided I wanted them a little taller at the front than back, for a slouchy chef look, but not too high. I topstitched the foam to the inner part of the band fabric. I purposely made the foam a little short, and put a short elastic across the gap, so there’s some stretch at the back. I like how this turned out, but I wish I had made the bands just a little bigger. However, I suppose when they’re outgrown I could open up the back seam and add a little panel there, and just adjust the back couple of pleats to fit.

As it is, though, they’re wonderfully, ridiculously, over-the-top adorable. Despite my best intentions, we did not wait until Christmas to give them to the twins. They did get used for making some (not terribly successful) Christmas cookies and any number of other meals, however.

11 Comments

Filed under Sewing