

Once upon a time, long long ago, Helen of Helen’s Closet posted a series of hacks on her blog to her fun, basic York Pinafore pattern. I, of course, fell in love with the most complicated hack, the combination of spaghetti straps and a gathered tier skirt.
Fast forward to last month, and I found myself purchasing three metres of this deep teal cotton/linen blend from the half-price sale at Fabricland. It’s soft, more cottony than linen-y, with one side very slightly brushed. (Which I didn’t notice until halfway through construction, so fortunately I was consistent about which side I used for the outside.) I wanted to make something that would transition well to fall, but wasn’t too complicated/didn’t require tracing a whole new pattern, because that’s pretty hard for me right now.
As “hacks” go this one is pretty intensive, as the only line from the original pattern that stays the same is the three or four inches of side seam. As such my version ended up a bit different from Helen’s—my front bib is lower (since I started from my low-necked version of the pattern) and I think I inadvertently squared off the neckline curves a bit more. I would raise the front (I’ll get into that) but I don’t mind the square necklines.

I also did my tiered skirt a bit differently. I decided I wanted a long skirt with a ruffle rather than three equal tiers, and also that I wanted the longer part to be flared, not just rectangular. I thought I had calculated pretty carefully to still get the 1.333:1 gathering ratio she followed, but I think my mental math was a bit off for the top of the skirt, as the gathers are very minimal. Also, minimal gathers are WAY harder to get nice and even, by the way. I don’t think I’ve ever consciously aimed for less than a 2:1 ratio in gathered tier skirts, so even though I’ve made a million of them this felt pretty awkward. And I had to pull my first go at the bottom tier off because the gathering was way too minimal. I thought I would try to get away with using only two fabric widths, and have a bit of fabric left over for baby dresses. This looked terrible. So I added a third fabric width, got much better results, but baby dresses won’t be happening unless I happen to go back for more fabric. Really that’s ok.
I made the spaghetti straps into adjustable ties, partly because the mental work of figuring out the exact right length seemed too much, and I’m glad I did although the babies also love to pull on and untie them. This way I got to play around with where the whole thing sits, with the side scoop at my waist (as originally drafted) or dropped way low—turns out I mainly like the “way low” version (as seen in these pics), although I probably wouldn’t feel comfortable wearing it with a crop top at work.
It also works backwards! at least in the “dropped” length. So that’s a fun variation. If I were to do it again I would definitely reduce the discrepancy between the height of the front and back panels, so that the front stayed over my boobs even when “dropped”, and as it also makes it harder to get the ties tied nicely.
I had originally cut inseam pockets but completely forgot to install them and was too lazy to unpick the side-seams once I had them all sewn and serged. So I made patch pockets. This turned out well in the end as I had decided I wanted the option of wearing it backwards, so I put them centred over the side-seams like cargo pockets. This wouldn’t’ve worked so well with the inseam pockets I had planned. So sometimes being brain dead and distracted while sewing in five minutes bursts is actually helpful? they stick out a bit as the skirt is gathered but I don’t mind, though I could add a button if I really wanted to. It makes it easy to drop a phone in them, though. And they are plenty big enough for phones, masks, baby snacks, and a plethora of other doodads.

I got a bit of a mixed reaction from the older kids. Tyo (who is the Twenty Year Old, now, by the way) said it was very “90s teacher” and reminded her of Miss Honey from “Matilda.” Which is apparently a good thing? Syo (the seventeen year old) is just confused by it. I might be a little confused myself, as it’s definitely not my “usual style” … not that I actually even know what that is these days, I gotta say. But I think I like it. At the very least it’s comfy and practical and more stylish than leggings and a tank top. Now I kinda want to make a bunch of cropped sweaters…


 I decided for my birthday this year I wanted to have a sewing day, since I now have a (moderately) spacious house and a gigantic dining room table. I invited a few friends (ok, mainly former co-workers), laid out my giant cardboard cutting mat on the dining room table, and brought my main sewing machine and serger up to the kitchen table.
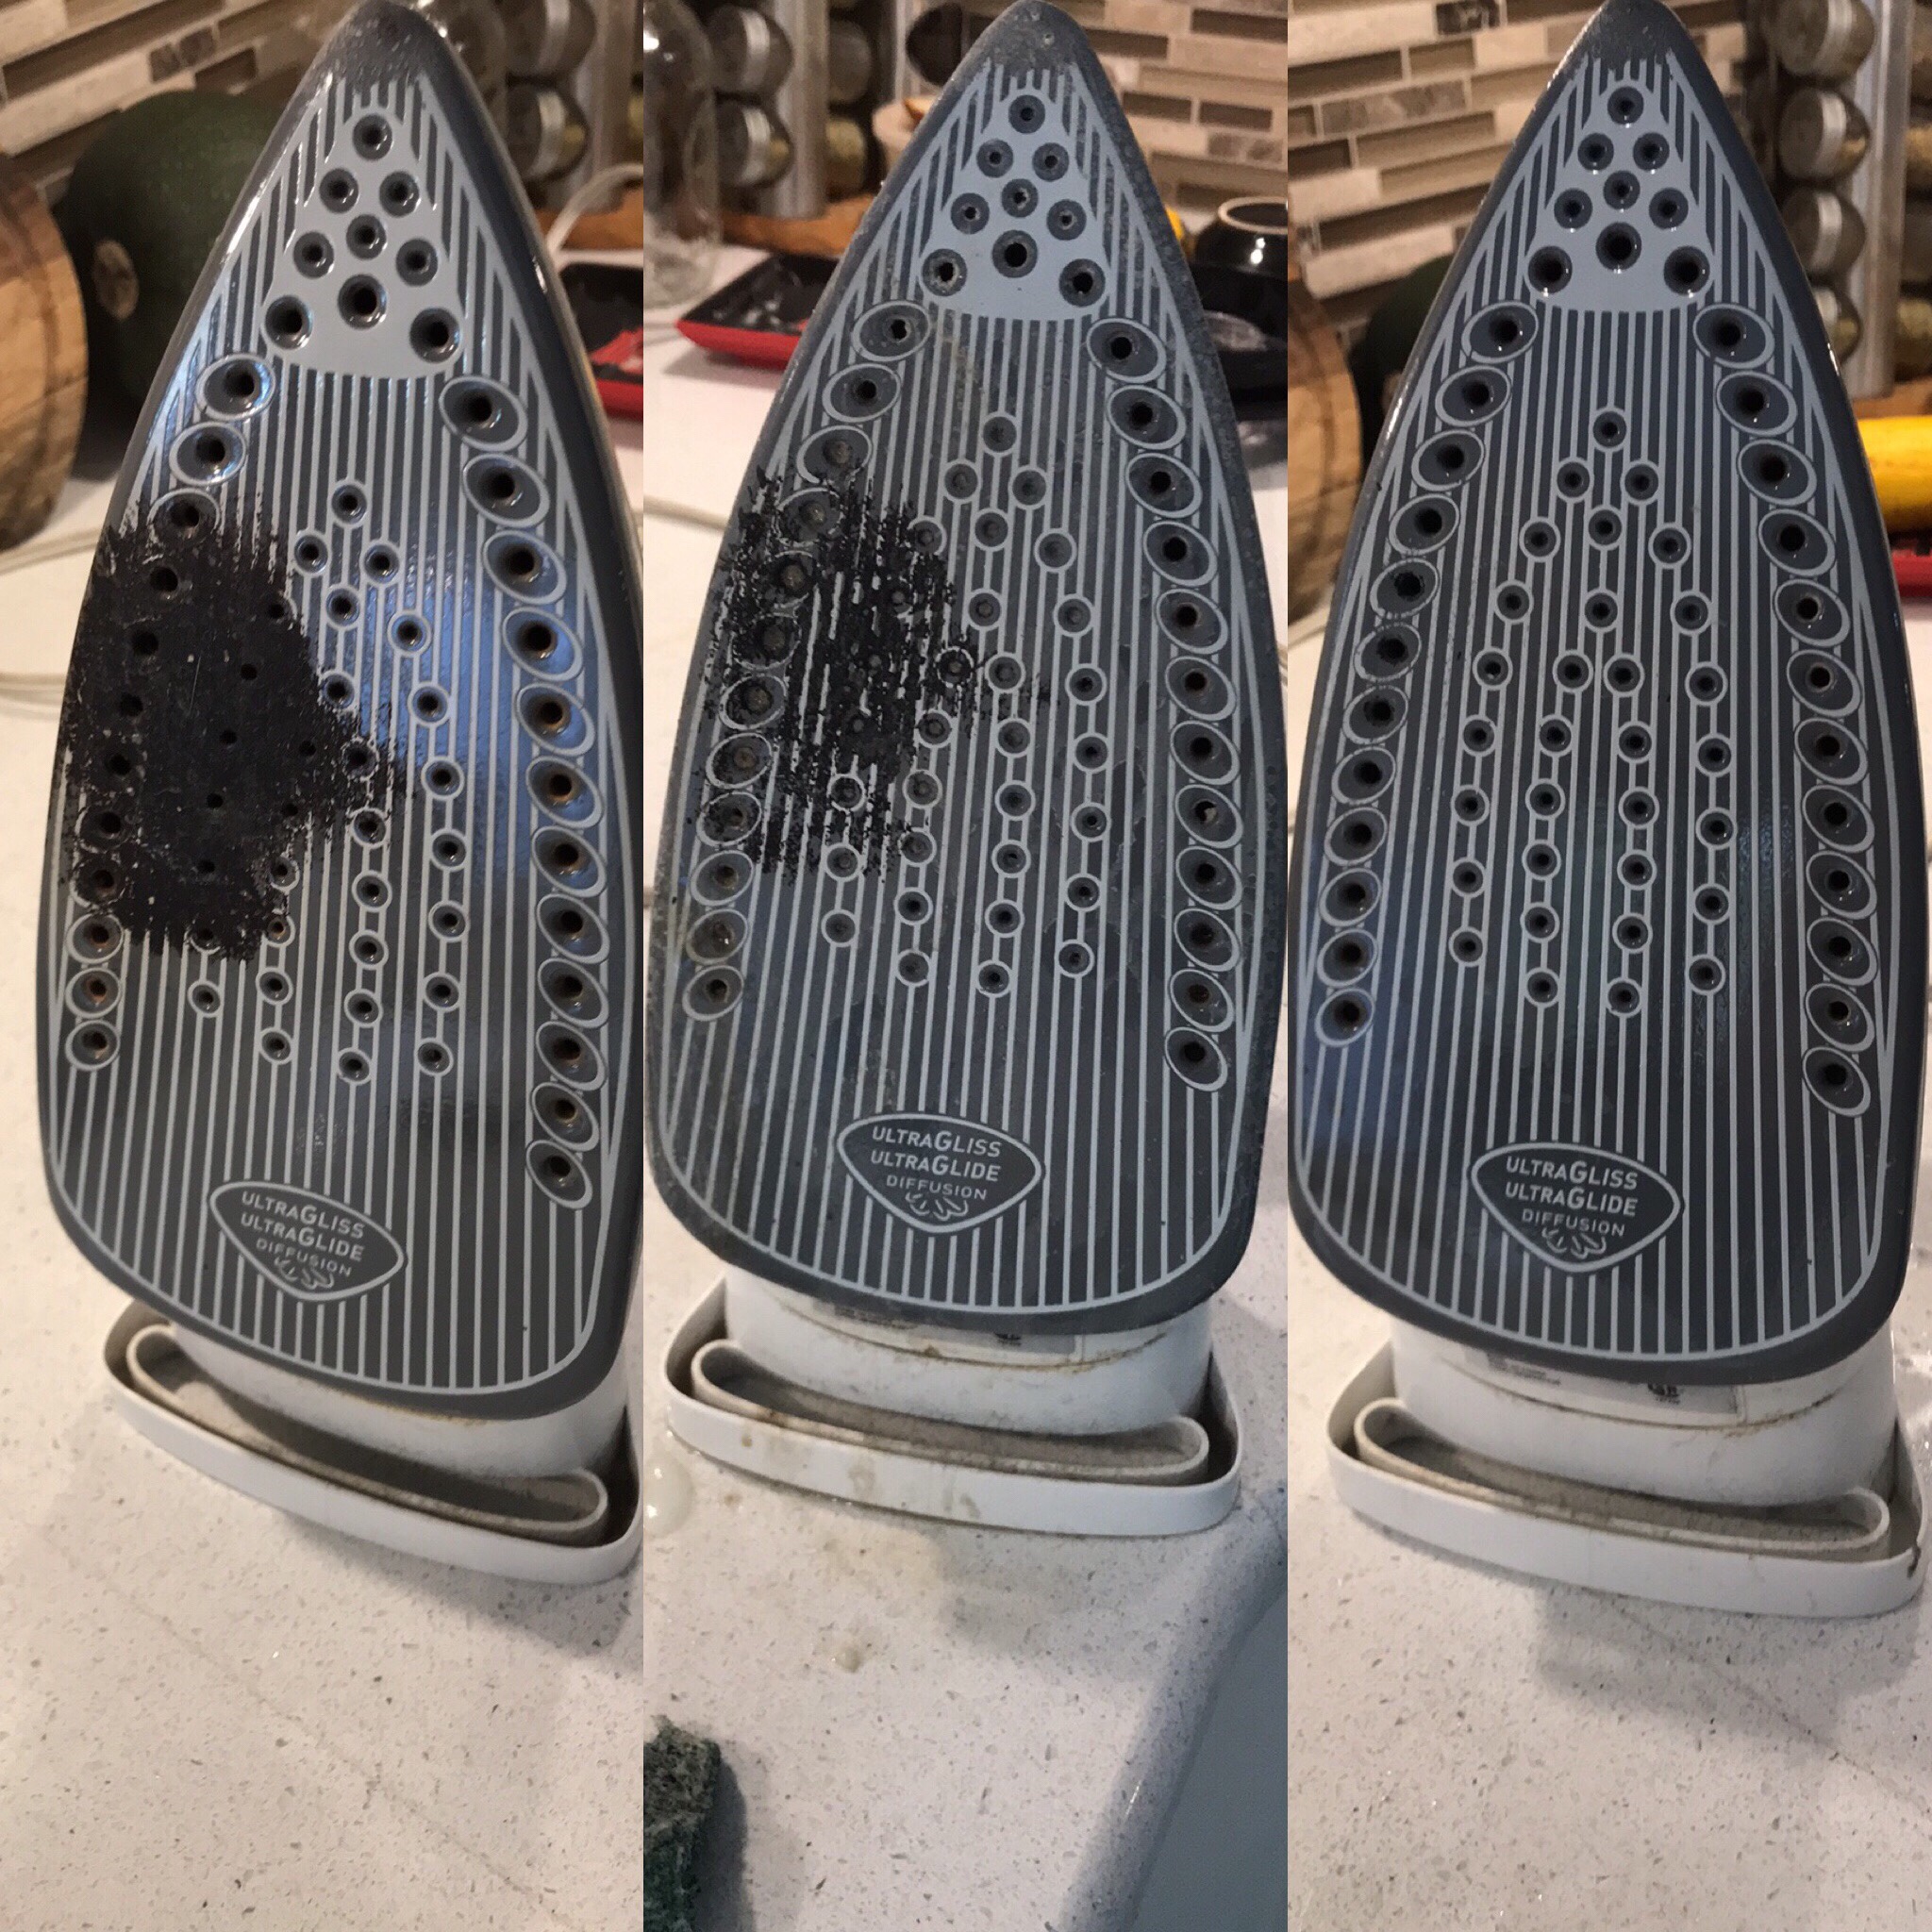 I even cleaned my iron, which was a whole other adventure as I nearly killed it in the process. But the sole plate hasn’t been this clean since a month after I got it, so that’s good. (The process involved vinegar, salt, toothpaste, a little bit of heat, and a LOT of scrubbing. The near-death happened when I was trying to rinse all that guck off. I think water got inside somewhere it shouldn’t’ve. But it seems to be working again now so fingers crossed. )
 My friends brought various projects, mainly handwork (one seam ripping), and I displayed my lack of millennial skills by getting absolutely NO pictures of everyone. So have some dark after shots instead. (Dawn, if you’re reading this, you forgot your fabric!)
 There is one shot of me and Cee at the machines, taken by a friend, where I have a derpy face.
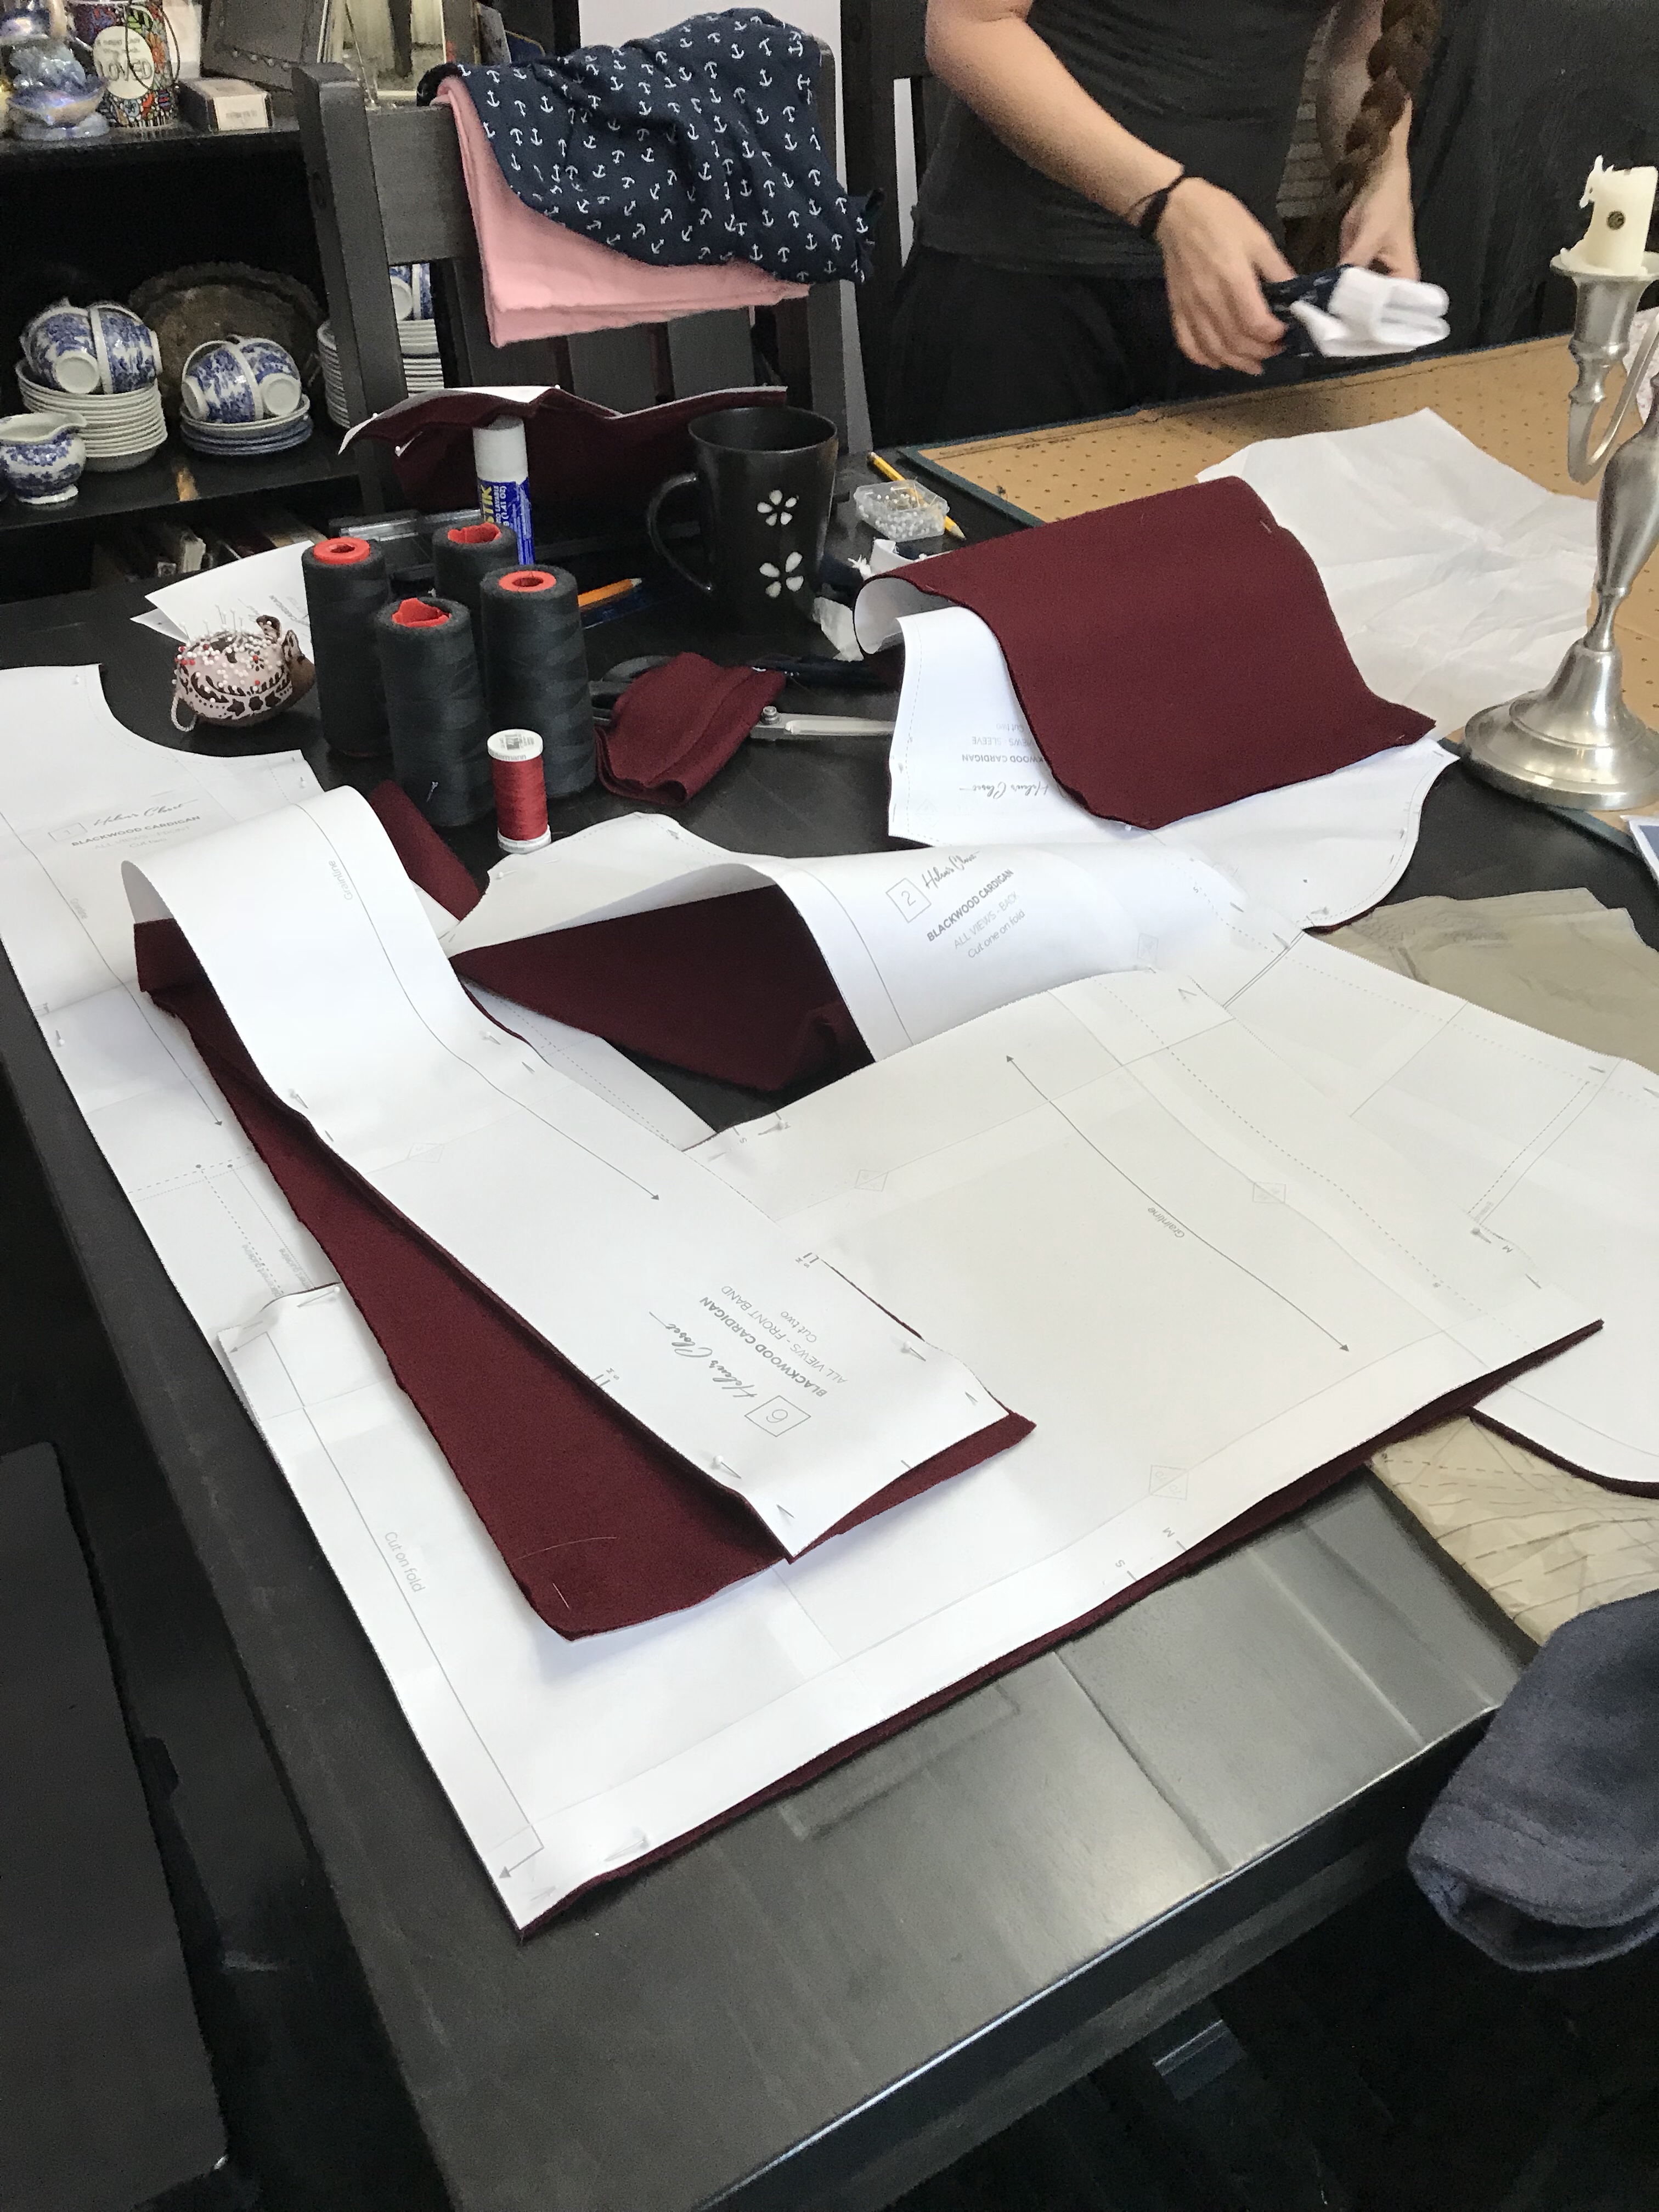 I decided, at long last, to tackle the
  Of course, once you own the pattern, you might as well try it out, right? Save yourself redrafting all those rectangles and figuring out how much shorter to make the neck-band so it doesn’t gape.
 My fabric is technically a mystery jersey from a random group at Fabricland last spring. I got it because I was pretty convinced it was wool or a wool blend, and now having ironed it I’m pretty sure I’m correct. (I love the sheepy smell of wool when you steam it.) I thought it would be a good choice for a cardigan since it won’t need to be laundered as much. I steam-shrunk in my dryer, which is my preferred method of pre-treating wool although I confess I can’t completely recall how much subsequent laundering any of those things have had.
 Anyway, I’m pretty thrilled with my result. I love the slim fit. I love the longer length. (I may have to make a floor-length version) I love the pockets, although I’m not totally in love with my application of them—but that’s a separate issue.
 I do still wish it closed. I might add some kind of a loop and button, like the
  But especially, I really, really, really like sewing with friends.
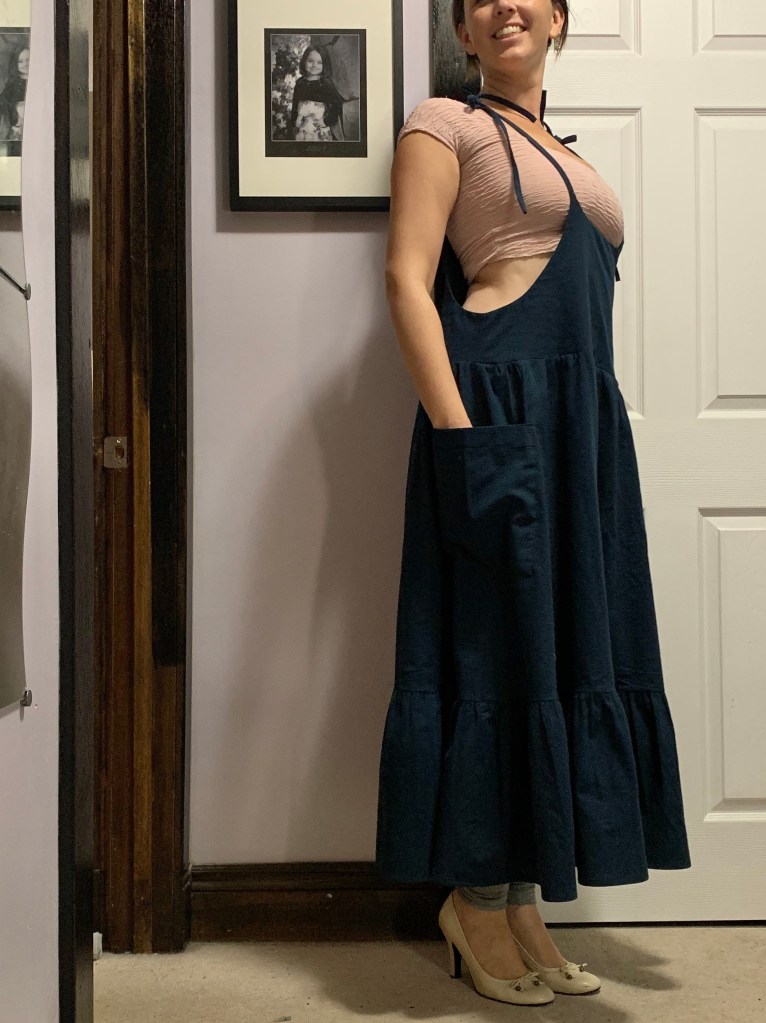
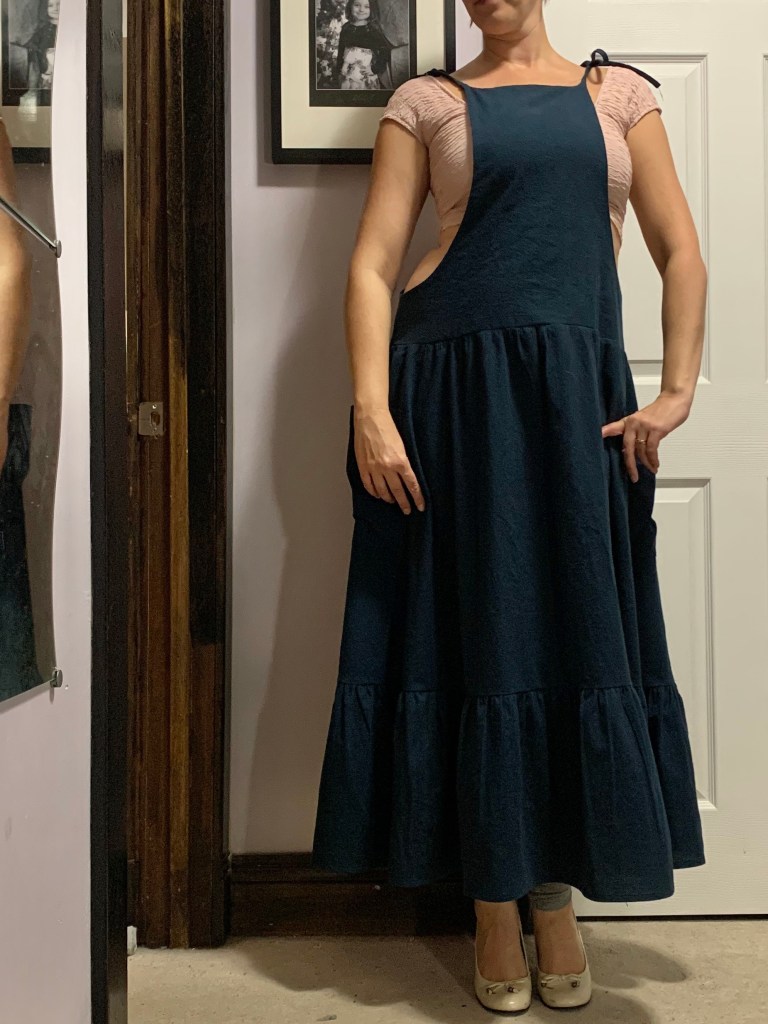
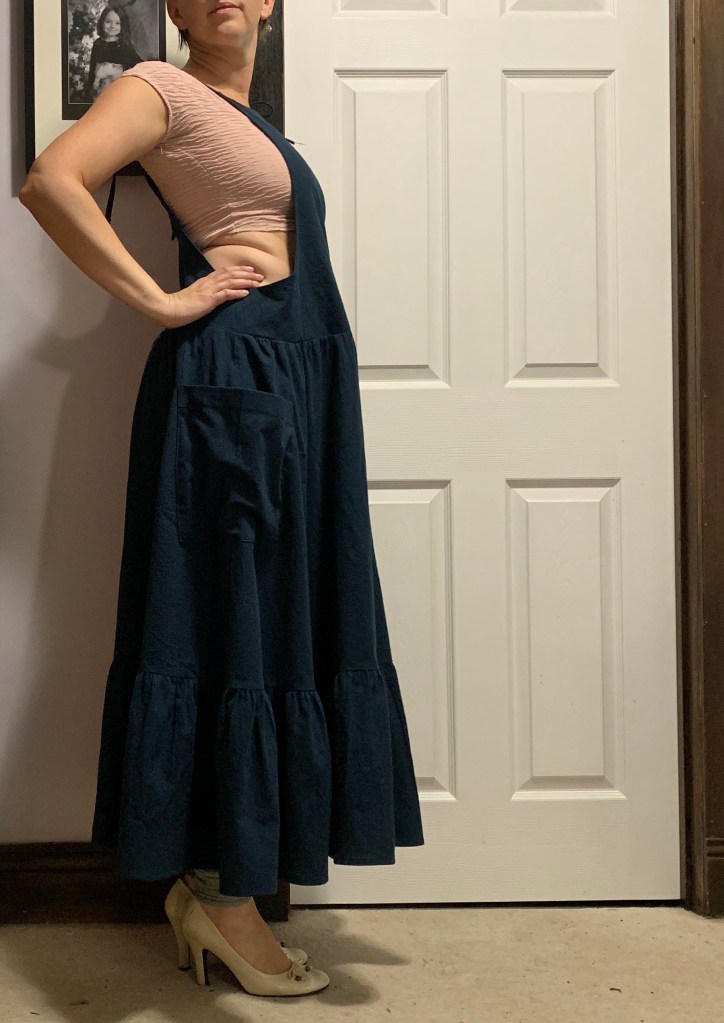
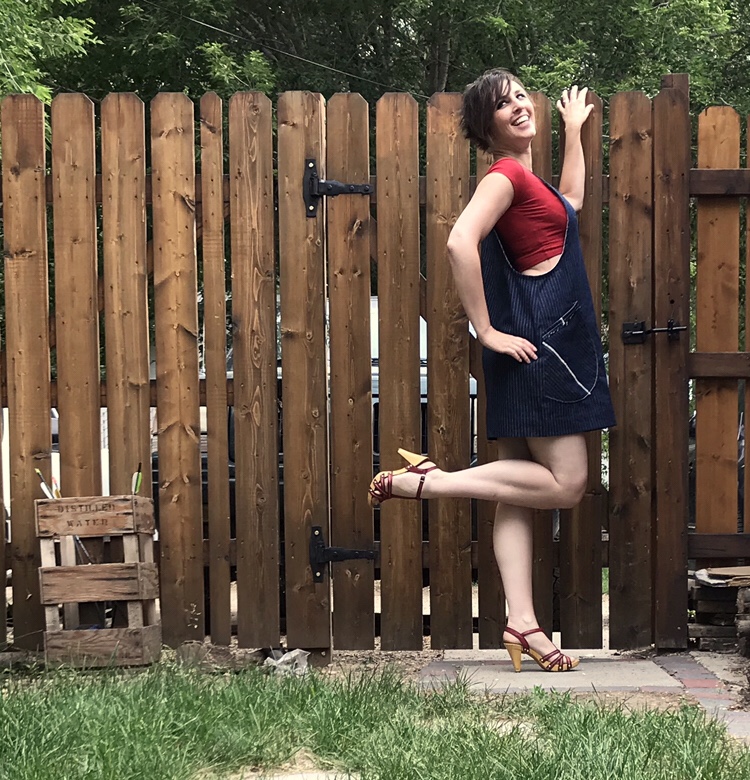 I’ve been vacillating about the pinafore/overall trend that has been bubbling around the sewcialsphere for awhile. I think they’re adorable, but I couldn’t really see myself in them. The last time I wore overalls (the only time I’ve worn them post-adolescence) was when I was pregnant with Tyo, and then only because a friend gave me some giant pairs (since I had no money for maternity clothes) and I felt able to get away with wearing my beloved crop-tops with them. In hindsight it was a pretty cute look, though, and I kinda wish I had pictures but that was long pre-selfie.
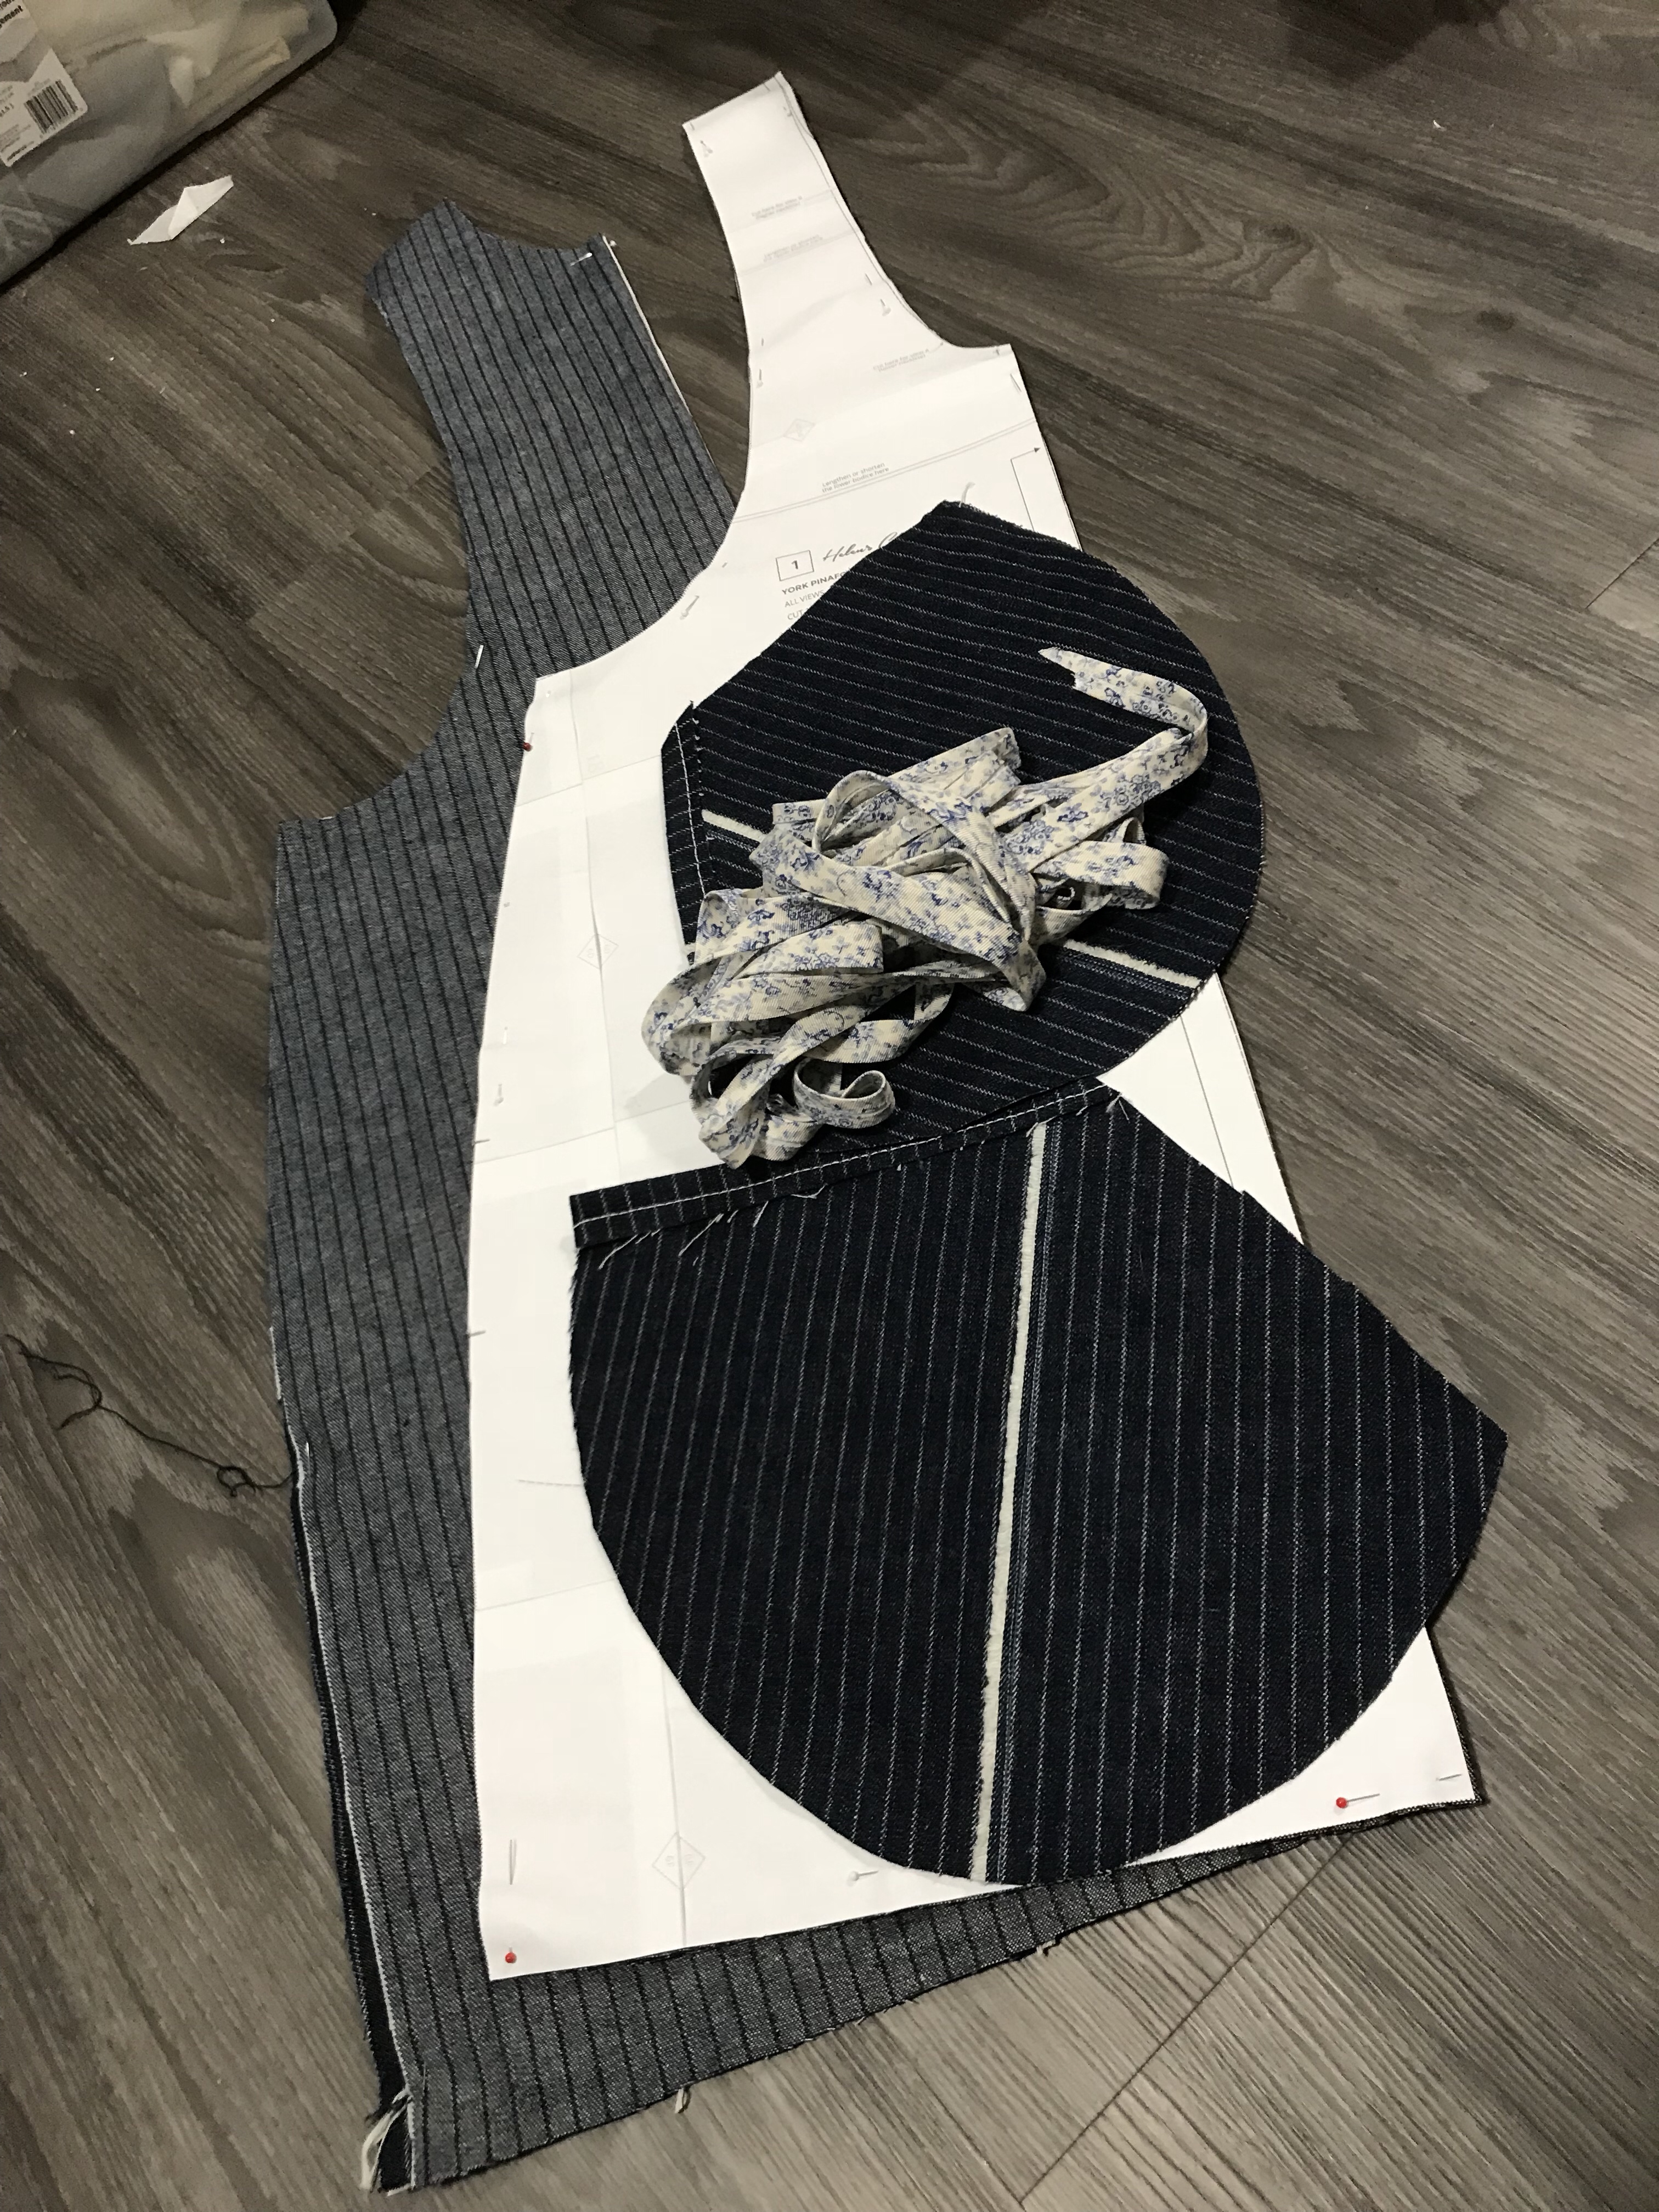 The pattern is kinda stupidly simple, front, back, pockets. No darts, fastenings or anything.
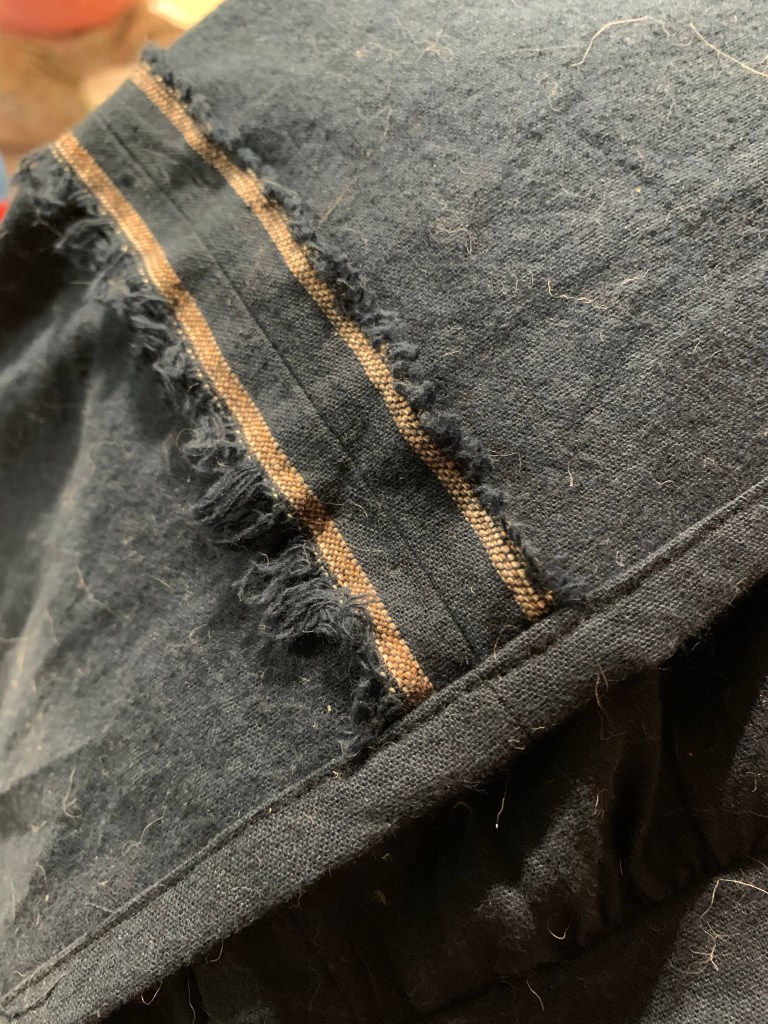
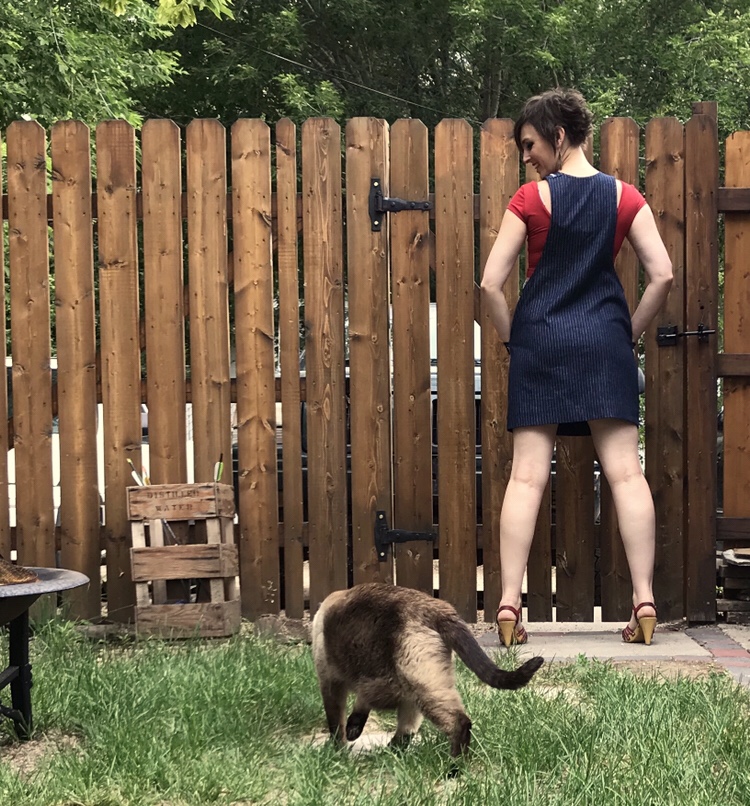 I spent a few weeks dithering over my fabric choice. I liked the idea of denim, but I didn’t really want a stretch denim and I wanted something not completely plain. Then I remembered I still had some pinstriped denim in deep, deep stash, left over from my
 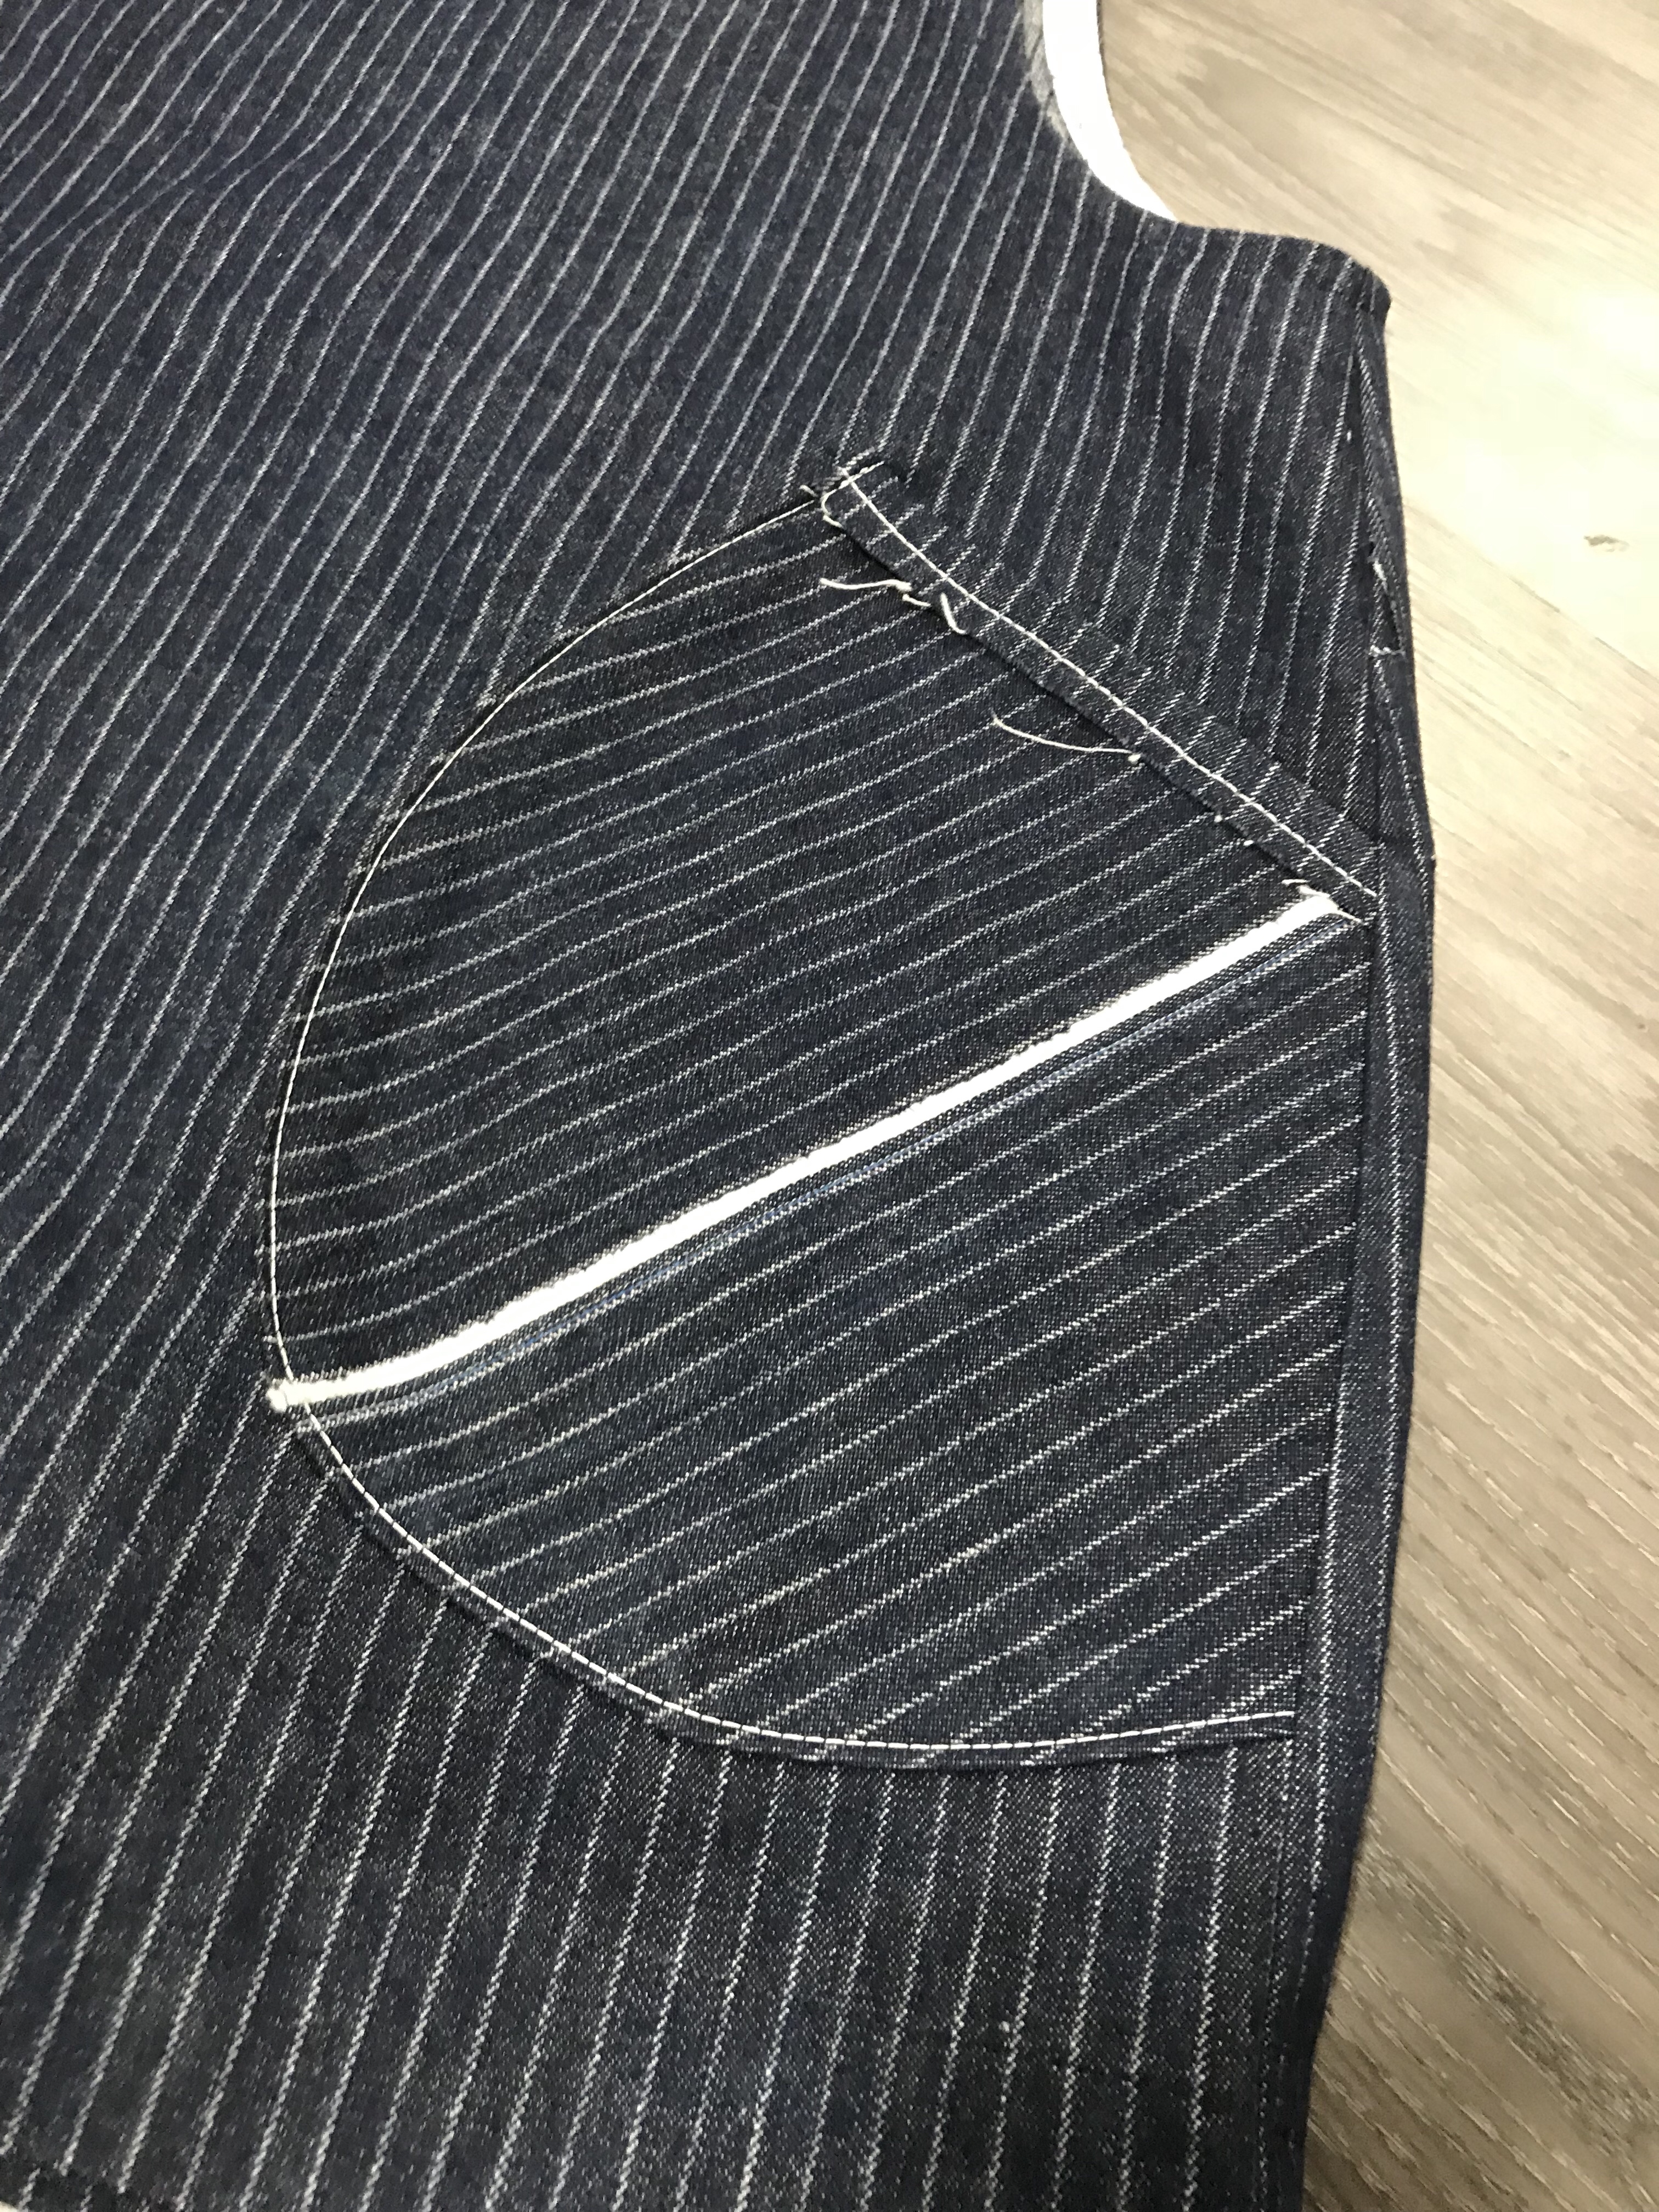 I didn’t have QUITE enough fabric, technically, since my remnant had some odd bits trimmed out of it, but I was determined, so I made it work by featuring some raw lapped edge piecing. Hopefully it looks cool and intentional and doesn’t completely fray away. And of course I had to cut the pockets on the bias, which necessitated some more piecing. I finished the pocket edge with a band of denim on the straight grain, and of course managed to sew one of them onto the part of the pocket that goes into the side-seam, not the actual top. Because I’m that good.
 You can see the pockets have some pretty prominent topstitching, which is cute but not reflected in the stitching on the bias tape finish. That was mostly fear that my first pass at stitching down the tape was going to be all over the place, but now I’m not sure I want more visible topstitching. It’s kinda nice and sleek how it is?
 I made my own tape. Actually, this is tape I made for
 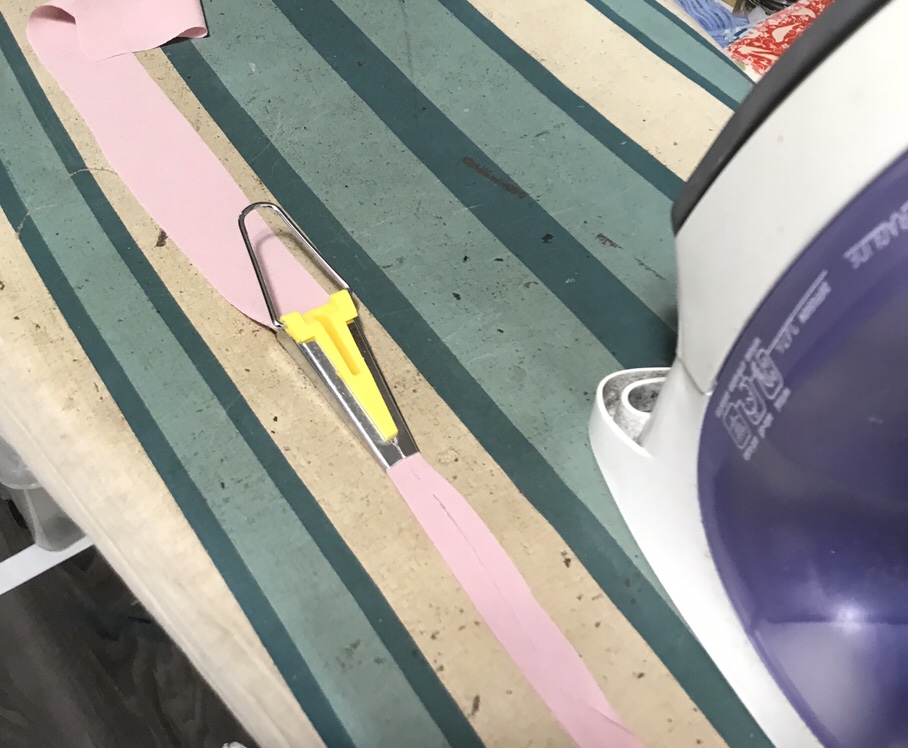 I guess here’s my first issue. I make continuous bias tape, because it’s efficient, but I tend to wing it on the cutting part so my finished tape is often pretty uneven. That’s not a big issue for most of the things I use it for—Hong Kong seam bindings, corset edges, finishing the edge of the inside waistband of jeans—but it gives the bias tape folder doohickey fits. For this particular tape, I had actually marked and cut quite a bit more carefully than other times, and the width was pretty good for my 1/2″ folder. The second problem was that this fabric is a lightweight twill. Still lighter than my denim, so this was a good project for using it, but heavy enough that getting the seams through the folder took a bit of finessing.
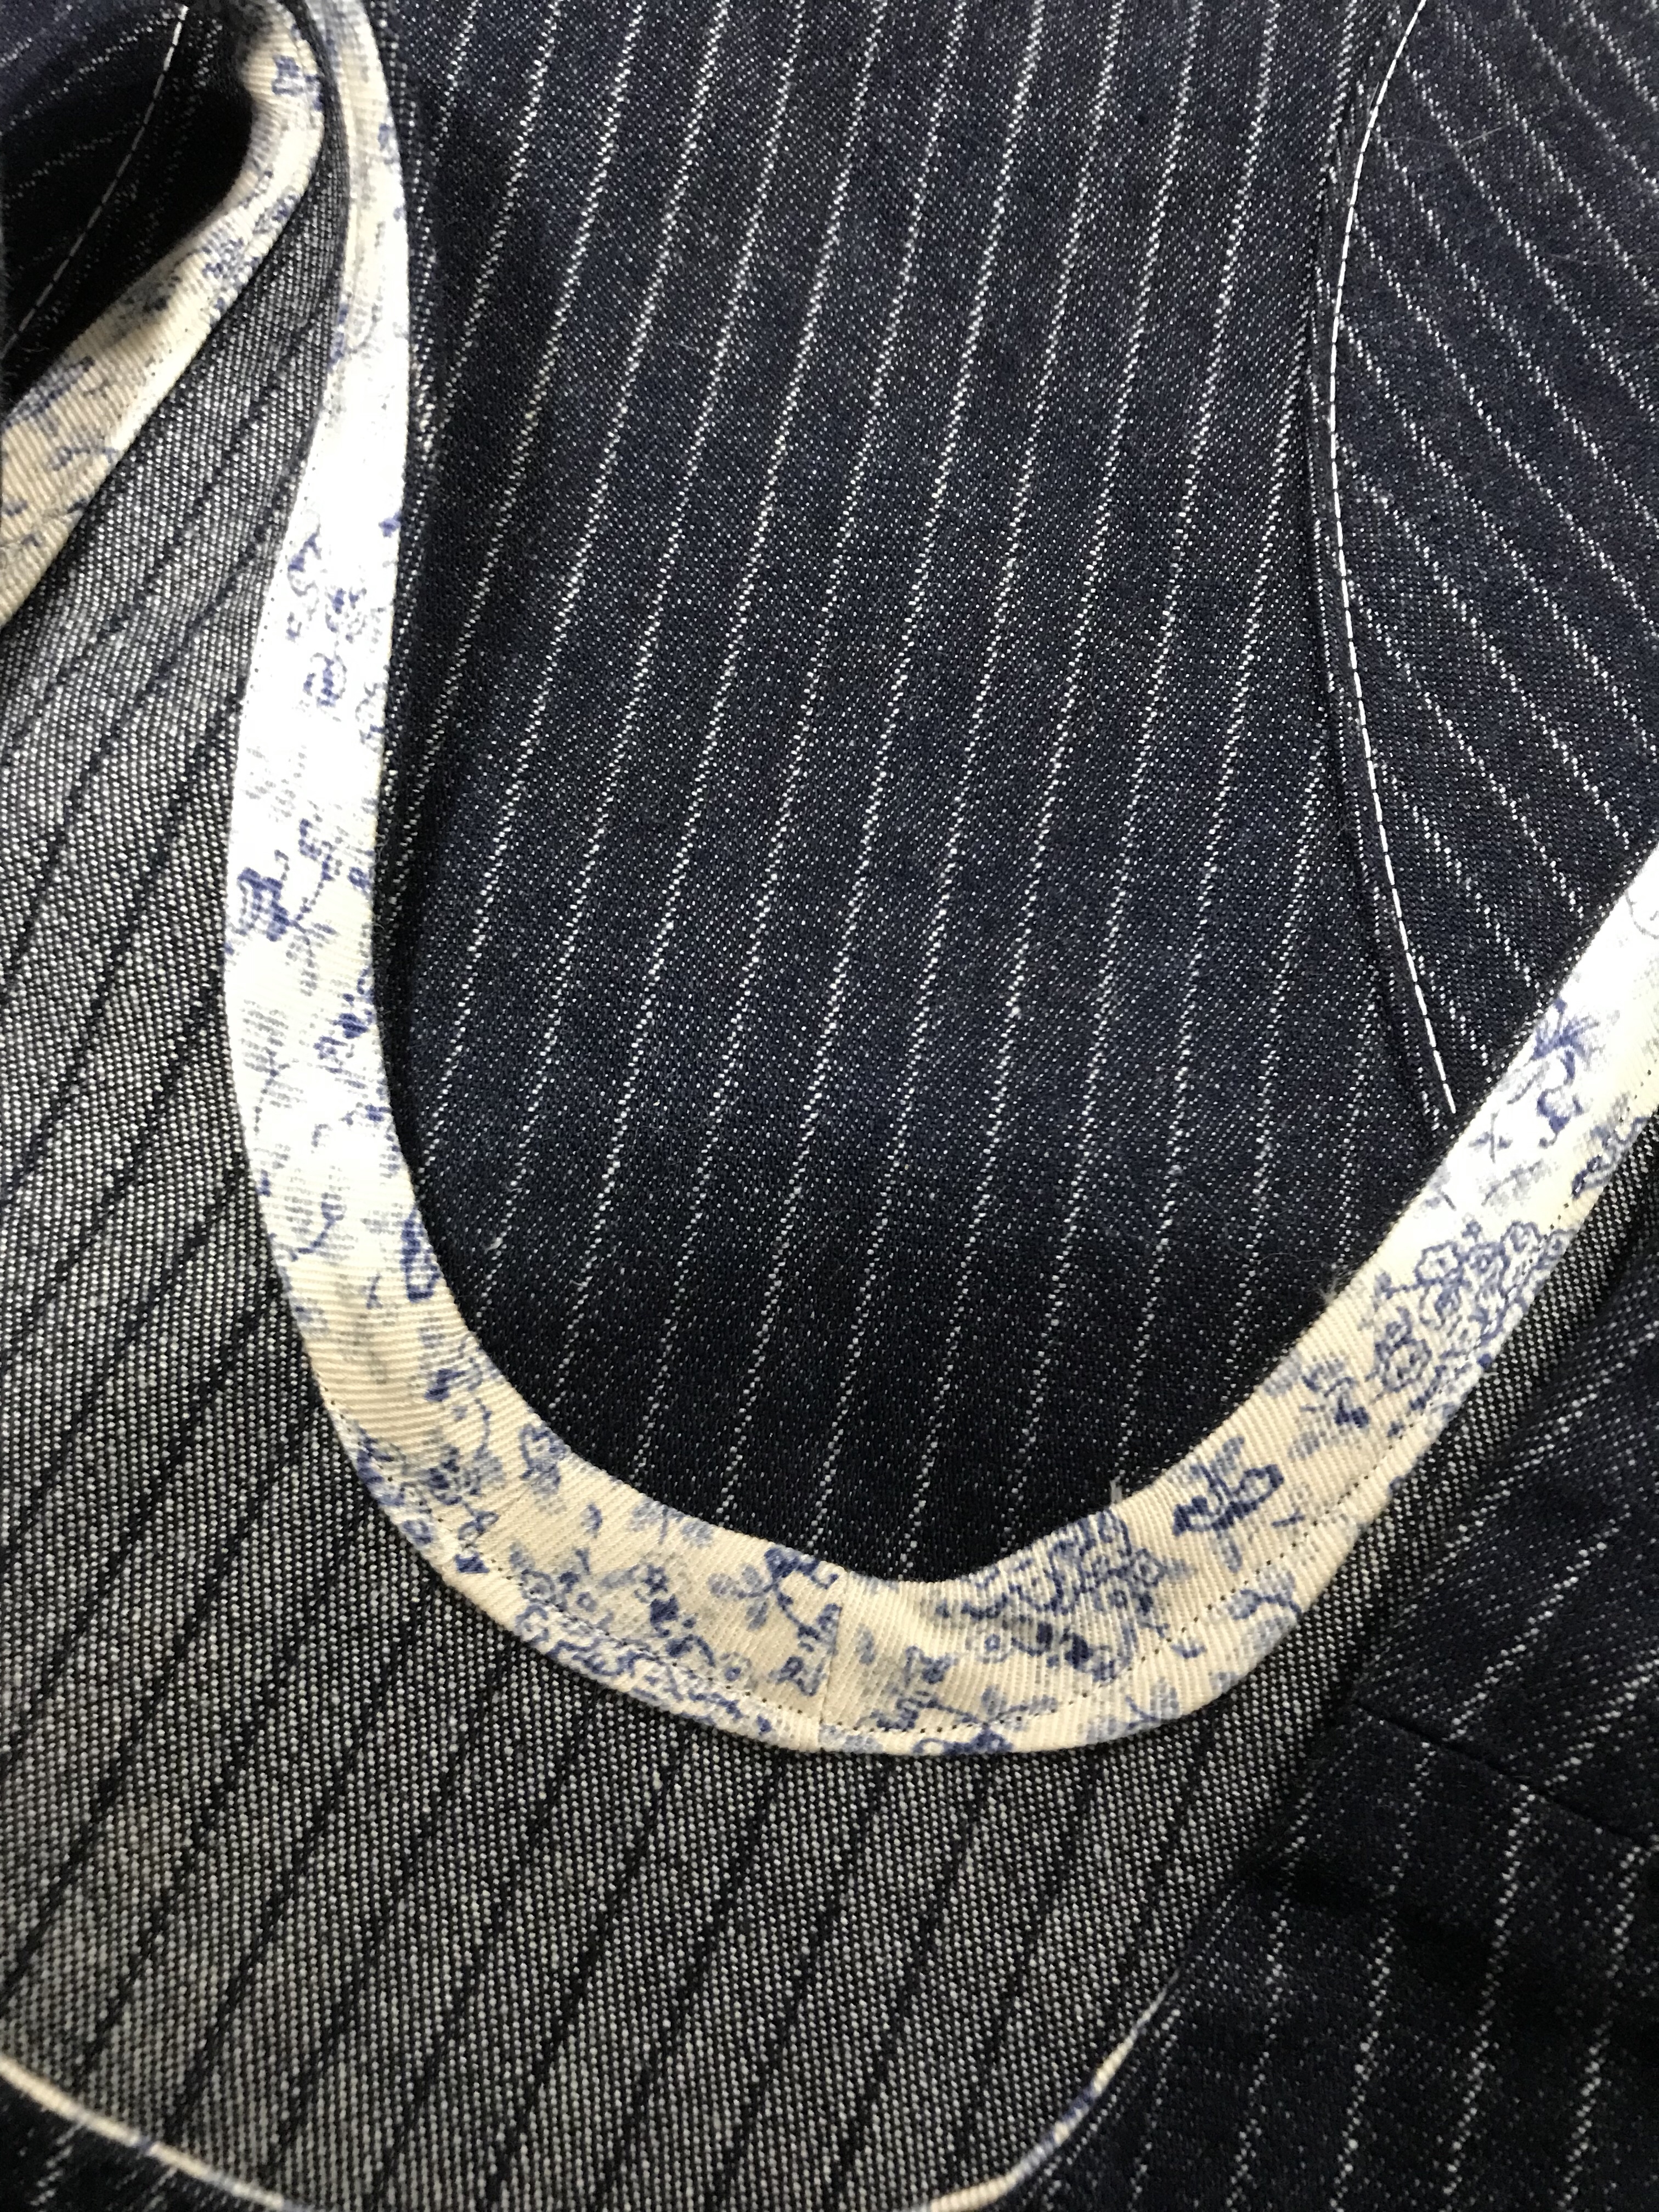 Then there was the application. Before applying your bias tape to a curved seam like these ones, you should really press it into a curve. The curve doesn’t have to match your finished one, but it gets you into the right ballpark, shrinking one edge and stretching the other. But for some reason I thought I could skip this step. I could not. If you look real close in the pic up above you can see two seams where I had to add in 1″ of tape at the center front because I didn’t have enough tape there to stretch the outer edge round the curve. I’m not even going to complain about the not so even folding to the right. Once I curved the bias tape, the rest of the finishing was much less harrowing.
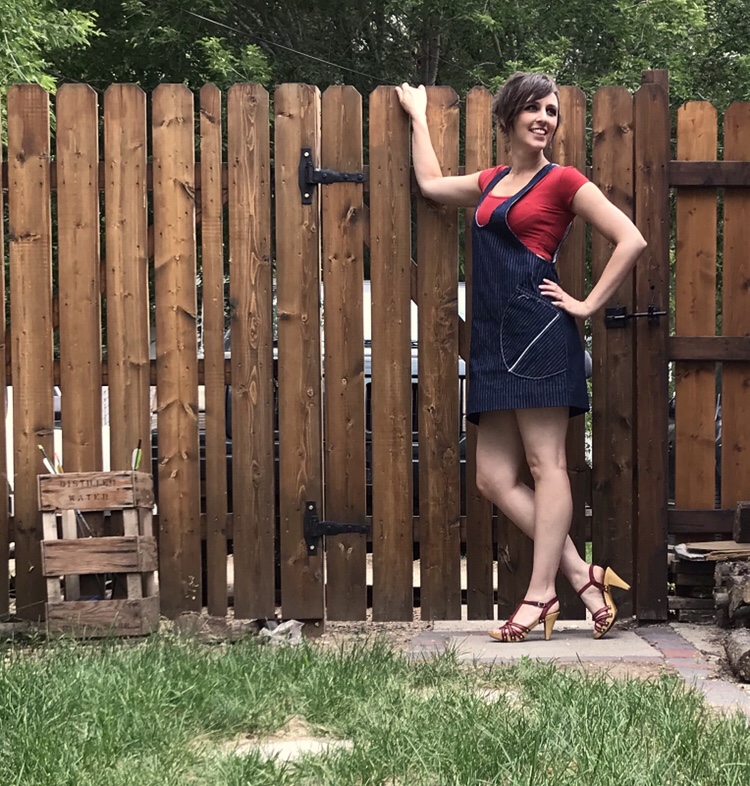 Helen spends quite a bit of time in the instructions on fit (aimed at beginners) and I did absolutely none of it. Other than combining the pockets from one view and the length from the other, I made no changes at all to the pattern—I even did the specified 2″ hem. (Actually, on re-reading, the hem should’ve been 2″ total, 1/2″ folded over and then 1.5″… so mine is 1/2″ shorter than intended. And I’m quite satisfied, though a version with a deeper side scoop might be nice.
 It feels fun but bordering on cartoony—I’m very curious if it’ll be something I reach for or something I only pull out for novelty value. On the other hand if it lets me wear my crop tops more, that’s a big reason to wear it because otherwise why do I even have them? So I guess I’m not certain, but hopeful.
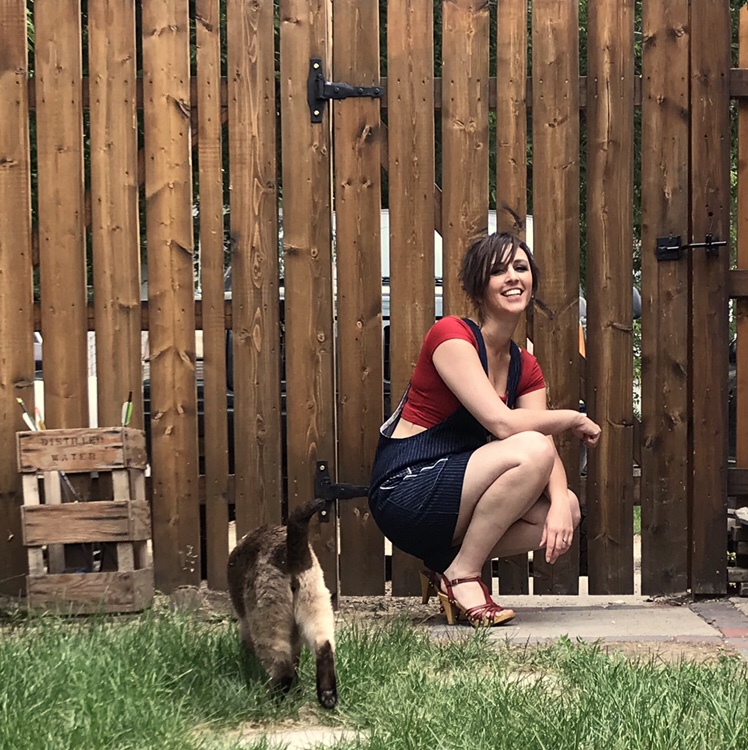 And on that note, let’s finish with some cat butt!
 Leggings are the ultimate quick make. They’re one of the few things faster to sew than to shop for. And while they’re easy and cheap to buy, I almost never get the particular fit I want in bought versions—the length is rarely right and the rise never is.
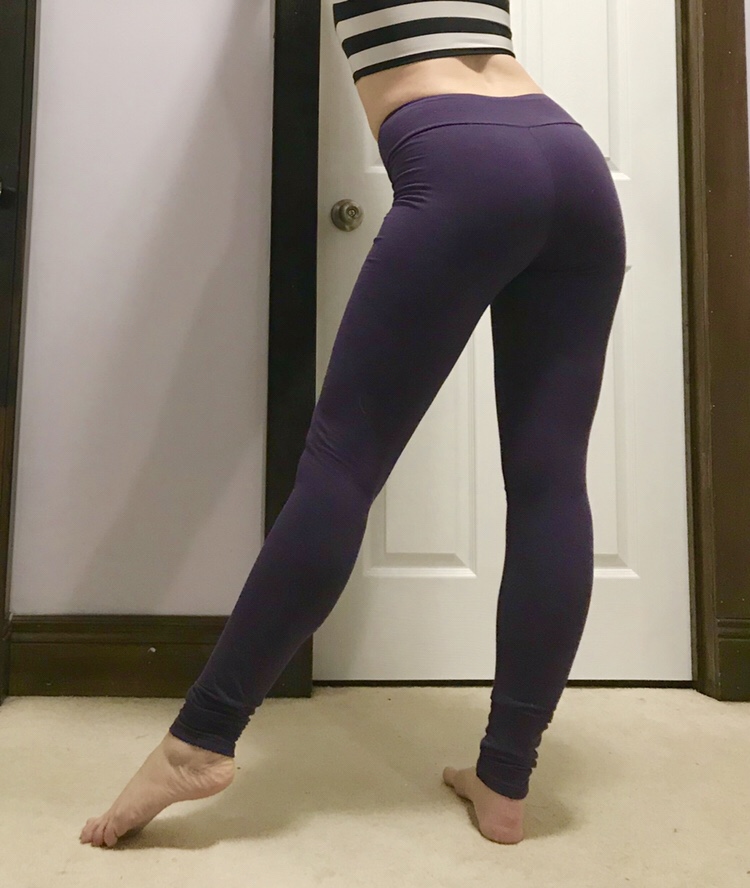 So why branch out? Well, both Espresso and Jalie 2920 are solid basic leggings patterns, a single pattern piece. A nice feature a lot of my kids’ more substantial storebought leggings have is a wide top band. I’ve been
 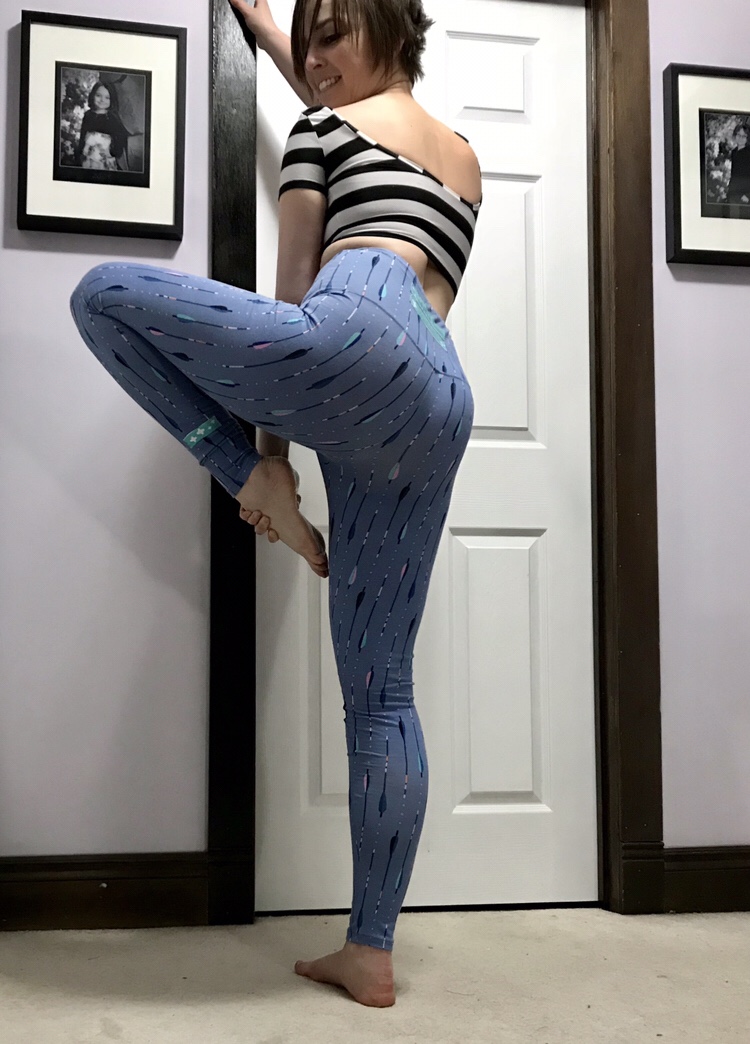 Obviously any of these features you could hack on your own, but we use patterns to make things easier, and easy patterns to make things effortless. When I got offered the opportunity to teach a leggings class at my local quilt shop,
 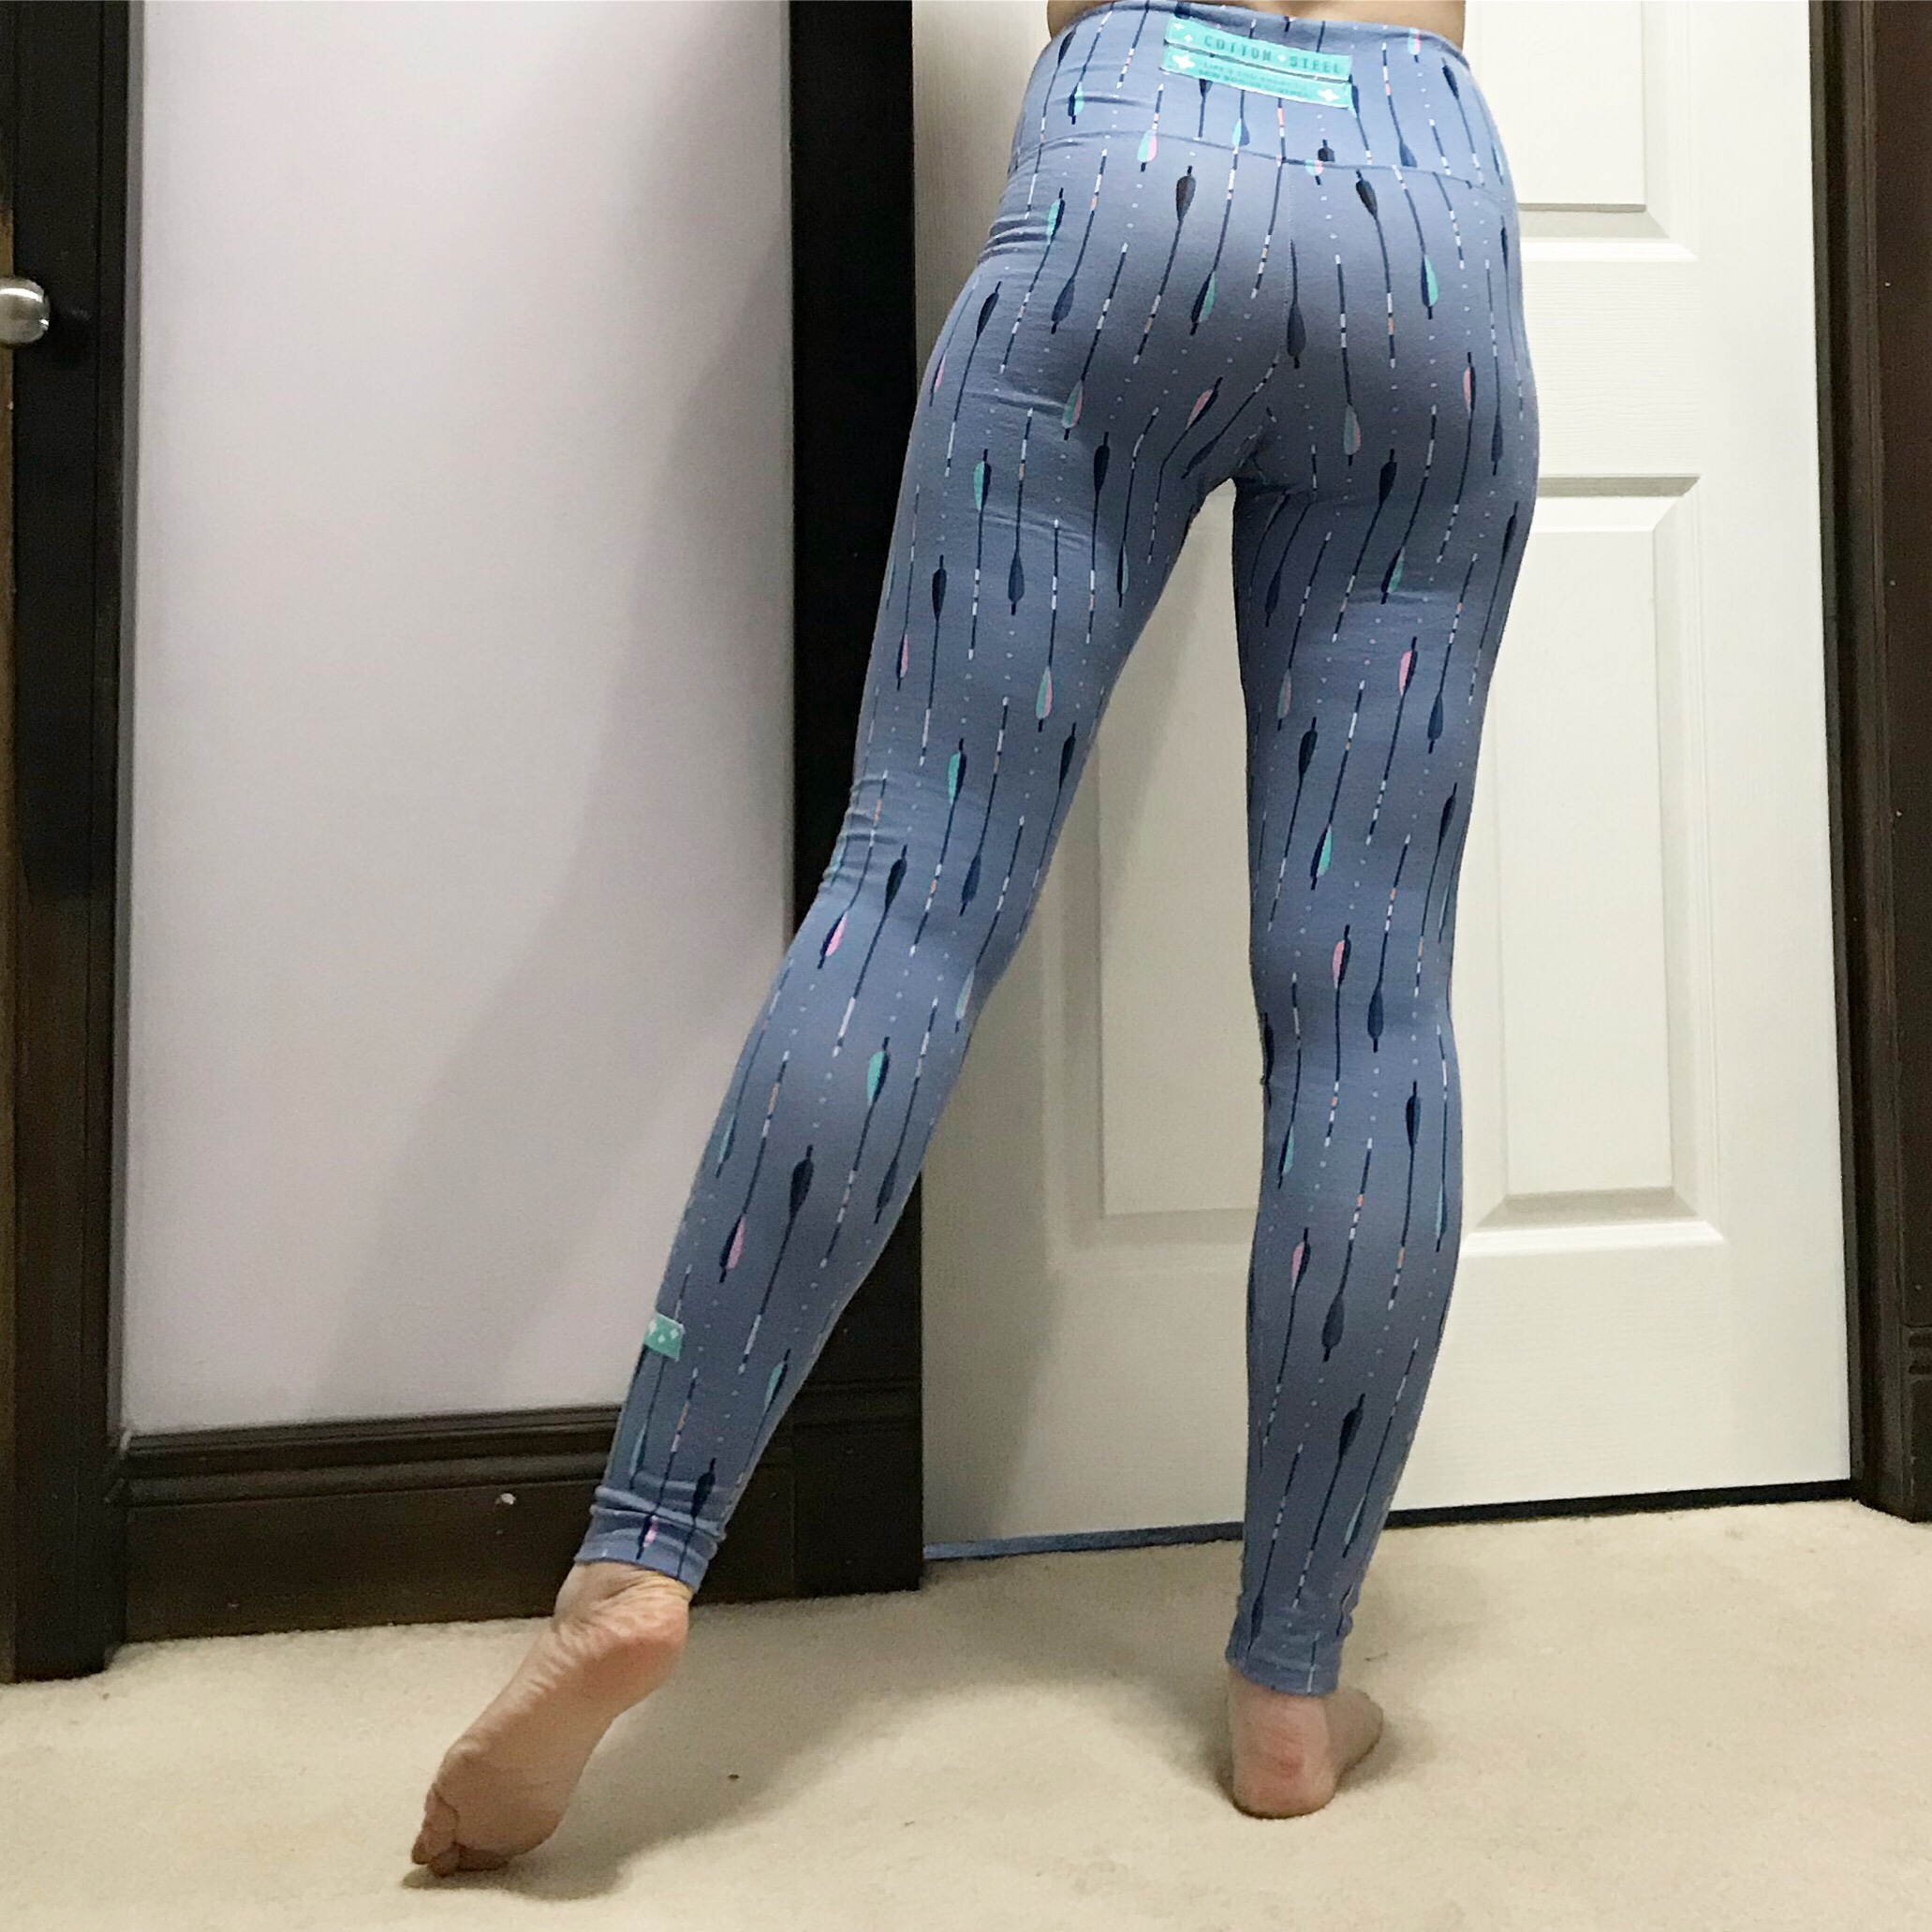 We’ll see how that works out, but at the very least I got the pattern and a chance to try out some of the cute knits they’re stocking from Cotton and Steel, which is a lot more swanky than I’m likely to find at Fabricland.
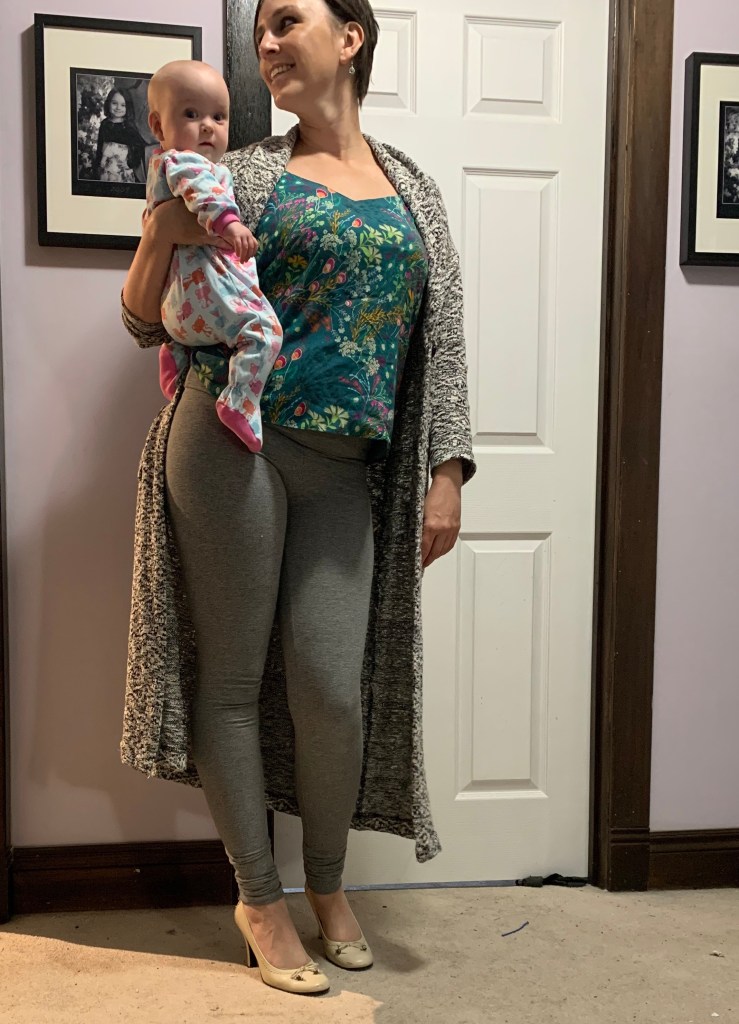
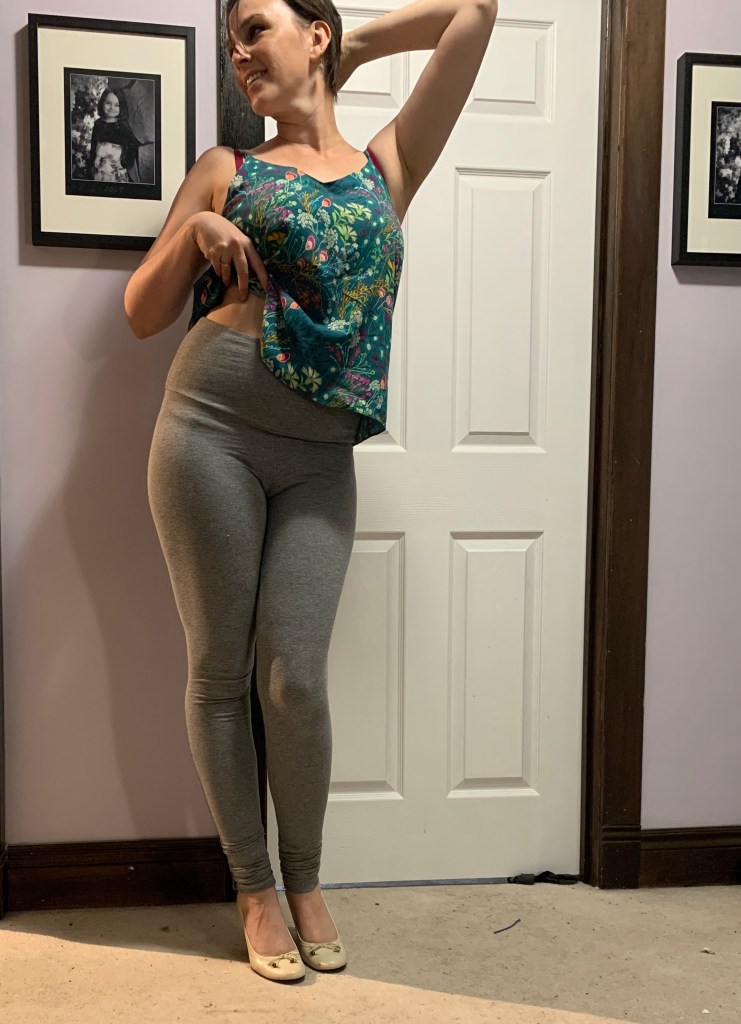
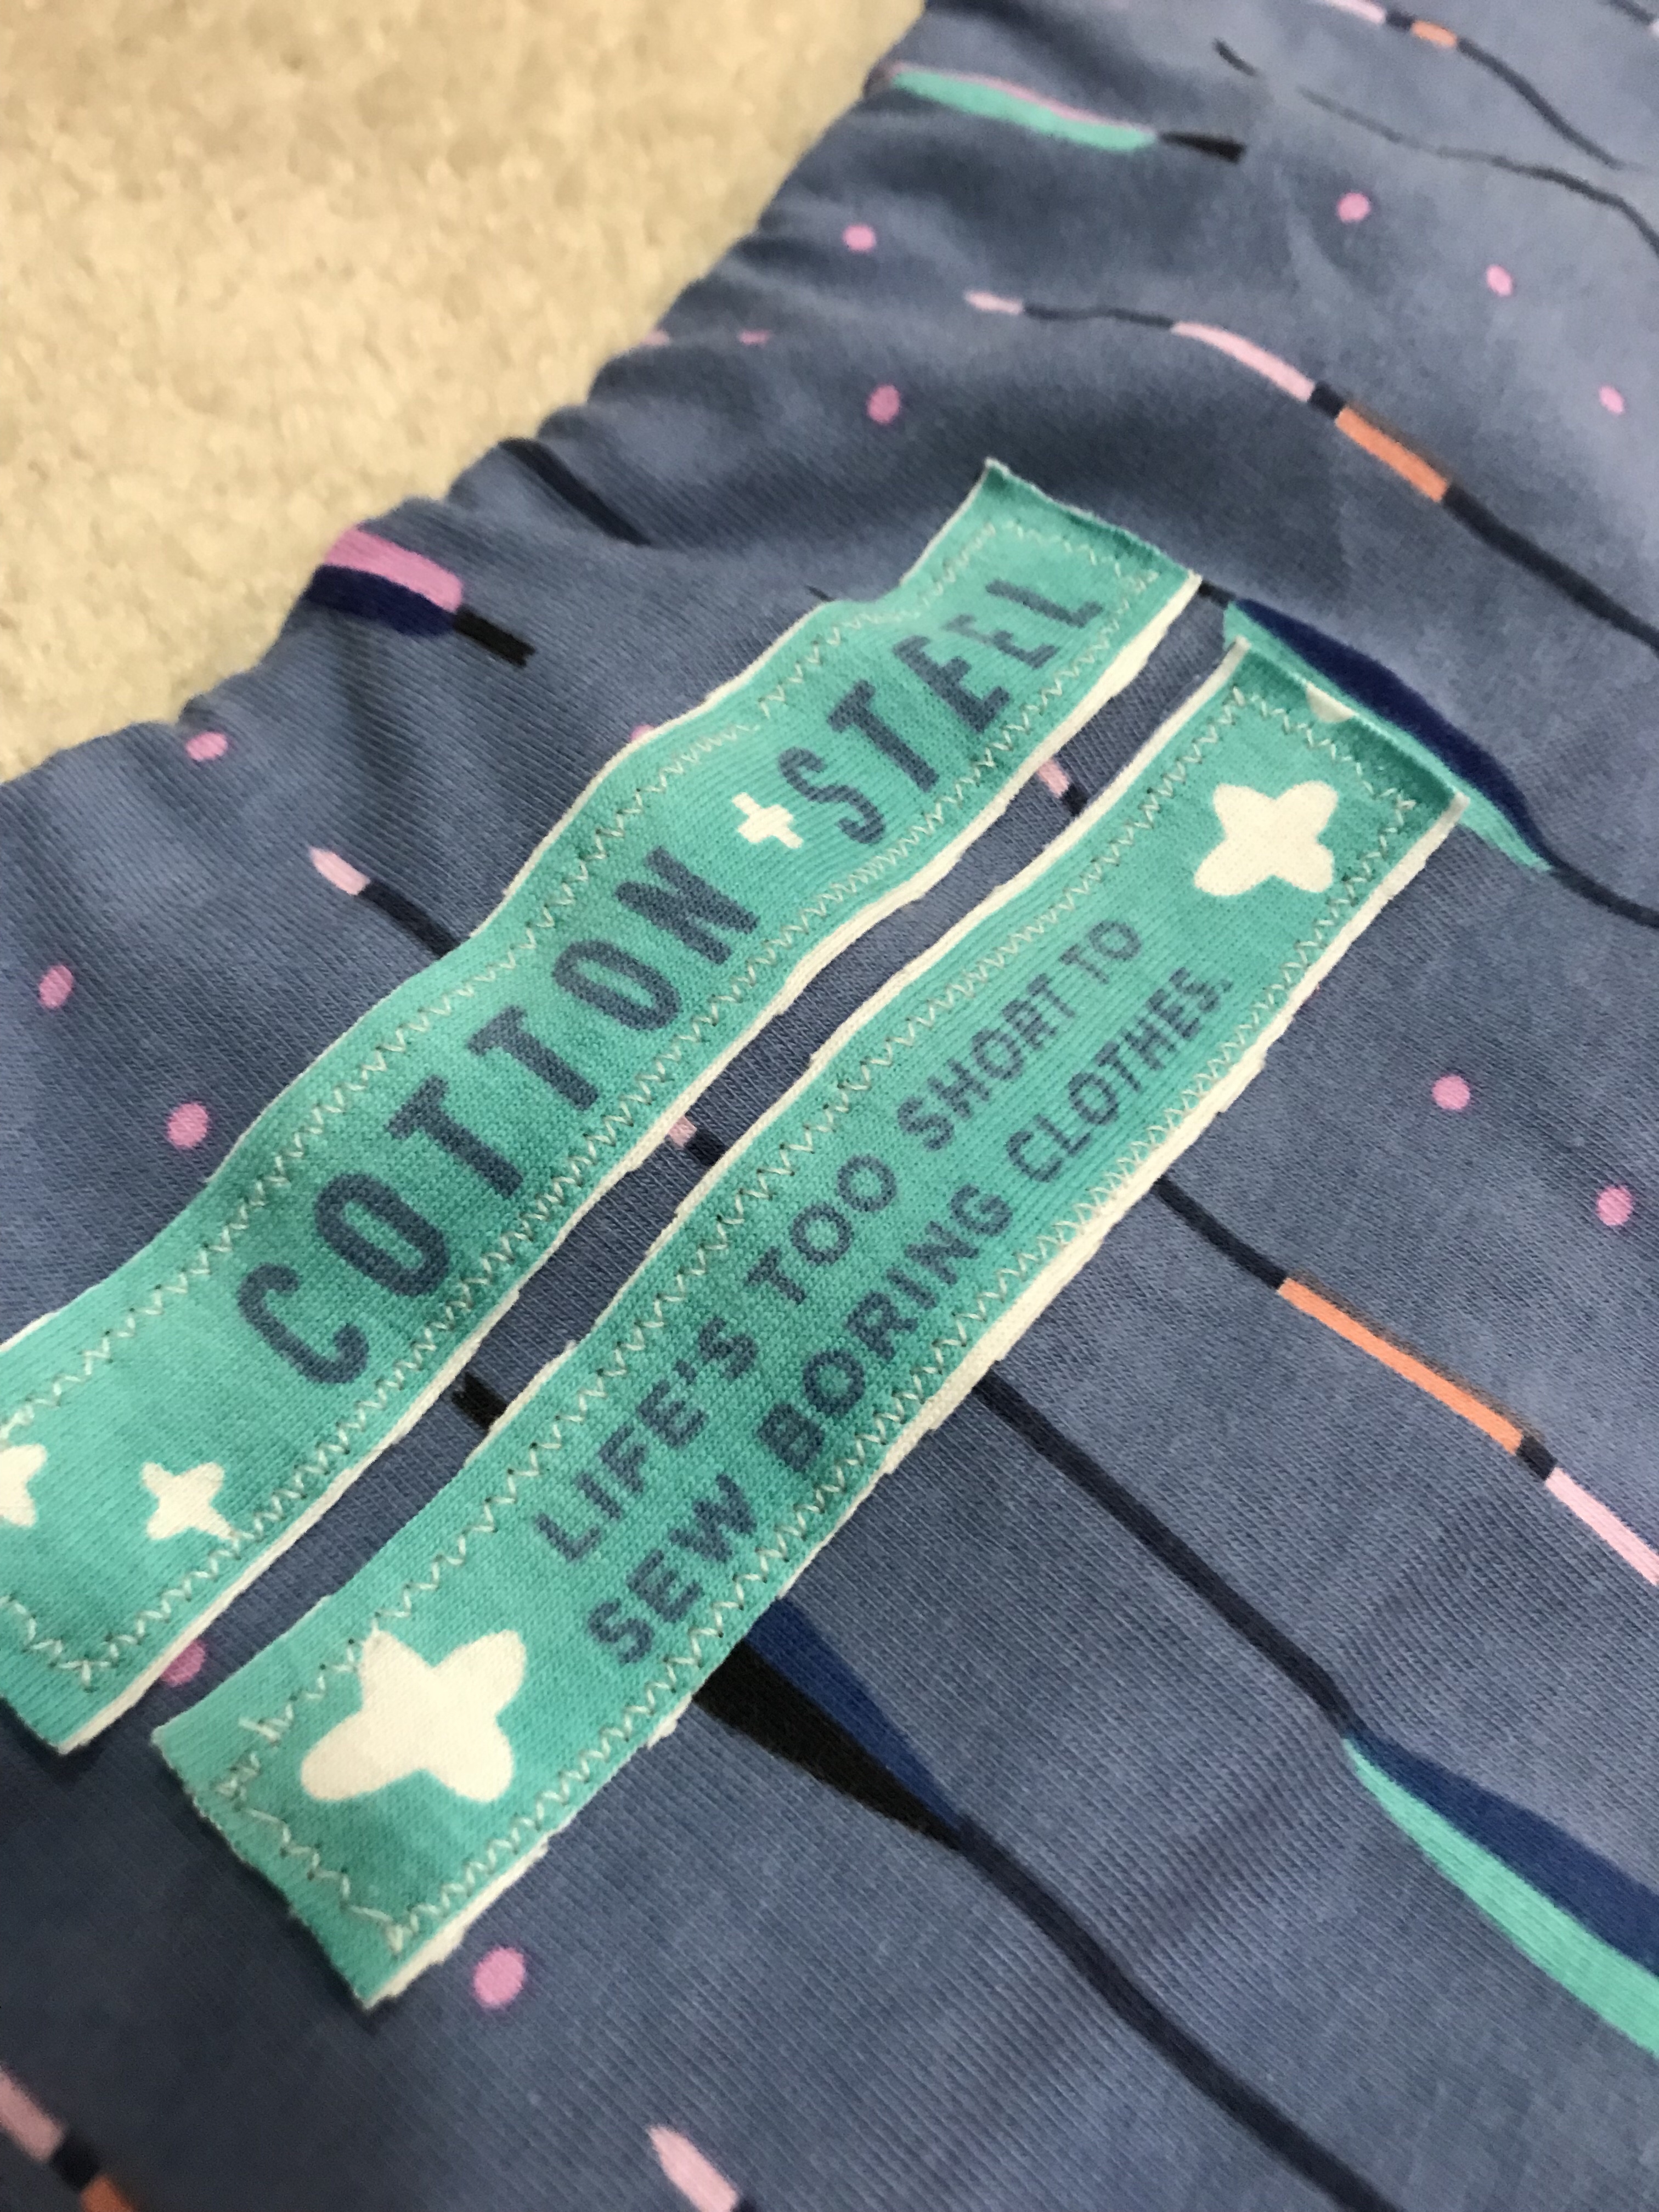 The Cotton and Steel jersey is a bit thin for what I like in leggings, and perhaps not quite as stretchy as the Avery calls for, but I wanted to give it a shot, even though in the grand scheme of things it’s probably better suited for a T shirt. I picked the arrow print mainly because the colour didn’t fade out as much under stretch as some of the other options. Also it’s super cute. And it had the most adorable slogan in the selvedge I just had to appliqué it on the back of the waistband as a label.
 I also used a wee bit of those cute selvedge stars on one ankle, too. I cut the longer length, which is meant to have ankle scrunchies. No ankle scrunchies on me, but they are long enough.
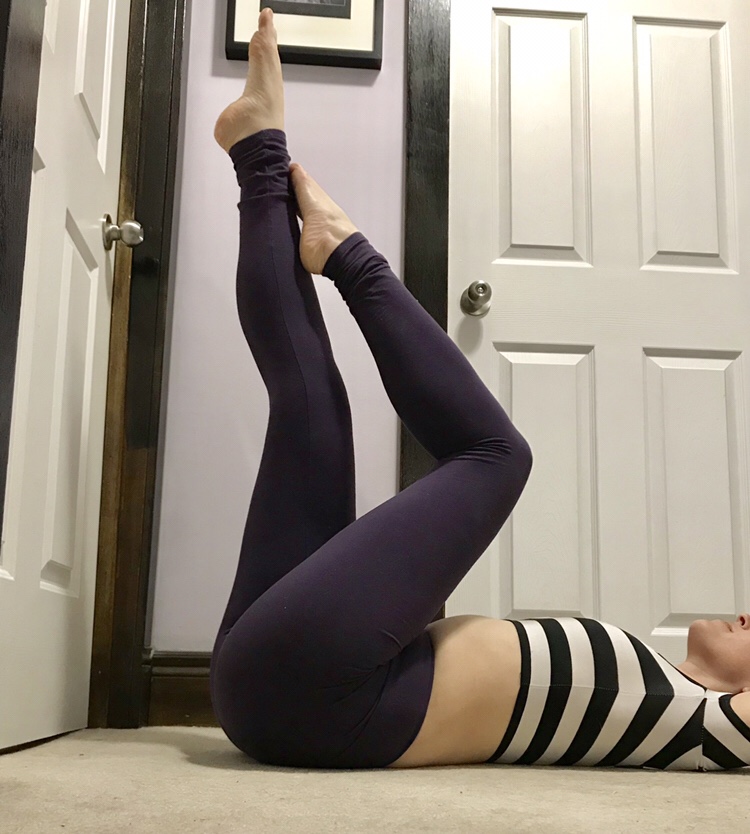 For my second pair I added 3″ in length. Perfect ankle scrunchies!
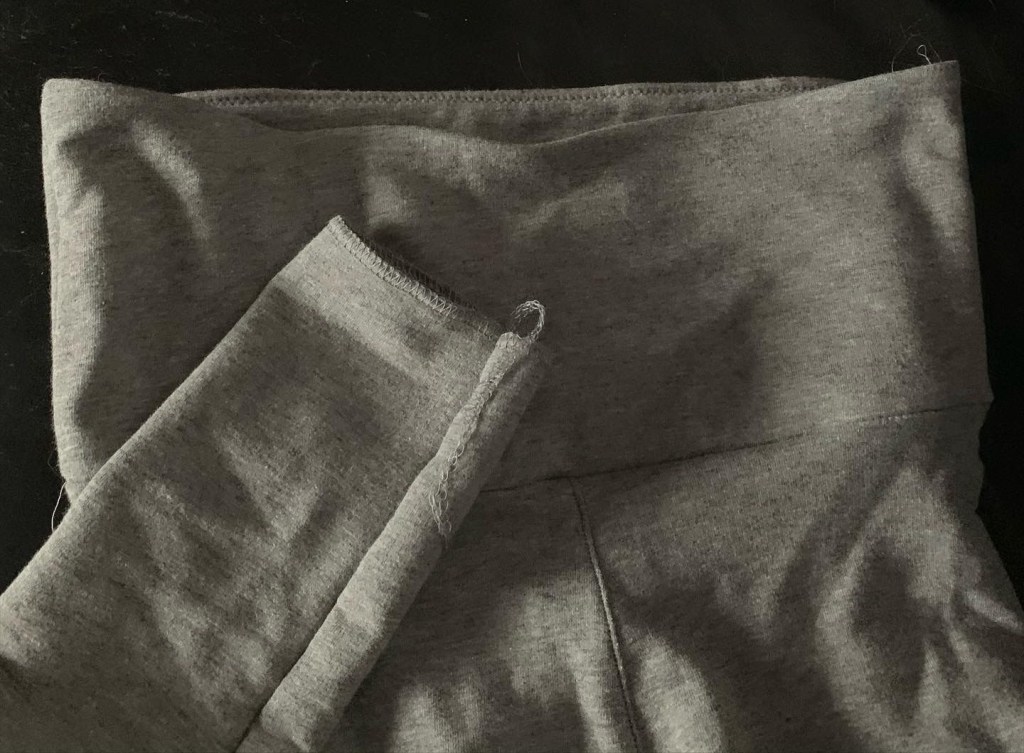
 For the crotch gusset, I made it two layers. Even though this isn’t like an underwear gusset, I just felt better with the gusset being thicker. Your mileage may vary.
 I was curious about the construction of the waistband. Turns out it’s much the same as Jalie 3022, if you skipped the contrast band, which I always do. Good instructions.
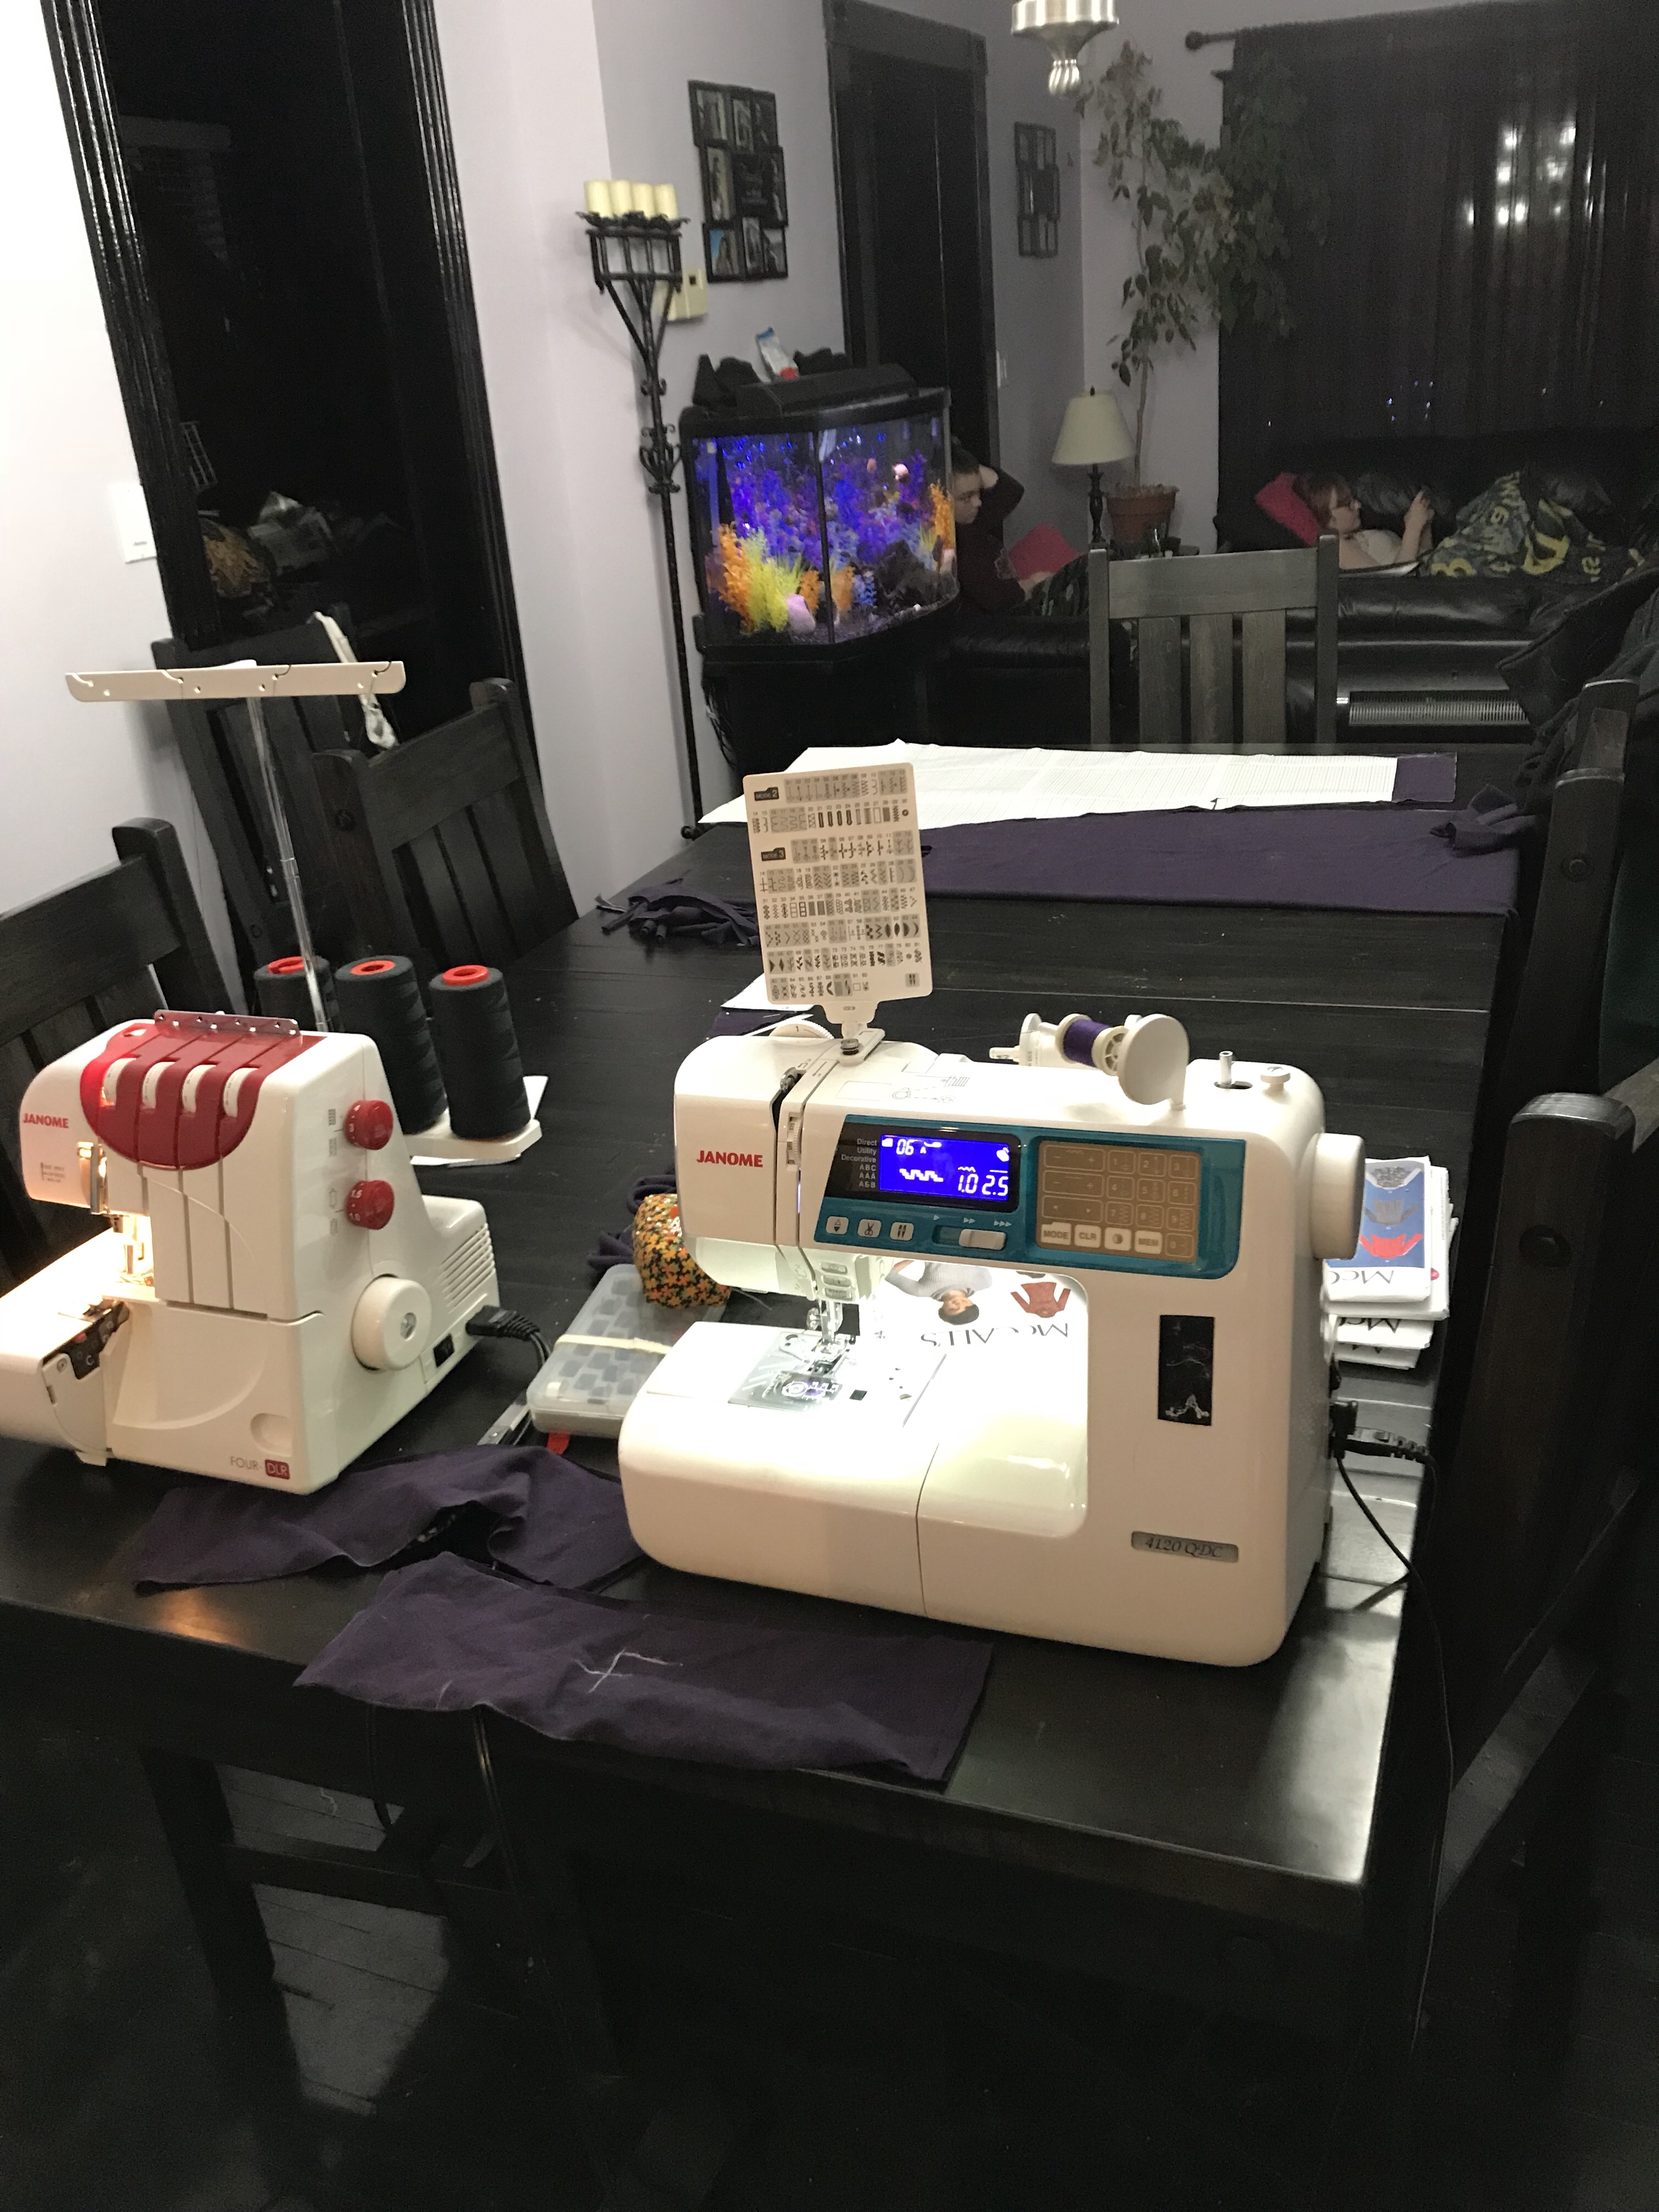 I was sewing all these while my basement is under construction and most of my sewing gear is trapped in the depths of a storage container. And I didn’t think to buy elastic, because I always have elastic, but the only stuff that’s not buried is my 1/4″ clear elastic. That makes for a nice non-bulky finish—but maybe not ideal for the whole staying-up part. The pattern calls for 1/2″ elastic.
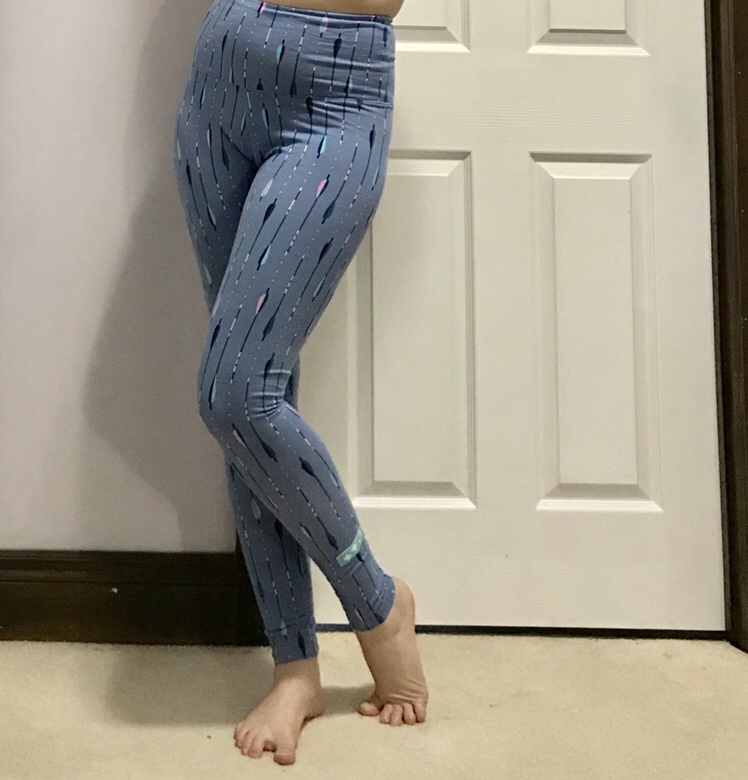 Partly because of my not-totally-optimal jersey, and because Avery calls for 70% stretch (Jalie 2920 only calls for 60%), I rounded my size up to the Large. This is comfy but may be a bit “big” technically—there are some wrinkles in both pairs, especially around the hips, that maybe don’t need to be there. A quick note on the % stretch—I had always read to measure stretch along a fold of fabric, since the raw edge will stretch out more. But the instructions for Avery don’t mention this. So if you’re measuring the 70% stretch along a raw edge, the actual stretchiness of the recommended fabric may not be much different than the Jalie pattern. I’d compare but, again, all my stuff is buried.
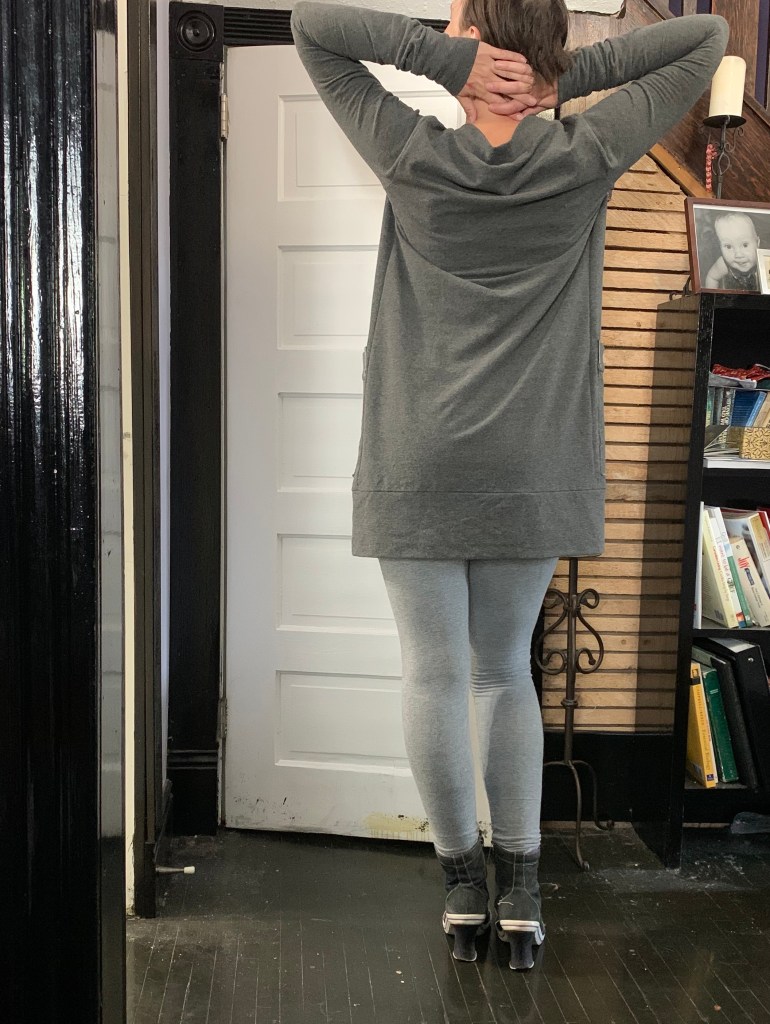
 My second version is in a deliciously beefy cotton spandex knit from the ends at Fabricland. It’s everything you could ask for for a pattern like this. I added a bit more length, as I said before, for ankle scrunchies, and went with the mid-rise version of the waistband. The high rise version I think is actually a little too high for my short body—the mid-rise still comes up to my waist pretty easily, though it does ride down a bit.
 In the mid-rise, I think a little more height in the back could be a good idea—this happens with almost all my pants. I think the correct solution might be to use the high-rise waistband but lower the front rise on the leggings piece a bit.
 But while there’s always room for a tweak or two, I gotta say these are pretty darn perfect.


