Tag Archives: finished projects

JJ the third

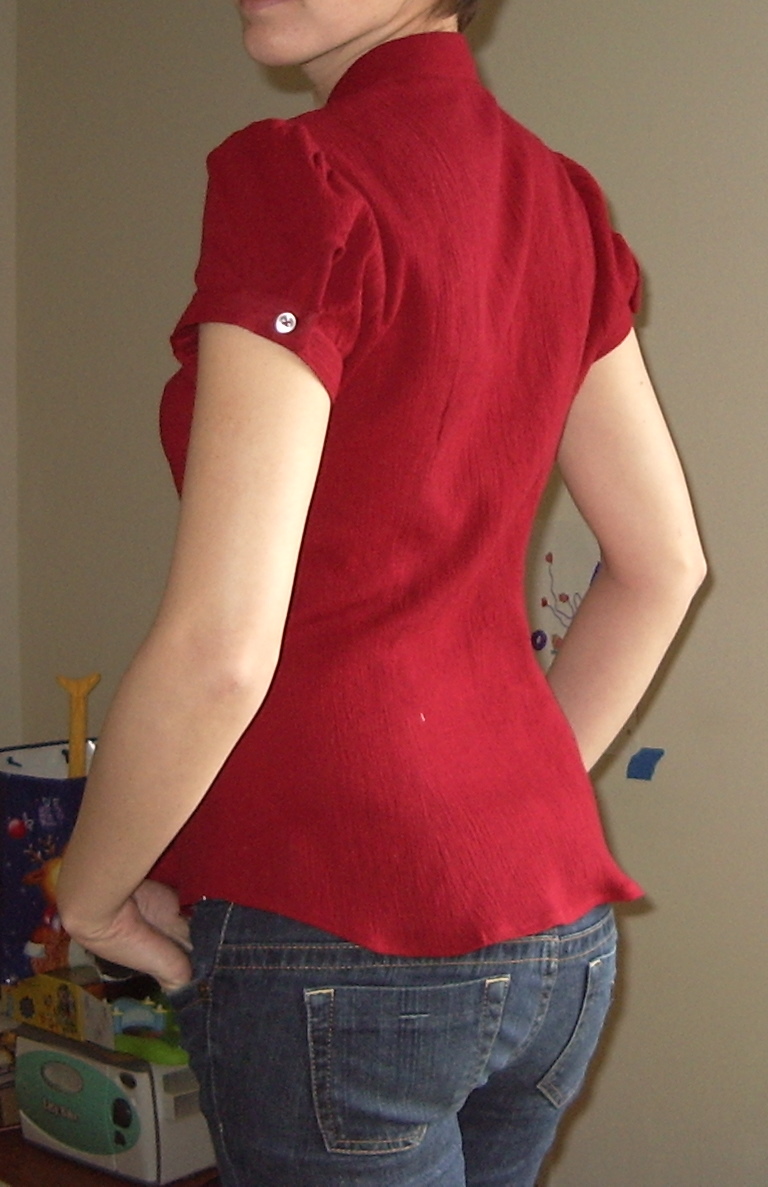
Newest JJ... still slight puddling at the back.

Almost done with this pattern? Well, almost. Sorta. I still haven’t *nailed* it yet, although this version was a lot closer. At least in terms of construction.

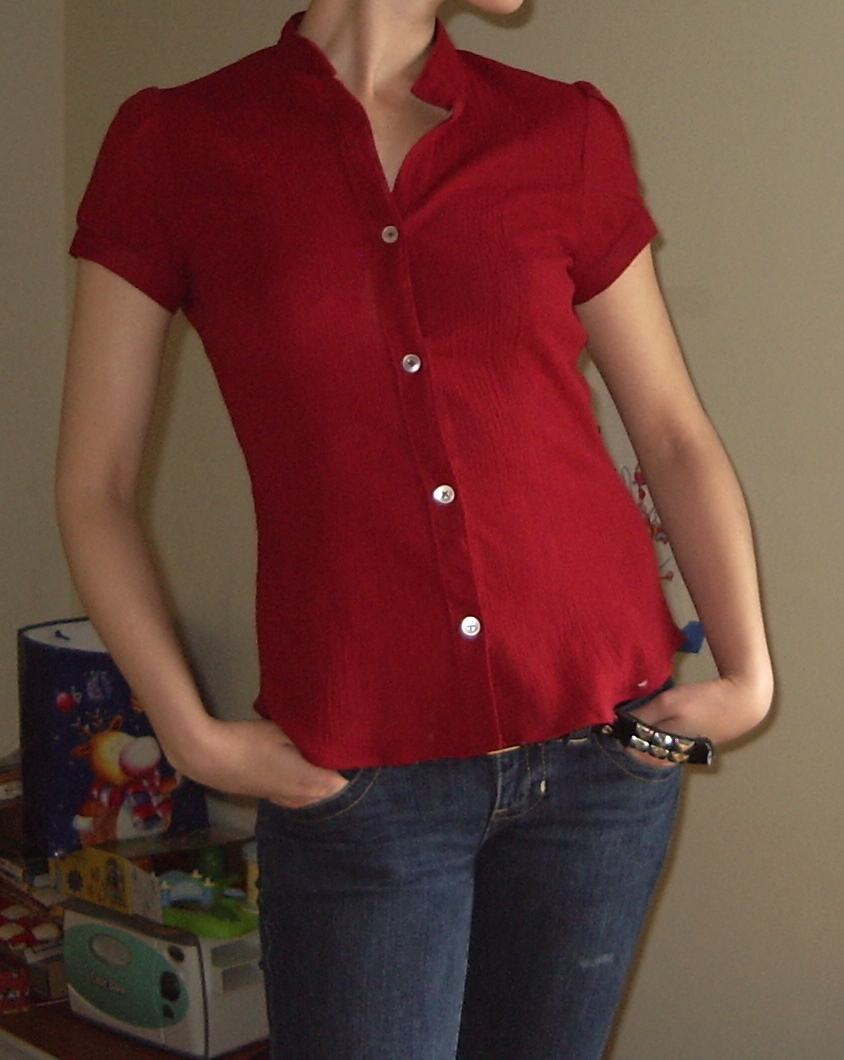
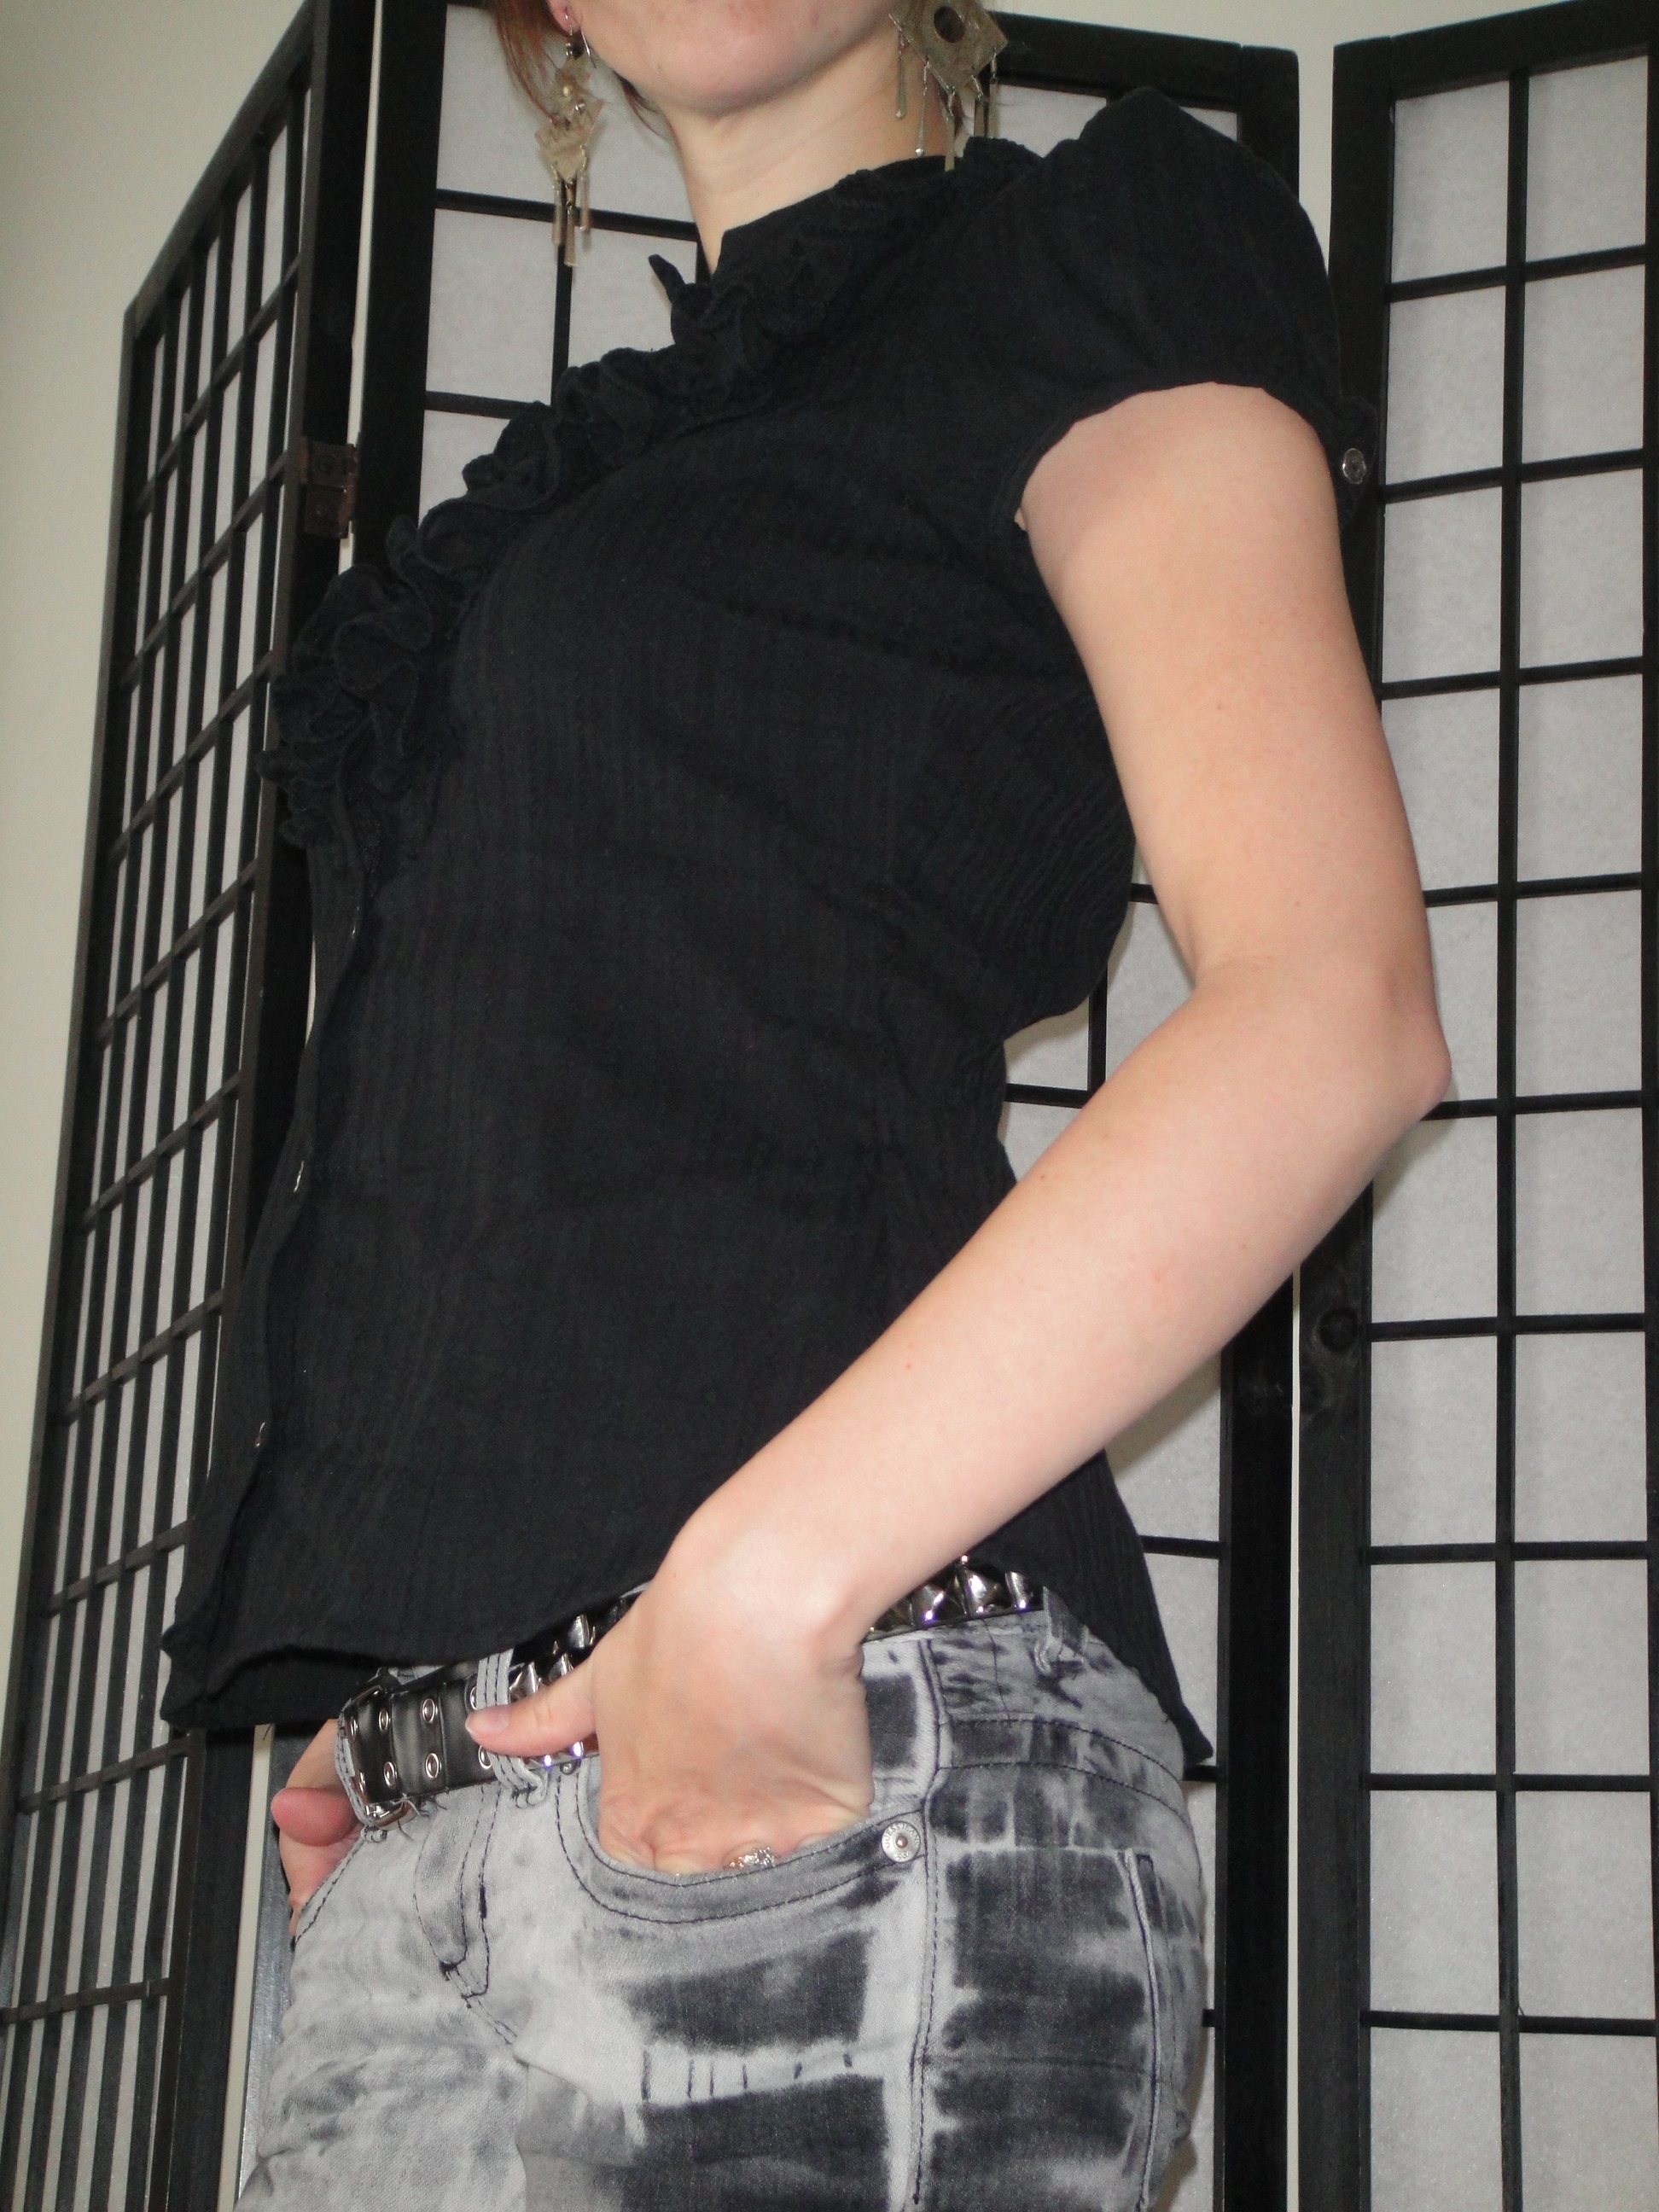
Black JJ with silver buttons.

I added 1 cm to each centre front piece this time, in an attempt to avoid the bust gape and get the front princess seam falling in a slightly better place (it tended to fall inside my bust point, which is not quite right). This accomplished my aim, but at the expense of some fit; the side seams were edging back and the whole thing was quite big when I tried it on, and the side-seams were riding a little far back. I took the side-seams in (curving from very little at top and bottom to 1.5 cm at thewaist, and I could have taken it in more… there’s probably still about 2 cm of extra ease. Apparently what I needed wasn’t extra room along the whole front, but just at the bust. So I guess I should take 1 cm off the side front (to match the 1 cm I added to the front) and then do a small full bust adjustment (!!! me!!!). Who’d’a thunk? And probably shorten the waist a cm or 2, which I think would get rid of the last of the back puddling.

Black JJ---Back

Construction-wise, however, this shirt is a thing of beauty. The fabric is 100% cotton with a subtle woven-in stripe that looks like cross-stich up close (I adore it… and I have lots more!) and it was delightful to work with. I actually got the collar attached properly (meeting, not overlapping) at the centre front) and neatly. I made one more slight alteration to the ruffles, tapering them at the ends, and I like the effect very much. I think I could still narrow them slightly… they seemed perfect on the sheer blouse, but a little big still on this one, maybe because the fabric is heavier? I bit the bullet and hand-finished the inside of the collar and sleeve cuffs, and hand-rolled the bottom hem, and if I get really ambitious I’ll overcast the raw edges on the inside. The machine did manage to make a disaster of the bottom buttonhole, but the others are perfect. I adore my little silver buttons.
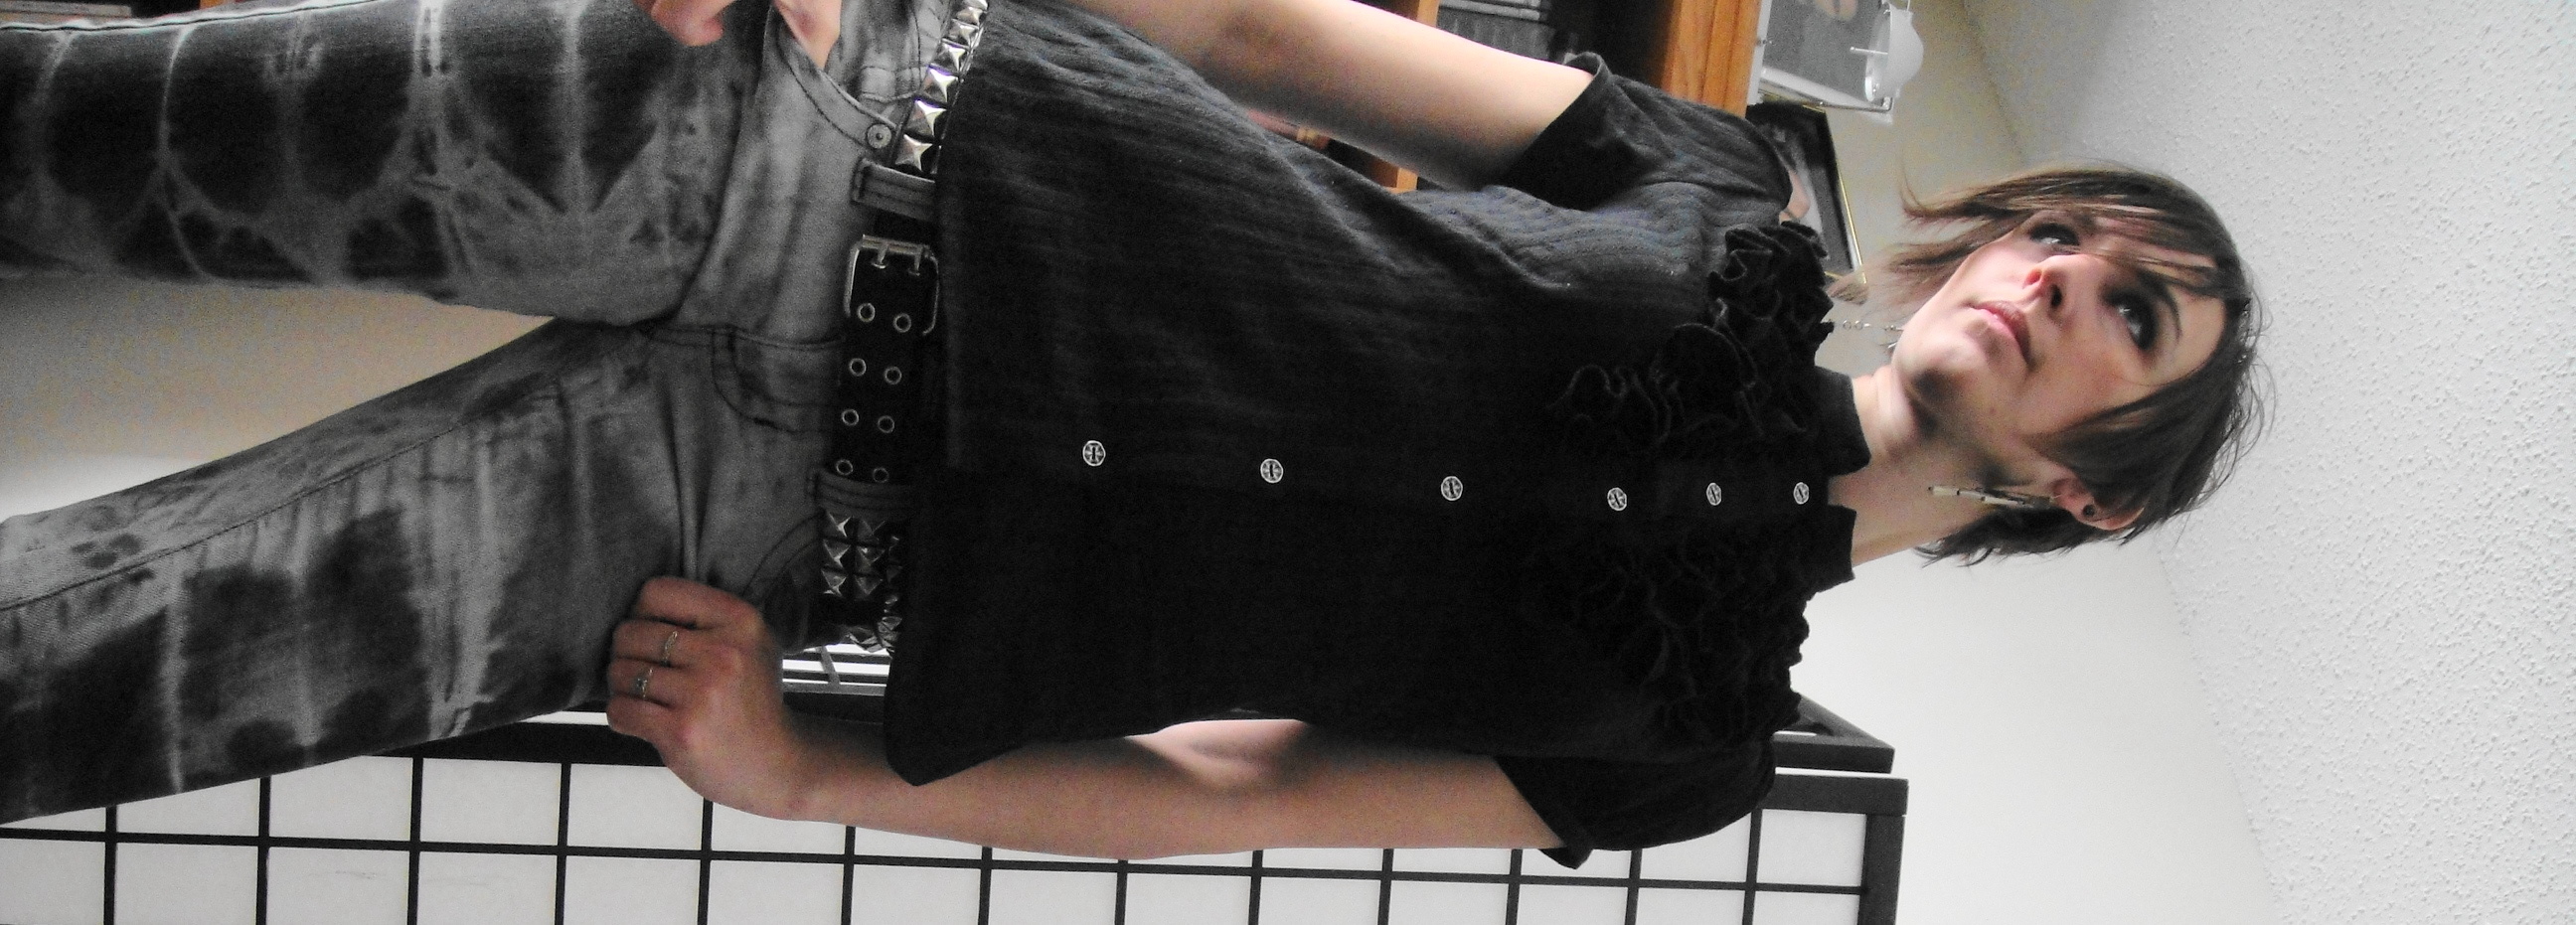
Work it, work it!

I could spend a lot more time dissecting the shirt,but really, I’m pretty darn happy with it. I can still see myself making one more version of this shirt (in opaque white)… but maybe I’ll have to change it up with the ruffles or something. And then figure out a long-sleeved version for winter…

(An interesting aside… as a smaller-busted girl, I have spent the last ten years or so largely braless aside from nursing and athletics, once I got over the excitement of actually getting to wear a bra and realized that most of them didn’t fit very well and weren’t comfy. This doesn’t bother me in the least… but with the addition of a couple of non-stretch JJ blouses to my wardrobe, I realized something. My usual staple tops are snug knits. These actually provide a bit of support in and of themselves. Not much, but enough to feel… comfortable. Without that, in these woven blouses… well, a bra just feels welcome. Interesting. no?)

Low camera angles courtesy of my mini-tabletop tripod.
1 Comment

Filed under Sewing

Jalie Jeans for me!

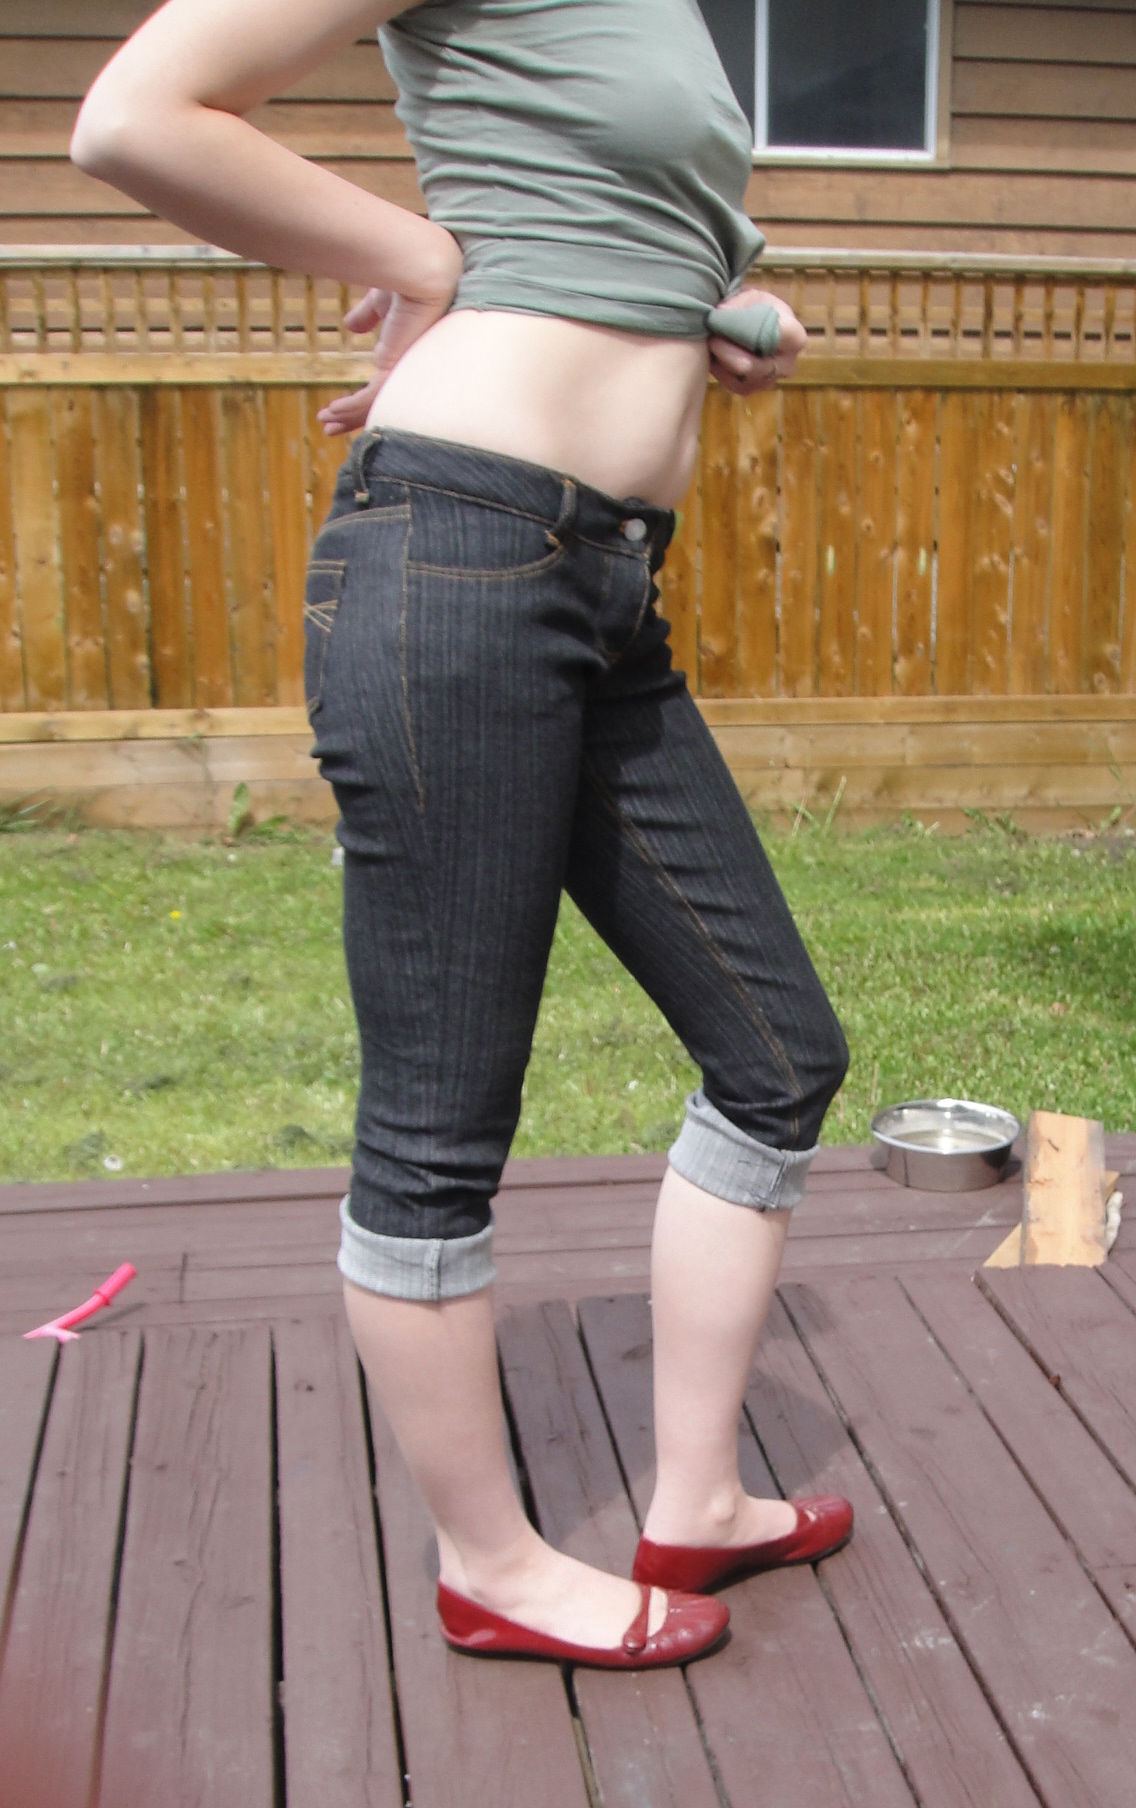
Jalie 2908 capris!

Yay!

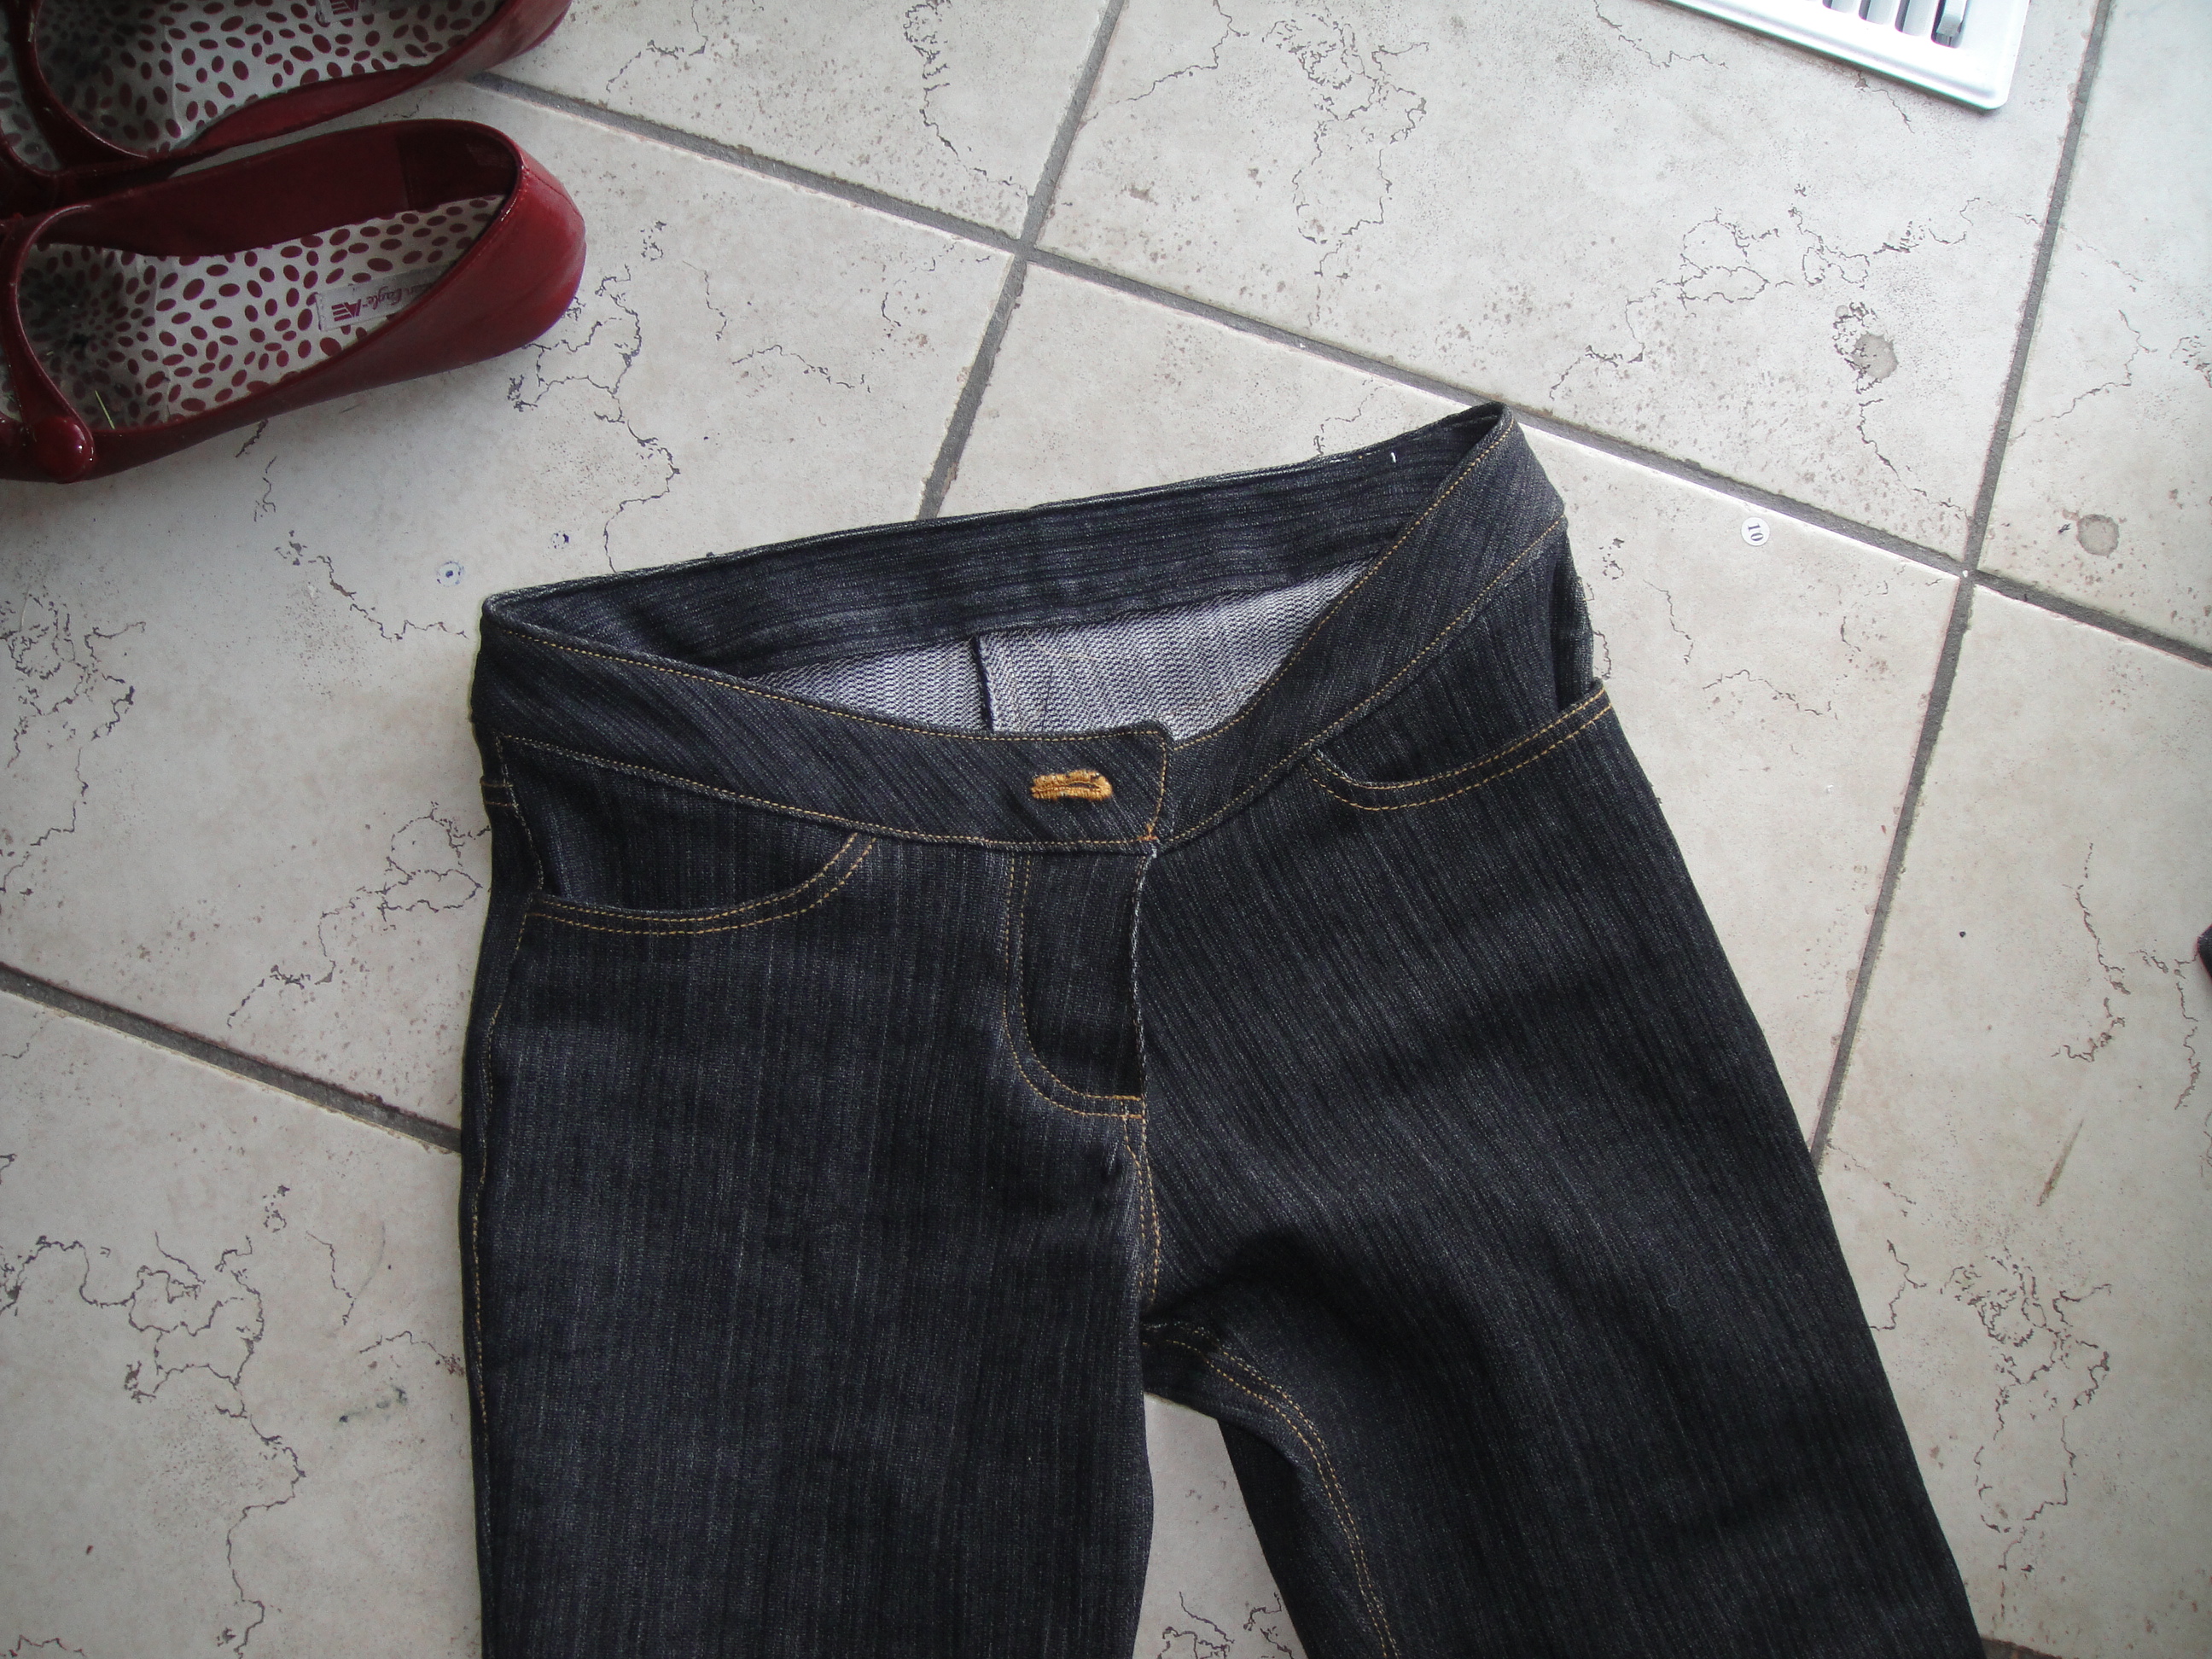
Pair number one is complete! (minus hemming and rivets. Details, details.)

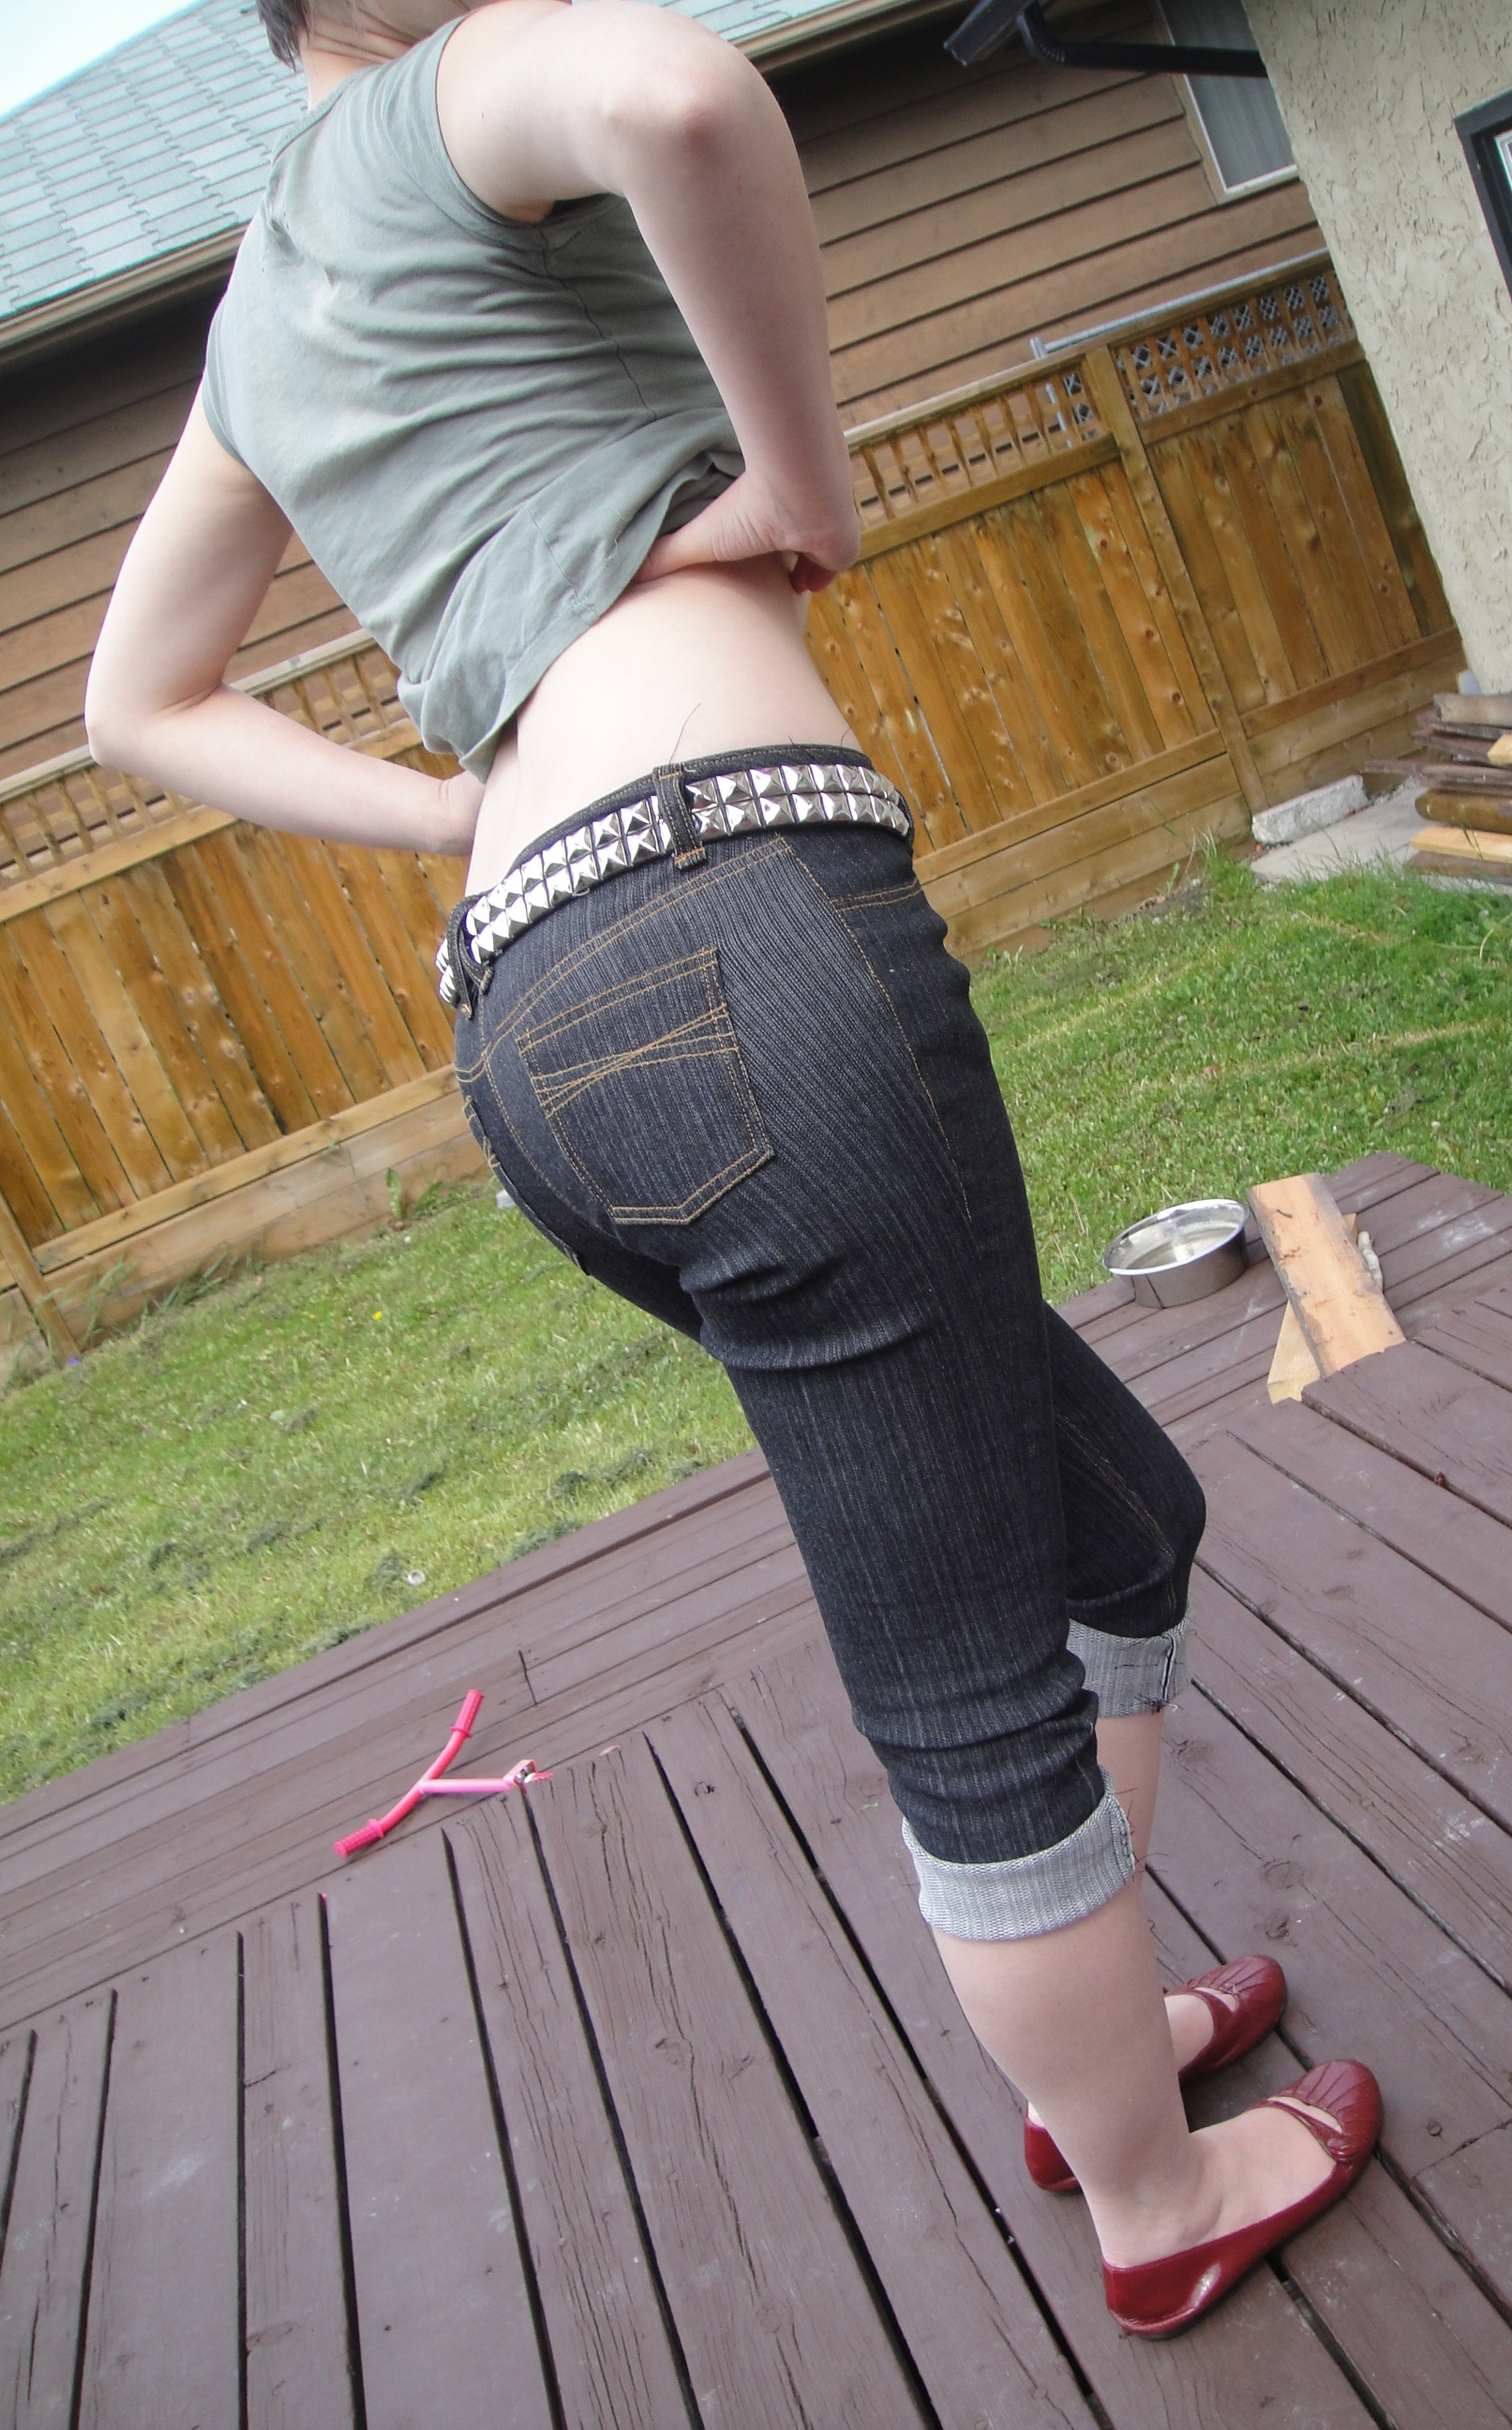
These are capri-length for summer (since I only have one other pair of capris). I used Becca A’s from Pattern Review’s alterations for making an even lower low-rise (thankfully her daughter and I are close to the same size) which worked perfectly. I also wanted a contoured waistband, so I used the one from the Burdastyle Ellen pants pattern (because it was free). This also worked out well, although it still ended up with a bit of gaping… I think probably from stretching during sewing as it fit perfectly when I was trying it on in advance. I converted it into a single-piece band and narrowed it a bit.

So… aside from my usual sewing blunders (I still haven’t quite figured

Jalie capris---front

out the zipper insertion… I got the zipper facing the right way this time but then sewed the fly shield on the wrong side, and the zipper wound up sitting way back from the centre front, which I think isn’t quite right) I’m pretty darn happy with these as a first pair. My attempt to pre-curve my yoke panel worked fine (there was no gaping at all at that stage of the try on, just after the waistband was attached). I think I have finally understood why the original yoke comes so “straight”… it’s very easy to take it in, but it would be somewhat harder to spread it out evenly if you have a flatter bum… so they drafted it to the “flattest common denominator”… at least, that’s my theory. I tried them on right after I sewed the outer seams, and wore them for a few hours to gauge the fit, after which I took each side in about a 1/4 inch. This improved it nicely, though it wasn’t that bad before; I think most of my issues with the “feel” of the pants have more to do with the fabric (which really isn’t very nice. Next time I will splurge on the $18/m fabric.

Original pocket pattern...

... which didn't work out so well in practice

There were some hiccoughs in the production. I spent quite some time drafting a lovely ankh pattern to topstitch on the pockets… and totally butchered it when I tried to stitch it down. Partly I’m not very good at machine embroidery, partly it was the stretchy fabric (perhaps I should’ve interfaced the pockets)… anyway, that was a bust, so I reverted to some boring straight lines. Oh well. I did make the pockets mini (the same size as my daughter’s) and I like the way they look on my less-than-oversized bottom. The

Not-quite-couture hand finished buttonhole

interfacing helped with the “flabby” feeling of the waistband immensely, but thickened it up enough that my machine balked at doing the buttonhole… so I hand-finished that, which is the first time I’ve ever tried it. It’s definitely not as nice as all those couture hand-finished buttonholes I’ve seen photos of ;). I originally failed to heed Becca A’s advice and cut a size Q yoke (same size as the rest of the pattern) rather than a size R as she suggested, and it was too small (since the lowering of the rise widened the seam… I am brilliant, aren’t I). So I had to re-cut that too.

The topstitching thread, as expected, was a little finicky. I found that most of its tantrums happened at the start of the seam, and could be avoided by holding

side view... gaping at the back doesn't really show.

Back view: boring lines on pockets.

on to the top thread so that the end didn’t get sucked down into the bobbin and do weird things, but it was still a bit of a crapshoot. And I managed to shatter my double-needle (perhaps I’m cursed with those) when I went to do a test stitch with it and had the stitch still set to zig-zag. The needle hit the presser foot. The waistband turned out a little bubbly and bulgy, and the fly is still a little gapy; I’ll have to try a couple more fabrics so I can figure out whether that’s me or just the flabby fabric pulling funny.

(artistic photos by my daughter… sorry about some of the wonky angles 🙂

7 Comments

Filed under Sewing

Jalie Jeans test type… 100% complete

No pics of them on the kid (yet… maybe after I wash them) but here’s the final details:

Jeans front finished---rivets and belt loops!

The rivets went in quite well (it’s much easier to hammer metal stuff in now I have a concrete garage floor to work on!). They did need to be shortened, but they seem to hold well (I’ll get back to you about whether they’re STAYING on in a few months). I experimented with not shortening one, and regretted it—it went together and didn’t damage the caps, but the inside cap kind of skewed off to the side, so the inside and outside caps are offset. You can’t tell from looking, of course, and it feels solidly attached… but not desirable.

The belt-loops as measured were kinda long, but that’s fine. I put them on after the rivets… before would have been smarter. I was going to sew them right by the edge of the front pocket, and couldn’t because the rivet was in the way. Not that their current placement is a problem,

Back---finished. Cool belt loops!

but note to self for the future. In the back, I criss-crossed the centre back belt loops. I like. 🙂

Oh, and I finally located and tried out my double needle for the belt-loops and hems! I bought it last fall, just to have a double needle, despite my disastrous results the first time I tried to use one (the bobbin threads got tangled and when I tried to raise the needle one of the tips was getting bent funny and snapped off. This was about five minutes into my first attempt to use it). But for whatever reason this time—better thread, auspicious alignment of the planets—it gave me not a hint of trouble this time. I did take the advice I read somewhere to put the spools on so they spool out the thread in opposite directions (eg. one clockwise, the other counterclockwise). Maybe that made all the difference. No idea. Anyway, aside from the fact that the double needle I have wasn’t purchased with jeans in mind and is a bit narrower between the two tips than the rest of the top-stitching, it worked perfectly. I did the hems with it (the zig-zag from the bobbin makes it stretchy, too, even on a regular straight stitch!). I wound up doing two rows of the double stitching on the belt-loops (the zig-zag underneath does a really nice job of finishing the triple-folded bottom surface), and I was worried that they were too uneven, but once cut into the short lengths they looked fine.

So, verdict? Definitely some loving-hands-at-home going on in the details. But, perfectly respectable from a distance (even I don’t notice the offset pockets unless I look for it) and the kid loves them. Considering her lukewarm reaction to her jacket, I am going to declare these a success. Which is good because I cut out my pair last night…

4 Comments

Filed under Sewing

Jalie jeans, test type

Kid's jeans (first try on)

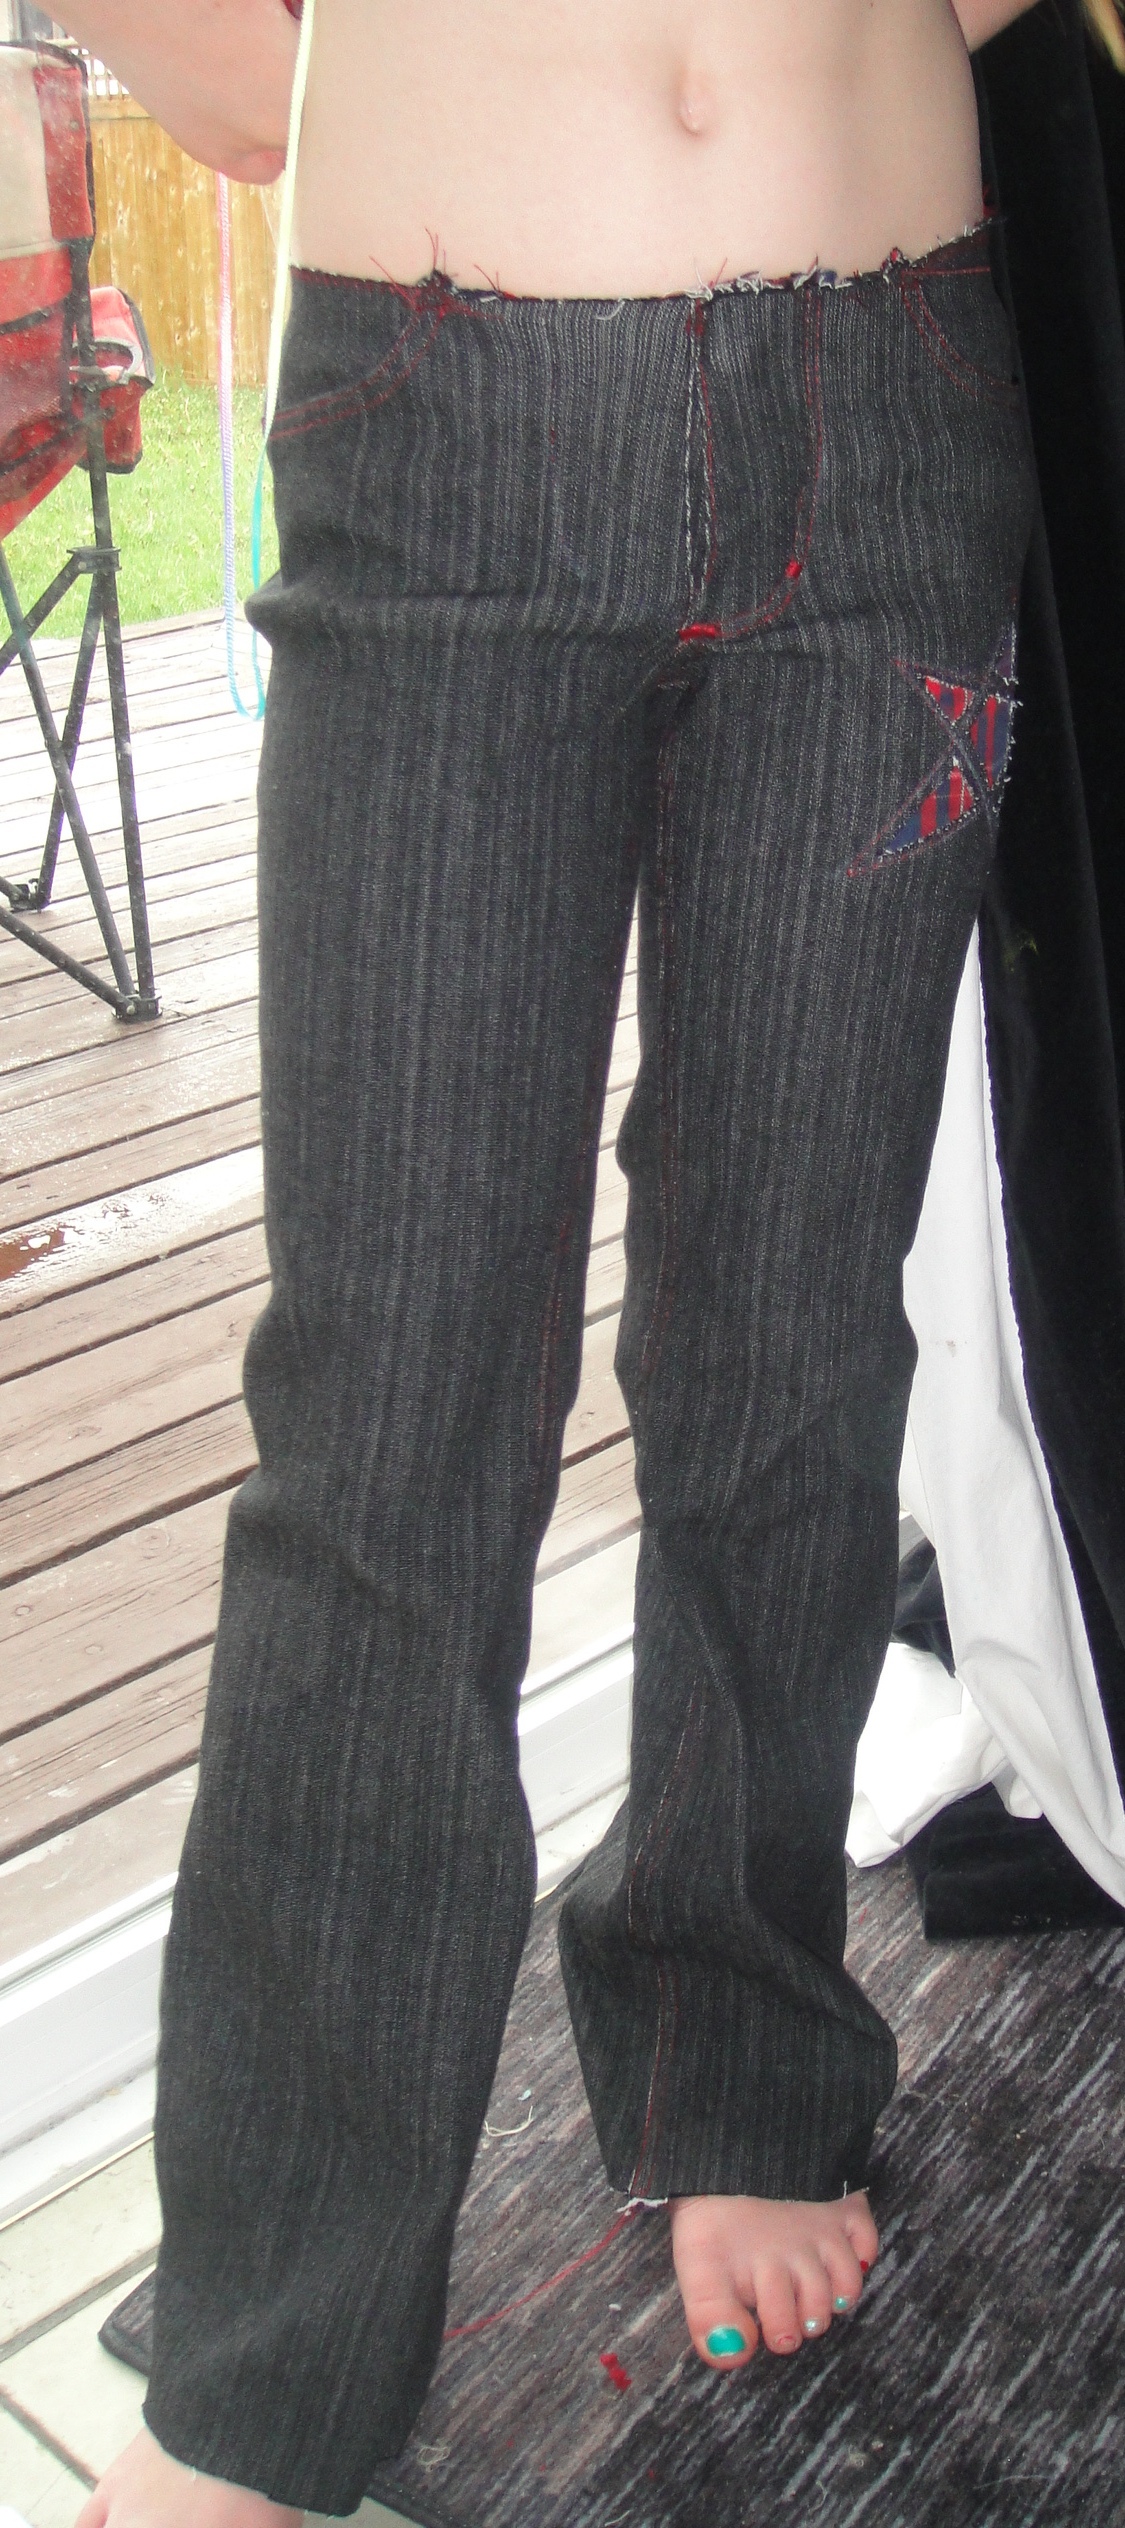
So, I took the plunge. Well, in miniature. Just putting the finishing touches on a trial pair of jeans… for my daughter. A little torn—on the one hand, they’re very cute, but on the other hand, there’s enough booboos in the construction and fitting issues that I’m a little dissatisfied—more with myself than with the pattern, however. Oh, and the plaid flannel in the cut-outs is the same fabric as the pocket lining, and was a pair of my hubby’s pyjama pants long, long ago. So glad I kept those scraps!

On the plus side:

  • they fit! Like stretch jeans should… which may actually be a little snug.
  • I LOVE the pocket design/yoke and front leg detail. We were inspired by a pair of jeans belonging to my younger daughter, and I think it’s so super cute. I am excited to see how it looks once it’s washed and frayed. The cut-outs on the front leg and the back yoke are both backed with another layer of denim behind the flannel, for strength. The pocket just has the flannel.
  • The red topstitching is super nice, even though it doesn’t show quite as much as I might like. I used the triple stitch with regular thread, and I really liked it for topstitching because it is SLOW…

    Are these not the coolest pockets EVER, I ask you?

    much less chance for me to mess up, especially along short lengths. All in all the topstitching, though not perfect, is a LOT better than my last attempt. My “edgestiching” blind-hemmer foot definitely shows its limitations along longer seams, although that may be as much shoddy construction of the foot (the screw that adjusts the front extension is really loose, so it jiggles out slowly as you go along… this is just as much a problem for blind hems as for edgestitching).

  • I also didn’t have any trouble catching the 1 cm seam allowances in my second row of topstitching; some people had complained about this in their pattern reviews.
  • I added the perfect amount of length to the leg (1″) (at least as long as they don’t shrink in the wash any more)… they should be perfect once hemmed as is.
  • I put buttons and buttonholes on the inside waistband to thread and adjustable buttonhole elastic through the back (a fave feature of mine for most kids’ pants these days). However, my gaposis-fixes were such that I don’t think she’ll actually need it.
  • hammering REALLY helped with a few of the ultra-thick areas. I am impressed.
  • I almost got the fly right on the first tr. Almost.

Negatives:

  • The instructions say to attach the back pockets before you sew up the centre back seam. Despite marking very carefully and gluing the pockets in place so they didn’t shift around, they’re still not even. Next time I will definitely put them on AFTER the centre-back seam is stitched (which is the next step anyway so it’s not like it’s a big rearrangement.
  • the yoke definitely needed adjusting for back gaposis. Now, my nine-year-old definitely has a booty for her age (to her father’s dismay), but on the other hand proportionately I doubt hers is any worse than mine, so I will definitely curve my yoke in a bit before I cut it.
  • I adjusted the yoke at the sides (since the centre back, which would’ve been better, was already topstitched and I didn’t want to take tucks due to the cut-out peekaboo layers at the yoke), which left a bit of a pointy stop at the top side.
  • the waistband kinda sucks. This is for various reasions:

    Kid's jeans: front (finished except for belt loops, hemming)

  • 1) I cut it on the straight grain, non-stretch direction, rather than on the bias or the stretch grain. This is because I like pants that stay up… but I should’ve added to the length because it was a little short.

    Kid's jeans: back (finished except for belt loops and hemming)

  • 2) I didn’t interface it. This might’ve been fine with a heavy-duty denim, but this denim is so light and stretchy, it’s just floppy. My bad. I got lazy and impatient (and forgot).
  • 3) I angled it in at the centre-back seam to further reduce gaposis, which was successful but left it with that little divet at the back. I am definitely excited to try my contoured waistband. Thoroughly interfaced.
  • the jeans button is a little off of where it needs to be; I centred it on the buttonhole, but its post of course needs to go at the END of the buttonhole. And of course since it’s fairly soft and floppy, this makes the whole fly (which IS interfaced, by the way) pull a little wonky. I suspect the solution will be to stitch the end of the buttonhole closed a bit. And next time, position the butotn AFTER cutting the buttonhole. I think for mine, I will hand-stitch the buttonhole so I can do a keyhole, but for these I just did the lone buttonhole setting on my machine. (and it says it all about how thin the denim is that I even COULD do the buttonhole on my machine, which doesn’t like to do buttonholes on thick fabrics at all.)

(sorry about the colour in the last two pics… the camera didn’t like having the black couch in the background. Also the jeans are  rather rumpled in the last couple of shots because she won’t take them off long enough for me to hem and put belt loops on.)

8 Comments

Filed under Sewing

An oldie… Kids’ choli

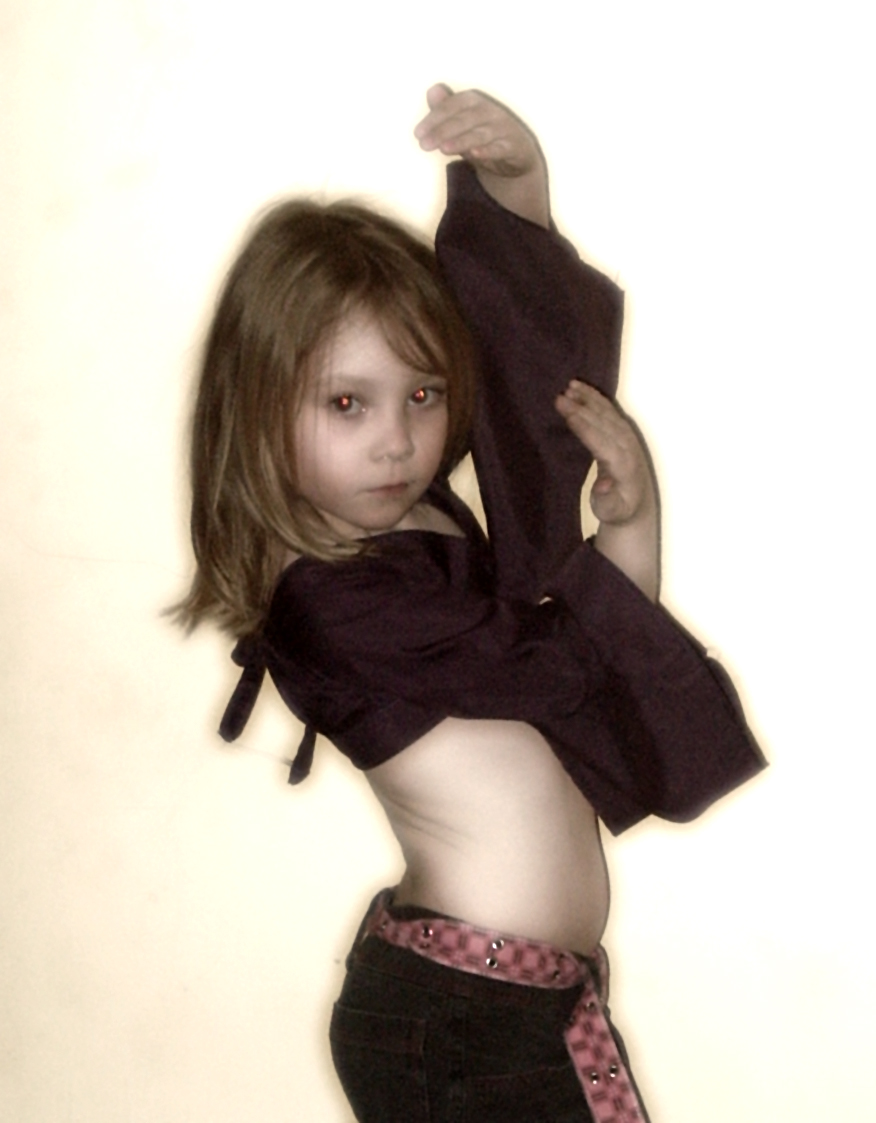
My daughter showing off

This is a dance shirt I made three or four years ago now for my older daughter. The idea is loosely based on an Indian choli, a kind of cropped, sometimes backless blouse worn with skirt or sari or whatever (depending on the region). They’re popular in tribal bellydance, and a little more modest than the traditional bellydance bra top. I have about a zillion of my own, made to various patterns, which maybe I will talk about at some point, but this one seemed like it would make for a nice quick post.

I drafted the pattern for this shirt based on her measurements; kids’ patterns are SO nice to draft because you don’t have to worry about bust shaping. There’s a theme or principal in “folk” clothing where you try to be as economical with the fabric as possible—most pieces will be rectangles, triangles, or trapezoids. This makes sense if you have to spin and weave your own fabric—you don’t want to waste ANY of it. It comes at the

a choli (a kind of backless top popular in bellydance) designed by my daughter

expense of fit, of course… but that’s the nature of the beast. The other upside, however, is it makes the patterns dead easy to draft. My daughter chose the kimono-inspired sleeves for this shirt (and made up her own pose). Since you can’t see it too well in the photo, here’s a rough technical drawing of the shirt: as you can see, nary a curve in sight. The triangles under the arms are actually square gussets.

1 Comment

Filed under Sewing

We’re doomed, I tell you, doooomed…..

JJ (near?) disaster

This JJ did not want to go together. The construction is terrible, the errors and flaws innumerable… and yet, I still like it. From a distance, anyway, it’s still pretty cute.

JJ done up

Partly, it’s this stupid fabric, which is a slippery sheer polyester I rescued after a wedding last summer, where it had been used as bunting. It made good bunting—pretty, drapey. It’s the kind of fabric I hate to sew with,but I have a bunch (albeit ripped into strips about 20″ wide by 4m long) (note the characteristically Canadian blending of Metric and Imperial measuring systems there. I learned to sew in Imperial, but fabric is sold by the metre. I am trying to move towards sewing in metric, but so far… limited success).

Partly it’s me being impatient, and frustrated with this stupid, slippery fabric that doesn’t want to take a crease. It doesn’t help that I don’t have a small enough machine needle (or at least I THINK that’s what’s causing some of the puckering at the seams). But mostly, I think, it’s me. Like last night I started  pinning a cuff to a sleeve; went to finish it this morning and started sewing and realized it was on the wrong side. On the plus side, I forgot to shorten the stitch length from all the gathering stitches I was sewing, so it was easy to rip out. 😛 Or the side French seam that I sewed wrong-way in. Or when I sewed the side back piece to the back piece upside down.

But, it’s now together. The ruffles are uneven (and were a pain to get hemmed, and I still don’t think I got the right pieces on the right length for all of it). The collar is a mess. The whole thing is a little too snug because the french seams (which are fairly uneven) took up a bit more seam allowance than the pattern actually had (plus the one I mis-sewed I was too lazy to rip out, so I just cased it around itself again, costing me about a cm of girth. But, from a distance it’s still pretty cute, and since I’ll always be wearing it over a camisole or something, it looks fine with just the bottom buttons (or even only one done up). The sleeve closure detail doesn’t actually open since I couldn’t get my machine to do nice buttonholes on such a small, thick piece of fabric.

The back... still a bit of swayback puddle.

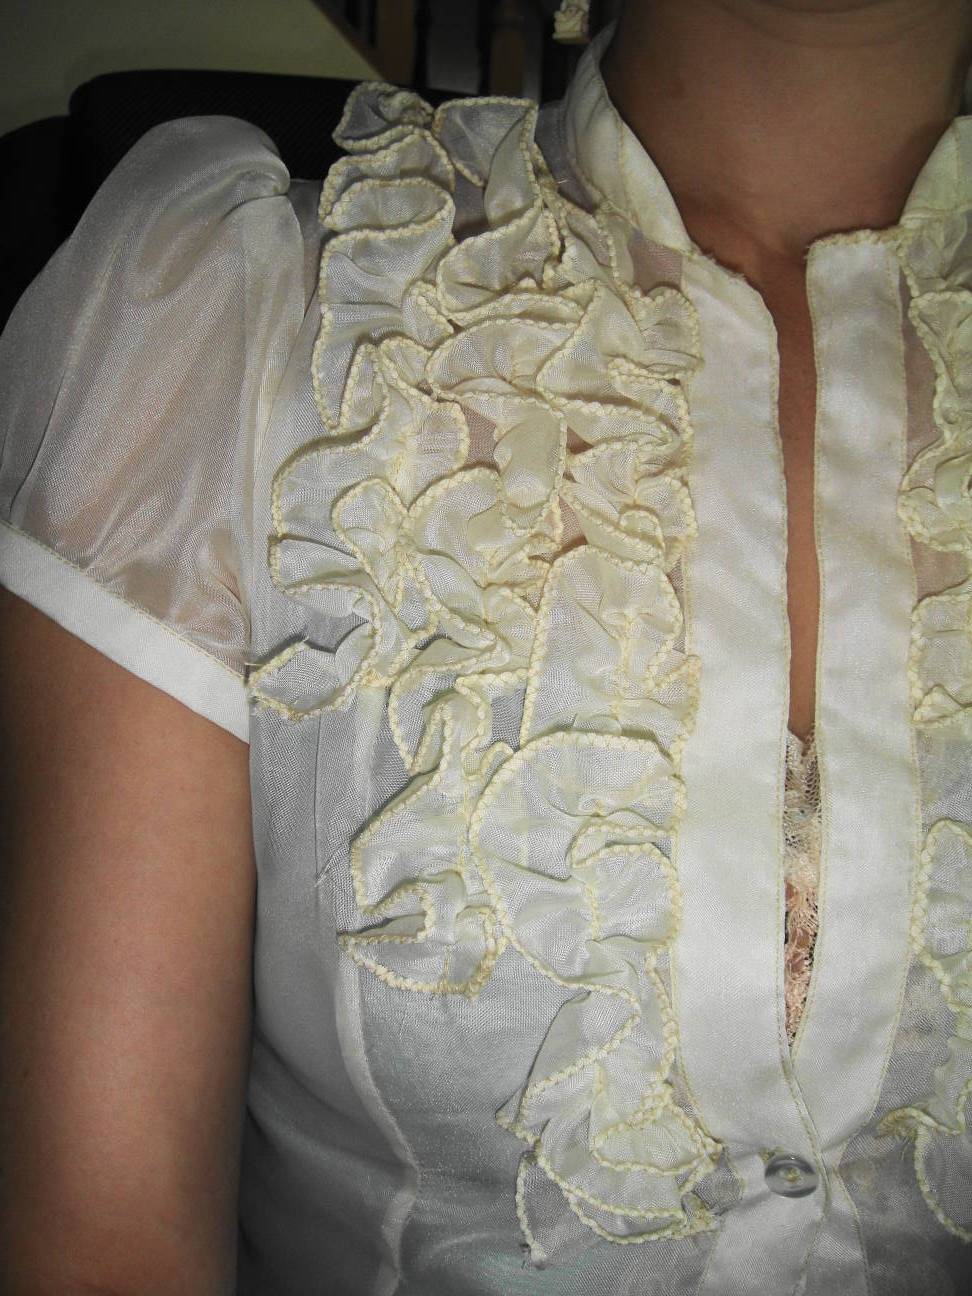
Closeup of ruffles

Alterations: French seams (as I mentioned) since the material was sheer and ultra-ravelly. I narrowed the collar and the sleeve cuffs a bit, more-or-less successfully. I attached the ruffles differently; I was going to just shorten them (since I think they look too long in the original) but I wound up finishing both edges and sewing the gathering seam about 1 cm in from one side.

A few minor fit issues remain. The back still shows a bit of swayback bubble, which I might actually have to remove with a horizontal tuck to get rid of. The front princess seams actually fall to the inside of my nipples, which makes me want to move them over a bit (given that I seem to have slight to not-so-slight gaping in the front, maybe I should just widen the centre front piece). I’d still like to make a couple more of these, I think, one in black (either linen or a cotton eyelet) and one in a white cotton that I could actually wear without the fancy shirt underneath. At some point I want to draft a long sleeve, and play with the design now that I have a nice, (almost) perfectly fitting princess bodice.

So, things learned…

1) don’t sew with fabrics you hate. It’s not fun.

2) Take your time. Fix your mistakes. Don’t be too lazy to iron (ESPECIALLY with a difficult fabric).

3) zig-zag rolled hems are WAY easier than straight-sewn ones.

Wearable? Well, we’ll see.

5 Comments

Filed under Sewing

Going vintage…

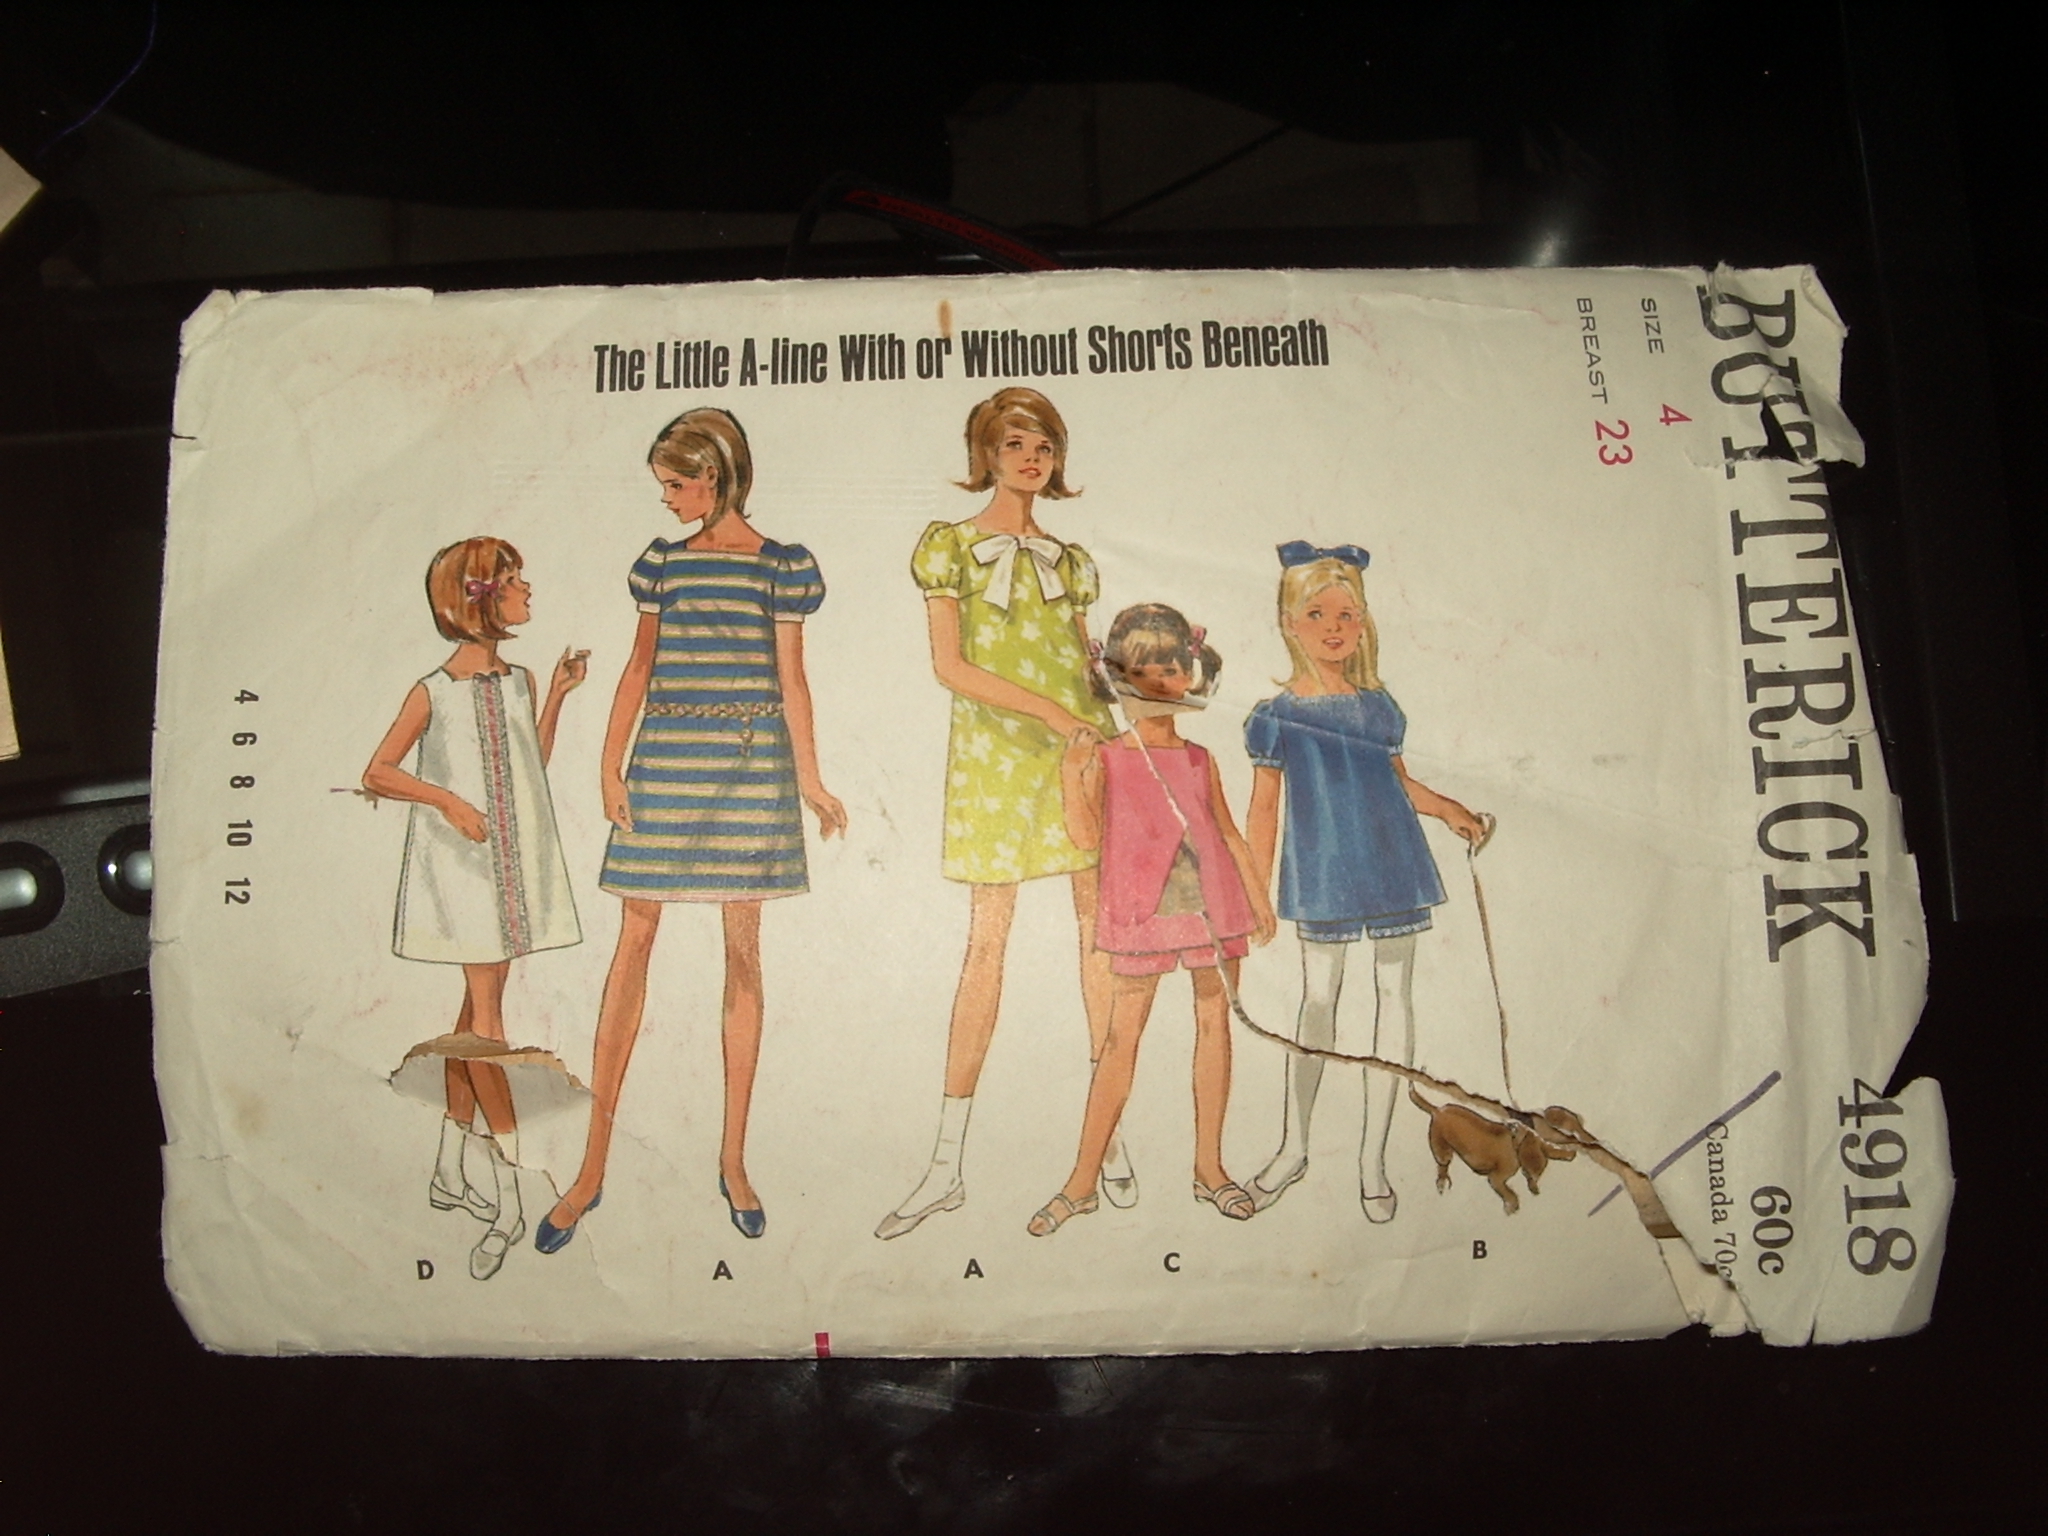
Butterick 4918, The Little A-Line With or Without Shorts Beneath

So I may have mentioned at some point that I inherited a large chunk of my mother-in-law’s old sewing stash; in particular, after her divorce, the stuff I got had ended up in my father-in-law’s storage. When he liquidated that storage a few years ago, it came to light, and I nabbed it. Mother-in-law didn’t seem too interested in having any of it back (I checked)… so I inherited a few fabric remnants, a fair selection of thread, some random notions, and a bunch of old patterns.

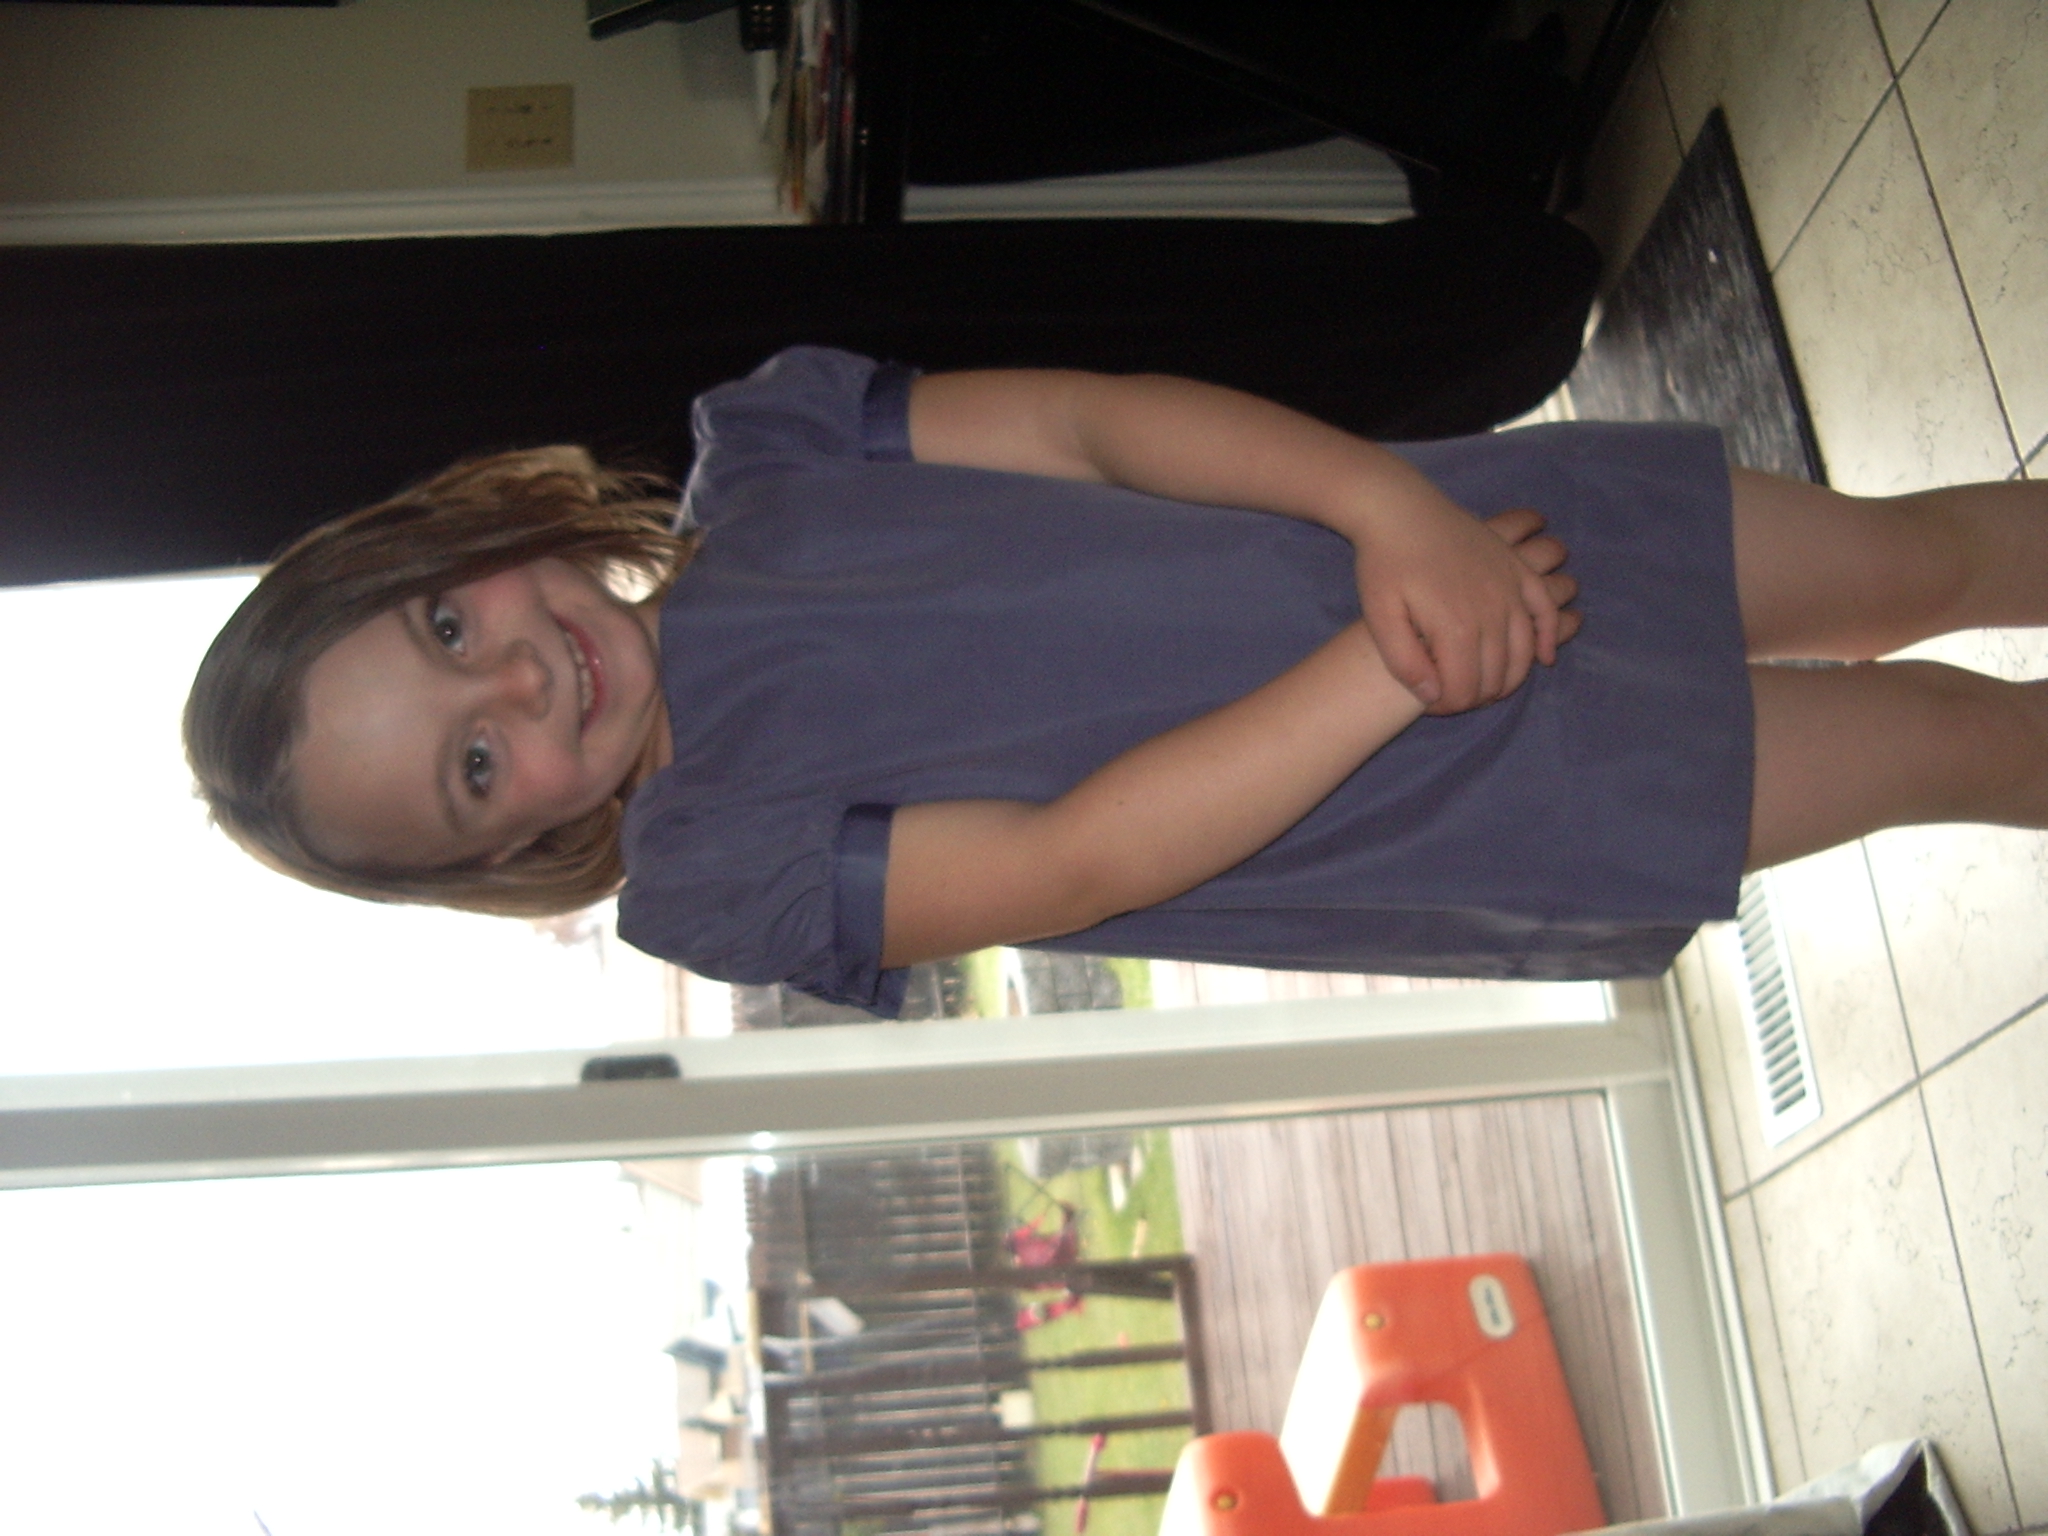
Most of the patterns date to my MIL’s sewing heyday, which was the 80s (Most are also kids or babies patterns). I’m not quite willing to grant the 80s vintage status yet…  but there are a couple that are even older, and yesterday my younger daughter asked me to sew one up for her. It’s labelled as Butterick 4918. This is not the Butterick 4918 that turns up on my internet searches, which are a 1952 evening gown or a 1980s cowgirl shirt. It’s an A-line short dress with short puff sleeves and optional shorts (although the shorts portion of the pattern seems to have evaporated). From the hairstyles on the drawing I’d say late 60s; the price on the envelope is 60 cents (70 Canadian). The pattern is a kids size four, which I am hoping will fit my rather pint-sized not-quite-seven year old (I know, but the coat I made her from the rather less vintage McCall’s 3374 was also a size 4, and it’s too big. And the chest measurement looks right, which is probably more important… worst case scenario, it’s too small and we give the dress to my 3-year old niece. And then I have to figure out how to grade the pattern up for my kids).

Now, I’m not a huge fan of vintage patterns. I was scoping out some late-60s ones at my grandmother’s this spring and let them be. My basic problems are as follows: I’m not a big fan of fashions of the 60s, 70s, or 80s, and I don’t have a figure the 40s and 50s patterns would flatter (at least without major corsetry). It’s possible that I could do something nice with a drop-waisted 20s frock, but… well, unlikely. And even less likely that such a pattern is ever going to cross my path. As I mentioned above, I asked my grandma about old patterns lying around (nobody has moved out of that house since 1918… the new generations just keep on moving in), and she dug up a few, but all dating to roughly late 60s (And a little off-size, although probably close enough if I were really into making any of them). But for making them for my kids… well, I’ll give it a try. And I have to say, working off a one-size pattern is quite the treat. The seam lines are all marked; so is the direction of stitching. There’s the occasional diagram of which foot to use, not to mention an illustration of the zipper, and more match-points than you can shake a stick at. A lot of it is wasted on me (I am trying to get better at transferring pattern markings to my fabric, but I’m still pretty lazy. I need to get one of those markers that disappears in water, because otherwise I’m too tempted to use regular markers, which has had occasional disastrous effects in the past.) but I still appreciate having it there. I didn’t read the instructions, either, before I started construction, which I probably should have just for the appreciation of well-illustrated, thorough instructions. Ah, well. Also, the seam allowances are massive: 6/8″, or a full 2 cm.

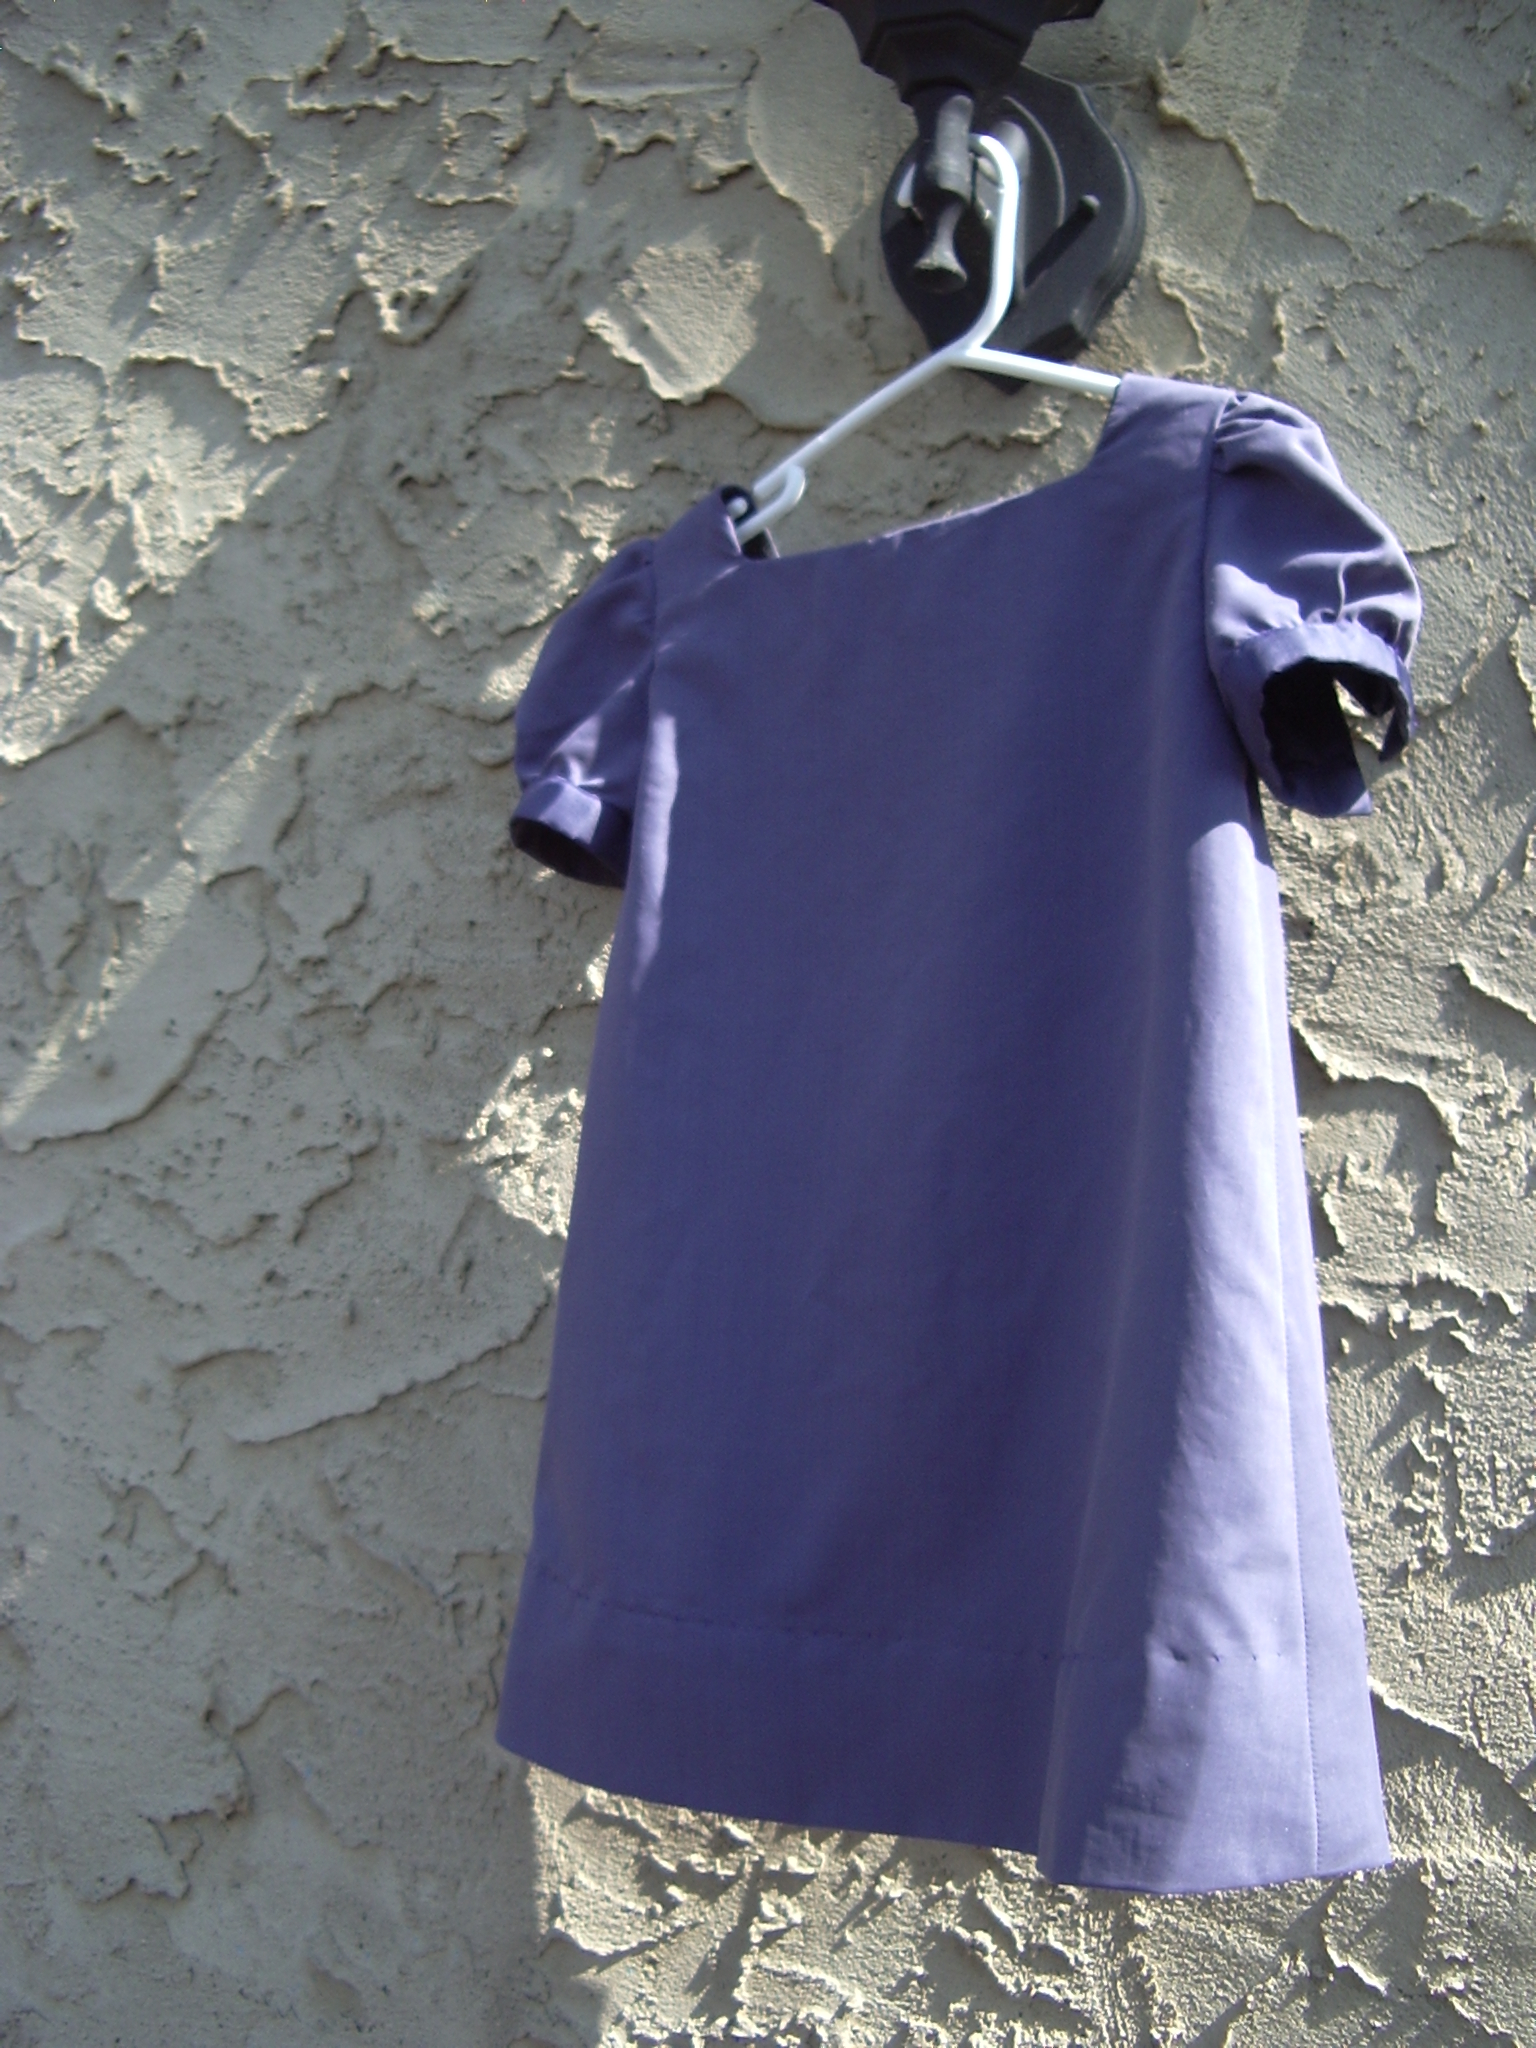
Vintage A-line, child's size 4, Butterick 4918

I made one slight alteration—I lined the pattern. Mostly because the fabric my daughter chose (from that same MIL stash, actually) is really soft and drapey, and the illustrations suggest a fabric with more body. Also,

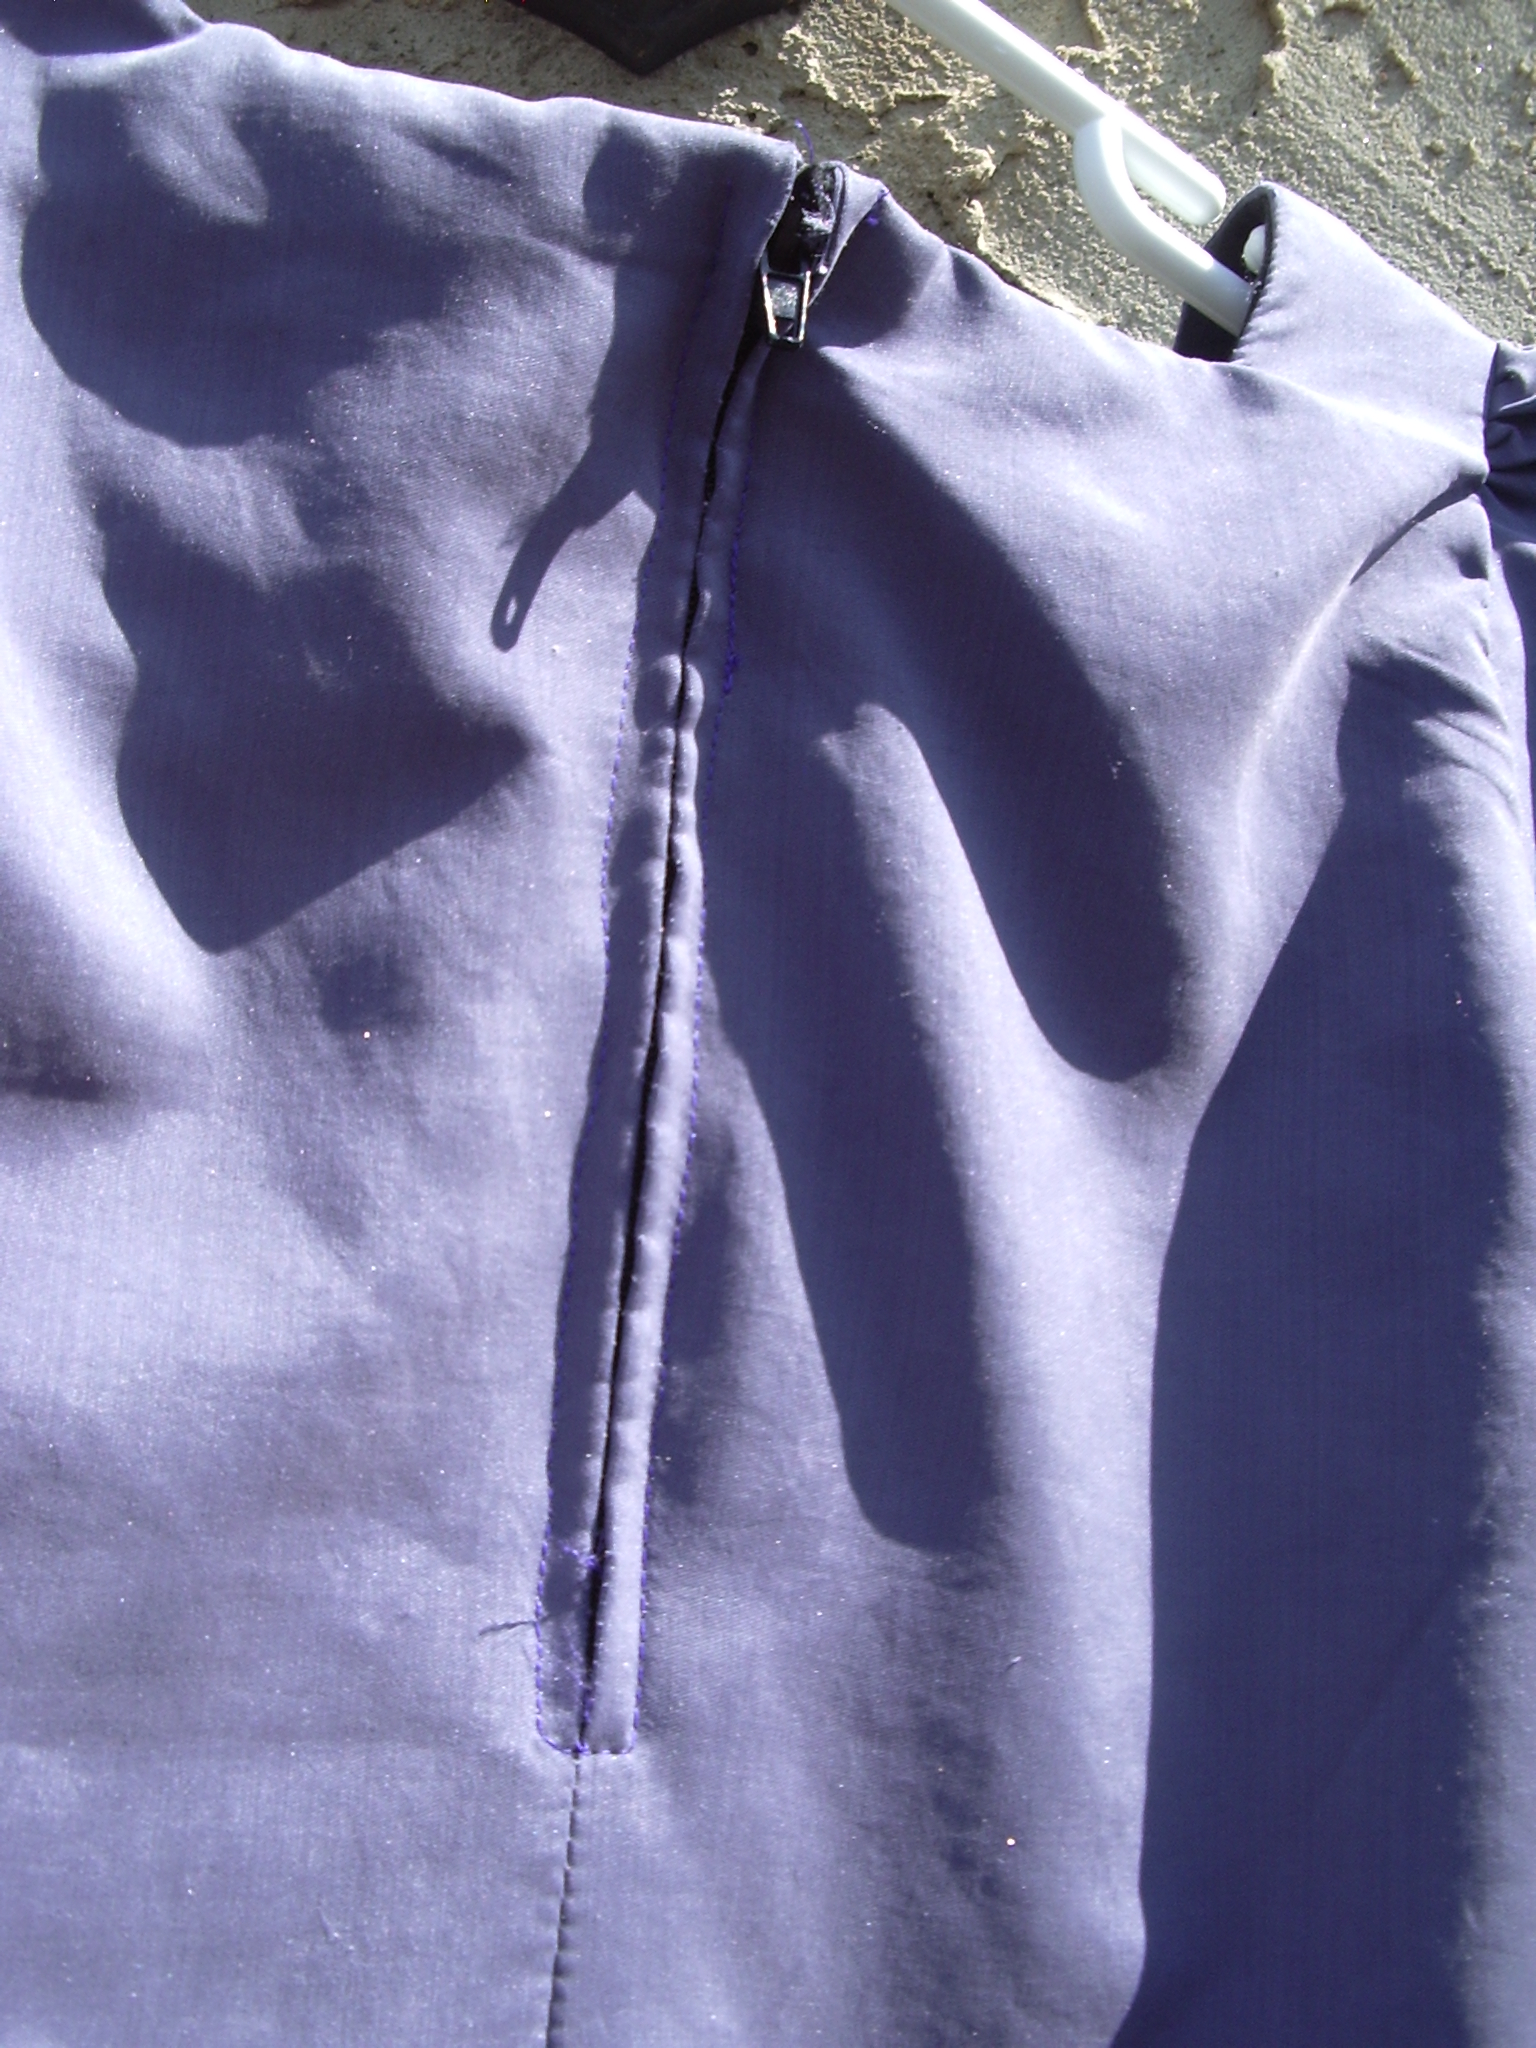
At long last, a zipper

I like lining things. This was my first zipper installation in a while (and my first on my new machine, and my first in a lined garment), so that was fun. It is not a perfect zipper, especially right at the top (I suspect some errors in my methodology… but it’s not bad (for me), and it’s nicely sandwiched between the two layers. Probably I would have benefited from reading the instructions more carefully (or any instructions)… but what’s done is done.

I dared to machine blind-hem both the lining and the shell separately. It’s my first machine blind-hem. Definitely not perfect (I could have done better by hand) but reasonable. I did a better job of easing the extra width in the lining than I thought I might on machine, so that at least was a triumph. Other triumphs include not having the lining peak out particularly at the neckline, and managing to catchstitch the lining around the sleeves (which I didn’t line) without having the outside end up totally puckered.

The original puff sleeve didn’t have an opening on the cuff, and I was a little concerned about my daughter being able to get her arm through, so I added some detailing to the back of the sleeve copied from my JJ blouse.

Back of sleeve detailing from JJ blouse

I won’t have enough length for an overlap, so I’ll do some kind of loop on one side and a little button on the other. Probably I should have embedded the edges of the loop in the cuff when I sewed it, but I’m not that organized.

All in all, a cute and surprisingly timeless little dress. Will update with photos of kid in dress (or news of a size disaster) when she gets home from school.

Edit: Kid in dress.

A vintage cutie

1 Comment

Filed under Sewing

JJ—Finished!

Red JJ blouse---Finished!

This might officially be my first piece of truly wearable home-made clothing. It remains to be seen how much I’ll actually wear it… I’m not usually a blouses kind of girl… but here’s hoping.

All in all… impressed with myself. Or maybe just the pattern. I was half expecting it to come out completely impossible to wear. Instead—a cute little blouse, despite my best efforts to mess things up.

Front view... slight gaping.

Nit-picking (because what fun would it be without nit-picking?):

1) there’s a slight bit of gaping at the front in the bust; it never showed during try-ons because I always had it pinned there, and in fact that’s where I was going to put my top button (there is no button at the collar)… but then when I was measuring my button locations it was easier to move it up an inch (so it was 16 inches above the bottom hem instead of 15) and put a button every four inches. That’s what I get for settling for easy mathematics :P. I can always tack a little snap in there or something if it’s really bugging me.

2) minor oopsie in the buttonhole placement on the sleeves… they’re a tad too far from the end of the band. If you notice this, you’re looking WAY too close.

Back... still a tiny bit loose, but fine.

3) hem a bit ruffly. Actually I’m fairly impressed with how this turned out, considering a) the stretchiness width-wise of my fabric, and b) how much I suck at doing narrow hems on a curve. It is no couture product, but it’s all right.

4) the back could still come in a tiny bit, maybe just a little higher up. but really, no biggie.

The interior seams are completely unfinished, since I was mostly thinking of this project as a muslin. At this point I’ll leave them as they are… if they ravel enough to really bug me I’ll try and zig-zag them at some point. I wish my serger were working.

Looking good!

All in all… pleasantly impressed. The automatic button-hole on the machine worked really nicely (though I’m still VERY glad I did the 4 or 5 test runs it took me to get the settings right. There’s always SOMETHING I forget about when I’m setting it up.

3 Comments

Filed under Sewing

Coats for Little Girls (Part II)

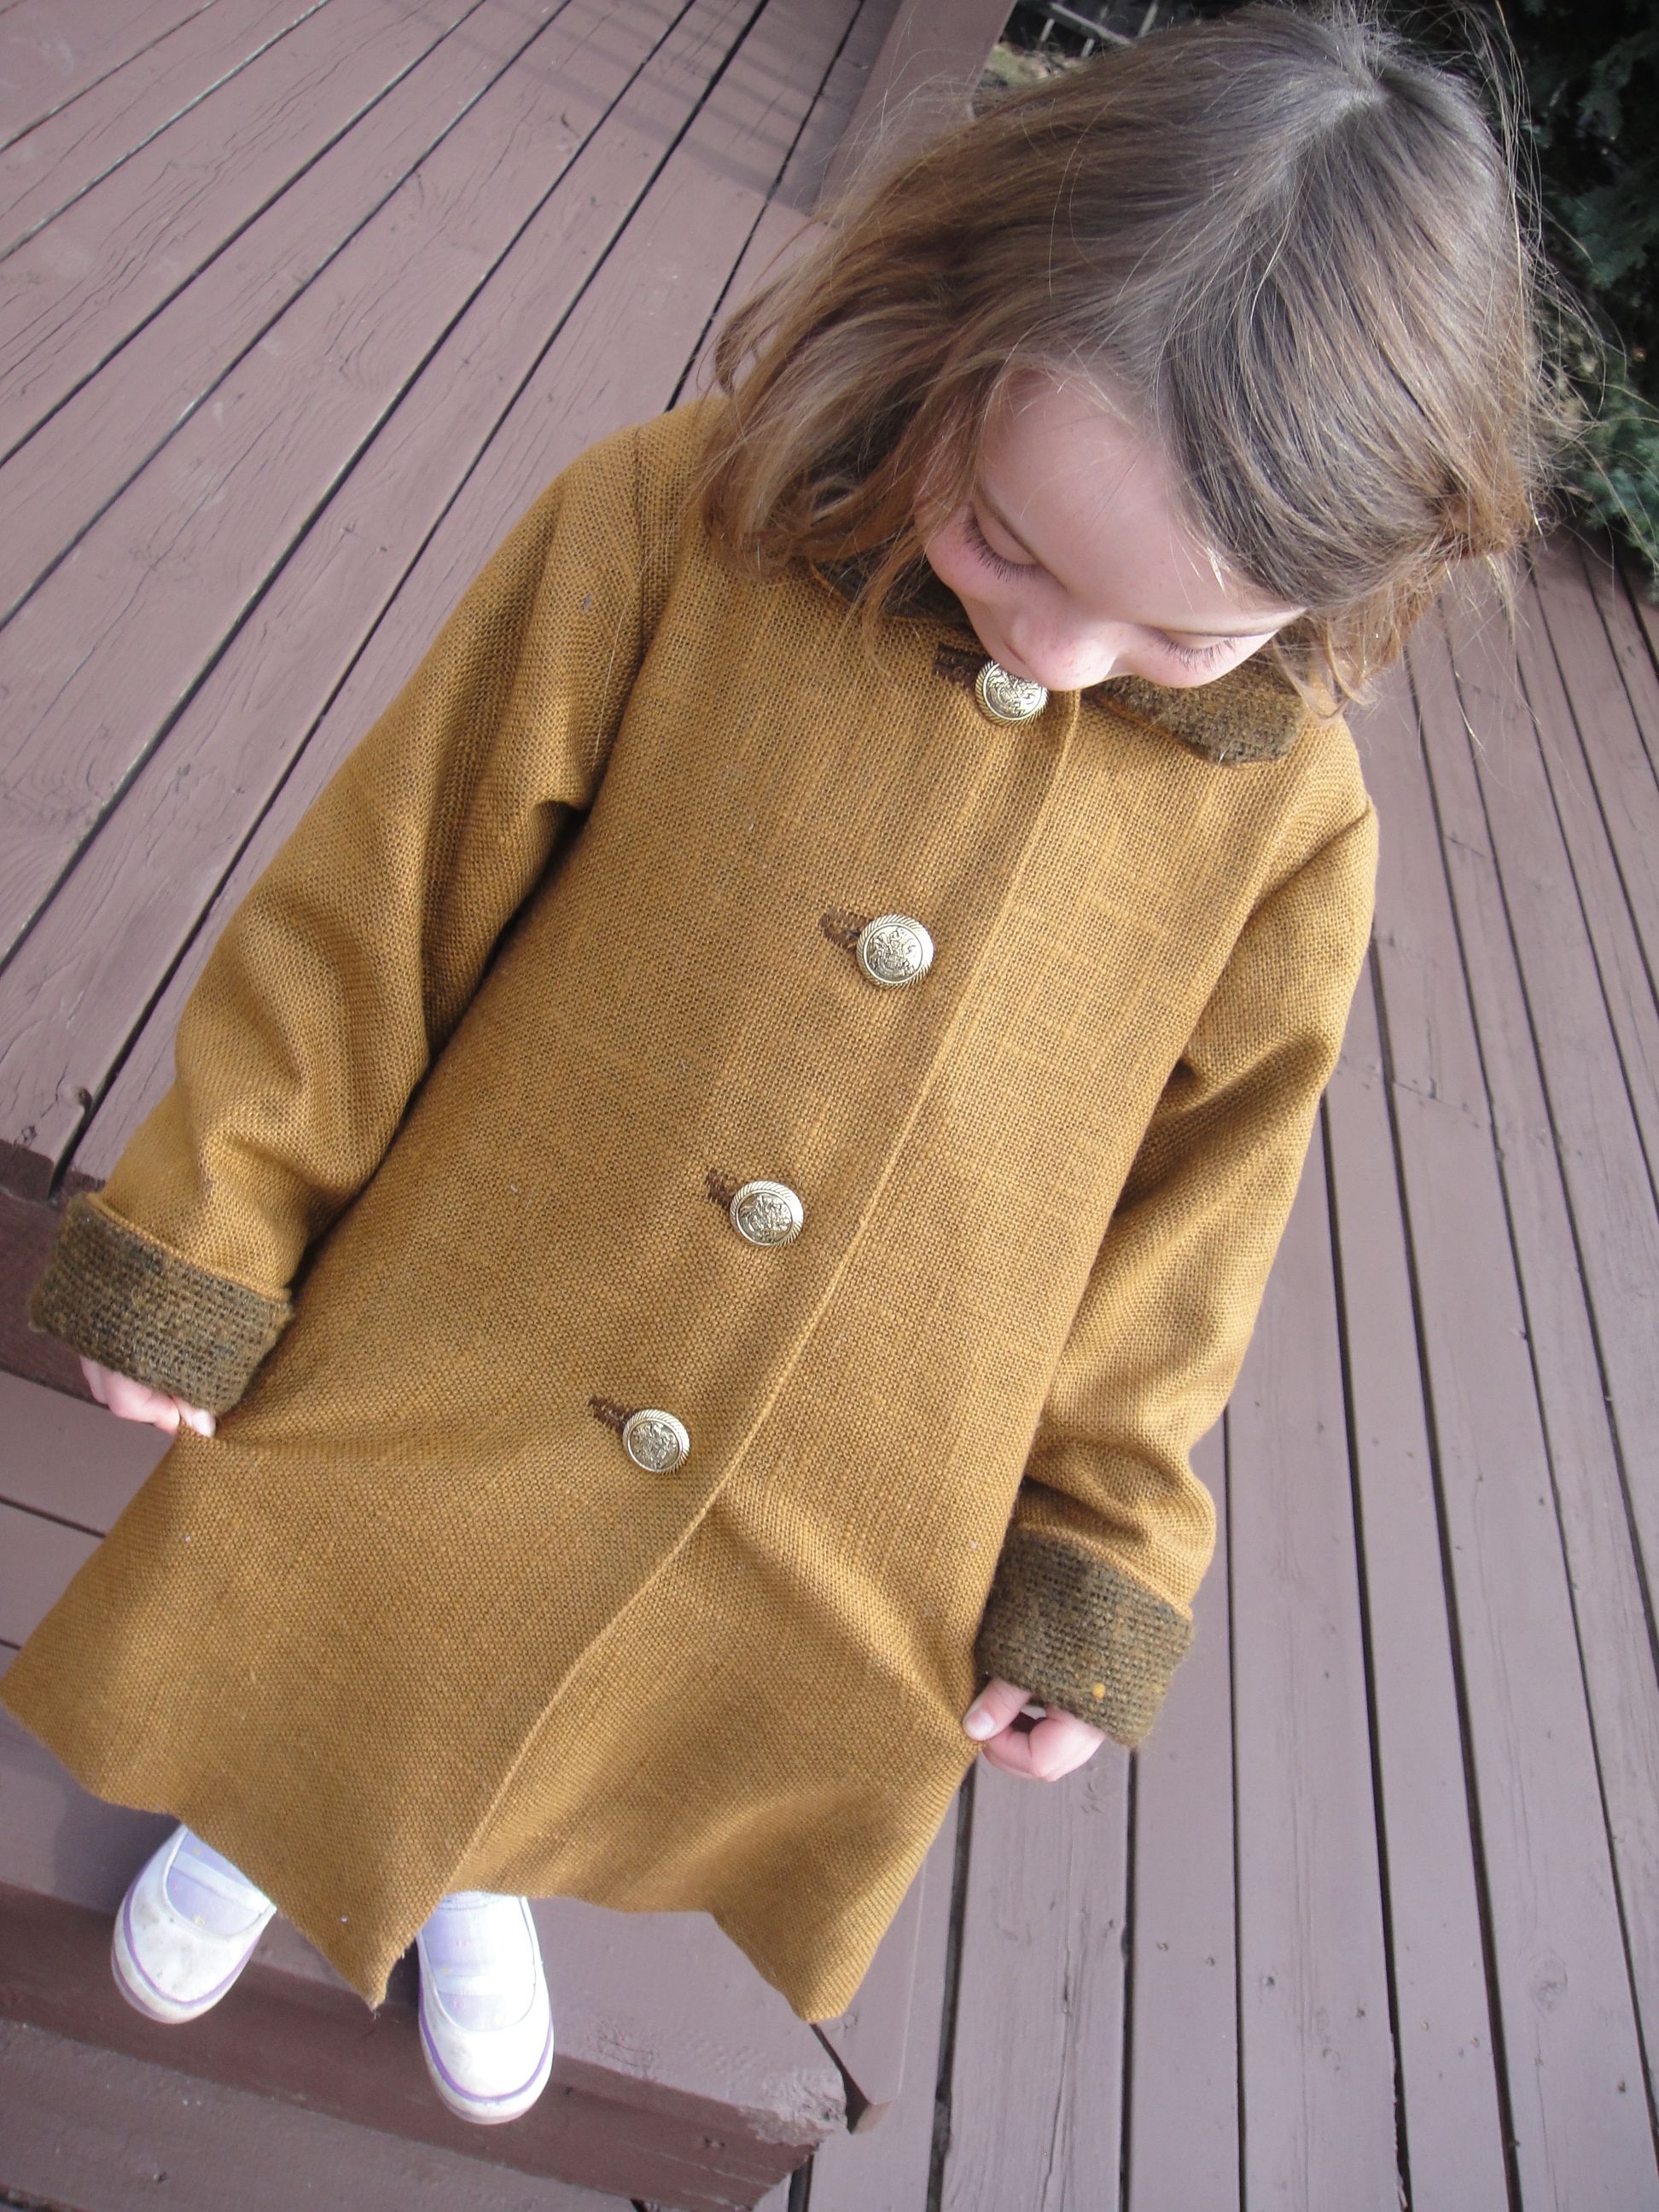
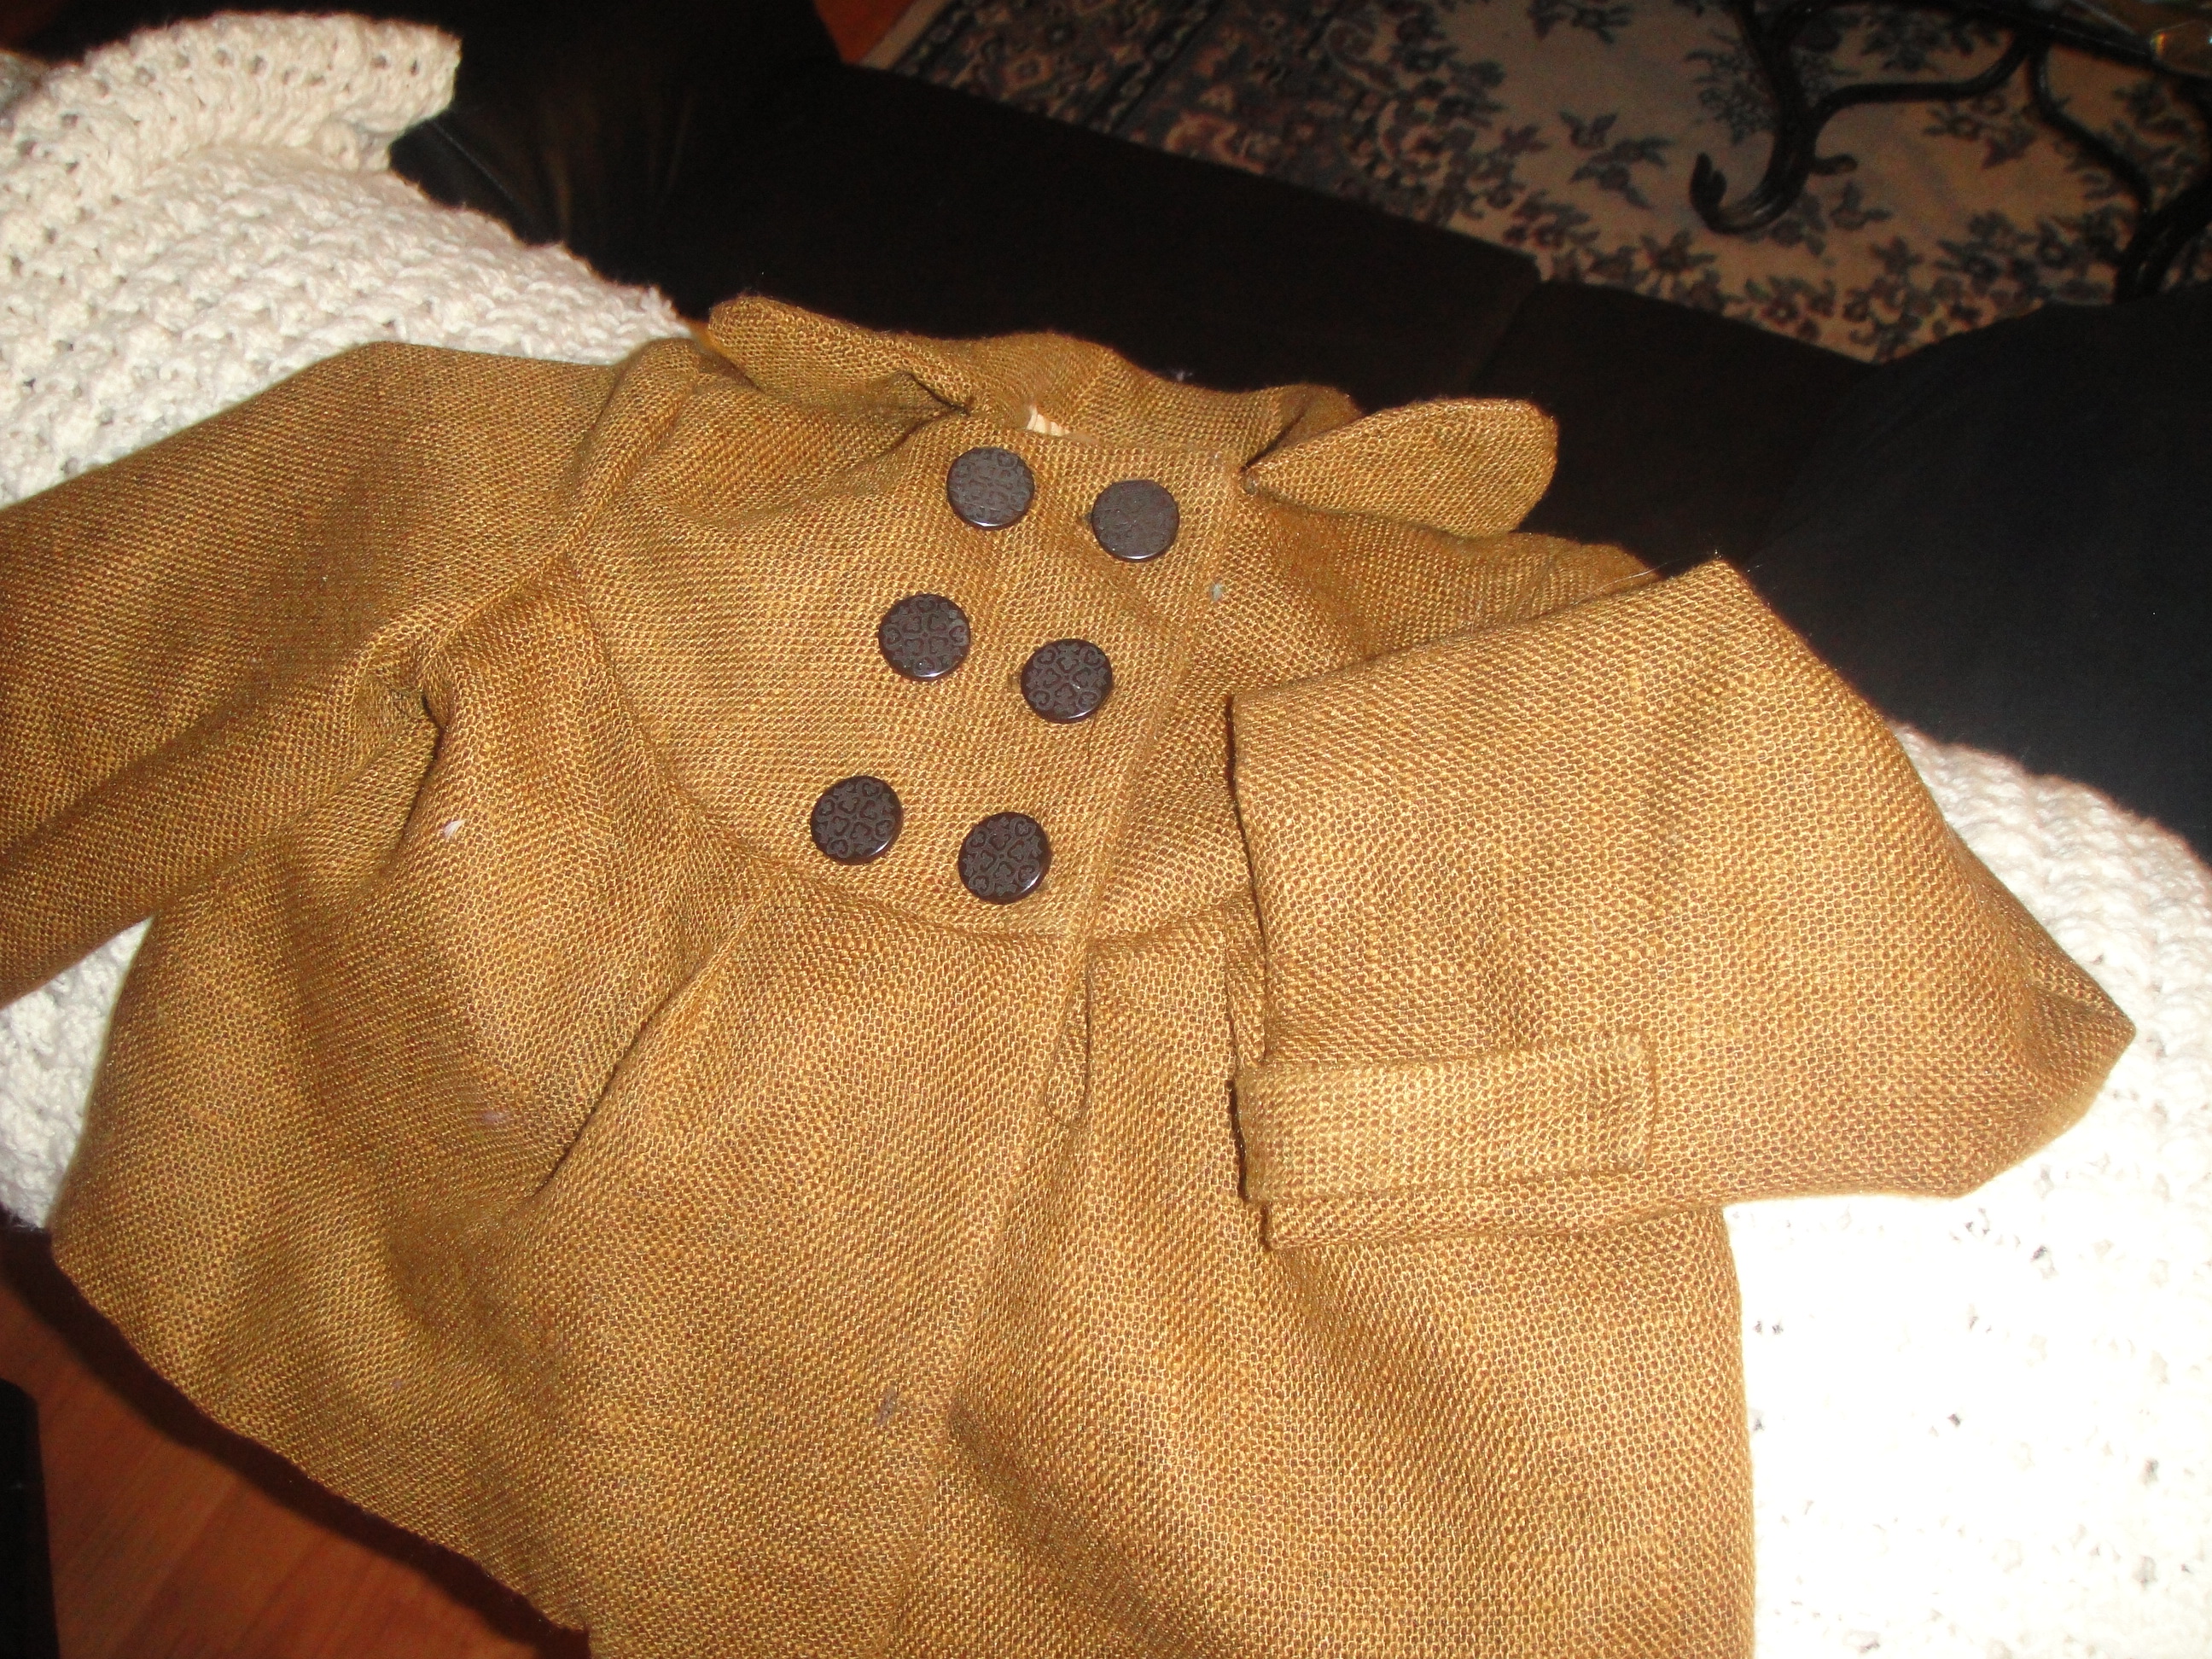
My younger daughter wanted the older pattern, McCall’s 3374, view C in particular. I was a little worried about having enough fabric, so I opted for contrasting cuffs and collar out of another, dark-brown curtain from the same hamper. Good thing I did… as it was I didn’t have enough fabric to do two facings.

Using this pattern was a little trickier than the other, mostly because the pattern wasn’t lined and I wanted the finished garment to be.  I just used the same pattern pieces, although perhaps I should have graded the sleeve lining a little smaller; it came out a bit ripply around the fold-back cuff part. I could have used the facing-pattern to subtract the facing amount from the front pattern to make a lining front, but I didn’t bother; for the one facing I did have (ran out of fabric, remember) I just pressed the inner seam back and topstitched it to the lining. I did put interfacing on both sides; I wound up fusing it to the inside of the lining on the un-faced side, which was not my best idea… the stiff interfacing really shows on the thin lining. Maybe it’ll detach with wear… if not, at least it’s not visible when the coat’s on.

Other than that it went together not at all badly.

3 Comments

Filed under Uncategorized

Coats for little girls… (Part I)

The fabric for the girls' coats

A year or so ago I received a gift-hamper that contained, among other things, some old curtains, a sort of ugly, coarse-woven, earth-tone fabric. They reminded me of burlap, though I think the fibre is actually wool (they didn’t melt when ironed on “wool” setting, anyway, and they feel rather scratchy to be cotton). “Oh,” thought I, “Fabric!” and proceeded to pick out all the hems.

I then spent a couple of months trying to come up with what on earth to do with this potentially hideous fabric. It was badly sun-bleached on one side, but the former inside was pretty much good. What to do?

And then it dawned on me: coats for my daughters.  This heavy, ugly fabric would be great in cute little retro jackets.

Unfortunately this revelation occurred right before I had to start studying intensively for my candidacy exams. Finally, just after Christmas, I actually got out to a fabric store; I bought a ton of lining, thread, some buttons, and the pattern for Simplicity 2876. An hour or so later I scored McCall’s 3374 at Value Village—so now I had everything I needed to start.

My older daughter chose the Simplicity, and wanted a short version (fortunately as it turned out, or I would’ve run out of fabric for the younger one’s). I actually whipped it up in the space of a couple of weeks, which is record speed for me. It was (I may have mentioned this before) my very first lined jacket; I also underlined the old curtain fabric. I did wind up hand-finishing the lining at the cuff and hem, as it seemed simpler than trying to figure out the instructions for finishing the sleeve lining. It worked out quite nicely, I thought, anyway. Now the weather just has to improve enough for her to wear it.

Firsts:

  • lining
  • underlining
  • buttonholes
  • iron-on interfacing
  • collar

Problems:

  • I suck at tight curves (like collars)
  • I also suck at buttonholes (and my automatic buttonholer foot wouldn’t work… the coat fabric was too thick.
  • pattern only mentioned six buttons (for the front); this particular sleeve variation should really have two more smaller ones for the tabs.

All in all, pretty happy 🙂

6 Comments

Filed under Uncategorized