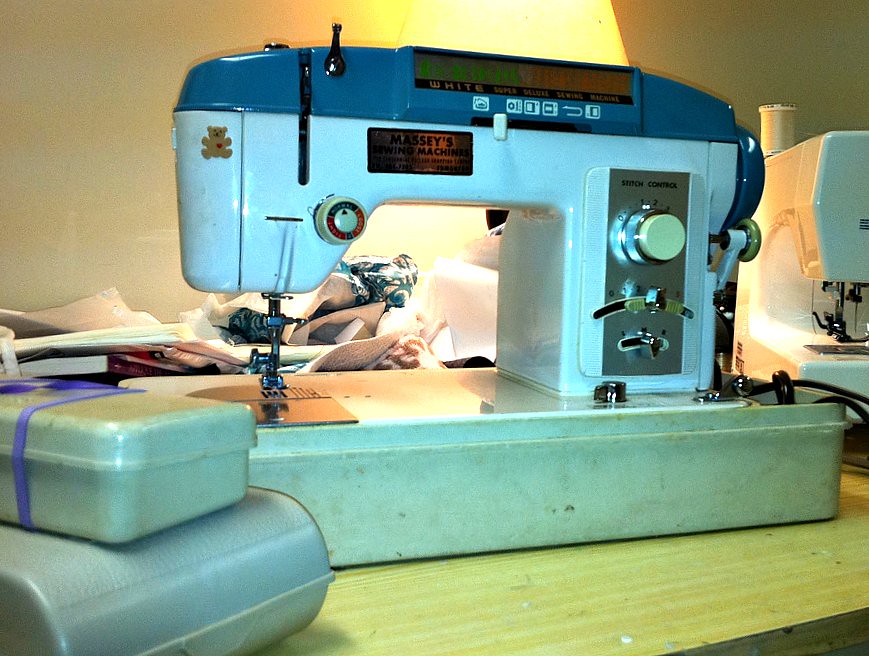
The Pfaff 360
Long, long ago, but not so very far away, a young girl sat at her mother’s sewing machine, fiddling with the knobs. This one changed the stitch length—long and short. That one changed the width—straight to zig-zag to wider zig-zag. Another one—but that’s a story for another day.
This is the machine I learnt to sew on, the Pfaff 360. At the time of its

The Case
manufacture, sometime in the 1960s, it was a top-of-the-line embroidery machine. My mother bought it second-hand in the early seventies, complete with manual, carrying case (it’s “portable”), and more feet than you can shake a stick at.
I can’t recall particularly clearly how I learned to sew with this machine. I remember watching her sew on it,

Coming out of her shell...
explaining that you needed to backstitch at the start of a seam. I remember at some point her showing me how to clip seams. She must have showed me how to thread it, too, since I’m quite sure I didn’t figure that out on my own, and I have vague recollections of learning how to wind a bobbin. That was about the end of my sewing instruction.
Then, when I was nine or so, my best friend and I started making doll clothes. I think it began with the paper dolls, but it spread fairly quickly to our Barbies. Our tastes were decidedly mediaeval: we started with

the accessories.
tabards, moved on to T-tunics, eventually experimenting with vests, jackets, and pantaloons and even front-opening shirts. At the height of my doll-sewing I attempted a few fitted dresses and circle-skirts. Everything was closed and cinched in with belts; there were no other fasteners (beyond a few ties), no darts, no real gathering. Seam allowances were 1/4″, seam finishing was nonexistant (except for external, decorative zig-zags), and hems were usually just zig-zagged for a tight, embroidered contrast finish. The fabrics were anything I could salvage from the scrap bag or steal from my mother’s modest stash.

The manual, which is the closest I came to real sewing instruction for well over a decade. Unfortunately, like most manuals, it describes the mechanics without hinting at the myriad little difficulties that crop up...
And I sewed them all on my mother’s Pfaff. My friend’s mother’s machine was a 1980s Kenmore, and I never liked it half as much—the tension just wasn’t as even. Although it didn’t weigh quite as much as Lady Pfaff.
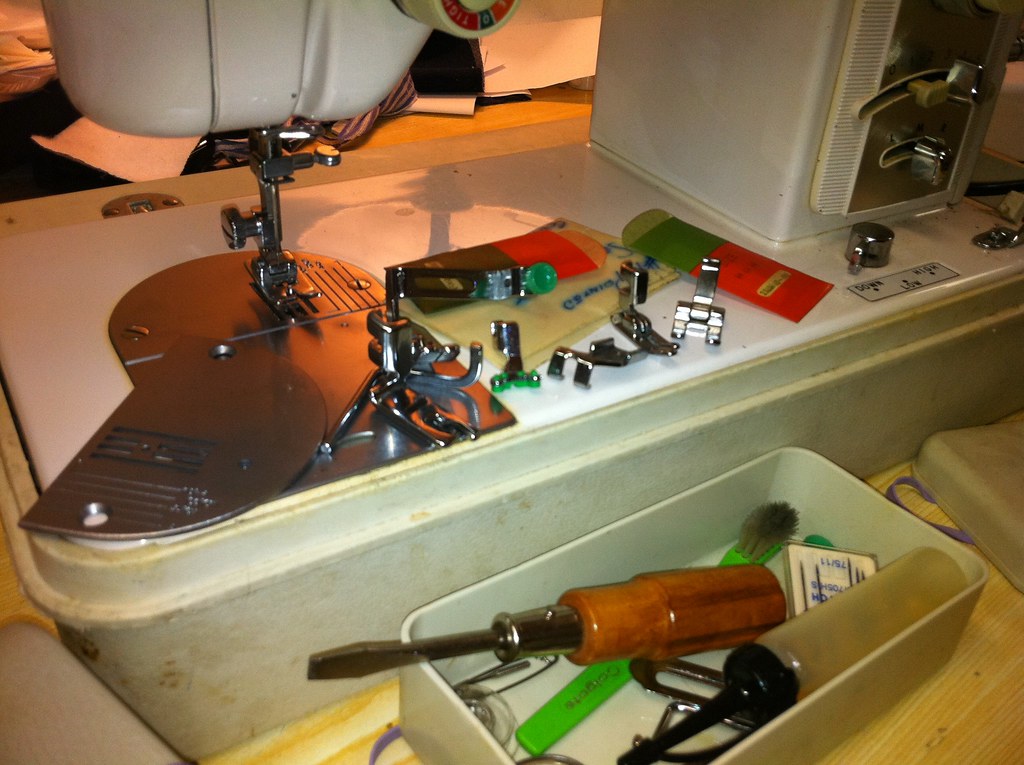
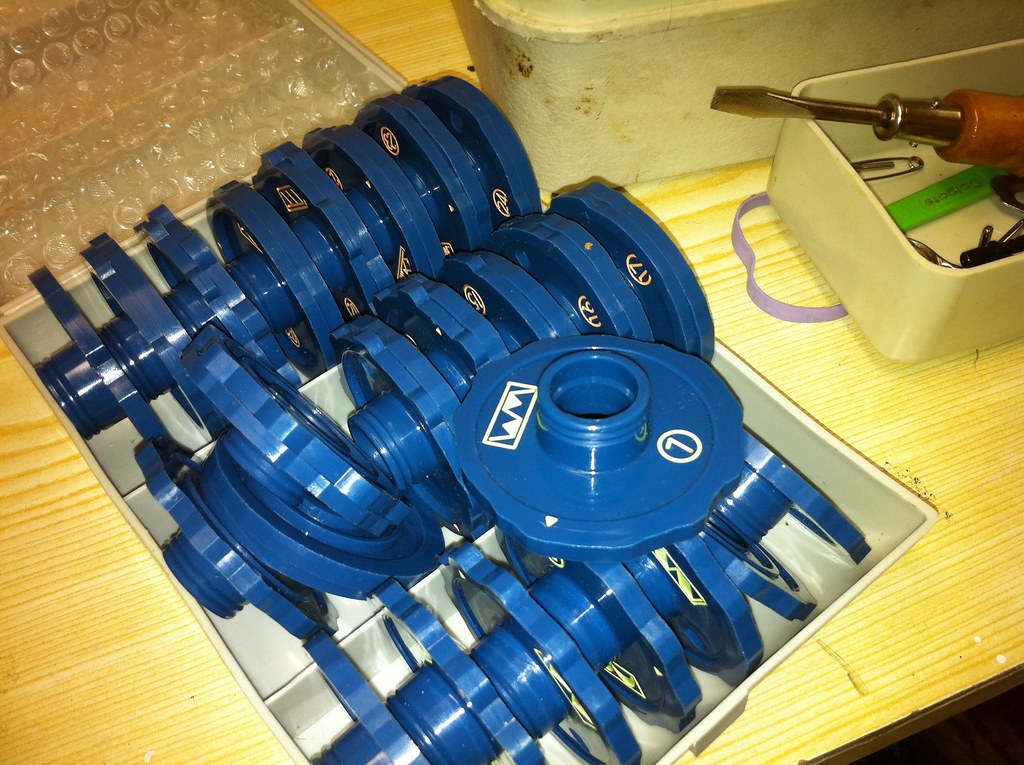
I never did figure out how to make her do the myriad of embroidery stitches illustrated on that round card, which were her specialty. It takes twiddling of a number of dials, as each stitch can be modified for width, length, and “side”, and then there’s another lever that basically engages or disengages all the embroidery settings (which is only mentioned in the last paragraph of the manual talking about them, and not illustrated). Too bad, because I would’ve had a lot of fun.
The Barbie clothes may not have been spectacular, but they left me with one major legacy: the powerful misconception that I could sew.
This misconception has stood me in good stead through the years since. When I took up bellydance in later high-school, it never occurred to me that I might not be able to make my own costumes (and, with the aid of the creative ladies I danced with, it turned out I could). It helped that tribal bellydance costumes, like the barbie-clothes, are often based on traditional, economical patterns (i. e. lots of squares, rectangles, and triangles). I still remember the moment I realized why “real patterns” had such wide seam allowances. (rrrrip! By the way, there have been many such lessons I’ve had to learn the hard way…)

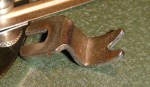
The Ruffler
Which brings me to the ruffler foot.
I love this thing.
One of the major articles of tribal bellydance gear is the tiered skirt. Three or more tiers of gathered rectangles, adding up to at least 10 (but often up to 25 or beyond) linear yards of fabric at the hem. I wanted to make my own, and I didn’t want to gather it all by hand.
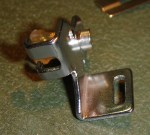
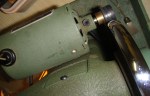
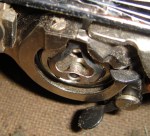
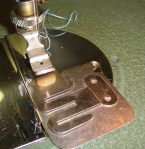
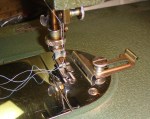
Some online research tipped me off to the existence of “ruffler feet”. They were apparently terrifyingly complex, unpredictable creatures, but capable, under the right circumstances, of creating instant ruffling without fuss or fidgetting. I had never seen one (nor a picture), but I set off to see if my mother’s machine had such an attachment. I pawed through the box (I still don’t know what half those feet are for, though my score is improving), and picked out the biggest, most frightening foot I could find—the one above. I had no idea how to even attach it to the machine, nevermind whether it was the one I was looking for.
I poked. I prodded. I figured out that the weird upper prongs fit around the screw that holds the needle in place (wtf?) and… I figured out how to ruffle. And pleat.
Once you’ve conquered the ruffler foot, surely there is little left to terrify you in the world of sewing-machines.
Well, maybe sergers, but anyway.
These photos were all taken in my mother’s upstairs hall because, against all

The crochet lampshade cover
expectations, we made it home for New Years! (and boy did we surprise them good 🙂 ). Tomorrow we drive back and Real Life resumes (/sniffle), but before that I thought I’d share the beginning of my sewing journey with you all—I’m just sad I wasn’t able to set her up and demonstrate some of those nifty stitches (or the crazy feet!)
And, to thank my mom for making her run up and down stairs hunting for the machine yesterday (and because I think it’s super cool), I want to show you her latest crafty creation: a crochet lamp-shade cover. Isn’t it gorgeous? Her own pattern (aka trial and error). Which just proves that she has way more patience than me!

An Antique Button Adventure
Coming soon: the fine line between “vintage” and “antique” and when stash becomes time capsule.