Tag Archives: sundress

The Red Polkadot Dress

Lady in a Red Dress

Some people can wear cinched waistbands. Some people can wear big shoulder-puffs. Some people can wear dirndl skirts.

Generally speaking, these people are not me. This is really too bad, as I like many of these looks on other people. And I’ve tried them on myself time and again over the years, only to go “ah, yes, that’s why I don’t wear this.” (with the possible exception of pouffy shoulders, which I like enough that I tend to ignore the linebacker effect.)

I really like the idea of dirndl skirts. They’re both ridiculously simple (gathered rectangle—can’t get any more basic than that) and economical of fabric, unlike my preferred circle skirts. But they generally sit right at the waist (not a good spot for me) and add a lot of visual bulk in that area.

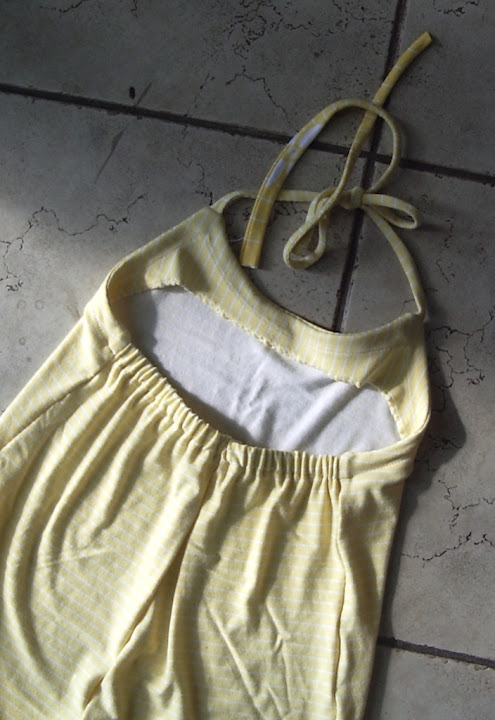
With the shrug. There’s a bit of pooching out of the ruching at the bottom of the front panel, where the outer fabric is looser than the lining. Presumably I goofed my seam allowances slightly or something.

However, as I’ve observed before, something magical happens when I slide the “waist” of my garment up or down a few inches. I can wear empire waists or dropped waists until the cows come home. Now, I believe another term for “empire-waist dirndl” is “maternity wear”, but what about a dropped waist dirndl?

Well, apparently that’s just fine.

I wrote a bit here about the bodice construction and my fitting challenges process. Having largely taken care of that, I came to the next stage in construction. The skirt.

Easy, right?

I had initially planned to do a gathered circle-skirt, like the original Katjusha pattern that was my inspiration. But on examining the amount of fabric I had left after I finished the bodice, it seemed like to get the gathering I wanted at the waist (er, hip) I was going to end up with an extremely SHORT skirt.  Whereas if I went with a dirndl style, there would be plenty of fabric for whatever length I opted for. Some quick and dirty measuring (aka holding the fabric up to my hips), and I was happily ripping away. Four panels of full-width (45″) fabric, a little below knee length plus a bit for hemming.

Red Dress

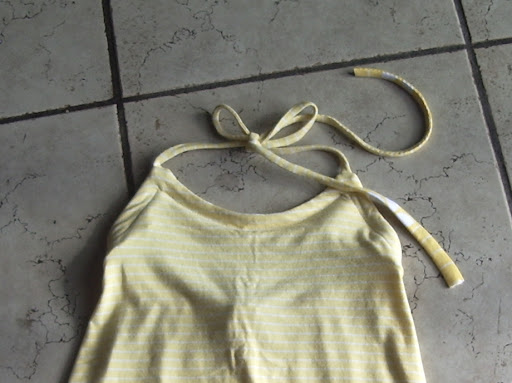
Confessions of a lazy seamstress: I didn’t even trim off the selvedges. I just tucked them inside the french seams I used to join the four widths. When they pucker up and throw the whole skirt off after the first washing, you can all laugh and point.So, I had settled on my width for the outer skirt, but my voile (or whatever this fabric is) definitely needed a lining. Back to my white cotton (yes, the stuff with the laceworked panel. Don’t worry, I’m moving from the opposite end of the length and there’s a ton of it.For my lining width, I used the width of the shirred back-panel, stretched out. It would’ve been smarter to determine this width before I did all the shirring, but I wasn’t sure it was going to shirr up the right amount at that point. Shirrly* you understand my quandary? Anyway, I decided to use this width for both the front and the back of the lining. I would gather the front to the bodice front, and sew the back flat to the stretched-out bodice back. But, you really want something underneath to give a dirndl (or any full skirt, really, IMO) a little oomph. I decided to make my lining skirt tiered. So I cut it approximately half the length I wanted, and then cut four more pieces of similar length for the bottom tier, and broke out the gathering foot.

Now, this is not my ruffler, with whom I have a passionate love-hate relationship. I wasn’t willing to deal with his idiosyncracies for four measly widths of lining. (If that sounds like a lot of gathering to you, please understand that I got the ruffler foot in the first place to make tiered skirts for tribal bellydance. The first such I made had 32 fabric widths in the bottom tier. And nine tiers, although I think only seven of them ended up being ruffled. So from my rather warped perspective, this is hardly any gathering at all

Red Dress

So I decided to play with my new, inexpensive, and untested gathering foot (Here’s a post contrasting the two). I popped it on, measured some 10″ lengths on scraps of the cotton, played with my stitch-length and tension settings, and after about three tries managed to get a gathering ratio approximating 2:1. Good enough. I began gathering.

I think I’m not going to become a huge fan of the gathering foot. It’s not awful. In fact, compared to some of the shit fits my ruffler has thrown, it was possitively easy to use. But the resulting gathering is not particularly even; it’s highly susceptible to the slightest difference in how I hold the fabric in front of the foot (crowding the needle vs. letting the fabric lie flat). The main thing I like about mechanical gathering with the ruffler over my preferred semi-manual technique (where you zig-zag over a supplementary thread… the zig-zag acts as a casing for the thread drawstring which you can pull up later) is that you don’t have to futz over the gathering being even, even if it may not be the exact ratio you wanted it to be. The gathering foot didn’t seem to have this evenness, and even worse it was pretty tricky to try to re-distribute the gathers after the fact. For the lining, I didn’t care, but I wasn’t enthused about using it for something that will actually be seen. It did turn out about the right length overall, so that’s good anyway, and it was quite fast.

I did give myself one further complication, which is that I had designed the bottom front of the bodice to dip down to a V. I love this feature a ridiculous amount, but it takes a bit of mental gymnastics to figure out how to reflect this on the gathered side of the skirt. At least, without sitting down and making an actual pattern and spreading it the required amount, which sounds suspiciously too much like work. Instead, I roughly measured the depth of the “V” (minus seam allowance) down from the top of skirt centre front, and free-handed an arch going from the skirt CF to side-seam. Good enough for government work, as my mother says.

For the outer skirt, I used my preferred semi-manual gathering method, mentioned above. I use this for “moderate” amounts of gathering, or larger amounts (like this) where I value precision of the resulting dimension over precision of every little gather. I gathered the over-skirt to match the width of the underskirt, and stitched them together. Really, fairly easy peasy.
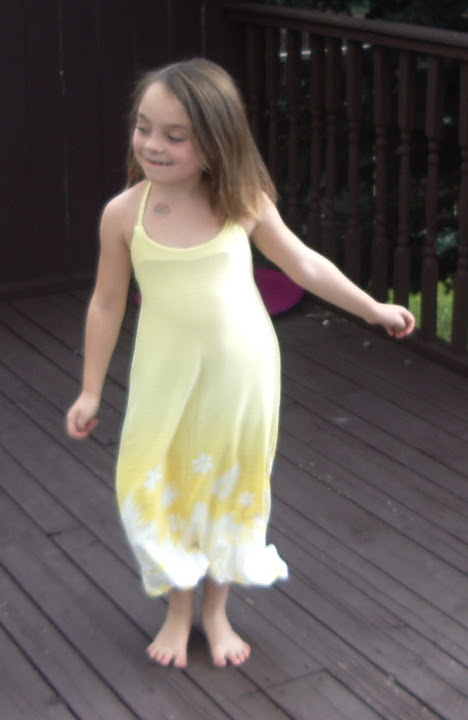
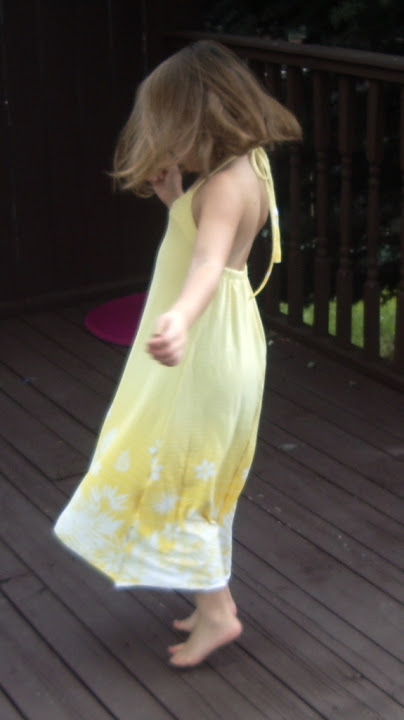
Twirling

Then, I did something I haven’t done since Tyo was a baby. I hand gathered the entire skirt front (both layers, and hand-basted it to the bodice. WTF? you are asking. I agree. But we were watching Sucker Punch with the kids last night and I could do the gathering and basting by hand without totally ditching the rest of the family. Normally I’d prefer to be hemming in such a situation, but I wasn’t quite sure of the finished length so I didn’t want to get ahead of myself and hand-hem four widths of fabric to the wrong length. I wound up shortening it by several inches, so it’s just as well I didn’t try this.

Possibly I should also have hand-basted the back to the shirring, as that was a beast to do accurately and took a couple of goes. But, water under the bridge. Man, I’m just full of platitudes today. If I can throw “a stitch in time saves nine,” in before the end of the post, I’ll be flying. Well, except that that’s one I rarely follow. It’s still good advice, though.

Red Dress

I am a little concerned that the combination of the front ruching with the full skirt have pushed this past “sundress” territory into the hinterlands of “something to wear to a summer wedding.” Since I don’t expect to be attending any weddings this summer, this would be unfortunate. I may just have to suck it up and be ridiculously overdressed (after all, it wouldn’t be the first time).I wasn’t actively going for a “vintage” look when I made this dress. Although maybe that’s an inevitable reference for any full-skirted, tight-bodiced dress these days. Anyway, pairing it with the shrug just turns the “vintage” look up to eleven. It goes, though, doesn’t it? This shrug is ridiculously versatile. Seriously, I wear it with EVERYTHING. I need about five more.All that gathering in the skirt interacts a bit oddly with the back bodice, despite my best efforts to reinforce the bottom of the shirring with some sturdier elastic, but it’s probably not something most people would notice (dazzled as they will be by the swishy, full skirt, right?)Incidentally, the length is only sightly below my knee. Tyo was standing on the picnic table to take the photos, so they’re from more of a downward angle than usual. I’m wearing the fluffy petticoat as well as the tiered lining.And obviously I need some red heels.

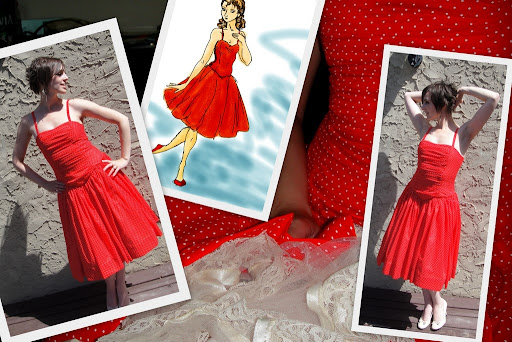
Final project and inspiration. I think I need a fluffier petticoat.

*I normally try very hard to resist the obvious sewing puns. I have never intentionally substitued “sew” for “so”. This one slipped through. I humbly apologize.

Advertisement

48 Comments

Filed under Sewing

Summer Essentials Sewalong—The Sundress

Those Summer Essentials

My bro and his GF are here, so computer time is at a minimum and sewing time is nonexistent, but here’s a quick attempt to post something.

I’ve been trying to collect my thoughts for a post about Ali’s Summer Essential Sewalong challenge, which I watched interestedly last year and have decided to actually participate in this time ’round. But I’m afraid I’ve felt a bit boggled, unable to really wrap my mind around the range of suggestions. So I’m going to cheat and tackle them one class (she helpfully divided the summer possibilities into six) at a time. And I’m going to start in the middle, because, well, I feel like it.

Ali wrote:

The Sundress: Need I say more? To me, the perfect sun dress strikes that chord between casual and elegant—arms and collarbones, looking good barefoot or high-heeled. It’s something you can wear to both a barbecue and a summer wedding.

Ok, so I’ve already made one contribution to this category, the Grecian Goddess dress. But I’ve got at least two more possibilities on the brain-pan, so hear me out.

A dress I don't need.

McCall’s 3415, of course, is still on the menu. I’ll get to it one of these days, probably when the temperature creeps above 20C for more than a day at a time.

Dotty Sundress

Then there’s that red polkadot voile from the thrift store that’s taunting me. I think it needs to be a retro, full-skirted, spaghetti-strapped sundress. I’m thinking along the lines of Katjusha, with the back of the bodice shirred for ease of fit and wearing, but the bodice would need to be modified, so the waist is slightly dropped. I’m generally wary of dirndl skirts, but if the waist is dropped it should be ok.

I just can’t be bothered with doing all the links for MMJ posts right now, but I’ve still been managing daily photos in the Flickr group, so check them out there if you like. (For today, I did my contribution to the “ugly background” challenge, with a photo of my once-and-future sewing room. It doesn’t look quite as disastrous in the photo as it does in real life, for some reason.) Maybe I’ll do a week-retrospective when my company moves on after the weekend.

9 Comments

Filed under Sewing

The Grecian Goddess Dress

Grecian Goddess Dress

I will admit I considered various alternative titles for this dress. The KISS (keep it simple, stupid) Dress. The Shirring Saves (Almost) Everything Dress. I commented in my inspiration post that I could just use a rectangle. I probably should’ve. Instead, I painstakingly drafted a short kimono sleeve, then added fullness for gathering both top and bottom. Even that would’ve been all right, though, if I’d just had this top flow straight into the skirt. But no, I had to fool with an underbust seam. Which of course (because I didn’t muslin anything) was about two inches too low in the front, and not particularly even all around.

In desperation a flash of brilliance, I decided to shir. I stitched up the front and back openings a couple of inches, pulled out my elastic-thread-wound bobbin, and started shirring a long spiral around the dress, beginning at my approximate underbust and continuing down across the bloody “waist” seam.

Front view

This created a vast improvement—instead of a mumu I now had something much closer to the elegant, drapey concoction I had envisioned. By a miracle, the neckline didn’t gape OR fall off my shoulders, and the bra straps are completely covered both at shoulders and at the back.

Back view

But all the shirring in the world couldn’t save that lumpy, uneven waist seam from being lumpy and uneven. No worries, though, I had always envisioned this dress with a sash across the offending area. I had planned to do a self-sash, but found myself desperately short of fabric. My Japonais Mum to the rescue! I cut off a pair of narrow widths ( it was too narrow to do just one), joined them in the centre, and made a simple tube sash.

Because having a seam at one edge and not the other annoys me, I hit on the idea of rolling the seam to the centre of the back-side of the sash. Quite satisfied with how that turned out. Yay me.

Sash closeup

Obviously I need to shorten the dress a fair bit… it’s dragging even in the heels I’m wearing for these photos (and the odds of me actually wearing heels like that out and about in the summer are pretty minimal).

I might try the general idea again, without an underbust seam and with a bit less gathering at the shoulder.

In Me-Made June news,

MMJ 4

This is an older ensemble, meaning everything in it was made last summer and fall. It’s not terribly glamorous and I have a few issues with the fit of the blouse that I didn’t notice when I first made it (too bad since I made like four different versions). Still, it’s warm and comfy on a rainy, chilly day. These remain my single favourite pair of me-made jeans, despite a number of material failures (the pockets have disintegrated and much of the topstitching is failing).

JJ blouse
Knit top formerly known as Lydia
Jalie 2908 Jeans

29 Comments

Filed under Sewing

Mellow yellow

Syo's Yellow Sundress

Back around my birthday, when I was feeling splurgy, I let Syo pick out a metre of fabric from the bargain section at Fabricland. She chose a soft, super-stretchy, lycra-y border-print in yellow stripes trimmed in flowers. We got home, and she picked out a pattern, New Look 6195, a kids’ sundress Ip icked up at Value Village. I settled down and traced out a size 7 (length 8)… and there the project sat, although the fabric got plenty of use as a blanket, veil, fairy wings, shawl, cloak, cocoon, and pretty much anything else a creative seven-year-old could do with it.

Dancing

This afternoon, however, Tyo had a friend over, while Syo did not. This (like most of their interactions) was threatening to bring on World War III, so I suggested we make up the dress. This was possibly even better than pissing off her sister, so Syo agreed.

Now, as usual, I am incapable of actually following the instructions (or good sense). The pattern was for a woven. Syo’s fabric is stretchy. VERY stretchy. On top of that, it is one of those pesky border-prints with the border on, y’know, the side. So the only thing to do was have the pieces go crosswise on the fabric. Creating, y’know, maximum vertical stretch. Exactly what you want in a dress.

Nonetheless, we bravely laid it out (man did it shrink a lot in the dryer, too, this took some ingenuity), cut our pieces, ironed interfacing on to the front facing, made the straps (Syo turned them inside out herself. It’s much easier to do in a knit, isn’t it?), and got to work.

It’s a cute sundress pattern. Simple. Not quite sure what purpose

Twirling

the back seam serves… it has a little shape but really, given the overall A-line of the dress, why bother? They have a very nice technique for sewing the side seams and facing all in one move, which gives you a nice finish and means that there’s absolute no chance to adjust the fit of the elastic before it’s sewn in completely. Which, of course, was too loose being designed for a woven (and probably with too much ease in the original pattern, too) and probably a little big for my rather petite seven-year-old at the best of times.

And then, there is the facing.

Now, I’ve heard facings are a bad idea in knits. As a result, I’ve never done them. This time, I decided to follow the pattern. Well, as you can see, the facing is a problem: it’s showing through like crazy. It was also turning out a bit, though you can’t see this in my rather blurry photos. I have since top-stitched it down at 5/8″ in (to match the elastic casing in the back). This should take care of the roll-over, and I will probably trim the bottom of the facing to match

Front with topstitching

It’s a fairly slapdash effort. Aside from the fudged facing, the elastic back was (inevitably) too long so I took a two inch tuck in it at the centre back, which is kinda bulky but can theoretically be released in a year or two when she grows into it. I left the selvedge at the hem, which has a bit of a lettuce-leaf look that I like. If it doesn’t work out, I may actually lettuce-leaf it at some point, but for now it’s fine. I eyeballed the ties, and it shows, but only if you look close ;). The seams are also a bit puckered, but hopefully that’ll soften up with a wash. The back hem tends to sag quite a bit, I think partly due to the halter cut itself, but certainly not helped along by the heavy, drapy fabric.

Nonetheless, her Sevenness is mighty thrilled. She might even get a chance to wear it, as the forecast is

Sundress back, showing tuck in elastic and the Facing of Doom

looking above-seasonal for the first time since August. We may even make it above 20 for much of the week!

In Self-Stitched September news, the weather has me HAPPY. Syo took the pictures, so they’re not full body, but I promise you those are my blue Jalie capris. Yay! I am getting so darned sick of the two other pairs… 😉

Mmmmmm

Top: Mannequim cowl top
Bottoms: Jalie 2908 capris

Sun, sweet sun

11 Comments

Filed under Sewing

Sundress!

70s sundress

Finally, something for me! And it may even be warm enough this weekend that I’l actually want to wear it!

This is the fabulously long version of my new 70s sundress pattern,

Sundress Start

seen on the right. It’s not a brand I am familiar with.

I added the patterned overskirt because I thought it would be pretty; the gauzy patterned cloth, as I mentioned before, was a broomstick skirt I’ve had forever. I like how it looks although it was a pain to cut out (especially since I wasn’t using pins).

The pattern calls for the elastic to run all the way around the ribcage; I preferred to keep it to the back and sides (less tummy pouff) but this had the side-effect of flattening the bust (since it’s designed to be partly pulled in by the elastic). I’m always amazed when I manage to make a pattern too small for my bust (ok, not exactly too small… they fit in fine. The shape is just flatter than would be ideal. The girls are really doing well for having nursed two babies, but they are still a little squishy these days). Other than that I really like the shape of the top—those kind of triangle tops can be really fiddly things, especially for gaping along the bias, and they both cover well and don’t gape, which impresses me. There is supposed to be an elastic inside the back of the neck, as well, which would probably make it more comfy, but I like the look of having it

70s sundress---back

sewn and flat. We’ll see for next time, perhaps. The waist elastic casing is only 1/2″, which looks very nice and delicate

70s sundress

but doesn’t feel terribly secure; I think next time I might try widening it to hold a 1″ elastic.

The instructions (which I read!) were simple but seemed fine. It’s a pretty simple dress.

Also, this amazing length is the pattern’s full length BUT it allowed for a 2″ hem, and I only did a 3/8″ one, as I didn’t think the wide hem would work with the crinkly fabric. So really it should be about two inches shorter. The extra length is fine for me, although we’ll see how impractical it ends up being.

(I’m not sure if you know me, but I tend to be drawn to the extremes. This means I like my skirts either really short, or really long. This has the net effect of making sure I don’t wear skirts very often, since the long ones tend to be too formal and restrictive, and the short ones I spend too much time making sure I’m not flashing people. Anyway, obviously this time I’m indulging in the long)

The gathered back does indeed look rather sack-like; hopefully my luscious and toned upper back will distract people from this.

The only other concern I have about this dress is that the voile is still quite sheer, and it does show all the way up in the front. Probably I would be wise to wear a slip or add an under-layer, but I don’t have much voile left, or anything else that would be suitable.

All in all, though, I am totally stoked to have a sundress again!

Closer view

7 Comments

Filed under Sewing

Speaking of impatience…

Sundress Start

Last night when I couldn’t proceed any further on the jean jacket, I pulled out the sundress pattern, read the instructions (!), even  did something approaching a tissue fit, and started cutting. Remember when I said I would make a top-length first, to try it out?

Ah, no.

I have now cut the rest of my white crinkle voile (otherwise known as this shirt) in a full-length version of the dress. The top is self-lined, by the way, so I decided to cut the outer layer of the top out of this print gauze, and add a 3/4 length overskirt of the same gauze.

The gauze, by the way, is a (now) former broomstick skirt I’ve had forever. Ok, since the early nineties. I wore it to my grade-8 grad, and it was not new then. Broomstick skirts no longer do it for me, but I’ve always loved the colour and the pattern. I’m not much of a print person, really, but this one works for me. Hopefully, it will also work for this dress. I’m going to do it as an overskirt, open in the front. I’m hoping it’ll be enough to make the voile non-transparent, but we’ll see. I may have to make a slip or something. Definitely not a dress to wear with black undies.

I did not trace this pattern out. It was already cut, apparently by someone with a lot more cutting skill than me. Also she appears to have used weights. There are no pin-marks. So when cutting mine, I used weights (aka soup cans), too.

I am not real good at that. Also, I think I may need to think about new fabric scissors. Mine are pretty good, but they don’t snip. You know, with the very tips. I have so many memories of my mom cutting out fabric, going *snip, snip* with just the tips of the scissors around the notches, and they would come out perfectly. My scissors cut really well except for the last half-centimetre or so at the tips. This makes snipping around notches really crappy. Especially with weights rather than pins. Especially with precious vintage tissue I don’t want to damage. It would be nice to have some bent shears, as well. The kind where you don’t have to lift the fabric as much to cut.

Anyway, here’s hoping. Stay tuned!

4 Comments

Filed under Sewing