Tag Archives: cottagecore

What’s old is new (x2)

(Santa stuffed my stocking well this year, too)

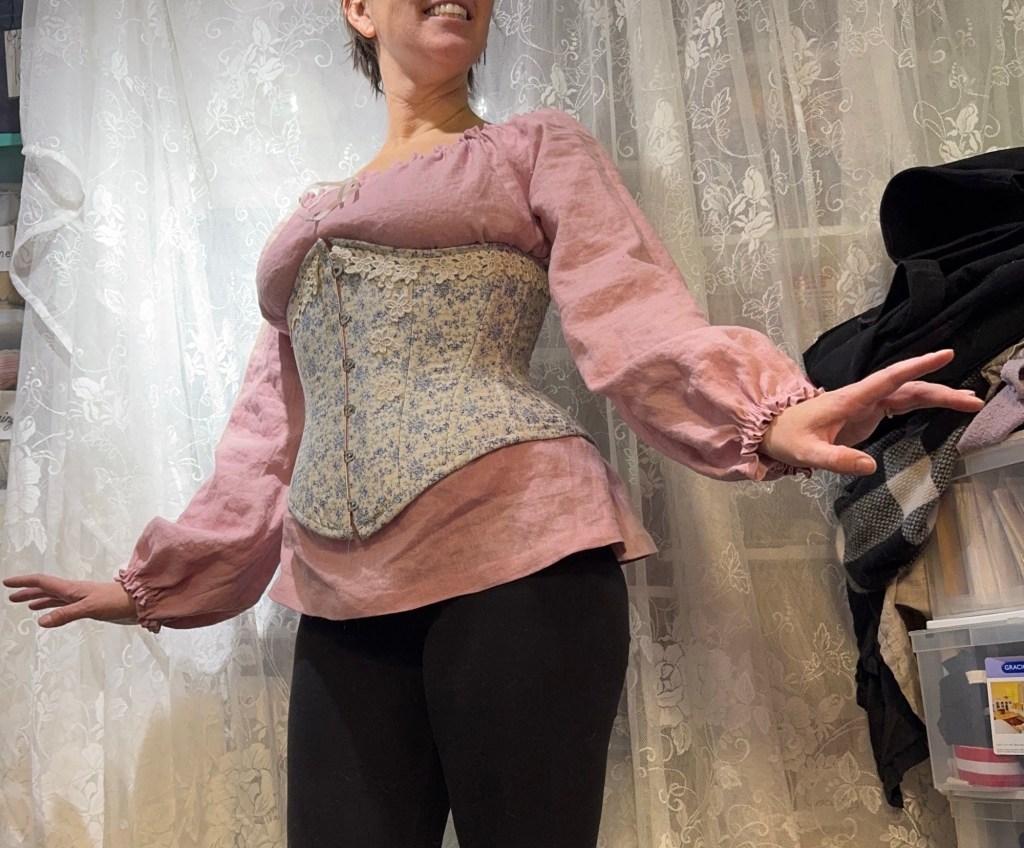
Syo gave me some very lovely pink linen for Christmas, brought back from her trip to Australia this past fall. Only two metres, she apologized, because it was very expensive. I was, understandably, thrilled. I prewashed the fabric that very day.

But then I needed to pick a pattern as special as the fabric itself. After some faffing around, I managed to find Butterick 6206, an old pattern of my mom’s. It has the significance to me, though, of being the first commercial pattern I ever sewed with, back in 1998 or 1999, when I was about 18, and wanted a white outfit to wear clubbing at the local goth night. I made it from an old, sheer curtain, and into a crop top, and I was thoroughly delighted with myself except for one thing—I didn’t know to lengthen the sleeves. So they were always annoyingly just a little too short.

Anyway, this felt like a good time and place to revisit this pattern, with a couple of adjustments.

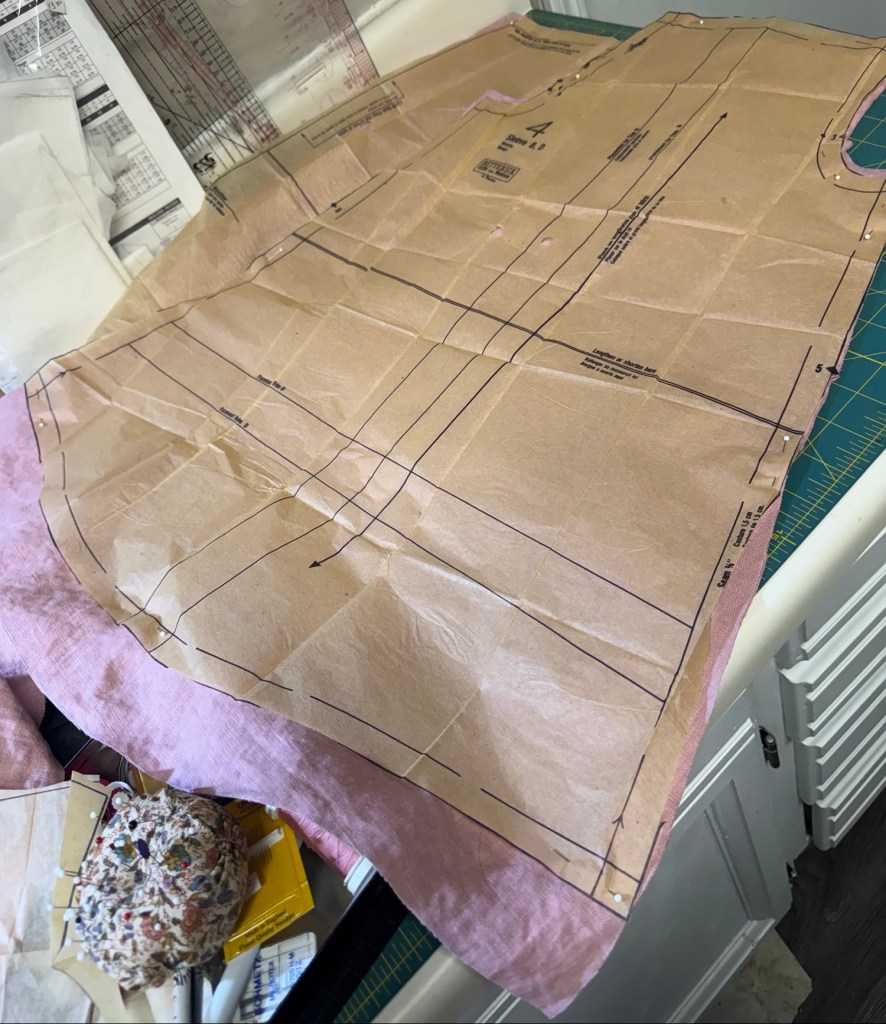
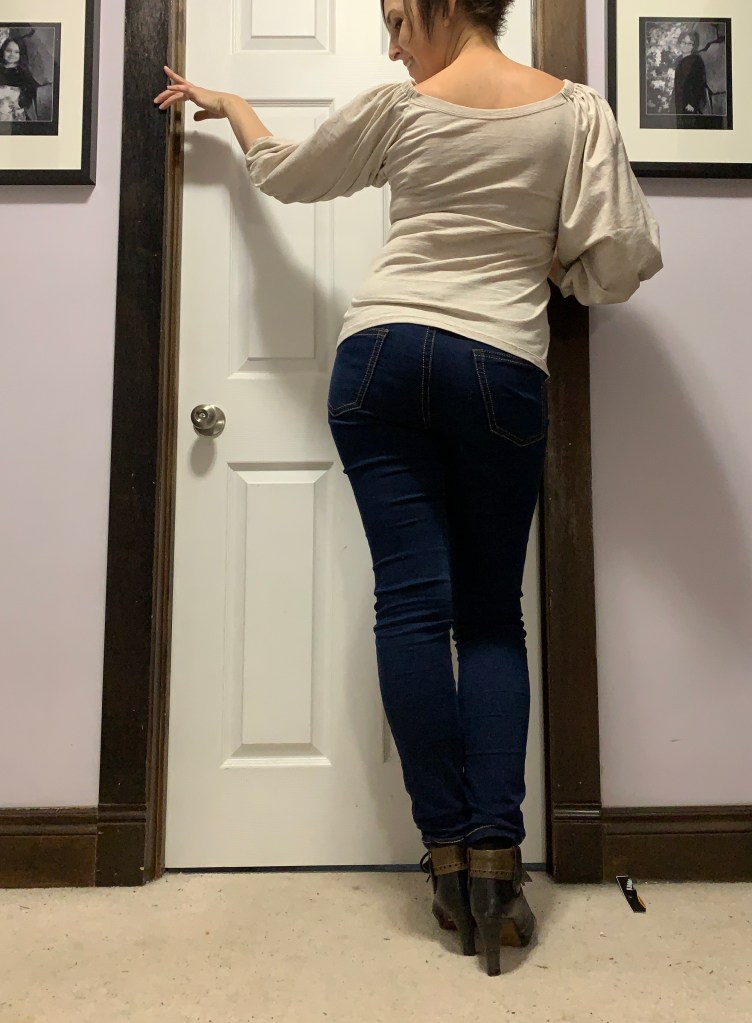
I added 2” to the sleeve length, just at the hem, since exaggerating that gorgeous bishop sleeve shape didn’t seem like a bad plan at all. And then when cutting the body pieces I scootched them in from the fold by about an inch each, for a total of 4” extra ease at the bust, which seemed about right for my current measurements. I don’t know if I strictly needed it for the bust but I definitely did at the hip. I also raised under the arms my usual 1/2”.

This was a great beginner pattern for me when I was a teenager because it really is as easy as it says it is, but revisiting it I also appreciated there is some really sophisticated drafting going on. The sleeve shape is lovely, and the neckline has some really subtle shaping as well. Much more subtle than the (similar era) Kwik Sew pattern I made recently.

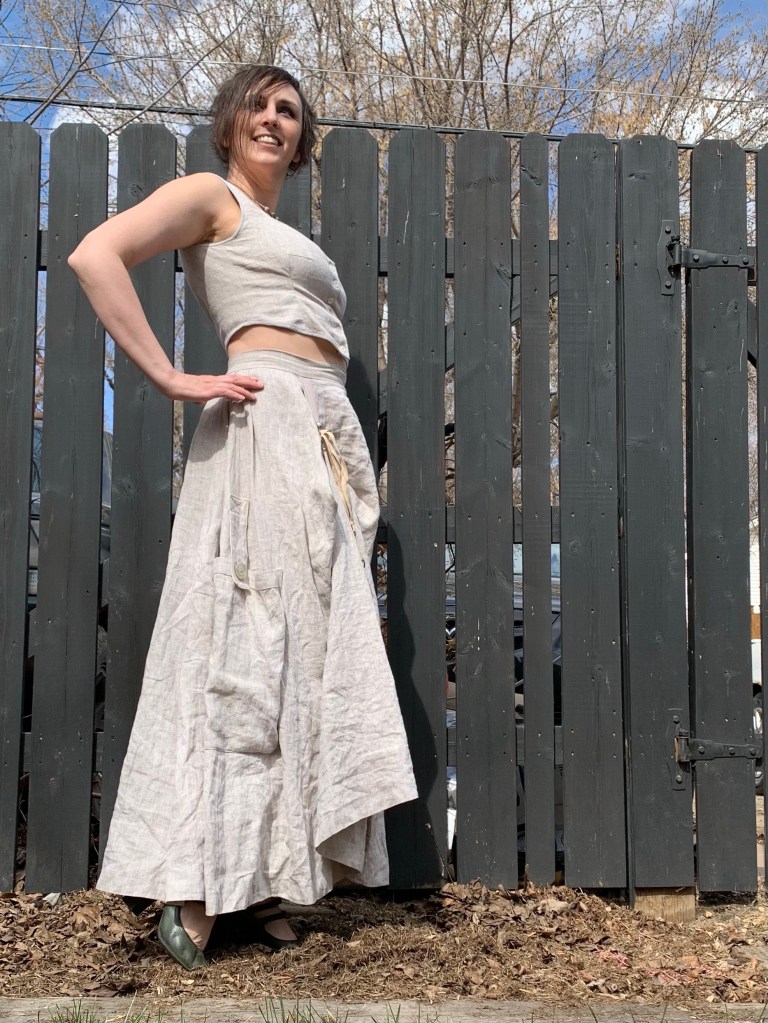
I added a little slit at the front, since I liked how that had worked on the Kwik Sew pattern, and it makes it easy to finish the neckline with a drawstring, which I like.

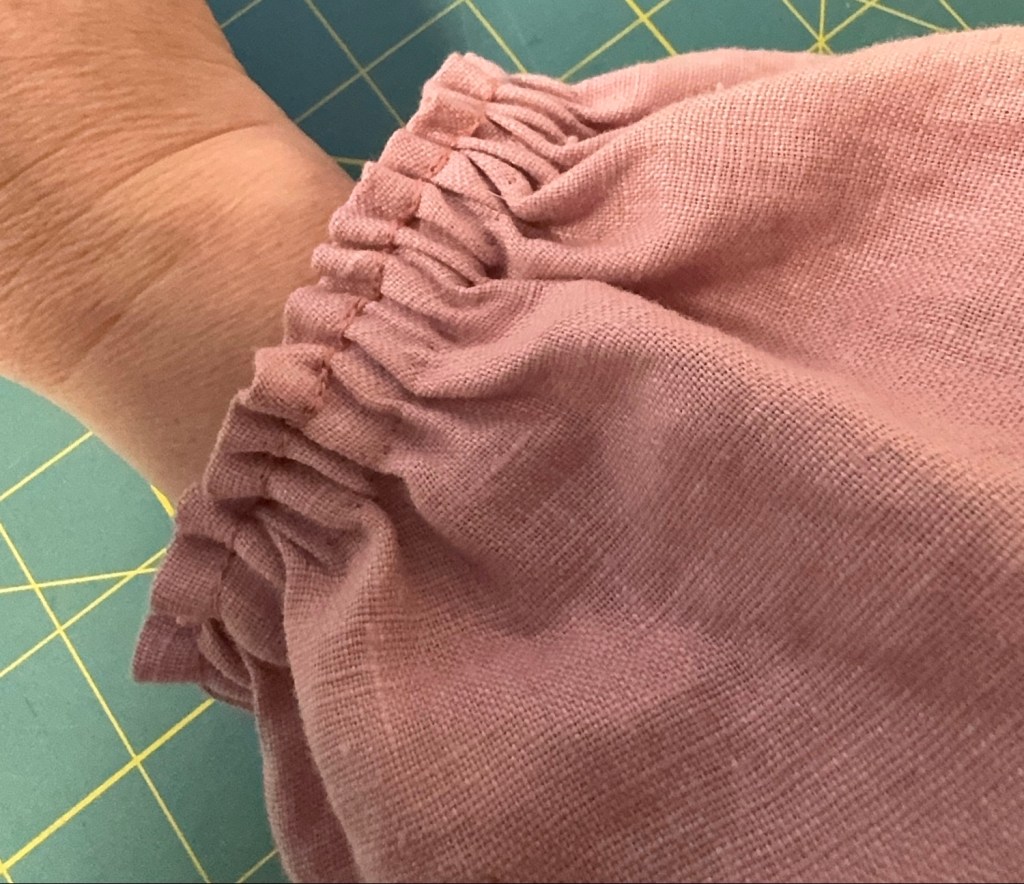
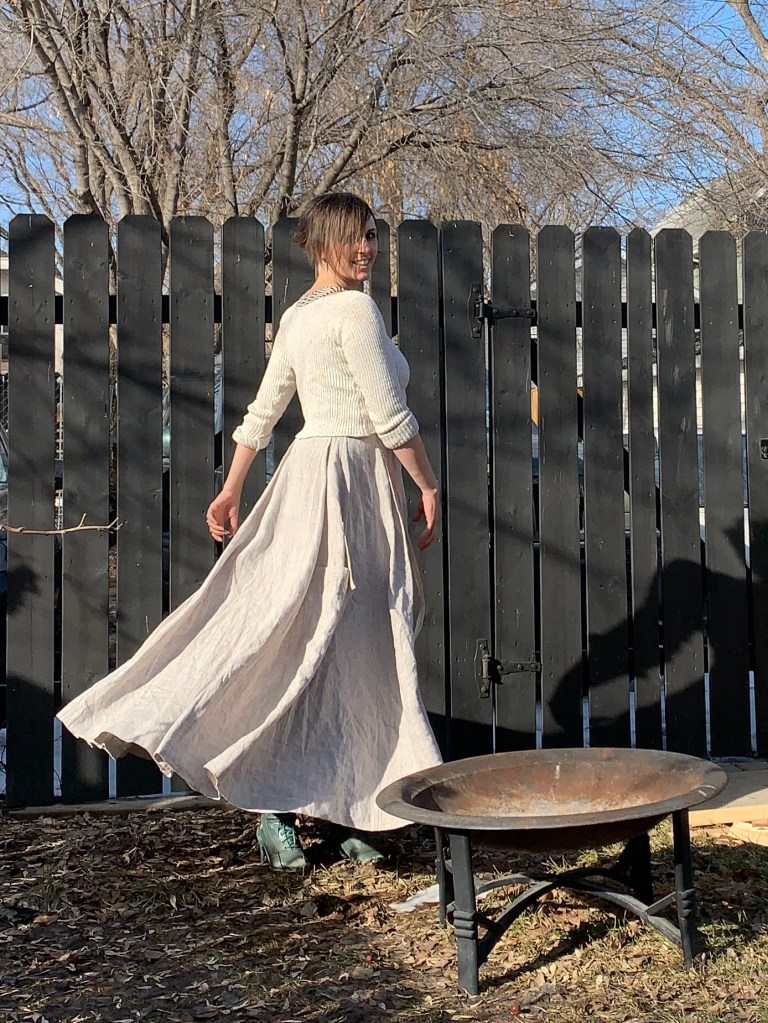
And then I went a little crazy, and decided this (very simple) special pattern and special fabric needed entirely hand-finishing. I hand-felled all the seams. And then I decided I wanted a ruffle along the edge, so after I hand-hemmed the whole thing I went back over the neckline and sleeve hems and added another round of chainstitching. I should honestly have added two, one on each side of the elastic, as I’m really not sure how well my basic hemming will hold up when functioning as a casing, but this was already a two week project and we’ll cross that bridge when we come to it.

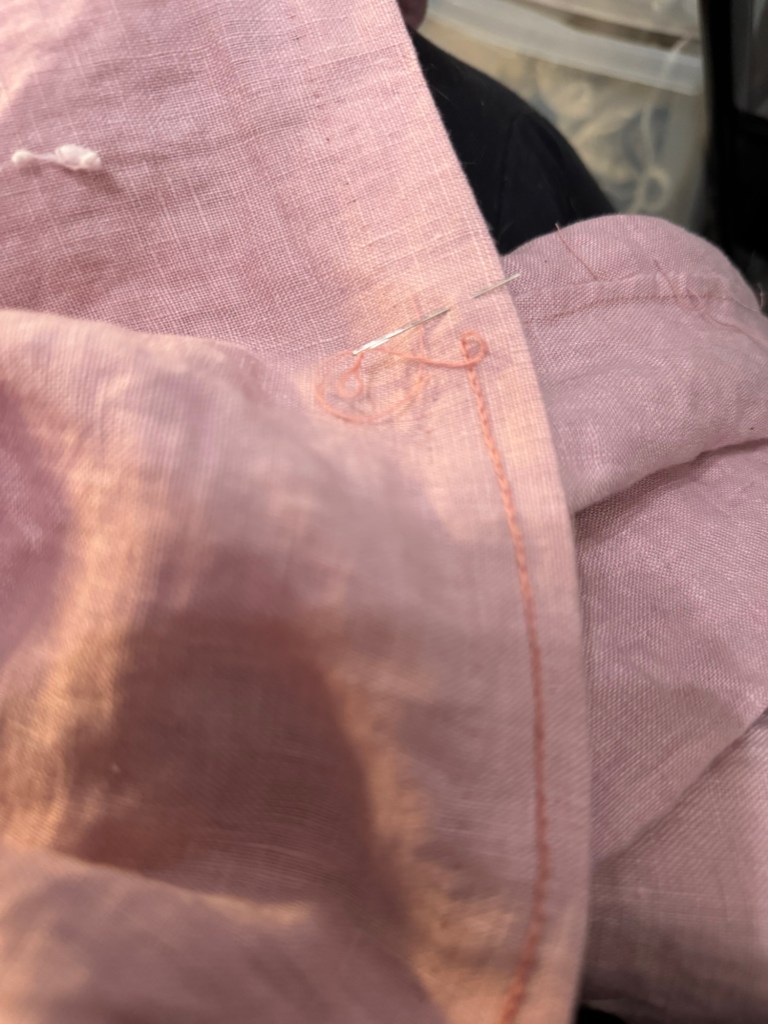
The chainstitching took by far the longest, although it seemed to go faster than the last time I attempted it, when it made me question my sanity. And you barely see it when it is all gathered up, although I like to think it adds a certain dimension and complexity to the simple design.

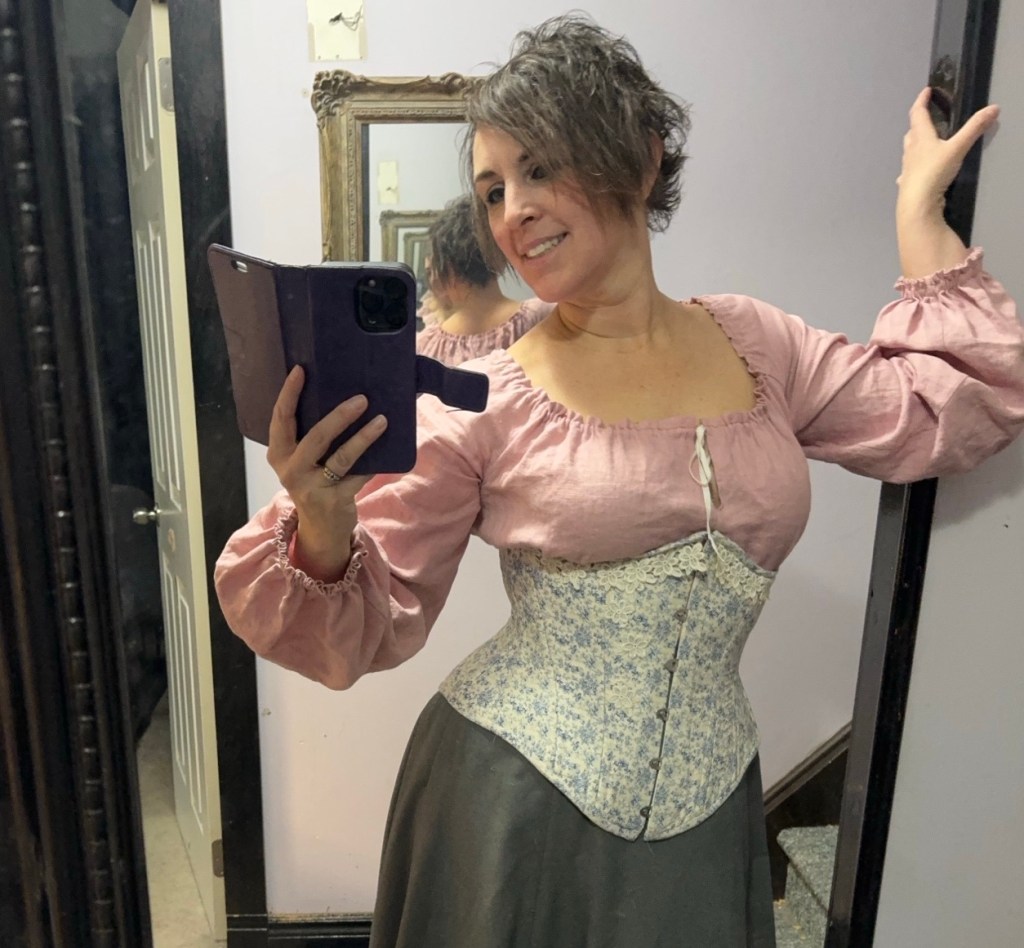
The only thing I’m not completely satisfied with is the drawstring I used, which is a piece of white cotton stay tape. Next time I have some avocado skins around I will try and dye it…

Then, because I was so happy with the pattern, I made it again.

Last summer, I attended a local sewist’s garden party, which included a fabric swap. I got this lovely piece of textured linen-rayon blend. It was, however, a very trendy chartreuse colour that I knew I would never wear. So I eventually managed to pick up some fabric dye and over-dye it with indigo blue. The result is a fairly dark, muted navy, still not one of my core colours but a lot closer than it had been before. However, there was only a metre of the fabric, and I was a bit stumped as to what to make, especially as I wasn’t in the mood for a tank top.

But when I had the Butterick 6206 pattern out, I realized that if I used the short sleeve pattern piece, I could just squeeze out the shirt, less about an inch of length, if I added a centre-front seam. I wasn’t able to add as much width to this version, but the fabric has a lot of give so I wasn’t too worried. And the CF seam made adding the little slit I like super easy.

This shirt was as quick and modern in its construction as the first one was painstaking. Overlocking and machine hems throughout. As a result it only took an afternoon to construct.

I do need to find a darker drawstring, though. Definitely not a fan of the white for this shirt.

Anyway, I think both of these will fit nicely into my existing wardrobe, drifting ever further in the whimsical direction as it is.

2 Comments

Filed under Sewing

Full cottagecore

For the last year or so an urge has been building. To make… not exactly a corset, not exactly stays, but a boned, fantasy bodice. A little mediaeval tavern wench, a little bit Ren Faire… and, let’s face it, a lot cottagecore.

I couldn’t quite settle on a plan, however. What pattern? How historical do I want to be? I have Butterick B4254, the 18th century view of which I haven’t made. I have the Scroop Augusta Stays, which the internet at large seems to agree is an excellent pattern. But what I really wanted was something a little more romantic and whimsical. Outer wear, not underwear. Something a lot like the creations of French Meadows, whose Instagram posts help keep my feed suitably aspirational.

And then, a couple of months ago, the creator of French Meadows posted a YouTube tutorial on how she drafts her corset/stays patterns.

And I was sold.

I have to say, her method (based apparently on instructions in Janet Arnold’s Patterns of Fashion 5, not one of the two volumes I own), worked pretty well. There’s a fair bit of art mixed in with the math of it all, but I can’t say I mind it. The draft itself just produces a kind of flared curve, which you then add details such as the front V, nubs for strap attachment, and other seams as desired.

Once I had it drafted out (which took a while since I have been so time-poor this summer), I decided to dive right in. I made extra-wide seam allowances and just went for it, figuring I could tweak the other features as I went.

As it turned out, my tweaks were quite minor: I added a bit more shaping to the side/bust seam, and I took in the side/back seam by about 1/4” on each side. When I make it again, I think I would narrow the front piece (and widen the side correspondingly) so that the seam is closer to a princess seam so I could add the shaping right there. It’s not historical but I do like the look for a fantasy piece like this. And I might add a bit of a swayback adjustment (raising the bottom of the center back), something French Meadows mentioned as an option but which I didn’t try.

But all in all, considering how arbitrarily I added my style elements, I’m pretty darn happy with it. The nubs where the straps tie on are in a good place and the front V only needed very minor reshaping. I had initially raised the front about 1” above the bust line but I did drop it down a bit between the strap tie nubs.

In terms of construction, I wanted to make something cute but not too precious. I opted for this toile de jouy print upholstery fabric (I thought it was cotton but it’s pretty soft and slippery and frays pretty badly… I should maybe do a burn test), with two layers of ticking as a backing. Ticking is nice for lightweight corsets and mockups as it doesn’t stretch, and two layers meant I could sandwich bones between the layers and add more channels on the fly as needed. (Turns out I needed an extra set of bones in the front). I used the same fabric for the bias binding, which I just attached in a single machine pass, rather than attaching the front by machine and finishing the back by hand. Again, for this fantasy piece the topstitching doesn’t bother me. And I managed to catch the back almost everywhere, which is always nice.

I did manage a decent mitered corner on binding on the front of the straps, so that turned out well.

I did initially play around with a wooden busk (aka ruler) for the front, but it seemed bulky so in the end for this non-historical piece I went with some of my heavier 6 mm spring steel boning for the front, which keeps it nicely flat, and spiral steels for the rest (except around the lacing, which is also spring steel, as usual).

I would like to swap out the soutache currently serving as strap ties and the back lacing, as it’s a little too slippery to hold how I would like. And I should make some slightly shorter versions of the straps so Syo and Tyo can wear as desired.

I am faced with a conundrum, however. For basically the first time in my life, I’m wanting skirts that are either gathered or pleated at the waist, as that seems to be the style that goes best with this kind of bodice. Mind blown. It’s not a style that works at all with my uncorseted body.

Oh, and I had to make it its own blouse to go underneath, but I’ll give that its own post.

4 Comments

Filed under Sewing

Refashion and repeats

I haven’t had the oomph to tackle anything big this fall, despite digging out some fabrics I’d like to use and some intense fall wardrobe capsule fantasizing. But words like “cottagecore” and “historybounding” have been inspiring me, and I’ve been puttering at an assortment of little things.

Tyo was looking for an elf-y white shirt for her Hallowe’en costume, and didn’t find quite what she was looking for in the house. However, her search inspired me (a few days after Hallowe’en) to pull out an old shirt my husband had retired as the sleeves weren’t really long enough. It was a bit of a romantic style, purchased from one of those booths that sells Central American hand-crafts at various festivals many years ago, with a bit of embroidery and a lace-up neck opening, but a standard round shirt collar and shirt cuffs. Since it became too small for my husband, it’s been kicking around in the “not in use but too cool to throw out” pile. (This pile is Too Big. But that’s another issue for another day.)

I cut off the sleeves just below the elbow. In hindsight maybe I should have cut them not quite so short, but I was thinking of Tyo and she finds it annoying when puffy sleeves flop down over the cuff, and her arms aren’t as long as mine. I hemmed the edges into a casing and added a narrow elastic for a blousy sleeve.

Also can I say I’m LOVING this outfit a lot more than I thought I would?

Then I cut a wide scoop neckline, starting just above the top of the neck lacing. I used one of the sleeve off-cuts to cut a series of on-grain strips, connected them together and pressed in the edges with a bias tape maker, and used that to bind the neckline. I was pleasantly surprised at how well the squishy, heavy-gauze type fabric curved around the neckline, even when cut on grain, but I should have stay-stitched or even slightly gathered the neckline first as the same squishiness of the fabric let it stretch out quite a bit under sewing, and the resulting neckline is a bit wide and deep for Tyo. It works ok on me, and hopefully will be ok for her—worst case I might unpick the back neck and add a pleat there or something.

Despite how long it took me to write all that, the entire mod was probably done in under an hour.

As I was musing over the shirt refashion, I still felt that I wanted a light/neutral coloured top with actual swishy sleeves, so I decided I needed another Adrienne Blouse. My previous versions are red and black, in heavy rayon knits. This one is a heathered oatmeal colour cotton knit, not nearly so drapey and a bit thinner, originally purchased from Blackbird Fabrics. I’m relieved to say the sleeves work just as well in this fabric, and the body still fits nicely (with just the right amount of ease). The elastic I used in the shoulders for this one is VERY firm, which makes the neck a little higher, and I wouldn’t mind if it were a smidge lower, but other than that I’d call it a pretty flawless make. There’s nothing like a TNT pattern when you just need a win. (Also, I’m going to be so sad when the big sleeve trend passes. I’ve always kinda liked puffed sleeves, and it is glorious to finally be able to revel in them without feeling slightly guilty that I’m too old or dignified for them.)

The only change I made with this version was to remove the extra sleeve length I had added. It’s not a huge difference in the look, and it saves a few inches of fabric. I’m excited to try it with some skirts and belts, but of course the twins goobered something dark right on the front about five minutes after I got home from it’s first wear, so my pictures are pretty limited.

So basically I just want to dig through my closet and play dress up figuring out all the possible outfit combos with these things… and I mean the twins would be all over the pulling out part, but they are still not too fond of the cleanup parts.

2 Comments

Filed under Sewing

Adventure skirt

This skirt comes from the confluence of a lot of things. I miss my old wardrobe. I’m so sick of living in leggings. I wanted to work with some linen—I’m craving the feel of a crisp natural fiber against my hands. And I guess the Sewcialists’ Zero Waste sewing month (that’s how long sewing this has taken) wormed itself into my subconscious, because even though I’m not usually thrilled with the practice of zero waste sewing, I wanted to try a really low-waste approach to this skirt.

It’s also taken a fuck load of time to complete, one seam (or even half seam) at a time, as the twins are VERY busy these days and we’re all worn out with winter and isolation, so it’s been hard to ask for more alone time to sew when everyone else I can ask is already at their limit, too.

The fabric was a big piece of extra-wide linen from Pure Linen Envy. I had ordered it hoping to make a bed sheet, but the 208cm width wasn’t quite wide enough for a queen size bed, nor is the fairly loose weave really ideal for bedding. But it wasn’t overly expensive for the size, and since it hadn’t really worked for its original purpose, I didn’t mind sacrificing it for something kind of experimental.

I started by calculating out the measurements for a trapezoid skirt. This is the low-waste method where you cut trapezoids in alternating directions, and then flip them around so the narrow ends make the waist and the wide ends give you the skirt’s flare. I could go into how I carefully decided on my number of panels, divided my waist measure by that, and then figured out how wide the bottom could be given that waist… but then my plotting onto the fabric wasn’t terribly precise (not least because my fabric was really wrinkly because have you ever tried to iron 2m wide linen while two toddlers are trying to climb the ironing board?!?) and then the resulting skirt wouldn’t have been quite as full as I wanted. So I cut another set of panels, planning an assortment of pleats to fit the waistband… so really there’s a lot more “than art” in this than science. Which is fine, really.

I had a lot of fun playing with pleat ideas, and then I had the idea to add adjustable pickups, which I’ve wanted to do for a steampunk feel of skirt for a long time. Big patch pockets as well. In my head there were elements of asymmetry as well, but I may have kind of blinked in that staring contest (although due to my rather haphazard cutting and equally haphazard pleating there’s some asymmetry for sure.)

I spent a lot of time faffing about, well, all the details, and in the end it’s fairly simple.

The big patch pockets (which are set way too low to be truly functional but I’m not moving them now) are simple rectangles. I sewed some big, gorgeous, heavy shell buttons on them for decoration, which made them sag awfully, so then I added some tabs with buttonholes.

For the pick ups on the front, I used a 3/4” twill tape (tea dyed to be a little closer to the warm brownish beige of the linen) and some little brass D rings I stocked up on way back in my Fabricland days. And I still have lots more… After mentally planning all kinds of elaborate methods, I just tied some lengths of narrowed twill tape to the top-most D rings. It works.

I very carefully didn’t make the waistband of the skirt too tight, and now I think it’s too loose. I will try just adding a second button, though, so I can adjust it through the day, because I notice that what feels comfortable in the mornings these days can be way too tight as the day wears on. The wonders of getting older, I guess.

Leveling the hem was a bit of a nightmare. I’m not good at leveling hems at the best of times, and my simple trapezoid cutting plan inevitable created long points at the seams and shorter spots at the middle of the panels (and did I mention there were 14 panels?), and it’s probably still not that even, but if you notice you can just keep that to yourself, all right?

At the risk of this post getting way too long, I’ll say a few quick words about the top. It’s from an older Burda magazine, and I made it before to go with another skirt and failed to write about it then. I used it again this time for two reasons: 1) it was the general style I wanted, and 2) the pattern was already traced. Obviously, I’m a bit bigger than last time, so I needed to upsize a bit. I added some with to the side seams, and did a wee bit of an FBA along the princess seam (which didn’t work out terribly well as it doesn’t run over the bust—I should’ve done an FBA using the tiny dart. In the end I was a bit over-generous, and had to take in quite a bit, and it just doesn’t sit as nice as I wish it did. Particularly, I was paranoid about making it too tight, so I may have erred on the side of too loose. I’m also debating adding some boning to the seams to keep it sitting a bit better. Also I didn’t stabilize the curved seam on the sweetheart neckline, which is ok now but we’ll see. I do like the binding finish I added.

The kids have informed me that the whole outfit is “cottagecore”, which I’m going to run with. It’s a lot of fun, especially the swishy skirt.

1 Comment

Filed under Sewing