
(Please note—I wrote most of this post about a month ago, in late April. I am publishing it at the start of May Long weekend, and there is snow on the ground again.)
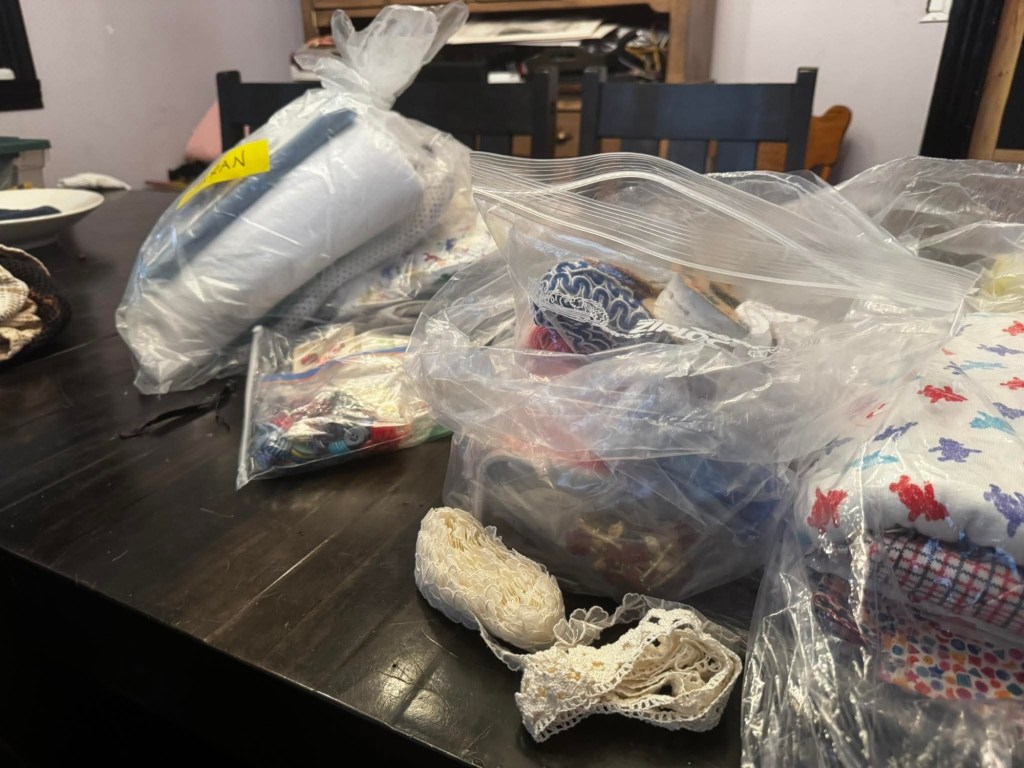
A few weeks ago I returned home from work to discover my aunt had deposited a sizeable pile of sewing-related donations on my dining-room table. While these aren’t unwelcome, they can precipitate a bit of a crisis in storage space, give the current (and perpetual at this point) maximum-capacity state of my stash. But this particular lot contained a lot of fabrics of appeal to six year old girls, so I received some more-or-less instant requests. The twins both picked out fabrics for Barbie-inspired dresses and fabrics for spring dresses.
This post is about the spring dresses. when and whether the “Barbie” ones get sewn… we’ll see.
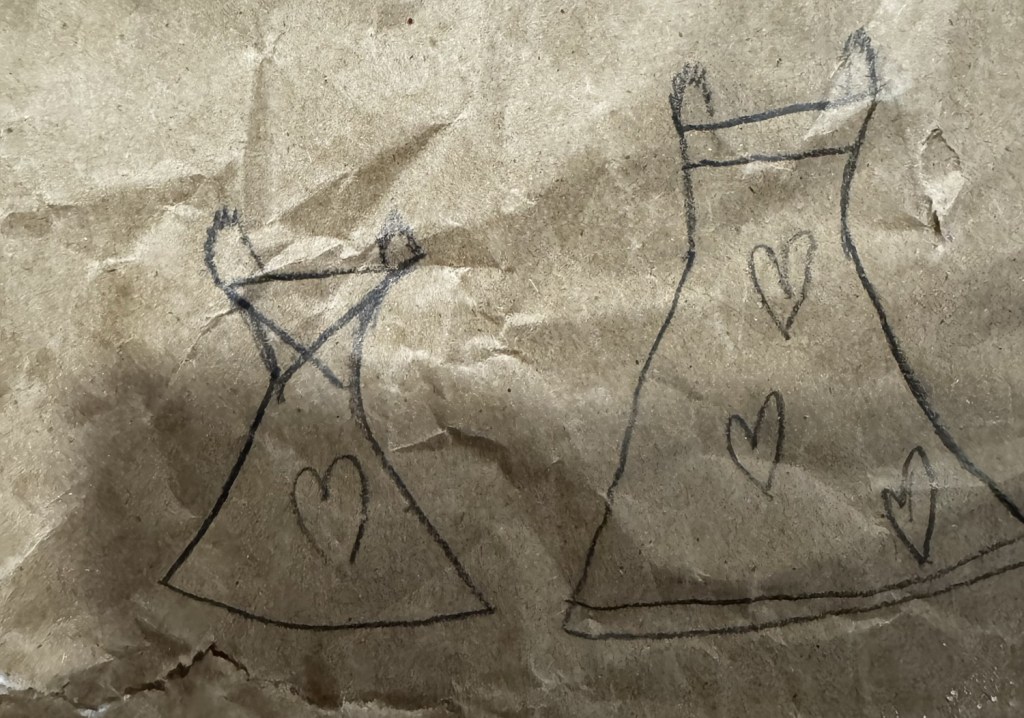
With a day or two of receiving the donation, R provided me with the drawing above, executed on some brown packing paper, if you’re wondering about the colour. I love that she thought to provide me with front and back views, even if I wasn’t quite sure how to interpret the back.
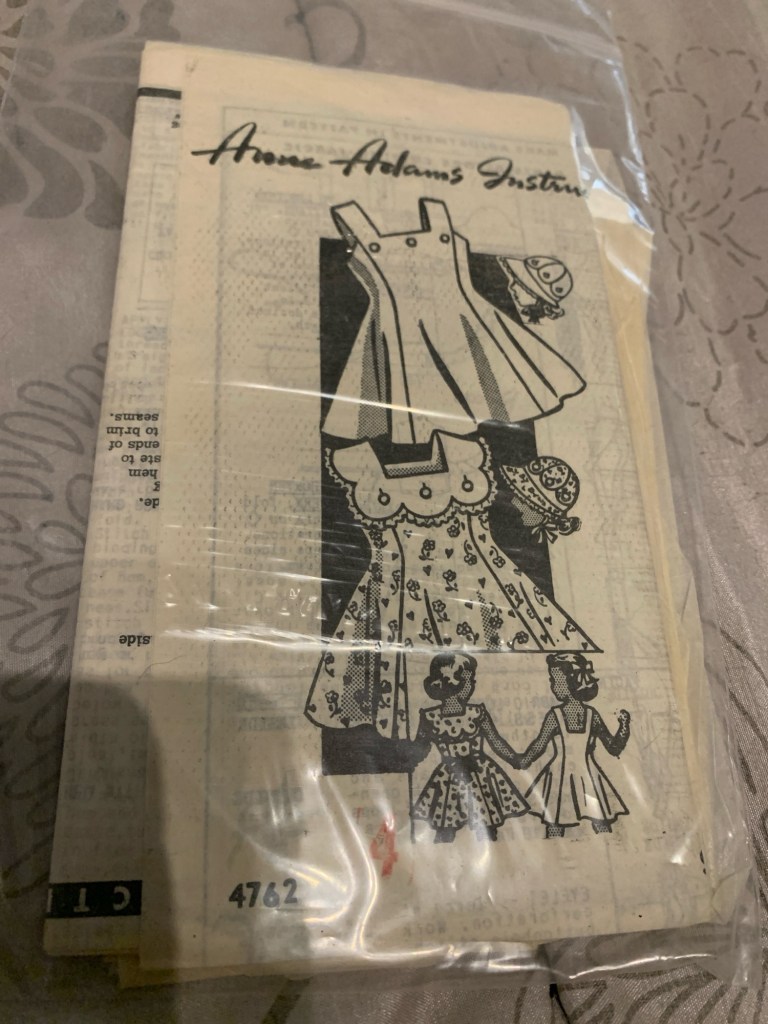
On paging through the kids’ dress patterns on my phone , I ended up on this Anne Adams pattern, a vintage mail-order brand that crops up around here from time to time. I don’t have the envelope for this one to get a date off the postmark, but it’s unprinted and the instructions “feel” old. Most of the mail-order patterns I have are from the late 60s, but I wouldn’t be surprised if this is a bit older, 1950s or even late 40s.
My pattern is only a size 4, but the width compared to the twins’ measurements was fine… I just needed to add a ton of length.
After carefully extracting and ironing out the pieces, and double-checking the instructions for the meaning of the various perforations, I made some very quick and dirty alterations.
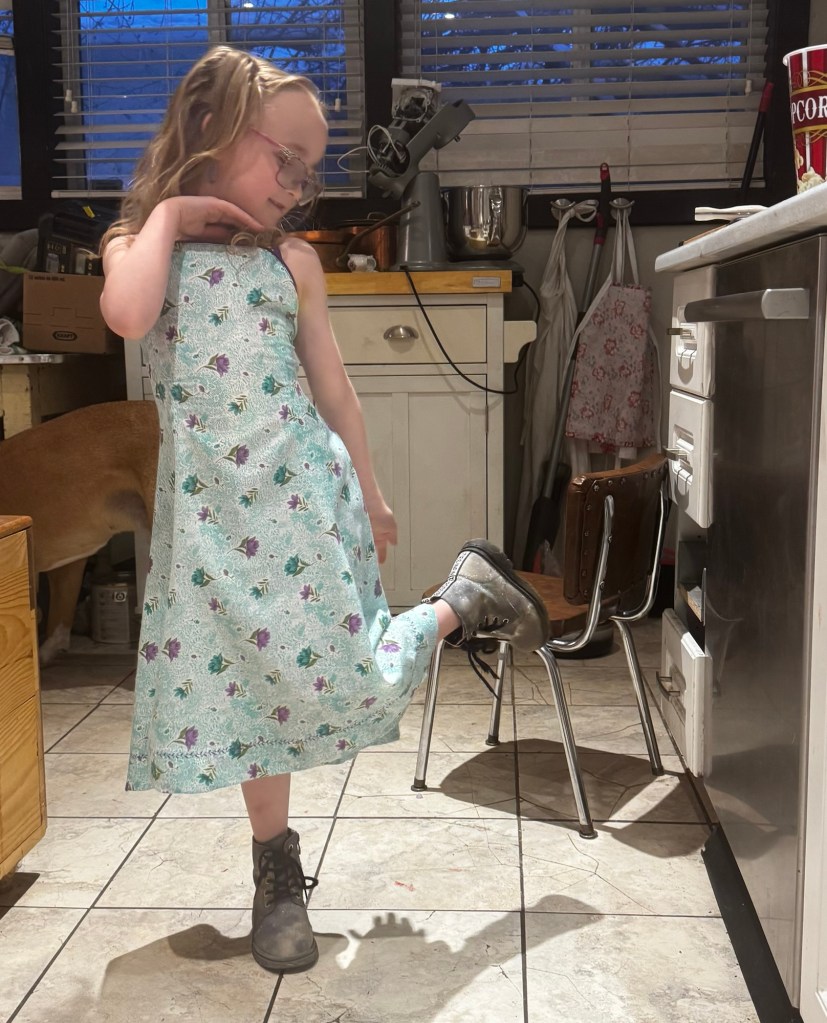
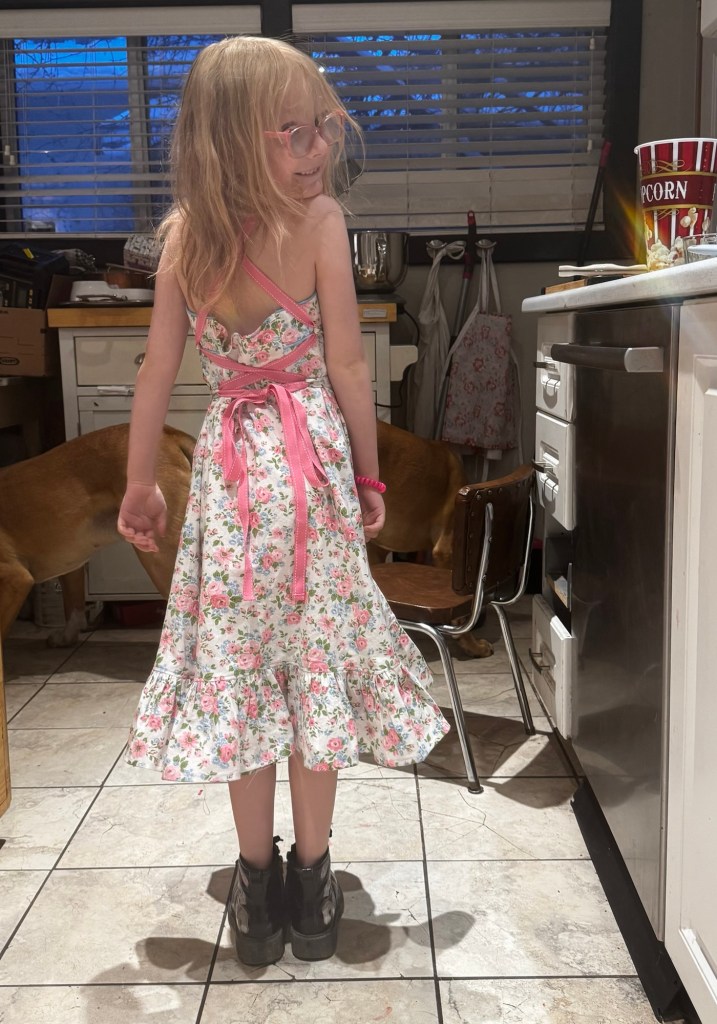
For R’s dress, I added about 6 cm length above the waist, and 19 cm (don’t ask me, it was a random amount the first time and then I measured after to replicate it) to the length of the skirt, and removed the straps, somewhat freehanding the upper shape to create a curved front and dipped back. I’m not sure why, exactly, since that wasn’t a clear feature of the requested dress, but anyway. I think it looks cute but I should move the straps closer to the middle.
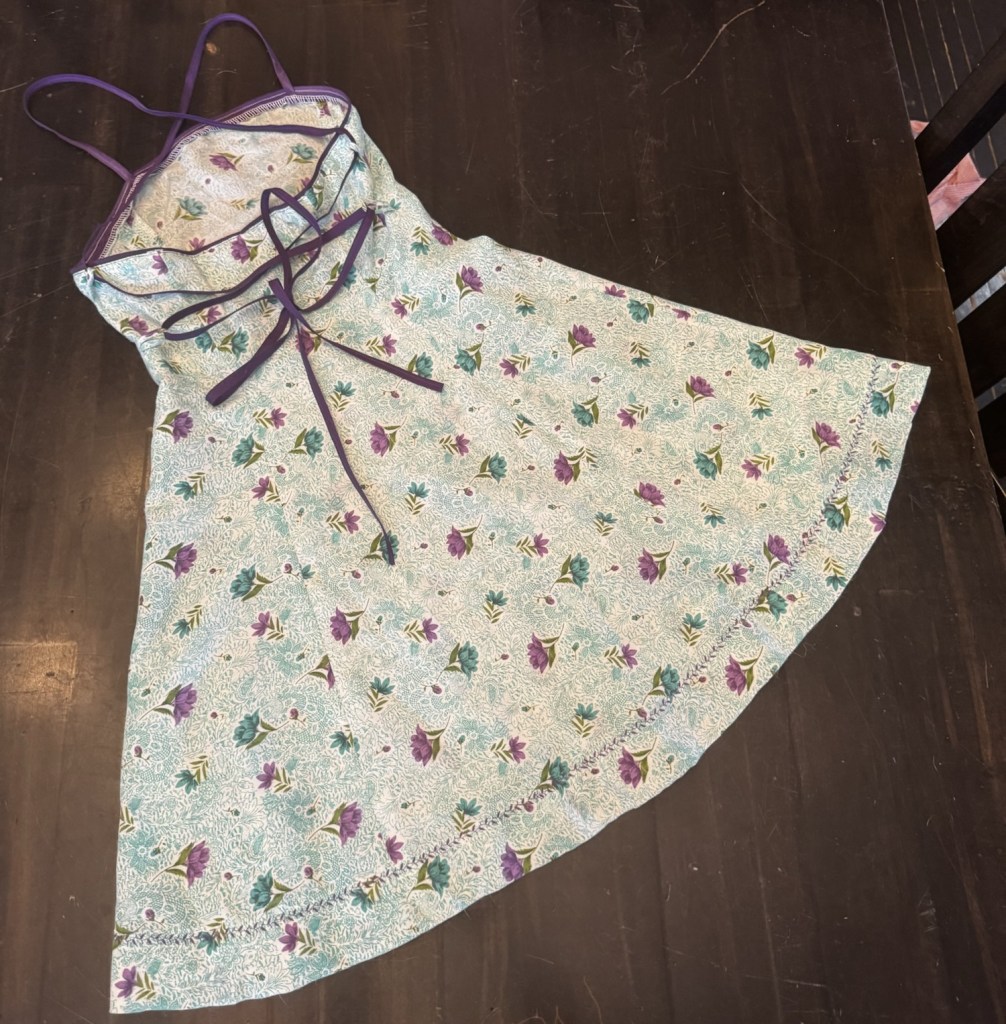
The pattern is a fit-and-flare design with princess-seams. Front and back are cut on the fold, with no zipper, and it’s meant to be pulled on and then cinched in with sash ties inserted at the side-seams. This seemed like it would convert relatively well to the kind of criss-crossed back lacing R seemed to be requesting in her line drawing.
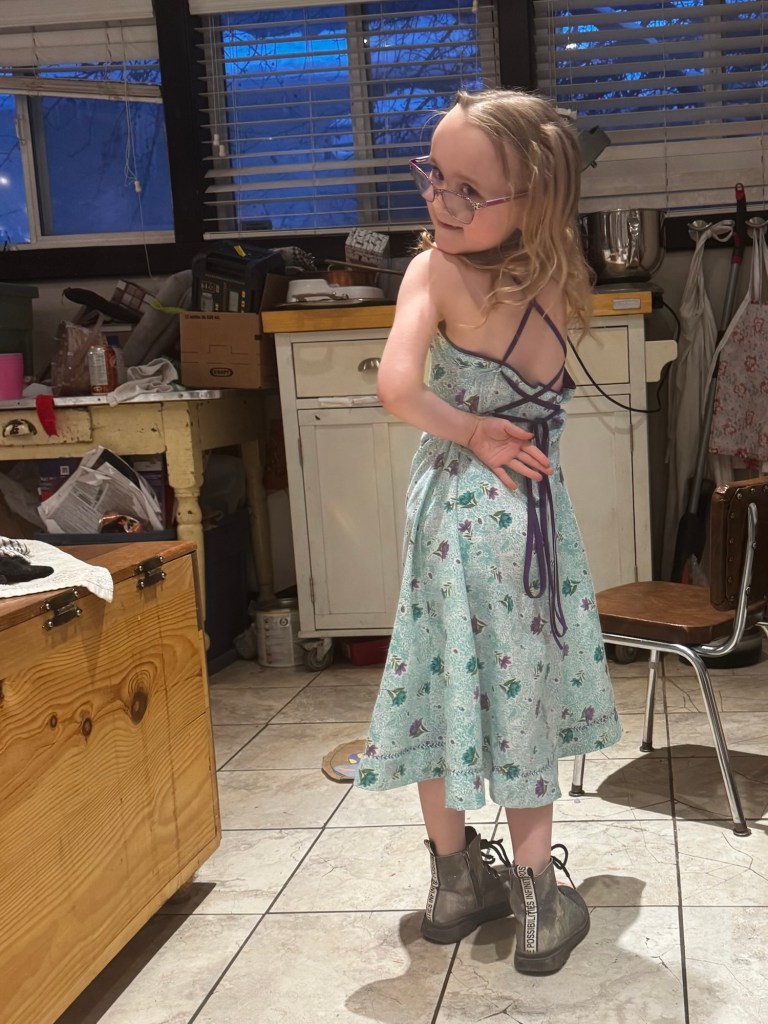
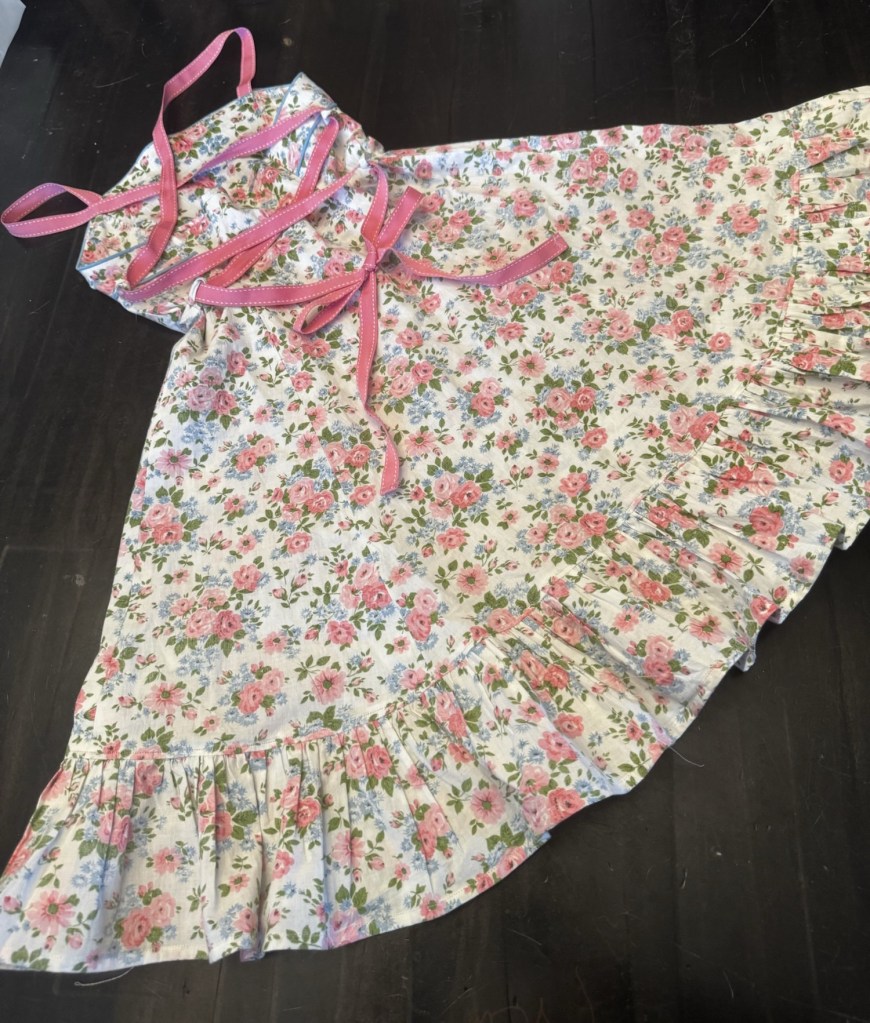
Now, R had selected this lovely aqua and purple floral print, made of some kind of light polycotton (or maybe just straight up polyester, considering how slippery it was.) It was, in fact, a straight-up pain to sew, so I didn’t want to fuss around with too many details, like the upper yoke-type decoration in her drawing. The only part that was pleasant, frankly, was turning the little strip of bias tubing to make the lacing loops, which is always nice in a slippery fabric. I found some dark purple bias binding in stash and made piping for the upper edge, and the long straps which cross in the back and then thread through the lacing loops to cinch it in. To ease in the hem, I ran it through the serger with the differential feed turned up to gather it in, though a lower gathering ratio would’ve worked better on this thin fabric.
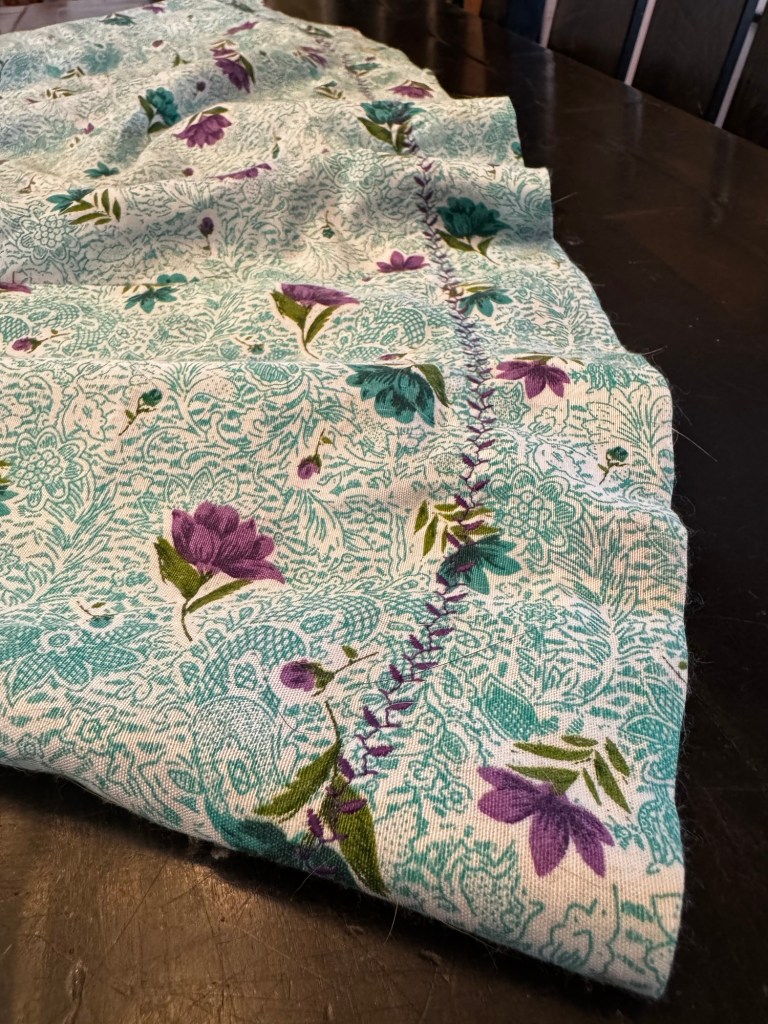
Then, since it still seemed rather plain, I did the almost-unthinkable and broke out one of my Janome’s decorative stitches to finish the hem. I had to test several to find one that printed out relatively close to how it is supposed to look, but I’m quite happy with the result, and if you aren’t going to use those stitches on little-girl dresses, when ARE you going to?
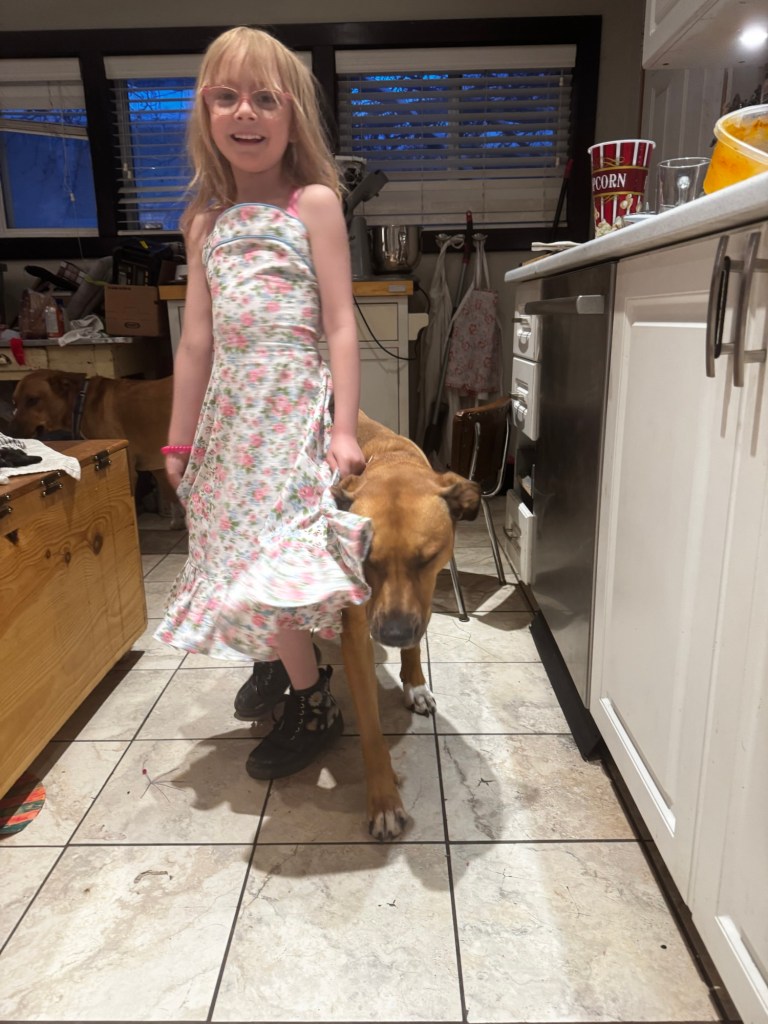
T’s selection was a much more pleasant-to-handle (probably quilting) cotton in a pink rose print. Some digging through stash turned up some blue cotton bias that looked good with the design, and she had claimed the ribbon to go with the fabric as soon as I pulled it out. The print is actually pretty vibrant, but we both liked the more subdued reverse side better, so that’s what you see.
Since I had made R’s dress first, she had a pretty good concept of it, and was amenable to having hers be from the same basic pattern. Except that it definitely needed a ruffle.
So I laid out the pattern again, this time adding 5 cm above the waist and a similar amount to the skirt length (but then a 15 cm ruffle, so the finished length should be similar, except that I took a 2” hem on R’s.
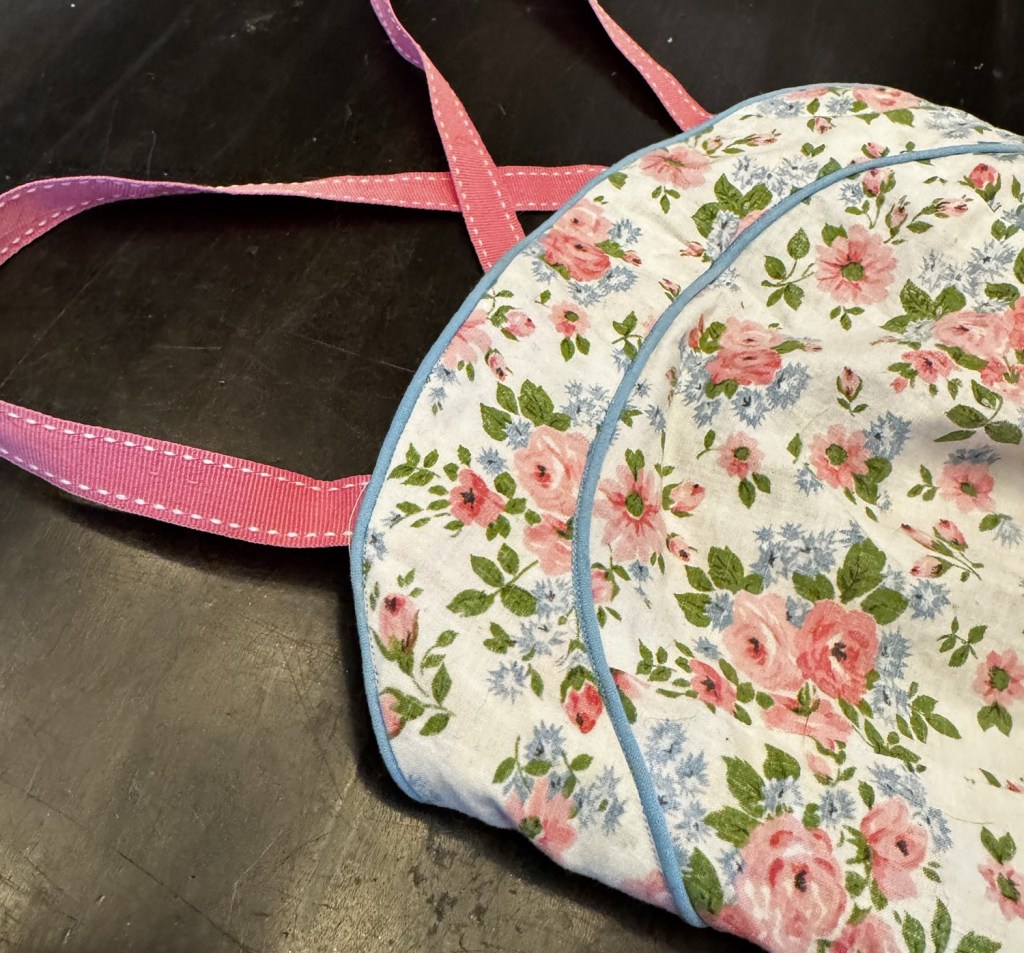
I felt more comfortable with my construction decisions this time around, so I decided to go for it and draft the exposed top yoke I had imagined for R’s but not had the guts (or masochism?) to go for. I took it slow, making the piping for top and bottom and basting everything in place, double-checking that I liked my proportions, but most importantly that I had all the layers in the right order, which is always a bit brain-breaking when a facing is turning to the outside, and made even worse this time with the addition of the straps, piping, and our choice of “wrong side” of the print. I decided to have the yoke extend around the sides to the side-back piece, but then hem the centre back piece, so it would be more flexible and “crumple” more easily when the dress was laced in. I don’t know if it actually makes much of a difference, but that was my thought.

And that’s about it. In hindsight I should’ve added an underlining to R’s dress, at least for the bodice portion, as the seams are already pulling since she likes to lace things tight. And the top edge flares a bit much—I might have had a better result with proper slash-and-spread style lengthening of the bodice part of the pattern. But they’ve both been wearing them any chance they get, so I’ll take that win. I’ll also take spring, whenever it decides to come and stay.


The dresses look just like the designer’s drawing! Good job. Hope it warms up enough to wear them.
Linda
It’s been all over the place weather-wise the last few weeks, but they’ve definitely gotten some wear!
Gosh these are cute! Well done! And adorable pattern! Love how you adapted it.
I hear you about the storage space crisis. And somehow things keep appearing 😂
Sew cute!
They do, don’t they? I swear I haven’t bought fabric in years and yet…
I love R’s little drawing! And then your excellent rendering of it! Big A always starts me off with a drawing. I suspect soon it will be time for a summer dress. But at 4’10” and maybe 60 pounds imagine the ” I need to add. Hope she picks easy material! But doesn’t request pipping! Well done on that.
Drawings are a good start! At least dresses are more forgiving length-wise than some other garments…
wonderful. Lucky girls. Always love your story that goes with them
Thank you! I saw some of Jill’s art up in the shop on 33rd today!
This is a small part of what I am doing this snowy weekend
That might be the best thing to be doing in this weather! I spent WAAAAY too much time out in it yesterday. 😂
I did go to the city and was amazed at how little snow there was. We have/had 2′ drifts. But then it rained all night so it melted and now it is snowing again. Beats the winds the south part had but man it is going to be a late season.