Monthly Archives: February 2023

Fluffy up front

So now that I have an Edwardian skirt, obviously I need a proper blouse to go with it. You know the kind—the ones that are mostly lace. But those are, y’know, notably sheer, and my current corset is, y’know, black, so a corset cover is kind of in order.

Now, ever since I started the Victorian Sewing Circle I’ve been collecting “resources” for attendees. Mainly some reproduction catalogues and a couple of original sewing manuals, some older Folkwear patterns my mom had kicking around, and of course the relevant Janet Arnold book. But we’ve received a few donations as well of odds and ends people have collected—including an Edwardian corset-cover pattern someone had painstakingly hand-traced from a magazine article, and photocopied the instructions, I’m guessing in the 90s if not 80s, allegedly based on a 19-aughts original. It’s also, by the way, the exact opposite of size-inclusive. I sewed up the largest size, which was intended for a 40-42” bust.

Inspiration: Random Pinterest photo with a broken source link.

So since I had that on hand, I used it. But, the pattern is designed for vertical pintucks and lace insertion as decoration, and I wanted the horizontal lace ruffle (bust improving) version.

TVE02

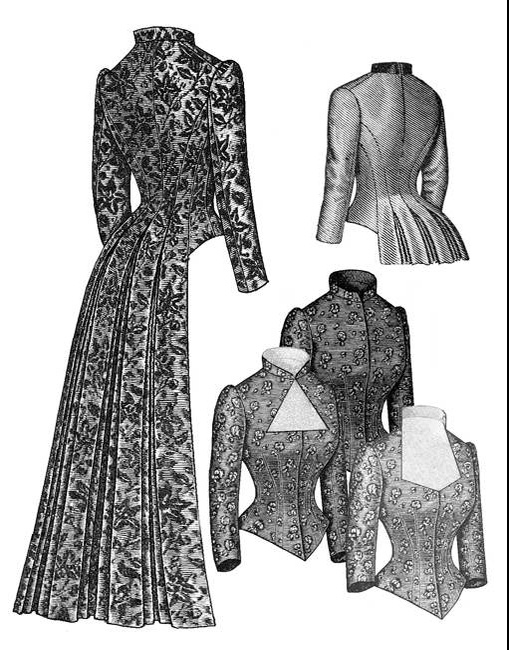
If I were buying a pattern, this Truly Victorian one would be the one. View A, right there.

My pattern is a little different as it goes below the waist and has gathering at the neckline as well, but the ruffle layout was the same.

I also wanted to take this opportunity, because I’m kind of messing around here, and the result won’t be visible, to use up some of the massive stash of questionable lace I’ve somehow accumulated.

Now, on digging through one of the bins of random white fabrics, I settled on a piece of stretch cotton sateen. The stretch is a bit unfortunate, but I already knew I wasn’t going for high historical accuracy here. It’s also a bit on the heavy side, but I figured that would be a bonus for the bust-volumizing I was going for. But most importantly, it was a tiny remnant that was just exactly big enough for a sleeveless pattern like this.

Of course, I didn’t begin diving through the lace stash until after I had cut out the main body pieces. Turns out the wider, ruffled laces I remembered were all beige, rather than white. And I really did not feel like gathering up a flat, nasty polyester lace for this purpose.

So, I wound up going with the nicest, and lightest coloured, of the off-white pre-ruffled lace. And this one is very pretty, not too nasty-feeling, and there was enough for the two ruffles I wanted, with very little left over. It’s a weird lace, with a ruffled top and bottom joined to a flat kind of connecting piece, but I think it will serve its purpose. And if I want to run ribbons through the joining I can.

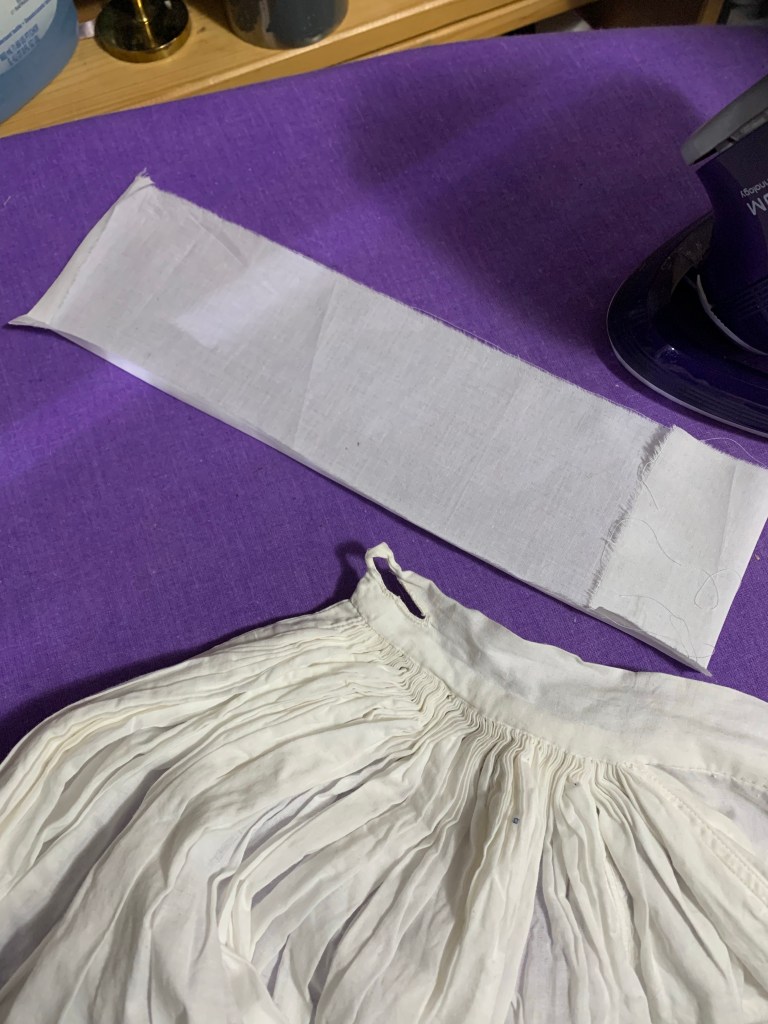
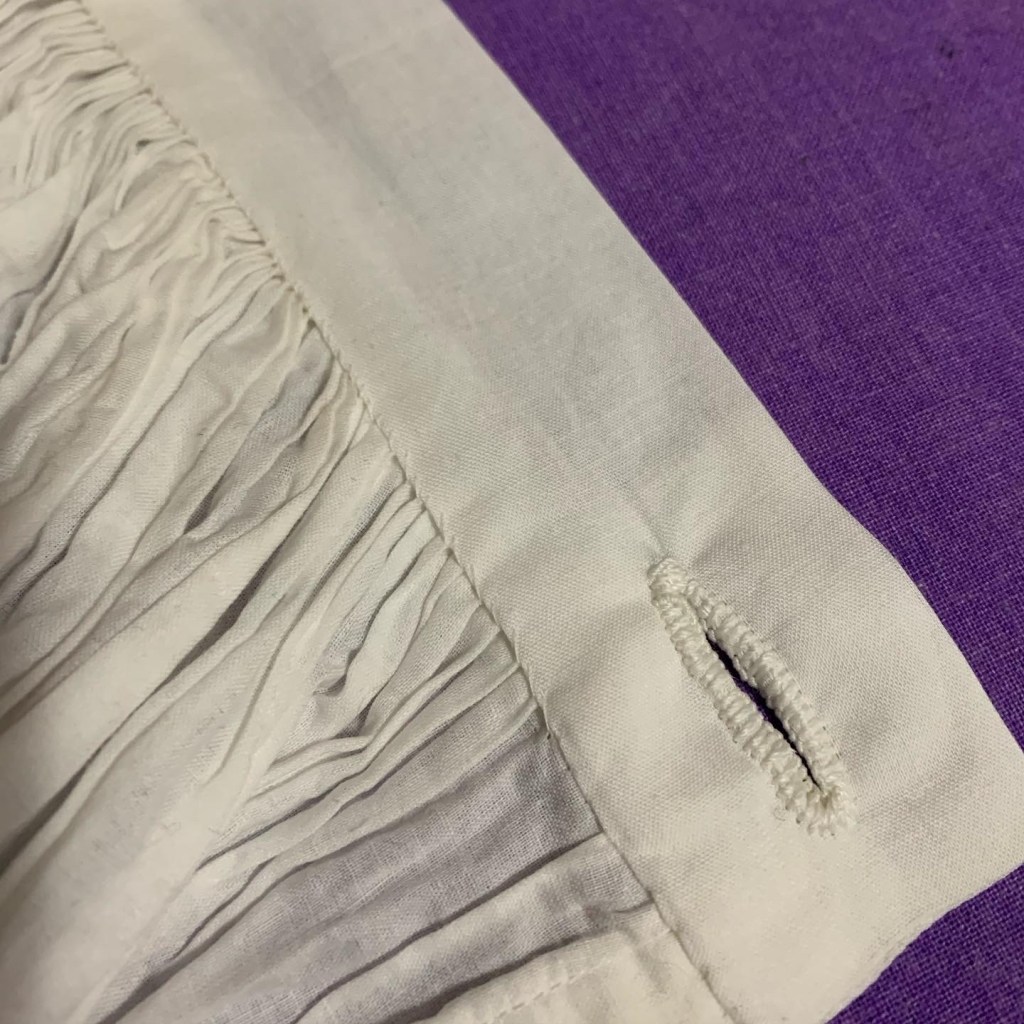
If I had realized I would end up using the off-white lace before I had cut out the main fabric, I would probably have tried tea-dying the fabric to be a closer match. I might still try with the whole thing, after I test how the lace reacts to a tea dye. (Polyester won’t be affected but if it’s nylon it will take up the tea stain too and might end up even darker). But, I’ll survive either way. The binding I used for the neckline and armscye, and the drawstring casing at the waist, are all ivory, so the whole thing has a tone-on-tone vibe, in theory.

I REALLY wanted beading lace (the flat kind you thread a ribbon through) to finish off the neckline. However, that’s the one kind of lace I do not have in stash, and I just couldn’t make myself spring for the polyester stuff at Fabricland, even if the ruffled lace is already polyester. So I bound the neckline, then realized I had JUST enough lace left to do a third tier right at the neckline. Which solved the issue nicely.

A lil bit goofy all on its own.

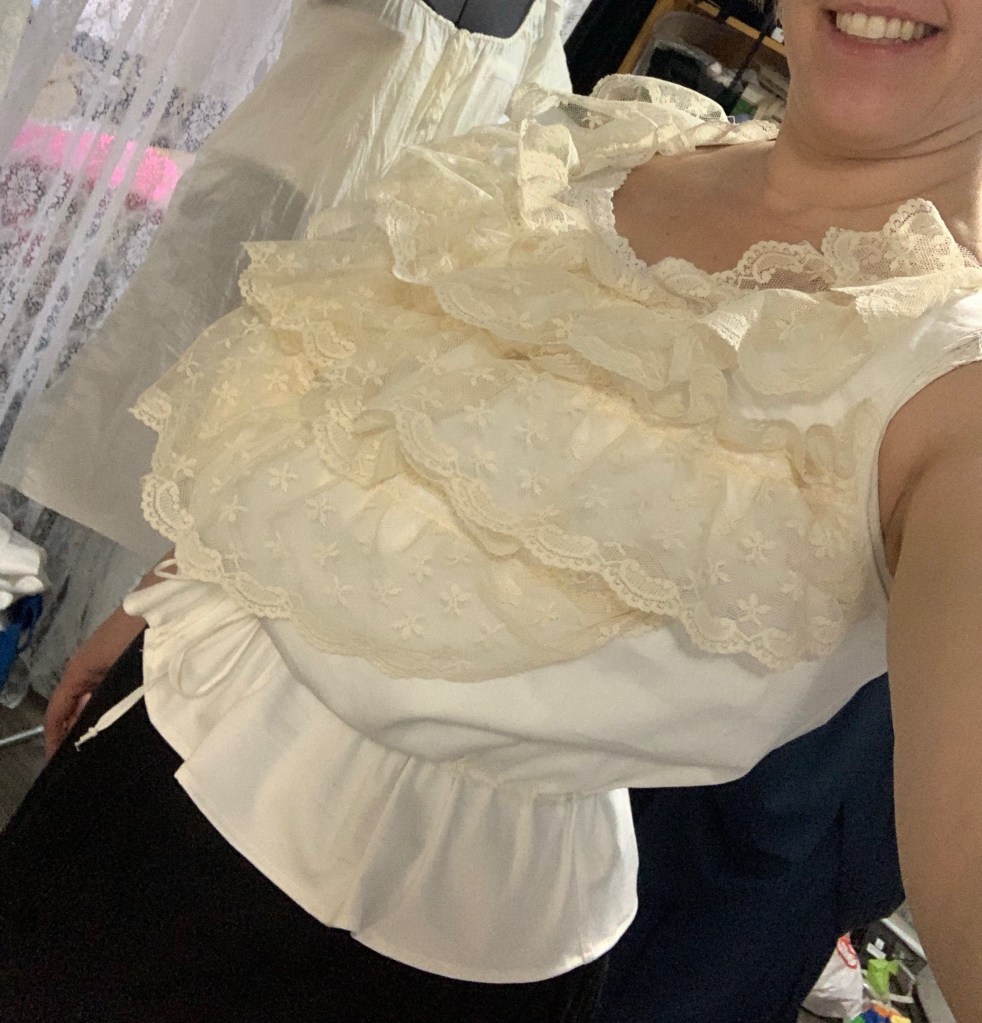
Now, on looking at the finished creation, I think my lace might be just a little bit too wide. The ruffles are VERY full-bodied, even allowing for the part where the original inspirations are a little compressed after over a century.

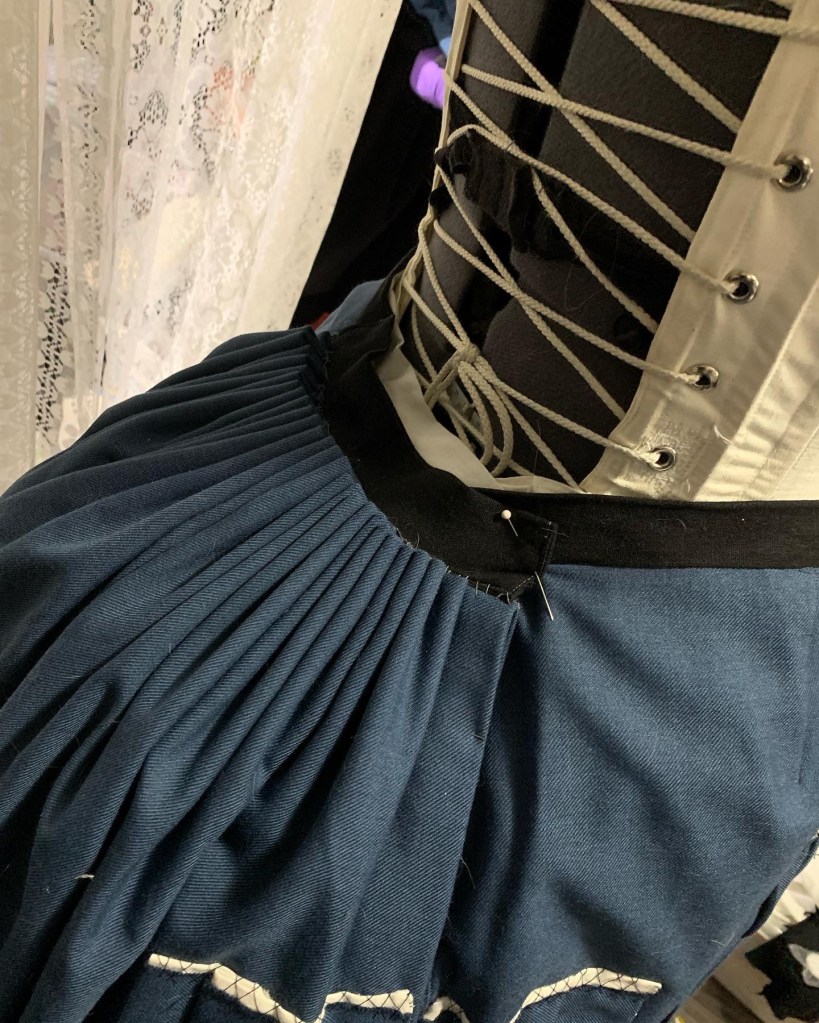
In an attempt to tone them down a bit, I shortened the bottom row of lace, so that doesn’t reach all the way around to the side seam, as it just seemed to make the whole thing look huge.

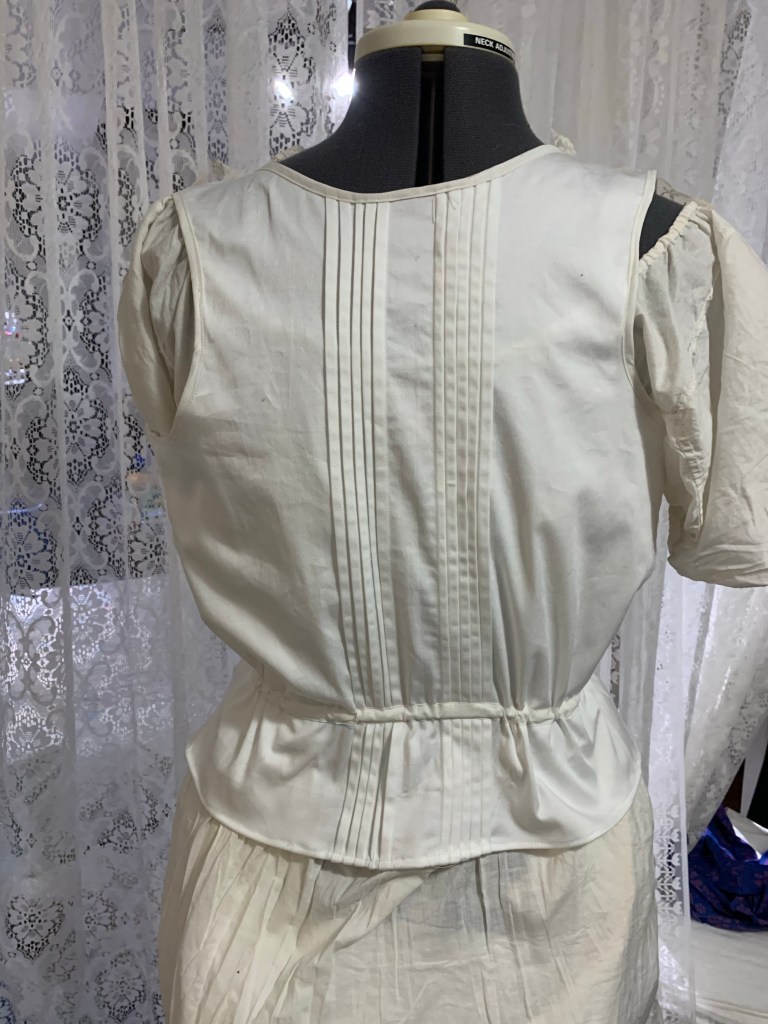
I kept the pintucks in the back, but I think maybe they should have been 1/8” instead of 1/4” tucks. Also this is the only photo I got of the back, because obviously this piece is all about the front. This is the first time in a long time that I was working with a pattern with pre-marked tucks (as opposed to making the tucks before cutting out the pattern piece, or just doing some calculations and I have decided I much prefer marking my folds one at a time and measuring from each fold to the next. But also this fabric was a bit heavy for all those tucks.

I’m not 100% sure I’m in love with the below-the-waist ruffle created by the drawstring as it’s pretty pronounced in my heavy fabric, but I guess if I hate it I can cut it off later. It was on the pattern, and would be good to have if your skirt didn’t have an above-the-waist portion like mine.

While I’m not so sure I love the piece itself, I THINK I do like it with my skirt, and that it will work well for it’s intended bust-improving purpose. Part of me wants to take the entire bottom row of lace off, but I’ll leave it at least for now.

Because now I can make a blouse!

(Or. Y’know, make the twins that “Elsa mermaid” costume they’ve been desperate for since before Christmas.)

2 Comments

Filed under Sewing

A long awaited party (dress)

Back in the day…

Way back in 2015, I started coordinating a little monthly get-together I like to call the Victorian Sewing Circle, based out of the Marr Residence, the Oldest House in Town* that the City operates as a sort of mini-museum. I was hoping to indulge my latent interest in historical costuming, meet some like-minded people, and give myself a venue to WEAR at least some historical stuff. Since the house was built in 1884, a mid 1880s outfit seemed like a good goal.

Inspiration dress

I picked an inspiration dress from a reproduction of the 1886 Bloomingdale’s catalogue, acquired a ridiculous amount of discount wool blend suiting in my favourite muted blue colour, and ordered two Truly Victorian patterns for the bodice and overskirt, TV462 and TV368.

I started work on the skirt in October of 2015. Later that winter, I got sidetracked and made a “quick and dirty” version to actually wear to our little meetups… and then my progress on the blue “good copy” slowed to an utter crawl. And then when I got pregnant early in 2019, it stalled completely. And what started as a planned hiatus of a year or so turned into three, and I didn’t dust things off until this past fall.

At which point pretty much every measurement on my body had gone up 4-5”. And the “quick and dirty” outfit (the first pic in this post) no longer even remotely fits, so making the blue version wearable became a lot more urgent.

I was pleasantly startled, actually, when I pulled everything out again, at how close to complete it actually was. The skirt just needed the waistband finalized. The bodice just needed boning—but it also no longer fit, and I had accidentally used a very rigid ticking for my underlining, which wasn’t ideal in any way. And (which I had completely forgotten), the overskirt was complete, just needing a way to connect the back tails to the front apron. And perhaps some trimmings.

New waistband, new waistband pleats

Adjusting the skirt wasn’t going to be a big deal—I had only basted on the waistband, and it needed length taken out at the top. I marked the new length on the front, basted and trimmed down to it, but then for the back I folded the extra down and just stitched the edge of the pleats to the waistband, so the seam allowance doesn’t add bulk to the waistband. This is a technique I’d read of in both historical sources and costuming articles, but never actually tried before. The transition from “seam allowance in” to “seam allowance out” is maybe not perfectly smooth, but every original Victorian skirt I’ve examined (which isn’t a high number, granted) had the most half-ass slapped on waistband, so I have a hard time being too fussy over it.

I had made a whole new corset, back at the end of summer, so all I had to do now was adjust the waistbands of both petticoats. For one petticoat this was no big deal as I had originally made it far too big and had to put in two large tucks in the waistband to make it fit. Ripping those out took about 30 seconds and it was good to go.

The second, on the other hand, was snug even when I first made it, and by the time I last wore it in 2019 I had already added a hair elastic looped through the buttonhole as a makeshift extender. But that no longer did the trick so the only option was to unpick the gathered back portion of the waistband and attach a substantial additional piece, then re-attach my painfully stroked gathers one by one, just spread out over a larger space.

It’s definitely an improvement though. I think even my hand-worked buttonhole is better, not that it’s a thing of great beauty.

And then there was the issue of the bodice.

I had steeled myself, frankly, to make a new bodice from scratch. The seams were only 1/2” and already somewhat frayed from a ridiculous amount of handling, and the rigid ticking underlining made the whole idea of altering just seem unpromising. I had enough fabric left over, just. But every time I went to start tracing out a new size of the pattern, a wave of exhaustion struck me.

I decided to try, just try, and see what happened if I let all of the back and side seams out as much as possible. Some of them, especially the waist, had been taken in quite a bit in my previous fitting adventure. And while 1/2” seams don’t allow for a lot of letting out, there are quite a few of them. I tried the bodice on again… it wasn’t enough. In particular, actually, the BACK just didn’t seem wide enough. Not at the waist, but the upper back, and there was still a stubborn 2” gap all along the front. I did toy with a plan where I could add a panel to the centre front, creating an “open jacket” look that is pretty common for the era. But the back still felt uncomfortably tight. If only I could just add more fabric, right at the centre back seam.

Well, why couldn’t I?

So I ripped open the CB seam, from just below the collar to about mid back. Try on. Rip a little further. Try on again. And lo and behold, after ripping it all open except for about 3” at the bottom, it closed in the front.

So I pulled out my scraps, cut a long, tapered spindle-shape, and set about stitching a panel into the back.

It’s not an ideal fix—it’s added some of its own fit issues and ripples, and makes boning the CB of the bodice difficult. But it’s also saved me an immense amount of work. Which these days, I’ll take.

My joy when the alterations actually allowed me to close the bodice!

After all that, all I had to do was add all the boning to the bodice, which I wound up doing by stitching the casings on by hand since my seam allowances were both narrow and quite irregular. Unfortunately, I also had to pull off the bias facing at the front hem to add the bones to my darts, because past me got ahead of herself in the finishing department. Mistakes like that played a huge role in why this damn thing took forever to make, by the way.

I swear in real life the hem looks symmetrical.

Anyway, the bones definitely help smooth out the look, though I might need to redo my buttons to get a truly smooth front. I’ll face that some other day.

After a fair bit of waffling, I decided to attach the tails to the overskirt apron the same way I did with my first version, with elastic loops and large buttons. It’s not historically accurate, but it’s easy, comfy, and highly adjustable.

And, at last, I finally got to wear it!

There are a few more tweaks that could be made. The back of the skirt, where I had omitted one of the overlay panels, looks a little plain. I’m not sure that my draping of the bodice tails or the back of the overskirt is finalized, and I do have some black tassel trim that might look good there.

But after a saga like this, wearable, in any degree, is a huge step forward. And for the first time in ages, I can actually say to myself “what’s next?”

(Actually, I finished this back in early December, so what’s next was the Edwardian skirt. But I really wanted some pictures that weren’t taken in my hallway. Thank you to my mom for digging out her good camera to take most of these, and for braving the technological minefields of iCloud and Dropbox to get them to me.) Next up… an Edwardian-style blouse to go with the skirt. Unless I get highjacked by one of my children, anyway…

2 Comments

Filed under Sewing