
It’s Steph’s fault.
I should be making up another long-sleeve knit top, or at most cutting out another pair of jeans. But she left the sweetest little invitation to join in the Vintage Sewalong 2011 in her comment on my last post. So of course I had to go check it out.

Simplicity 5728, on the right
And the next thing I know, it’s 10:00 pm (we’re staying up late these days with the kids out of school and my hubby not starting work until 9:30 in the morning) and I’m pulling out the pieces of Simplicity 5728, doing a bit of tissue fitting on my duct-tape me (I suppose I should dignify her with a name…), and finally decided to make my first muslin as-is. I did trace out the bodice pieces first, however, since I was anticipating fairly extensive lengthening alterations. This is, after all, a pattern drafted for someone a good half a foot shorter than me. (I have, however mentioned that most of my height is in my legs. The pattern’s back neck-to-waist measure is 15″, which is the same as mine.) So I pulled out my trusty blue flannel ex-duvet (what will I do when it runs out?) and cut out the pieces. Then, bright ‘n early (okay, not early—you saw the bit about tracing this out at 10pm last night—and not bright as it’s snowing once again) this morning I popped out of bed and threw the thing together.
Oh, god. This means I need to show you…
fitting pictures.
ugh.

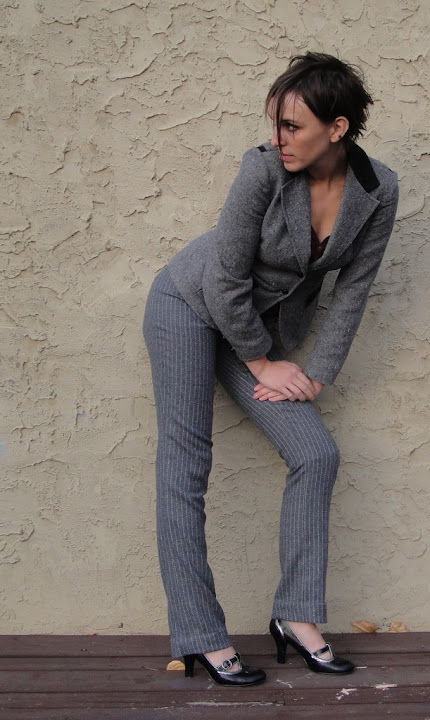
Simplicity 5728, Muslin 1: front
Well, it is a little bit short, at least in the front. The empire seam in the front could come down about 1/2″. The bottom of the front is almost exactly at my waist (and of course it needs to be about 5/8″ lower).

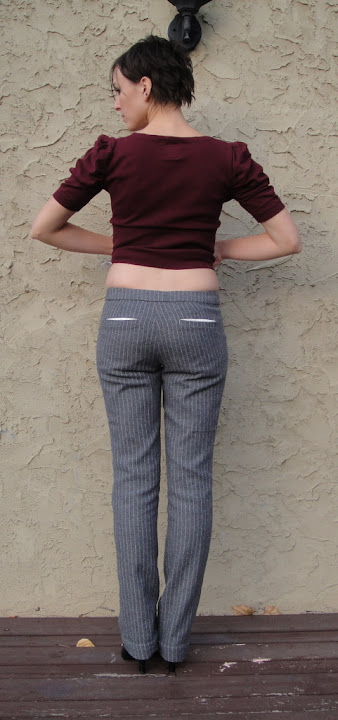
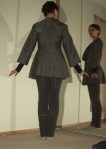
Simplicity 5728, back
The back is… well, practically perfect, length-wise. There are a couple of drag lines under the arms (if someone can enlighten me as to what they mean I’d be super-delighted… is is that the armscye is too high? it is high, although not uncomfortably so…), but they pretty much disappear if I cross my arms so I suspect I should just leave them (?).

Simplicity 5728, back, with arms crossed
The back hem could probably come up at bit at the CB, which I guess would be a swayback alteration? I’ve never done a swayback alteration where I had a waist seam to play with, so I’m not quite sure what the procedure is—I’ve heard some people rail that the hem must be kept on grain, and others say that you can just take a bit off it. I will have to do some research 🙂

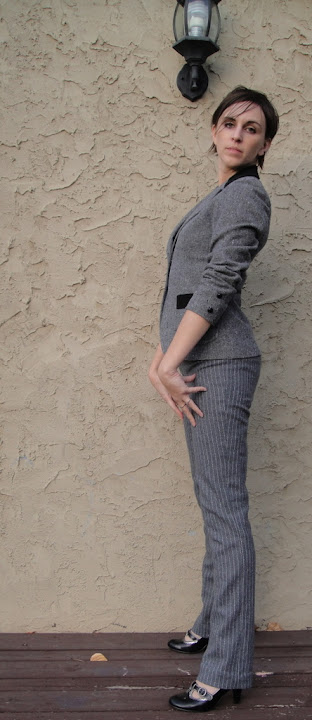
Simplicity 5728, side view
There’s some tweaking to be done around the shoulders/back neck where I removed the collar—it won’t be a problem. The armscye is high but I think will be comfortable—I have pretty scrawny arms. The side-seams seem to be in the right place.
So… any suggestions on lengthening the front but not the back? Maybe I could just increase the curve at the gathered part to build that extra length in there, without having to mess with any of the other seams at all? Or add the 1/2″ to the CF neckline and curve that out. On the other hand I don’t really have the bust to fill in too much more gathering in that area, though I can always wear the bullet-proof bra, I suppose.
I eagerly await your thoughts and suggestions!


")


