Monthly Archives: August 2024

Sunglasses recommended

A few weeks ago, I had to entice Tris back from her auntie’s house with the bribe of sewing.

We settled, after much wrangling (four year olds are highly creative in their project concepts, but very low on practicality and, well, taste) on transforming this old, eye-wateringly hot pink, blouse (donated to the cause of children’s wear by my aunt), via a 1970s Style pattern:

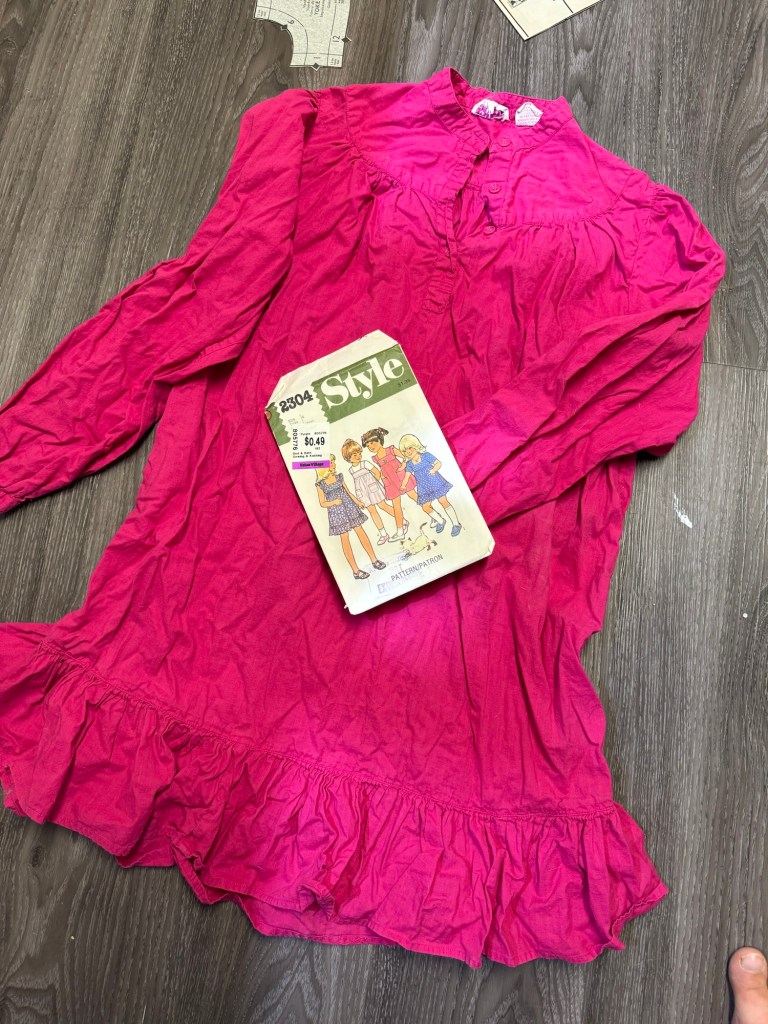
I thank that long-ago pattern illustrator for including a bright pink version otherwise I would not have gotten her to go for it, I think.

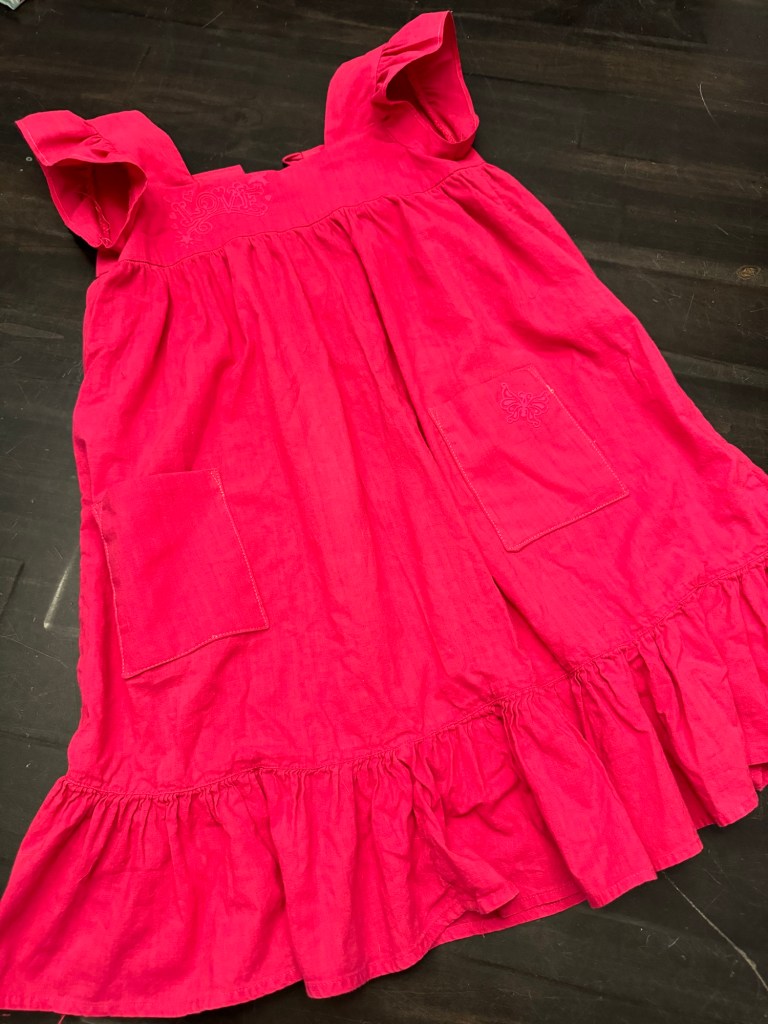
I started by cutting the blouse off just below the armpits. This gave me a nice chunk for the skirt, with ruffle already attached! All I had to do was cut the bodice pieces out of the sleeves and remaining portion of the upper shirt. The fabric, by the way, is a really lovely soft light cotton, otherwise I would be far less excited about tackling this project. It was lovely to work with.

The colour hurts my camera sensor

It’s been a while since I sewed a 70s pattern and they really are the peak of pattern making. A zillion notches to keep everything lined up perfectly. Meticulously detailed instructions. (Can you tell I’ve been sewing with Victorian-grade instructions for a bit?) This pattern even has each seam numbered on the pattern pieces so you can sew them in order.

If you look close you can just barely see the hot-pink iron-on flocking motif on the bodice.

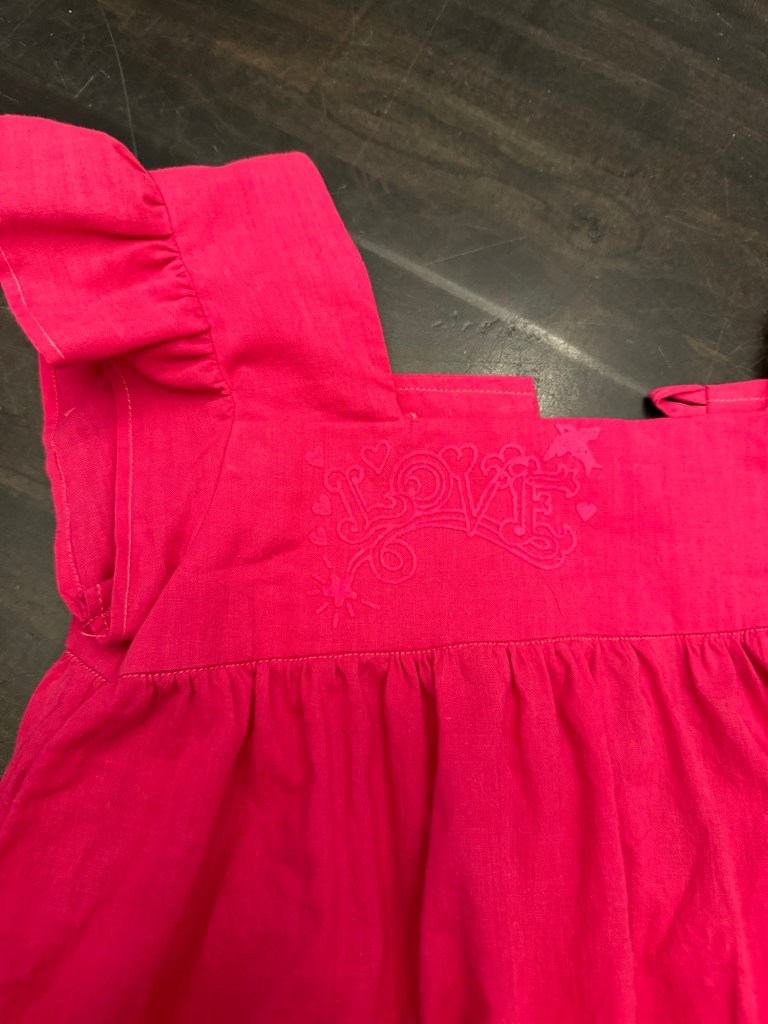
Now, I won’t say I followed all those instructions, but it’s lovely to have them. I spent a bit too much time trying to settle on the best way to line the bodice with the little ruffle sleevelets, which I originally thought were just shoulder ruffles but actually go all around the arm. In the end I did mostly follow the pattern, except for adding the button loops to the back instead of a zipper.

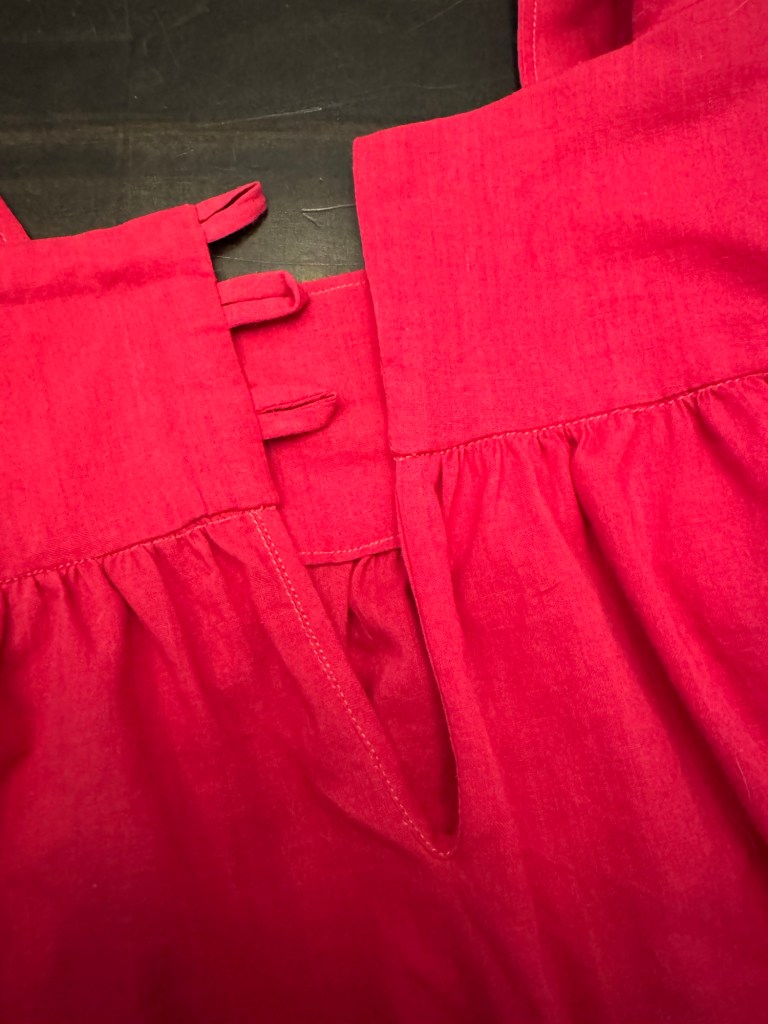
And, since my skirt didn’t have the back seam, I cut a little slit with a tiny bias placket to give it a little more opening room.

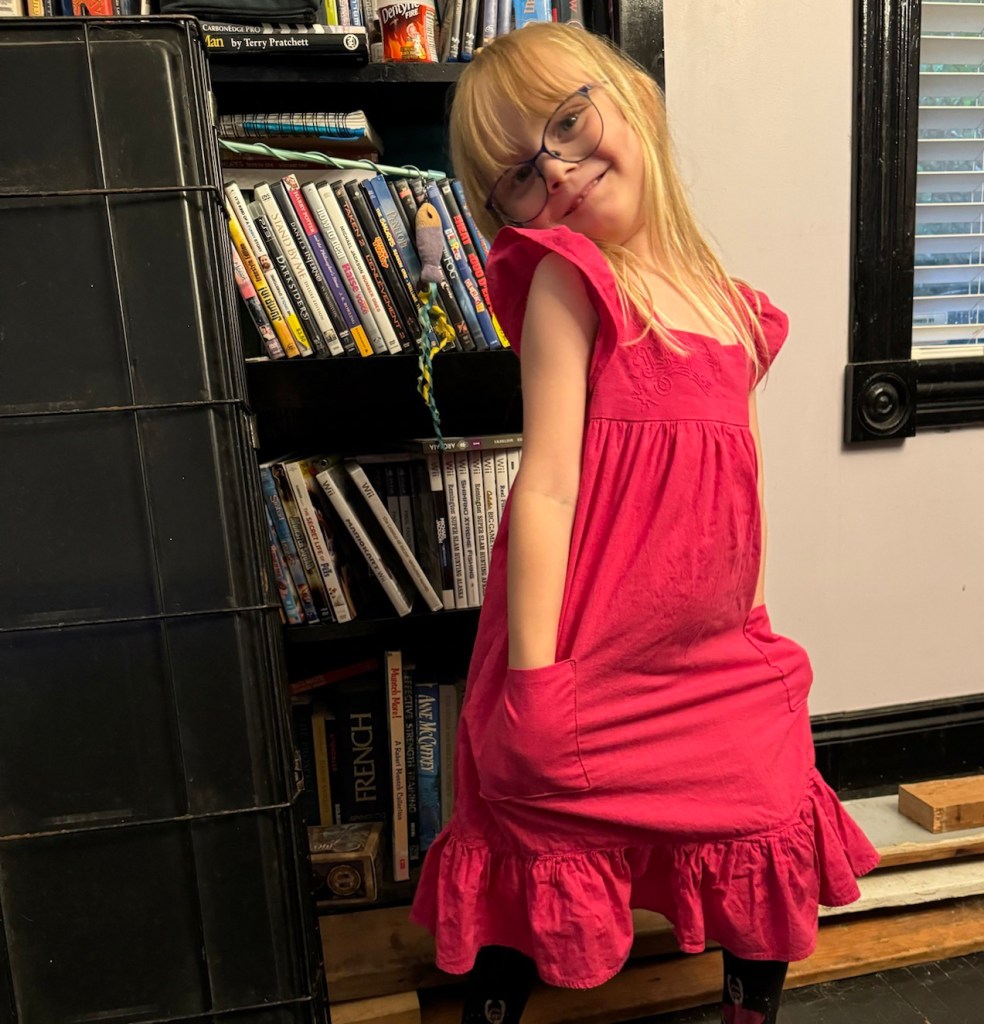
And then when I tried it on Tris (who is nearly five!) this size 4 pattern was massive! So to bring it in just a bit, I sewed the buttons on way over to the side, overlapping the back panels substantially. This looks a bit funny but the improved fit is worth it so it’s not constantly slipping off her shoulders.

Offset buttons create a bit of a pleat in the back. Worth it. And theoretically I can move them over as she gets bigger.

Also the button selection process was contentious. Tris was campaigning for purple buttons. I was looking for some cute little sugar skull buttons a friend gave me eons ago, that I think I may have foolishly destashed in last summer’s sewing room purge. In the end we settled on these sparkly white buttons. I didn’t have three in the larger size so the middle one is a bit smaller. Fortunately this dress is for Tris and she isn’t fussed.

More flocking!

I was able to just squeeze in the double-layered pocket pieces. It’s not my favourite method of making a patch pocket as they’re harder to get square, but double layering this fine fabric seemed like a good idea. You can, alas, see how my use of whatever thread we have on hand becomes a bit more of a problem when there is topstitching to be done.

At any rate, the recipient is happy with it and I’m not going to fuss over it any more. The pattern is used. The long-neglected shirt is living life as a functional garment again. Some of the iron-on novelty flocking got used. (Hopefully it holds up and doesn’t come off in patches on the first wash). And now I can move on to more fun projects for ME!

4 Comments

Filed under Sewing

Sweet Nothing

For the underneath portion of the tea gown of my last post, I waffled a bit. The classic tea gown (or at least, what those of us a century late to the party think of as a classic tea gown) looks as if it has an under dress and over gown (along the lines of a nightgown and a robe), but is actually a single cunning garment. But… 1) this is fundamentally a fantasy gown, 2) it might be fun to have different options for underneath, depending on the occasion, and 3) making an integrated half-garment actually seemed like as much or more work as doing a full separate garment.

So, eventually I decided to do an entirely separate nightdress, along the lines of a Victorian nightgown.

I could have gone with any number of patterns, not least among them the Folkwear Prairie Dress that I actually own (thanks to my mom having purchased it back in the 80s!!!). I also seriously considered the Sophie Dress from Ora Lin, but it doesn’t seem to come in A0 format and I’m not capable of that much cutting and gluing right now. But style wise it was exactly what I was looking for, with a pointed yoke front and back.

On the other hand, the pattern I used for my Edwardian blouse also had very much the right shape of back yoke, and it seemed like a pretty easy change to add a front yoke. I wasn’t terribly happy with my fitting the first time around, but surely that could serve as a bit of a wearable muslin, whereas a different pattern would be starting all over again.

In the end I don’t think I saved myself much (any?) labour, as it took me quite a bit of work to get the shoulder and collar fit right. I ended up making about two and a half muslins of the yoke and collar and tweaking them to fit. My shoulders are more square than standard and I was trying to hit that delicate balance of the collar between close fit and strangling myself.

I did however take a fair bit of inspiration from the Folkwear pattern as well, for the width of the final dress and the sleeves and armscye. I liked the cuffs from the Edwardian blouse, but was intrigued by the shaping and rear-thrown underarm seam of the Folkwear pattern.

The fabric I chose was also from stash, a gorgeous drapery lace again from my Fabricland days. It’s a fairly soft (polyester or nylon) mesh with scattered lace motifs and an intricate border. The sheerness isn’t historically accurate for any tea gown I’ve seen but is a lot of fun.

I spent some time playing with seam treatments, and also waffling about which portions to line. I was going to do a double layer for the yokes, for strength, but unpicking embroidered motifs from the net so as not to have them showing through was both incredibly time consuming and tricky to do without damaging the base net. So I only lined the collar and sleeves cuffs, smaller pieces where I could cut the inner piece to avoid or mostly avoid the scattered lace motifs.

For the seams, I determined I could topstitch right next to a seam and then trim off the remaining seam allowance. It looks fairly tidy.

The buttons I chose are these tiny mother-of-pearl ones that were some of my first online purchases back in 2007 or 2008. I think I bought a pack of 100 for decorating a dance costume, then discovered how much I don’t enjoy sewing on buttons. Anyway, it was exciting to finally use them as buttons. There was no way I was ever going to try putting this fabric through the machine for buttonholes, so I did them all by hand. They’re so tiny they didn’t take very long, especially compared to hand-tailoring the over robe. I didn’t fuss too much over them; the fabric doesn’t fray so they will do their job.

I left the front seam open, but will maybe stitch it up at some point.

And, since the lacy border means there’s no hemming, that’s about it!

I am enjoying the sheerness and whimsy. And it’s exactly right for the underneath portion of the tea gown. I might have made the sleeves a little more full, but on the other hand they’re mostly hidden in the sleeves of the over-gown anyway.

Compared to the over gown, this was a quick and easy project. I do love how it came out, though. Now I just need the rest of my elven accessories…

6 Comments

Filed under Sewing