
A while ago, maybe a year, maybe more, Cation Designs dropped three words into my brain: “Elven Tea Gown”

And I suddenly couldn’t think of anything else.
In particular, she was thinking of a particular House of Worth tea gown from the early 1900s… but make it Elven. My own inspiration was a bit more all over the place—but I’m not at all mad about it.

Anyway, it’s been a minute since Cation and I sewed joint projects (like, I think, our Spider-Man dresses in 2012, which was basically a lifetime ago for both of us). And we took our time ramping up to this one. But finally, after last Christmas, we took the plunge. If a dive were to play out in the most excruciating slow motion you can imagine, anyway.

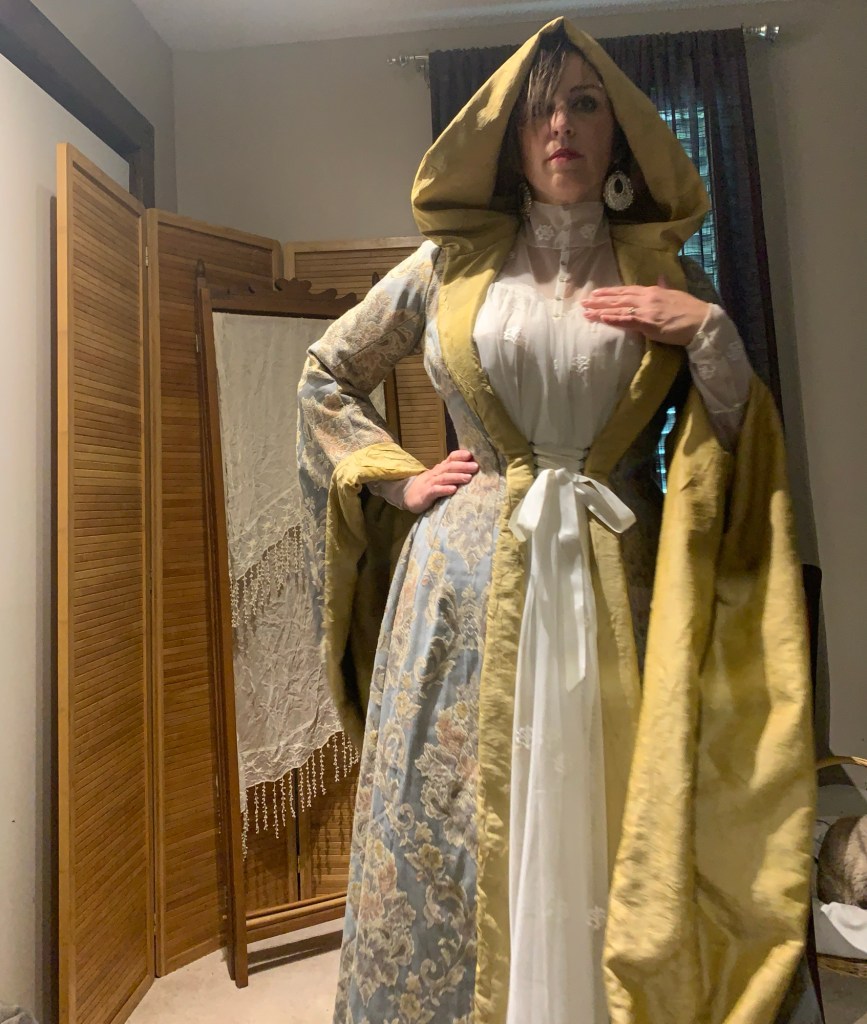
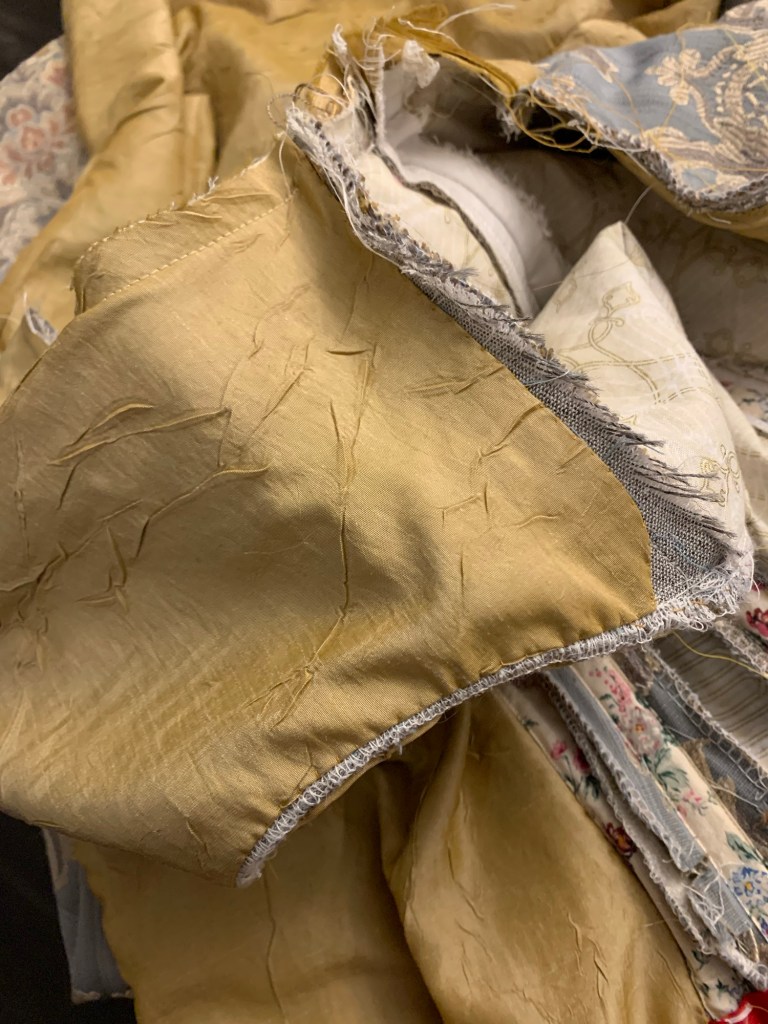
For fabric, I went with this gorgeous blue-grey upholstery jacquard I have been sitting on for YEARS since I got it on a steep sale at Fabricland back when I worked there and haunted all the sales. I did, however, have to go back to find a pale gold lining fabric, which I found in the bargain centre for three dollars/metre, so I’m not going to complain about that, either. The crinkly texture is utterly ahistorical but it’s fun and this is first and foremost a fantasy costume so we’re not going to dwell on it.

It’s all polyester, so this is in no way a light summer project, but it is what it is.
The first phase of planning, for me at least, involved a lot of Pinteresting of original tea gowns with features I liked, on the one hand, and costume things that come up when you search “elven dress” and things like that.

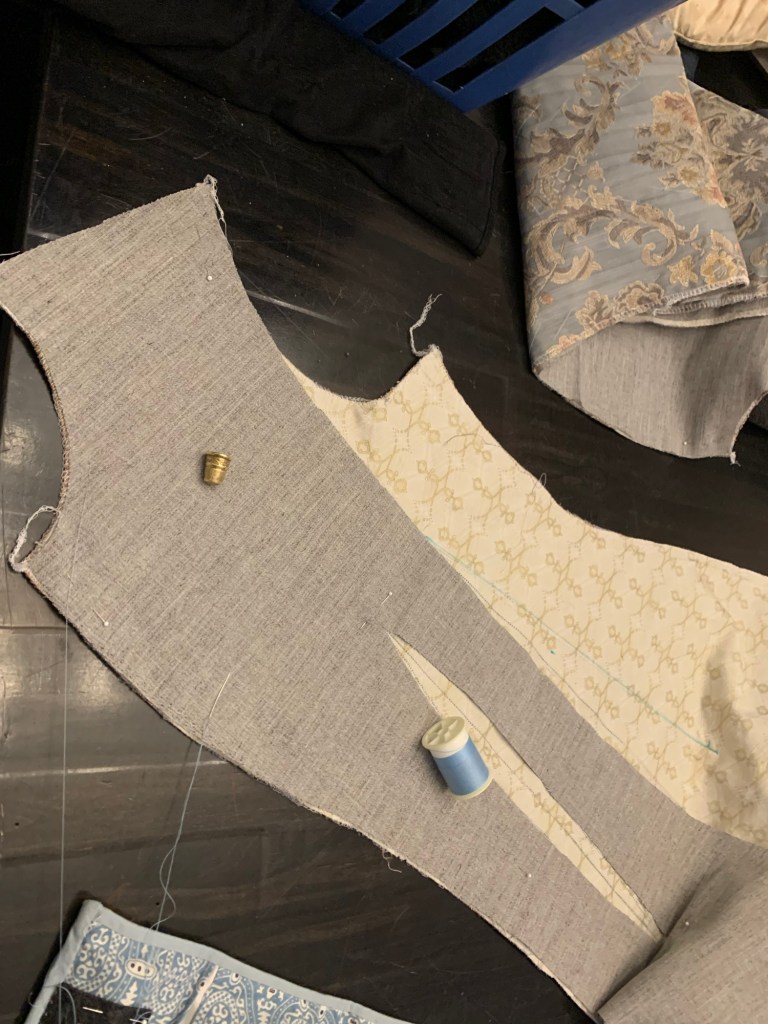
For the tea gown side of things, (and if you’re wondering what or why a tea gown is I’ll direct you to the Dreamstress’s excellent write-up) I wanted a princess-lined over gown using a classic Victorian pattern. After much waffling I decided to just run with my already-fitted Truly Victorian bodice and add a skirt to it. I wanted a slight train (my first ever!) and a Watteau back.
For the elven side of things I whittled it down to the following features: large dramatic sleeves, a laced closure across the front, and a dramatic hood.
Original tea gowns usually (always?) have the look of two garments, an over-robe and an under-gown, but are in fact one garment with the illusion of layers. After a fair bit of waffling I decided to construct mine as two separate garments, mainly for the flexibility of changing up the look in the future. Also because adding the second set of sleeves and collar and front yoke seemed like not significantly less work than making an entirely separate under-gown, although it would have saved me a bit of fabric. So this post will mainly discuss the over-gown.

I decided to live dangerously and cut my skirt directly on the muslin fabric (which I was also hoping to use as my lining.) This worked out fairly well, except that my draft was a little short at the sides; I added extra fabric there when I cut the outer layer, figuring the gap would be covered by my final hem treatment. BUT, then I messed up: to save fabric I had pieced the side-back pieces of the muslin. No problem, except that then when ripping apart the muslin, the bodice portion of the piece got ripped off the skirt portion, and since I didn’t have notches or anything, I re-attached it wrong way around (since I made my gores historically asymmetrical). So I wound up adding my length in the wrong spot, or at least I would’ve needed twice the length I thought I did. So the whole damn thing just isn’t quite as long as I would’ve liked. And I was STILL short of fabric—I pieced several parts (so delightfully historically accurate!) and still had only scraps left. Anyway—-note to self, add 2-3 extra inches everywhere when drafting a skirt, at least you can trim it later!
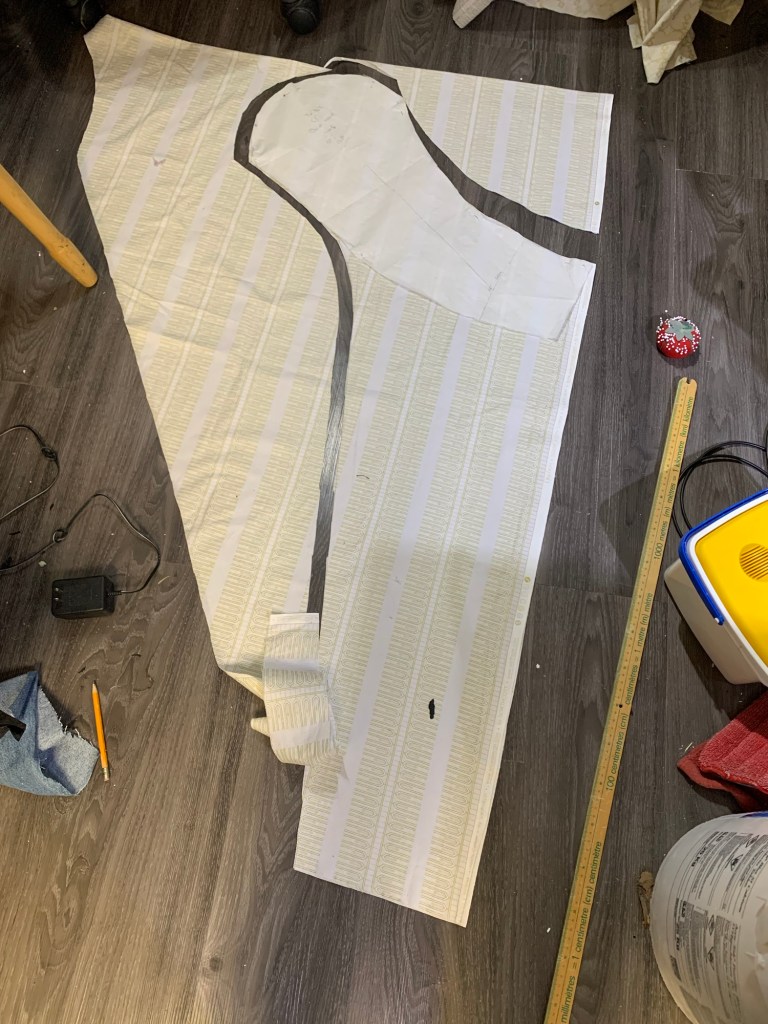
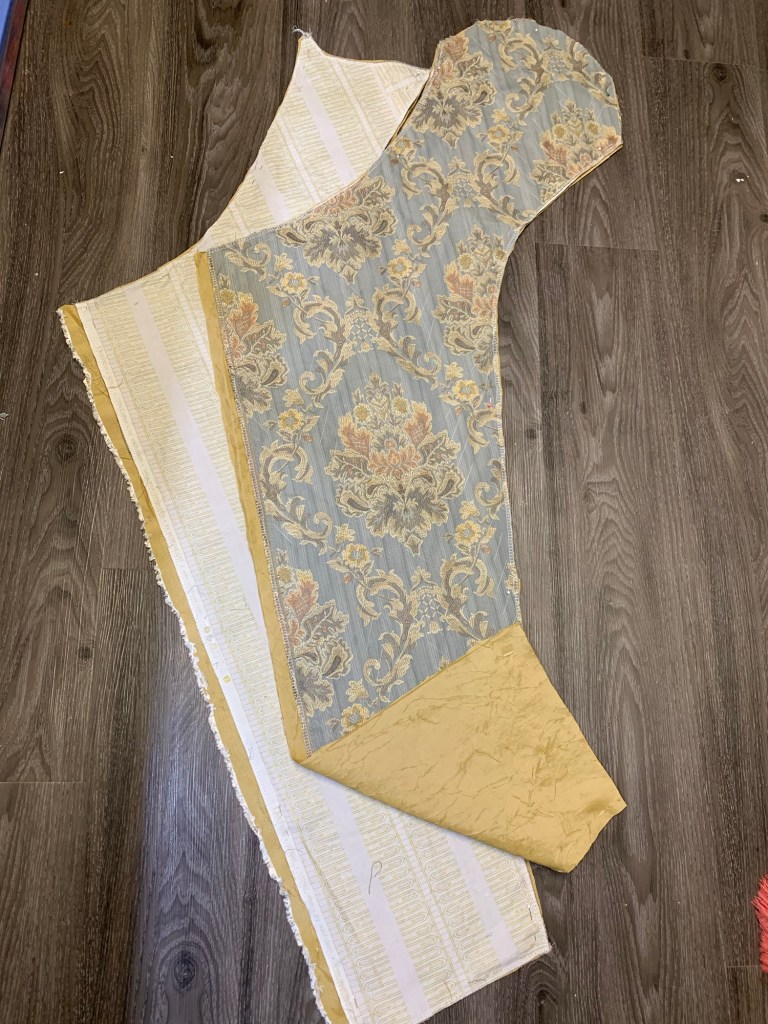
I drafted the draping mediaeval-inspired sleeves using the two-piece sleeve that goes with my bodice, but extending it down to a long, tapered rectangle. I was completely making this part up, but with some tweaking to the top seam I was able to get it to sorta work, though I’m pretty sure sleeves like this are never actually drafted this way.

I borrowed the hood pattern piece from Simplicity 5794 that I made last fall, but one of the other views, which had an exaggerated point to the back of the hood. I usually avoid these but it felt appropriate for the elven thing. I would still like to find a nice heavy drapery tassel for the point.

I originally wanted it to blend smooothly into the lapels, the way I rather accidentally got the hood of my denim M6800 jacket to sit. Arguably I should just have dug out that pattern and used that (surprisingly excellent) hood, adding my own point if desired. Although I’m not sure if the issue is the hood itself or the angle of the lapels. Either is possible. Anyway, it’s not quite what I achieved but I have decided to embrace it for what it is.

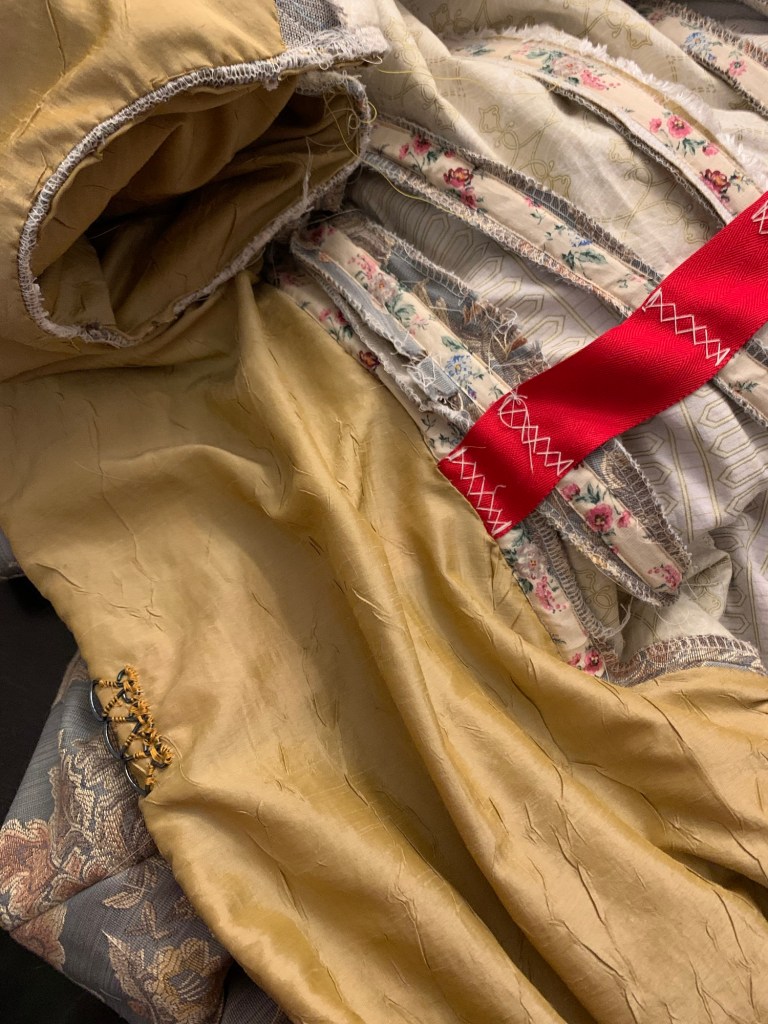
As I cut out my main fabric, it became tragically clear that I wouldn’t have enough for the Watteau pleating I so desperately wanted. However, some perusal of originals identified a few examples where the accent fabric was used to create the pleats, so once I had obtained my gold lining fabric I decided to use that. Initially I went with a full fabric width of pleating, because more is more, but eventually I decided that was just too much.
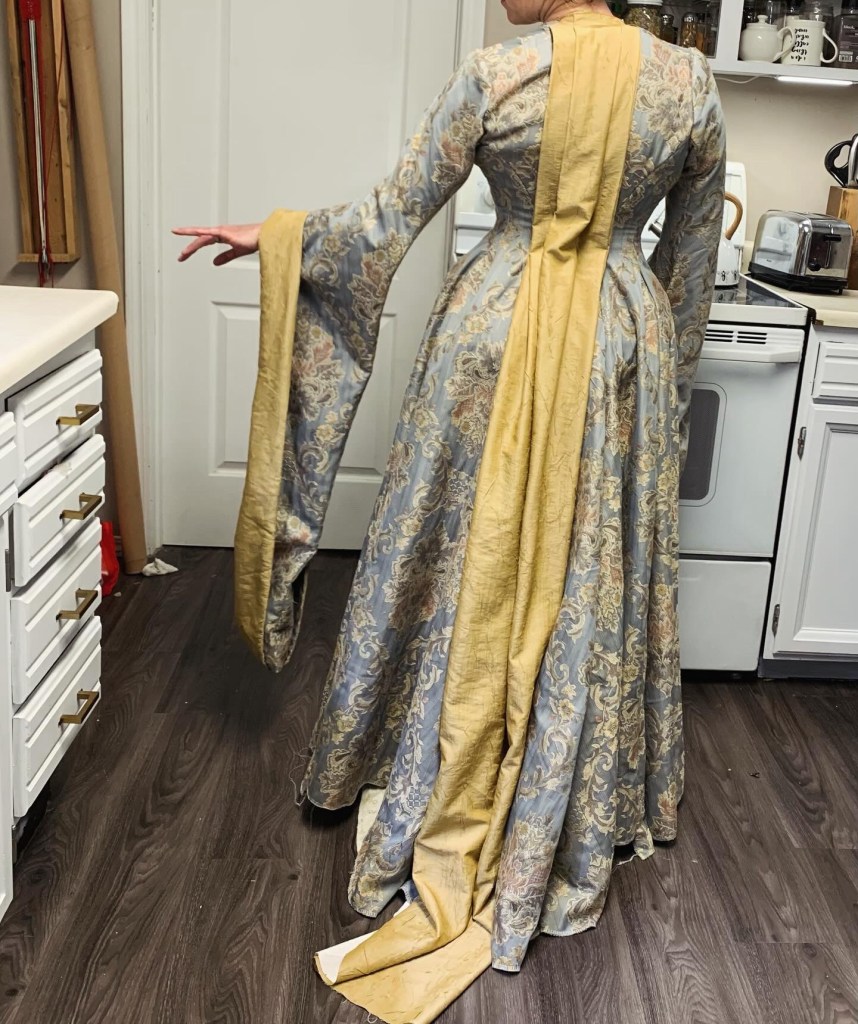
I ripped out the back seam, cut the excess fabric in half, and added an underlining of some kind of cotton sheeting to it to give it a heft a bit closer to other exterior fabric. At the moment I have the pleats hand-tacked down to keep them well-behaved (which seems typical of a lot of the originals I’ve looked at, or maybe it’s just how they’re arranged on the mannequins) but I might let that out at some point just to see. The only problem is the opulent hood covers a good chunk of it when it’s down.

I haven’t even started talking about all the handsewing I did on this project! Somehow I convinced myself early on in the project that I had to hand-baste the lining (aka underlining aka my muslin) to the outer fabric for construction. Then I talked myself into hand-tailoring the lapels, which meant hand tailoring a truly HUGE swath of hair canvas, since I wanted the lapels to go all the way down to the hem.
While I’m pretty sure these methods are period appropriate for tailored garments (give or take some quibbling—I should’ve used canvas, not hair canvas, but the canvas I have on hand is all really heavy), I’m not at all sure they’re appropriate for a tea gown, but anyway. I haven’t done a crazy amount of padstitching in at least a decade so I was due?

It took forever, but I love the shape I got, especially how it let me shrink in the edge of the turned back portion along the waist so that the roll line could bend to fall “properly”
Once the padstitching was done (which only took, oh, two months?) progress sped up a bit. Sewing up the actual garment didn’t take long. Adding in the lining pieces on the sleeves and the fronts took a little more time, especially hand-felling the front lining to the side seams.
Tea gowns are typically soft garments and are often completely un boned, but of course I wanted boning in mine, because I’m going for a dramatic and structured fantasy look. So I added boning to the various side and back seams. And the waist stay, which runs underneath the front lining all the way to the roll line where the lacing eyes are anchored to it.
For the hem, I knew I didn’t have the length for a turned up hem. I was planning to use my leftover lining fabric for a facing but after the lining was in there actually wasn’t much left, and I decided to save the remainder for a dust ruffle for the train.
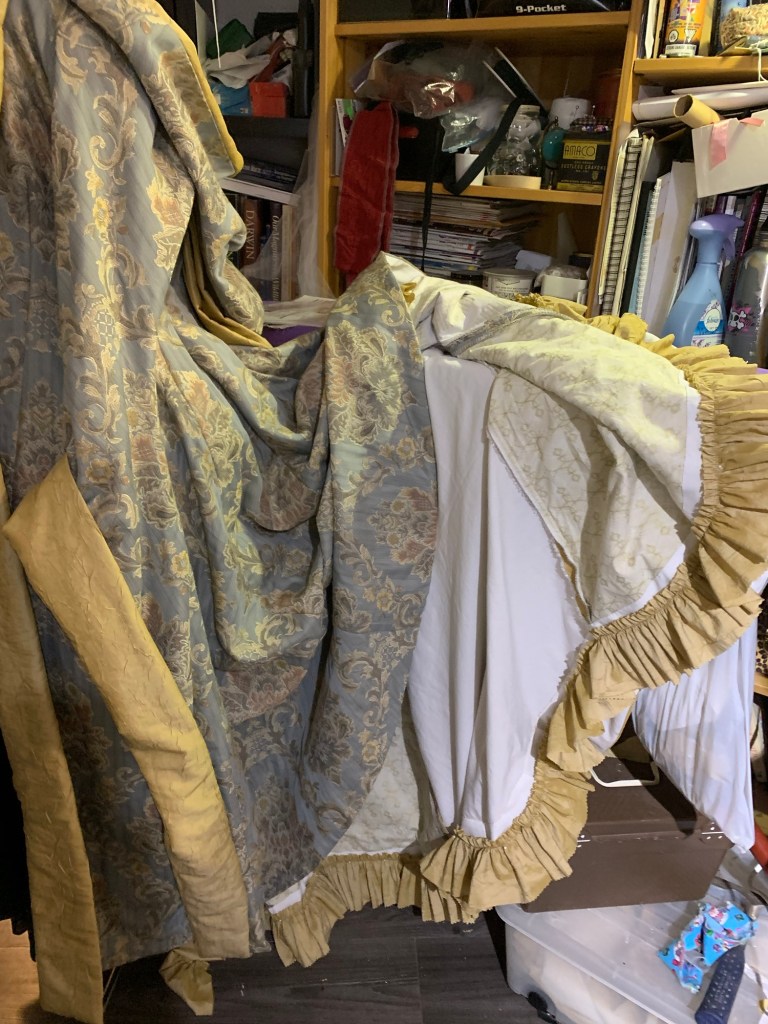
So I dug out some sturdy white polyester that I was happy to sacrifice to a purpose like this and made about a million miles of 5” wide bias tape and added a hem facing. It’s still shorter than I’d like in the front, but we’ll cry about that later.
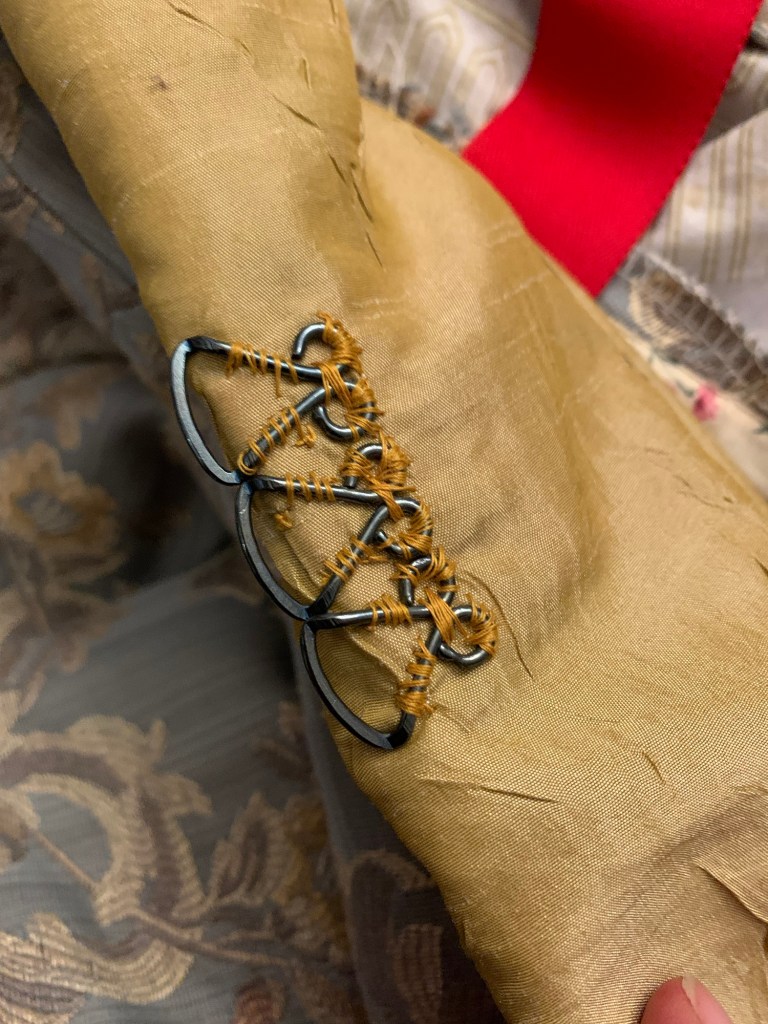
For the laced front, I sacrificed the “eye” side of some gorgeous ornamental hooks and eyes from Farthingales. Hopefully I can use their corresponding hooks with thread bars, or even make my own from wire. Or maybe I’ll find different eyes and swap them out sometime.

For a final touch, I broke out my pinking wheel to make a bunch of straight grain lengths of the lining fabric, gathered up and loosely tacked to the underside of the train as a dust ruffle.
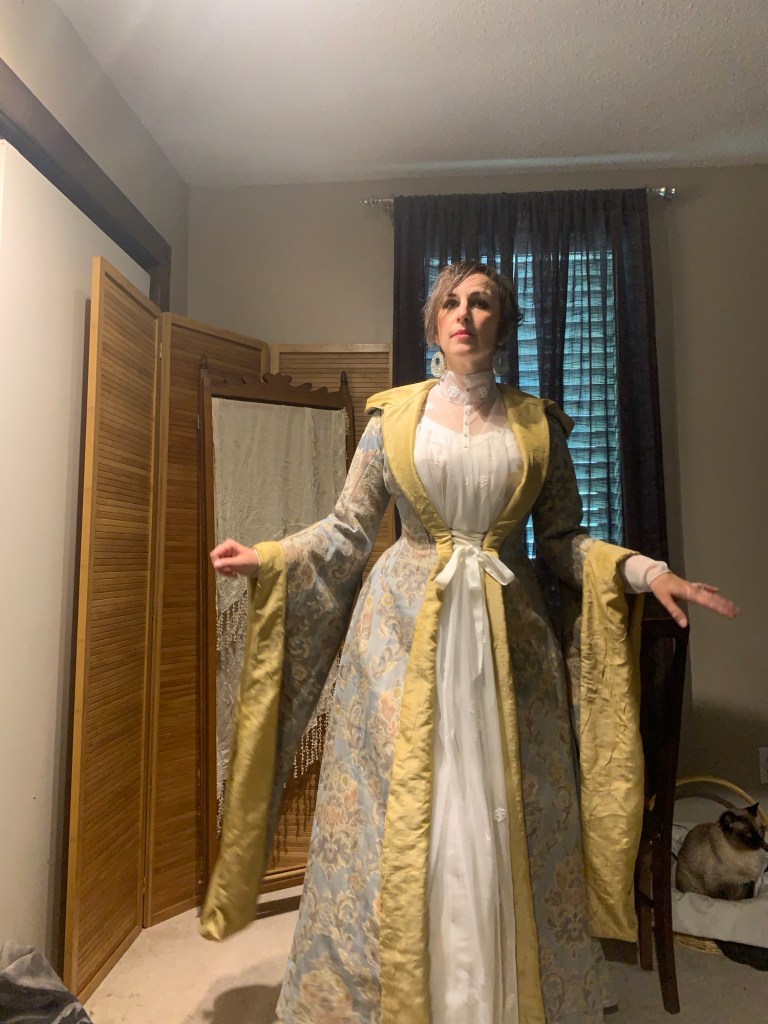
And that, basically, was that. There are a few other touches I might add in the future—a tassel for the hood, trim of some kind, more Elven accessories, long flowing hair—but after all that work I’m so happy to be done. I’d change a few other things, like the fullness of the back skirt (which is a bit excessive), but all in all I’m just super excited to have created such a fun piece!

Next post will cover the under gown.
It was super fun to chat and plan this out together, and I’m so excited (and not a little surprised) that we pulled it off at least somewhat within our projected time frame!

And of course I could not resist abusing the power of photoshop to try to virtually join Cation in a couple of her beautiful photos (by Faes and Photos)! (And thank you Doug for mine!)

The only thing that would make this better would be sitting down for actual tea together! But until I someday get my trailing sleeves to California, I guess photoshop will have to do.


Holy moly…..that’s an incredible amount of work!! It looks stunning on you even if most of what you wrote went over my head. You are so talented!!! Bernie
Thank you! Sorry for the writing though. 😥
What a grand read to go with a grand gown. I’m sure that opulent drapery tassel is waiting for you somewhere. Oh, and have the twins requested matching ones yet?
Not yet thankfully! And thank you!!!!
Absolutely beautiful. And your dedication is an inspiration. That gown was a lot of work but, it also looks like a lot of fun.
Thank you! It was fun, even if it took forever. I’m definitely happy to take a bit of a break now though.
This is so fabulous! I love the idea of an Elven tea gown, and there’s so much medieval influence at the time anyway with the pre-Raphaelites and the aesthetic movement that it all ends up making some kind of sense.
Yes, I found myself looking at a lot of those for the “Elven” side of the inspiration. 😄
This looks fantastic! Such a great mash-up of inspirations, and such a beautiful garment!
Thank you! It was a really fun idea to tackle!
Pingback: Sweet Nothing | Tanit-Isis Sews
Pingback: That’s a wrap(per) | Tanit-Isis Sews