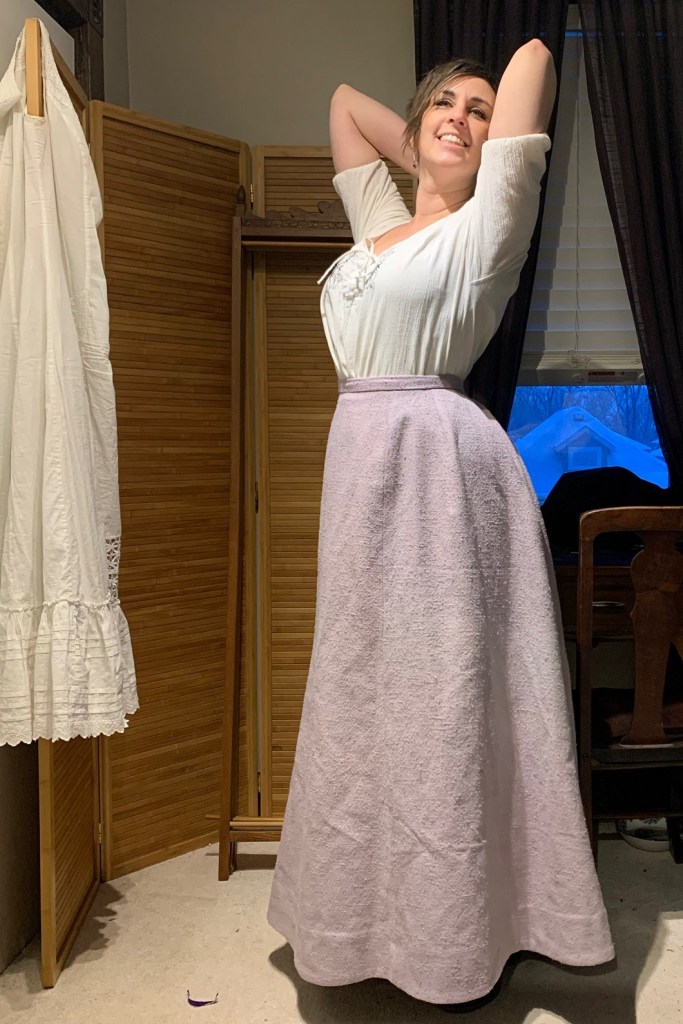
Not so very long ago Wearing History put out a new “Archive Collection” pattern based on a McCall’s original from around 1900. And, rather impulsively, I bought it.

Equally impulsively, I decided to get it printed in time for my little Christmas break. I didn’t get as much sewing done as I might have liked, after one of the twins brought home yet another virus just in time for Christmas, but I did eventually start on a tester version.

Now, this isn’t exactly a pattern I needed. In particular it’s very similar to the Scroop Fantail skirt I made in September. But I thought a detailed pattern comparison would be fun! So here goes.
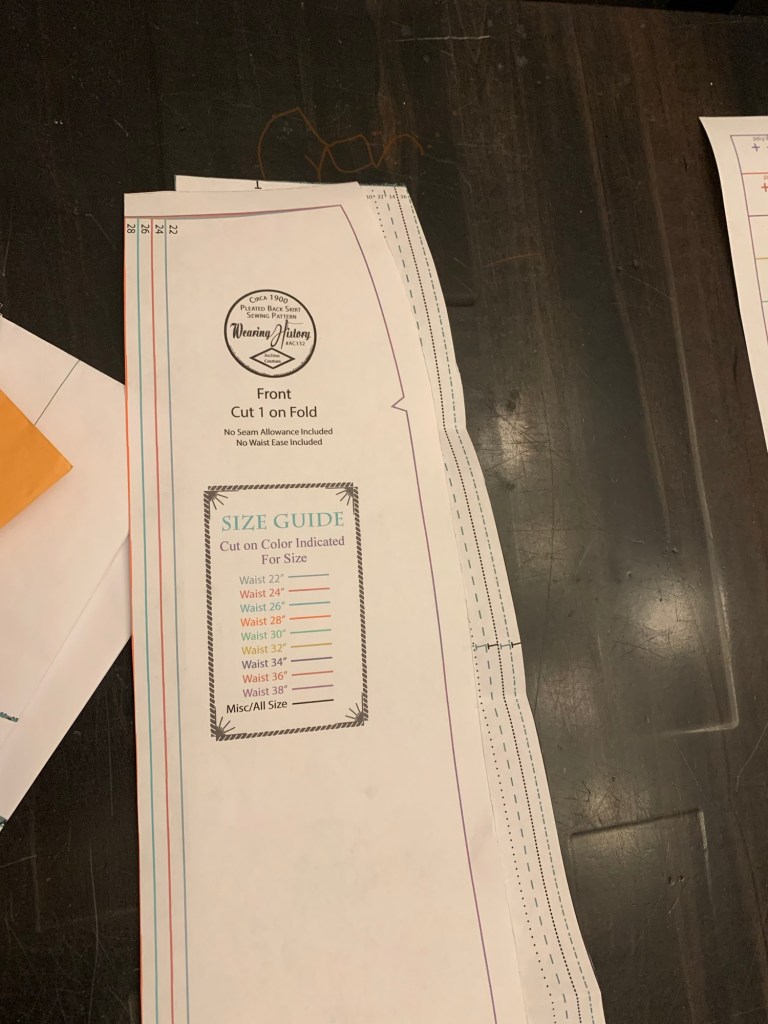
Both patterns are five-gore skirts with smooth fronts and added fullness in the back provided by pleats. Both have narrow straight waistbands and a centre back placket closure. The fullness in front and side panels is almost identical, although the Wearing History pattern is a little more full in the back panel, particularly towards the hem.

The Wearing History pattern differs mainly in three ways: the back placket is cut on, additional shaping for the waist comes from wide side darts, and the shaping of the flare, which is quite straight in the Fantail, and subtly fluted in the Wearing History pattern, narrower through the knees and then flaring slightly more below—though the difference is only a cm or two per pattern piece. There is a lot more shaping from waist to hip in the Wearing History skirt, something I had to increase in my Fantail by grading to a smaller size at the waist.
The grainlines of the patterns also differ, with the Fantail having a more modern style of grainline falling in the middle of the gore while the Wearing History original grainlines are the old fashioned type where they parallel one edge of the gore. However, the Fantail instructions also mention the variability of grainlines in the period, and when I made my version I used “old style” grainlines to get the pattern to fit on my limited yardage.
The side darts, incidentally, are features of my self-drafted 1880s skirts, based on period instructions. It’s neat to see the mix of older features and sharp new skirt shape in this pattern.
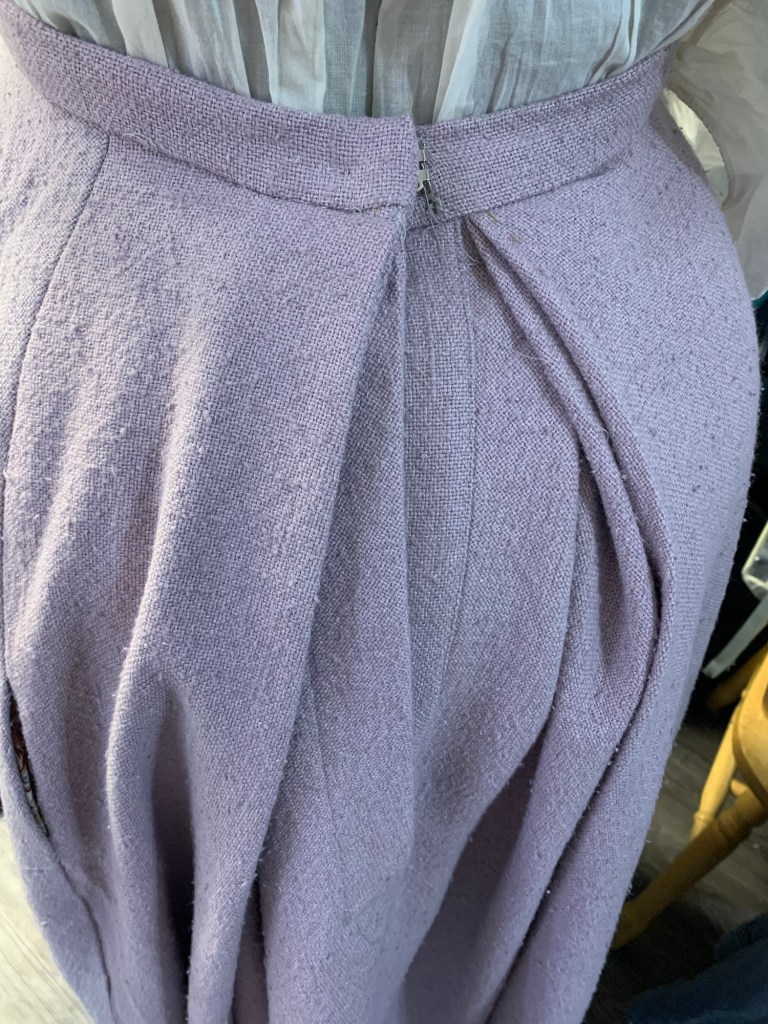
In my version of the Wearing History pattern, I decided to omit the cut on placket and do a sewn on one. This matches the directions I’ve usually read in period sewing manuals. And that whole back seam is on the bias so trying to keep a cut-on placket square just seemed like a nightmare. Instead I did the back placket basically exactly like the Fantail skirt, except for just making it rectangular instead of a fancy angle.

I tweaked the darts quite a bit to get a hip shape I liked, making them longer and a more sinuous shape. I also wound up making them deeper, at least partly because the waist was stretching out in my thick but weirdly soft fabric; I overshot a bit and currently it’s really too small so the back pleats aren’t lining up quite right. If I redo it, I might sub in a different fabric, like a thin cotton, for the waistband. This upholstery fabric is beefy and where all the pleats stack at the centre back my machine completely balked, although not before I had broken three or four needles trying.
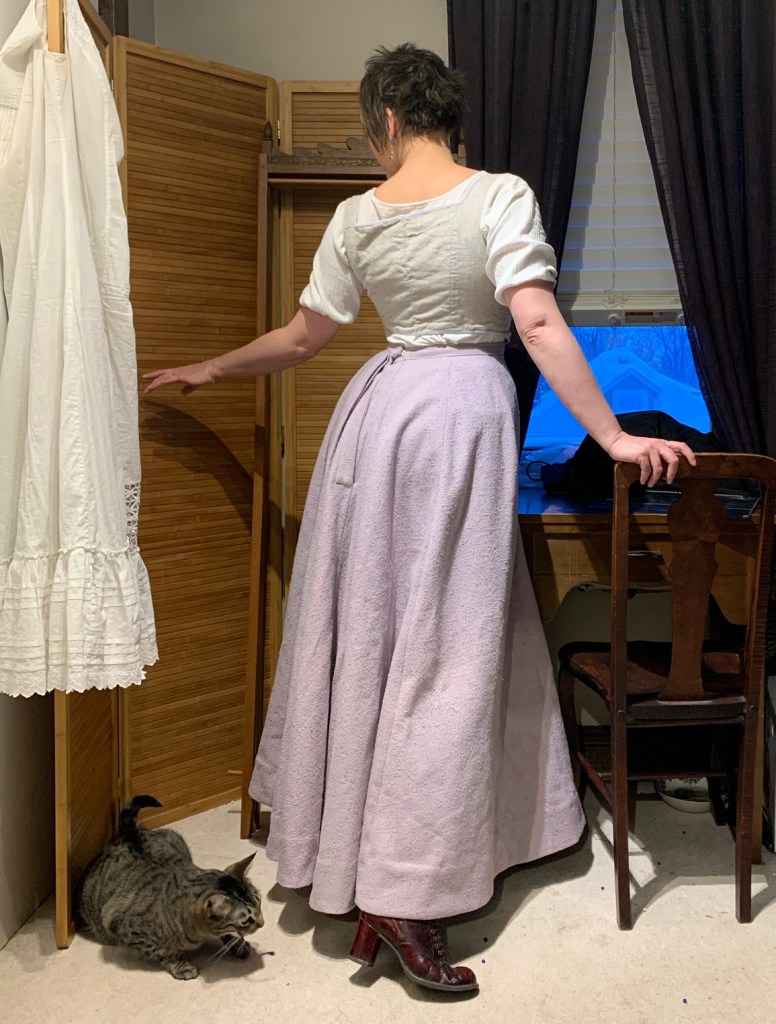
Speaking of the fabric, I almost forgot to mention my favourite feature of the whole skirt. Since the pattern has no seam or hem allowances, you add your own. However, when I was laying my fabric out, I had distinctly less than needed for the skirt, and I wound up basically not being able to add hem allowance.
So, since I basically had no hem allowance, I decided to do a faced hem. This is a legit period way to do it, although mine is a pretty simple facing, and they often jazzed them up in period with additional layers of velveteen binding or stiffening or braid. I would have to double-check if bias was appropriate at this point in history; certainly a little earlier they were perfectly happy to cut their facings straight and just ease or pleat the top edge as necessary to have them fit. But I also serged all my seams here, I wasn’t in the mood to be too precious about historical accuracy.

I dove through scraps and eventually settled on the remnant from this dress (man that was a while ago!), a linen/cotton blend that is beefy but still a lot thinner than my main fabric. I evened my remnant into a nice rectangle, cut off the diagonal on one side and sewed it back on the other… then sewed it into the offset tube and cut a truly massive amount of 10-cm-wide continuous bias. So hopefully there’s another skirt worth of it. Probably it would’ve been faster to cut the strips flat with a rotary cutter and then sew them together, but anyway.
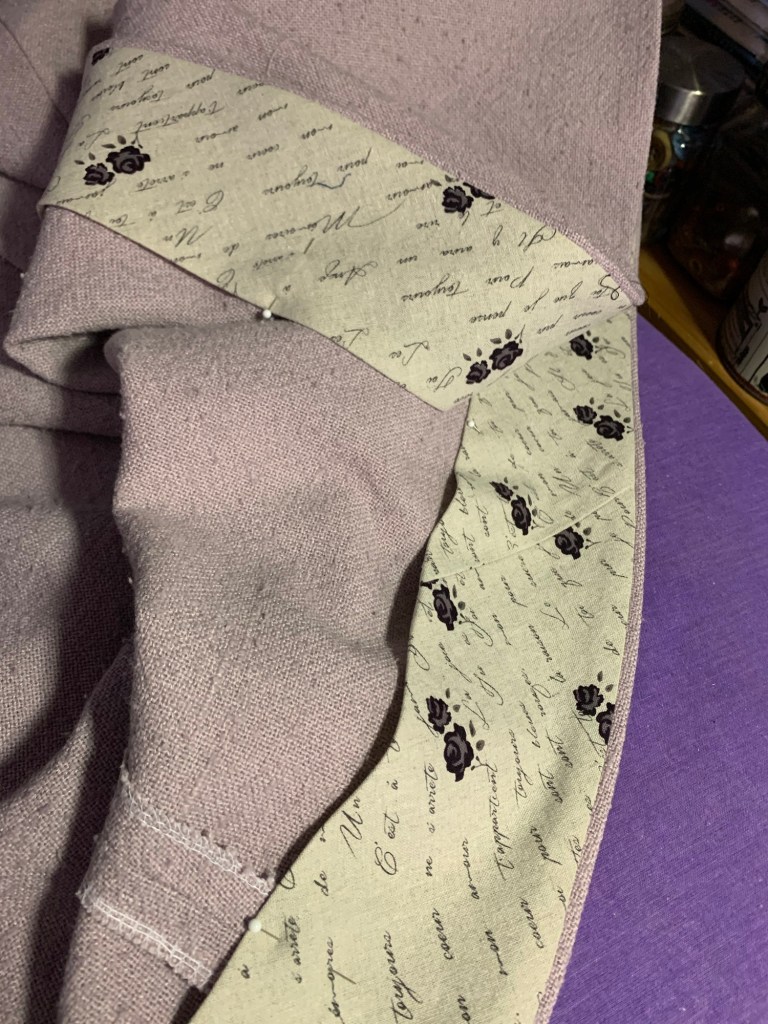
I’ll confess, I wasn’t super sure about the skirt when I first made it. The hefty fabric seemed too sculptural and stiff (despite actually being pretty soft). It sat on the dress form for weeks just waiting for that hem (probably a good idea since there was a lot of bias stretch to work out, but still). But this faced hem makes me love it! it’s such a nice finish. I love the facing fabric and how it makes the hem feel. I think a self-fabric hem in this fabric would just have been bulky.
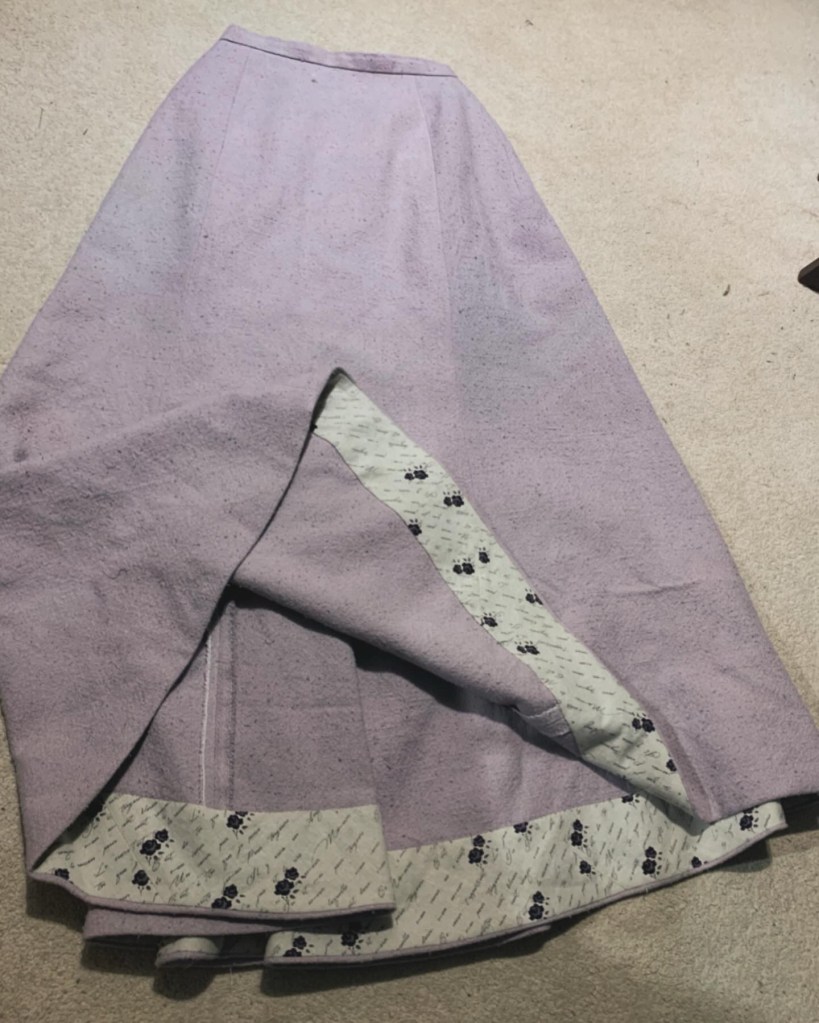
Oh, and the skirt is drafted for a 41” front length (from the waist) which is pretty much perfect for me but probably a little long for many people. The pattern does actually include original instructions for lengthening or shortening at the hem, but if you want to maintain the fluted shape you should probably shorten by overlapping in two places, above and below the knee. In a perfect world, anyway.
I picked my size based on waist size, mainly out of curiosity as to whether I could make that crazy waist-hip variation work, even if it took padding. And I’m not sad I did, although a more rational way to fit the skirt would be to pick the size by your hip size and just adjust the waist. Those side darts give an immense amount of room to play with the fit, four or five inches, at least, and you can always pick a wider seam allowance if you’re worried about having to let out the waist or adjust the shaping there.

All in all, it was a fun exercise! I wouldn’t mind trying it again in a more appropriate fabric. Though I should really get back to the blouses for this kind of period…




 Tanit-Isis Sews