Syo gave me some very lovely pink linen for Christmas, brought back from her trip to Australia this past fall. Only two metres, she apologized, because it was very expensive. I was, understandably, thrilled. I prewashed the fabric that very day.
But then I needed to pick a pattern as special as the fabric itself. After some faffing around, I managed to find Butterick 6206, an old pattern of my mom’s. It has the significance to me, though, of being the first commercial pattern I ever sewed with, back in 1998 or 1999, when I was about 18, and wanted a white outfit to wear clubbing at the local goth night. I made it from an old, sheer curtain, and into a crop top, and I was thoroughly delighted with myself except for one thing—I didn’t know to lengthen the sleeves. So they were always annoyingly just a little too short.
Anyway, this felt like a good time and place to revisit this pattern, with a couple of adjustments.
I added 2” to the sleeve length, just at the hem, since exaggerating that gorgeous bishop sleeve shape didn’t seem like a bad plan at all. And then when cutting the body pieces I scootched them in from the fold by about an inch each, for a total of 4” extra ease at the bust, which seemed about right for my current measurements. I don’t know if I strictly needed it for the bust but I definitely did at the hip. I also raised under the arms my usual 1/2”.
This was a great beginner pattern for me when I was a teenager because it really is as easy as it says it is, but revisiting it I also appreciated there is some really sophisticated drafting going on. The sleeve shape is lovely, and the neckline has some really subtle shaping as well. Much more subtle than the (similar era) Kwik Sew pattern I made recently.
I added a little slit at the front, since I liked how that had worked on the Kwik Sew pattern, and it makes it easy to finish the neckline with a drawstring, which I like.
And then I went a little crazy, and decided this (very simple) special pattern and special fabric needed entirely hand-finishing. I hand-felled all the seams. And then I decided I wanted a ruffle along the edge, so after I hand-hemmed the whole thing I went back over the neckline and sleeve hems and added another round of chainstitching. I should honestly have added two, one on each side of the elastic, as I’m really not sure how well my basic hemming will hold up when functioning as a casing, but this was already a two week project and we’ll cross that bridge when we come to it.
The chainstitching took by far the longest, although it seemed to go faster than the last time I attempted it, when it made me question my sanity. And you barely see it when it is all gathered up, although I like to think it adds a certain dimension and complexity to the simple design.
The only thing I’m not completely satisfied with is the drawstring I used, which is a piece of white cotton stay tape. Next time I have some avocado skins around I will try and dye it…
Then, because I was so happy with the pattern, I made it again.
Last summer, I attended a local sewist’s garden party, which included a fabric swap. I got this lovely piece of textured linen-rayon blend. It was, however, a very trendy chartreuse colour that I knew I would never wear. So I eventually managed to pick up some fabric dye and over-dye it with indigo blue. The result is a fairly dark, muted navy, still not one of my core colours but a lot closer than it had been before. However, there was only a metre of the fabric, and I was a bit stumped as to what to make, especially as I wasn’t in the mood for a tank top.
But when I had the Butterick 6206 pattern out, I realized that if I used the short sleeve pattern piece, I could just squeeze out the shirt, less about an inch of length, if I added a centre-front seam. I wasn’t able to add as much width to this version, but the fabric has a lot of give so I wasn’t too worried. And the CF seam made adding the little slit I like super easy.
This shirt was as quick and modern in its construction as the first one was painstaking. Overlocking and machine hems throughout. As a result it only took an afternoon to construct.
I do need to find a darker drawstring, though. Definitely not a fan of the white for this shirt.
Anyway, I think both of these will fit nicely into my existing wardrobe, drifting ever further in the whimsical direction as it is.
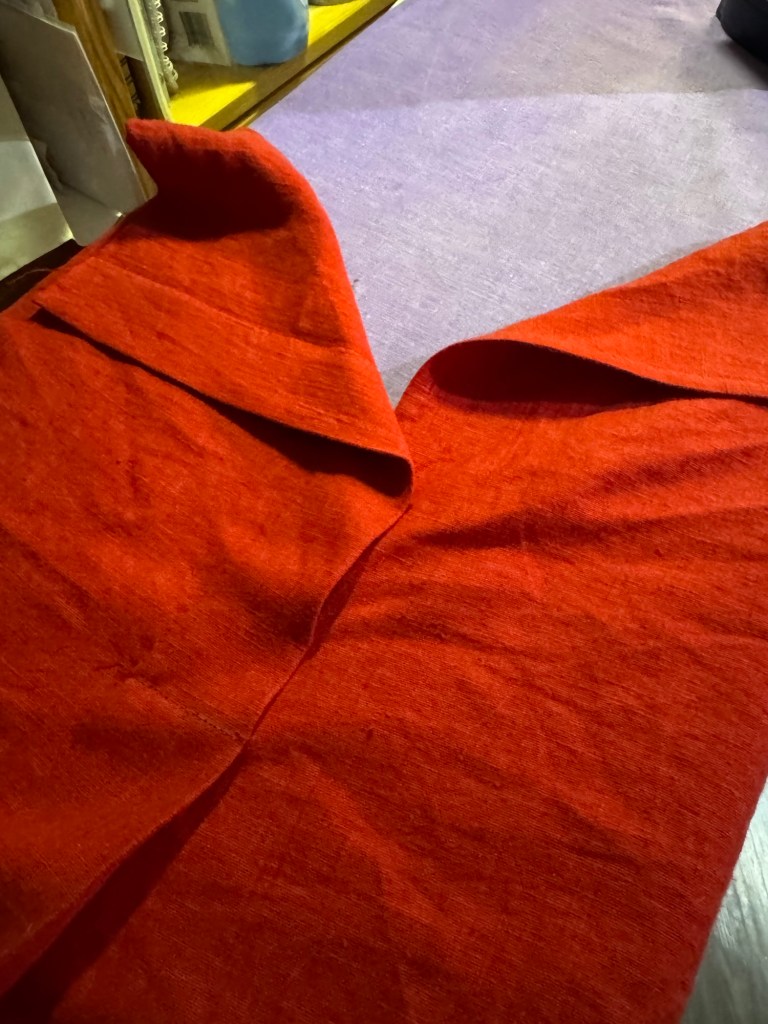
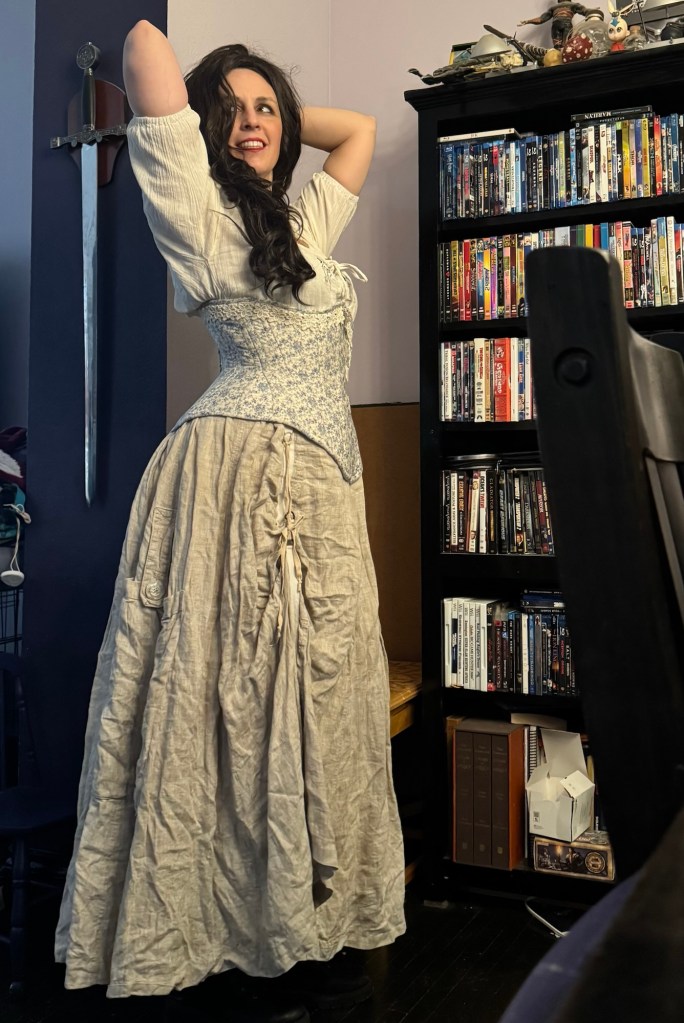
I got this fabric from a local sewing friend who’s been in a low-key destash mode over the last couple of years. It’s a gorgeous textured linen/cotton. I originally wanted a dress but the 2.5m length was a bit minimal for the long, flowing thing I was imagining. So then I decided to opt for a skirt… But to minimize cutting into the fabric in case I change my mind later, I went with a skirt style lightly inspired by eighteenth-century petticoats—two rectangular lengths pleated to a waistband.
Now, this is frankly an ageless method of skirt construction, and it’s one I have a fraught history with. I don’t usually like how gathered rectangles look on my body, above or below the waist. It worked ok for this dress here, but it’s generally not my favourite. I’ve attempted to rework this dress for post-maternity wear and I kinda hate it.
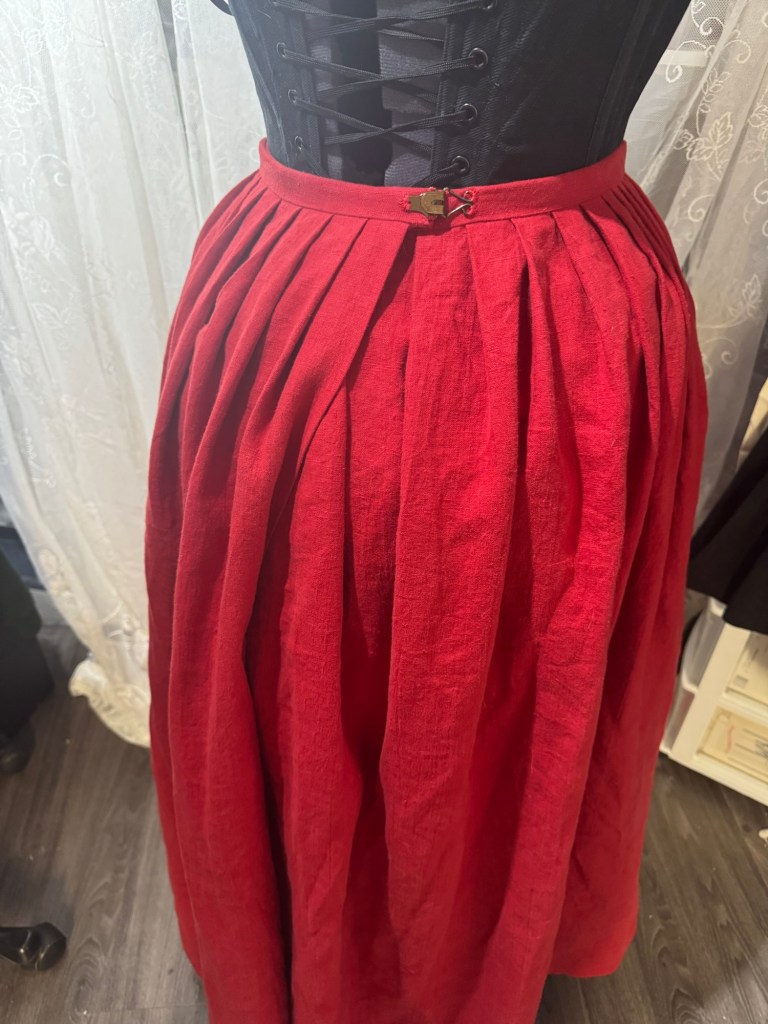
But, wearing over a corset lets me get away with some clothing shapes I haven’t usually been comfortable with, so I decided to give it a try in this case. With pleats, not gathers.
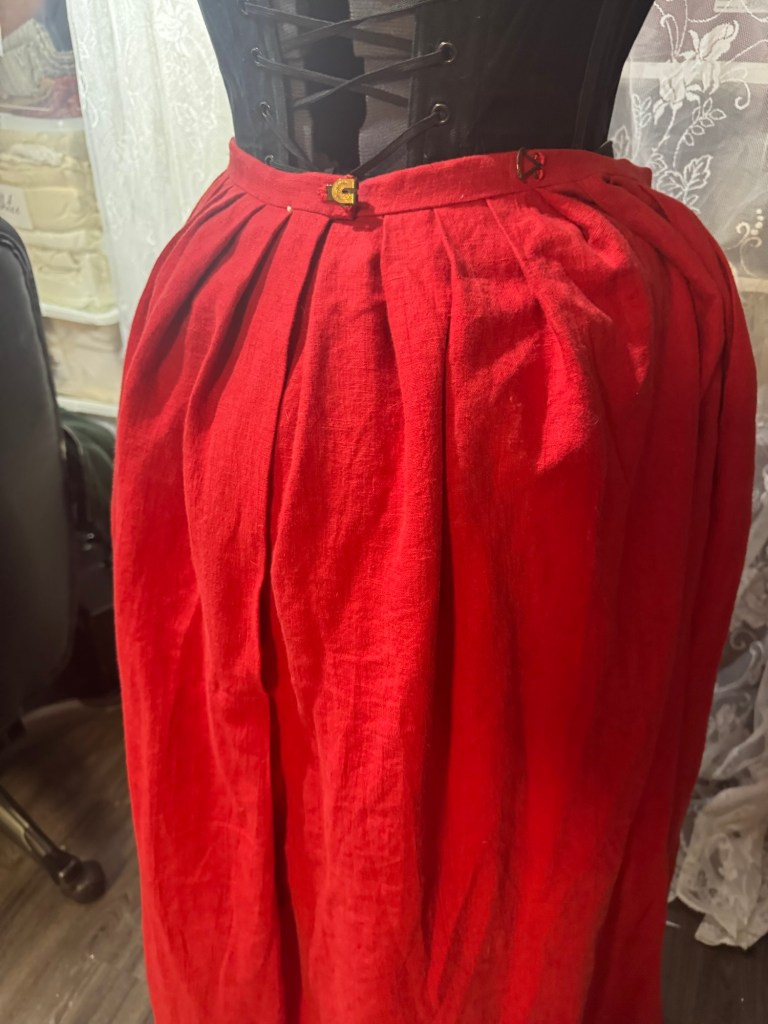
I left a flat space (maybe too wide) along the middle of the front, and then my pleats are closer together in the front, a bit more spaced out in the back.
The most common method of making 18th-century style petticoats seems to be leaving slits at the sides and putting separate ties on front and back. This works great and is highly adjustable, but I wasn’t too sure I wanted slits at the highly visible sides since I’m not likely to actually wear it with 18th century upper garments that often cover that area. So really this is more of a Victorian take on the idea, which I’m sure existed and I could probably find references and directions for if I dug.
Anyway, I decided to make a slit closure at the centre back, using the same slit in a pleat method I used on my flannel petticoat, though I didn’t do a good job of illustrating it in that post either. Basically you cut the slit; make a narrow hem (tapering to nothing at the end of the slit) for the underlay side, and fold in a big pleat to make the wide overlap side.
Stitch along the edge of the pleat that formed the overlap, and stitch across the pleat at the bottom of the slit portion to secure it in place, so above this line there is placket, and below it is pleat. Clear as mud? Thought so.
And that was the most complicated portion of the construction.
I got these gorgeous heavy-duty hook and eyes from Farthingales and they’re too pretty to hide inside.
Except…I knew I was pleating it a bit loose for my corseted waist. I kind of wanted to keep my options open for wearing without corsets (even though, as previously mentioned, I’m not likely to like this skirt shape on my body without a corset). But it’s a bit too too loose. So when actually worn the too-big overlap creates a fairly weird spot where the upper placket pulls awkwardly across several other pleats. On the other hand, it’s in the back so I can’t see it and pleats are always shifting around when you move anyway.
I definitely still prefer the flared look of a gored skirt, and I think undergarments—corset and gored petticoats—are going to be key to the wearability of this skirt, giving it the illusion of more volume at the bottom. Also, I need to go in and add real pocket. (I added one about a week later. ) But I’ll have to find a coordinating fabric for that because this was an absolutely zero-waste project, which is basically unheard of for me. Oh wait I lied…. There was a short piece of the narrow rectangle I used for the waistband left over. (Edit: I used that leftover rectangular bit to make matching pocket facings on my quilting-cotton pocket, it is now fully zero waste.)
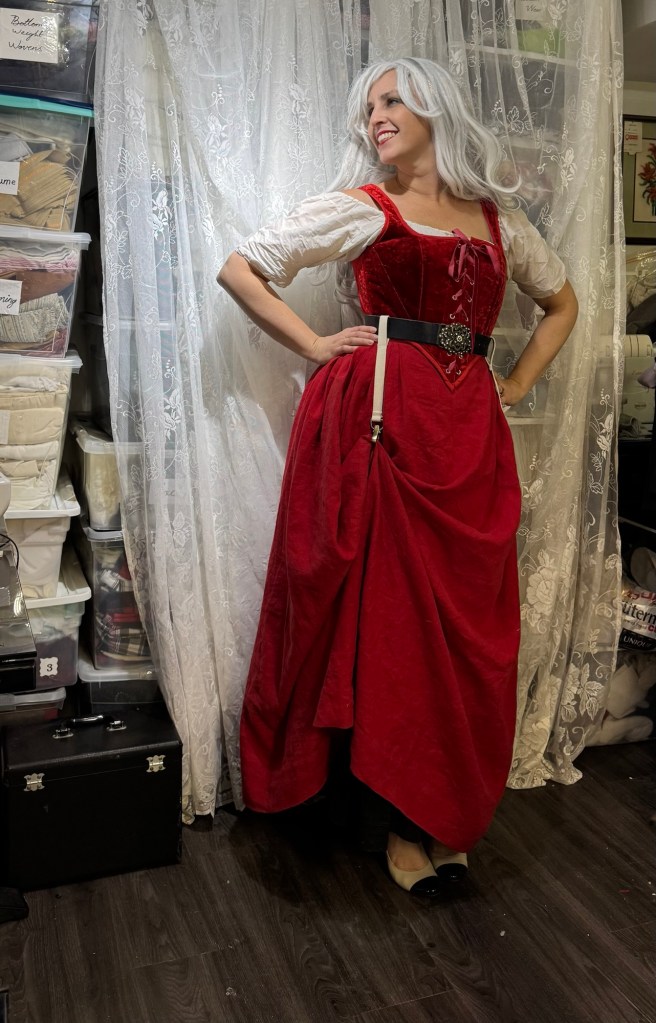
But I am excited to have a red skirt. Considering red is what I usually call my favourite colour, I don’t wear it much. So I’m pretty happy to change that a bit. And it’s definitely the season.
The first corset I ever made, back in 2015, has always been one of my favourites.
But, it’s also never really been wearable. Partly the fit wasn’t great, but the biggest glitch was my failure to properly bone the outer edge of the back lacing, which made it impossible to lace very tightly; it was also a bit big, though entering my 40s has fixed that problem for me. And as my bust has, ah, improved over the last few years, the upper edge went from not-quite-mid-bust to awkwardly low. There was nothing like enough hip or bust spring, either. So it’s been sadly awaiting a makeover for quite a long time.
I’m a bit between projects right now and a little too burnt out to tackle anything big, so I made myself start mindlessly seam ripping.
Fortunately I had the rest of the fabric still in stash, since I needed to add gussets to the hip and cut new binding for the top and bottom, as well as adding a casing to the lacing edge.
Lace flowers.
Removing the binding took the longest (well, except for adding the binding back on). I had to take off the lace along the top as well, and removed one of the carefully scatter of artful lace flowers that were pretty much my favourite feature of the corset, and I should probably reposition more of them, but we’ll see if that happens.
That being said, it really didn’t take nearly as much time as I thought it might. The original corset was layered over a white denim, but for the new additions I layered the fashion fabric over some bits of ticking, which is much more corset-appropriate. It’s a little thinner but this isn’t a big problem for the gussets.
Can you see where I added the hip gussets in?
Once I had the binding off I seam-ripped the bottom half of the side seam, drafted up a gusset shape to fill in that space, and marked where I thought the under bust curve should go. (I also ripped WAY up one side trying it on to get an idea of how big the hip gussets should be, and had to hand-stitch it back together, which worked surprisingly well. Here’s hoping if it works for 18th century stays it’ll work for me.
The result is a much curvier underbust corset—maybe not as historical, but it wasn’t really good at that anyway.
I think it’ll be much more useful as a cute outerwear piece than it was before.
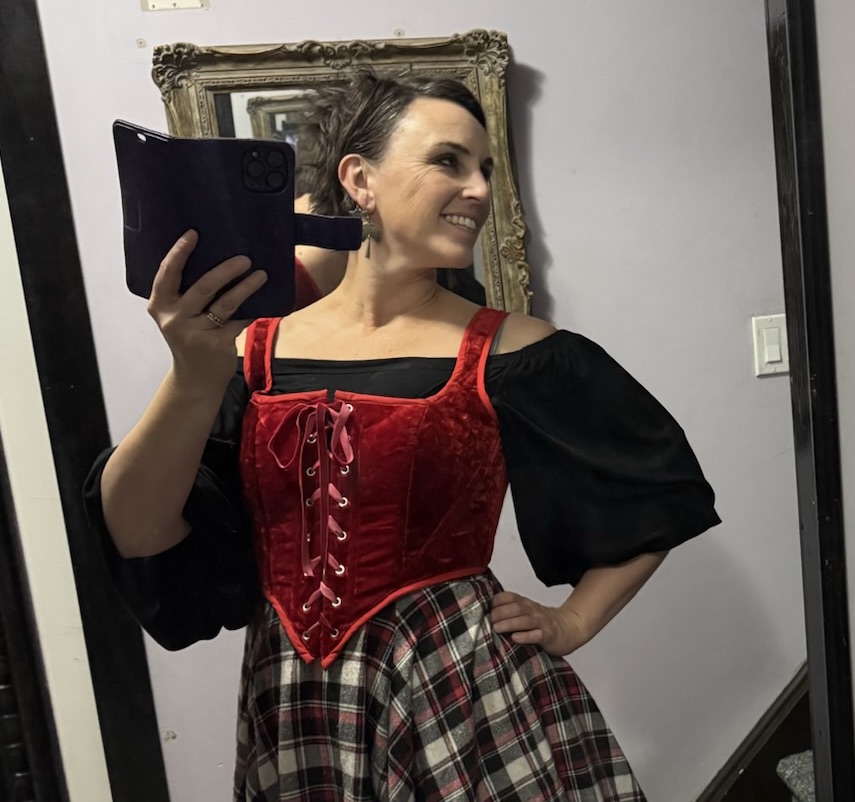
A friend mentioned this pattern (off Etsy) and it was cheap and had that cottagecore/hobbit/dirndl look I’m all excited about these days, so I jumped on it.
And… it’s ok.
The sizing I would say was true. I was between two sizes and went with the larger, and I think it is a bit large, in that I might like to have a bit of lacing gap in the front, and it laces closed quite easily right now. Other than that I made only minor tweaks, shortening the shoulder straps and reducing their angle, and trimming a bit off the bottom of the back for my swayback; all typical for me.
The pattern has fairly detailed instructions for assembling the PDF if you printed at home… but no actual instructions for the sewing (on looking back at the Etsy listing now I see it mentions a video for sewing instructions. Where that video is I’m still not sure….) Now, it’s not a hard sew, but I’m always interested in the construction choices patternmakers suggest, for corset-type garments in particular. So I guess I should hunt down that video.
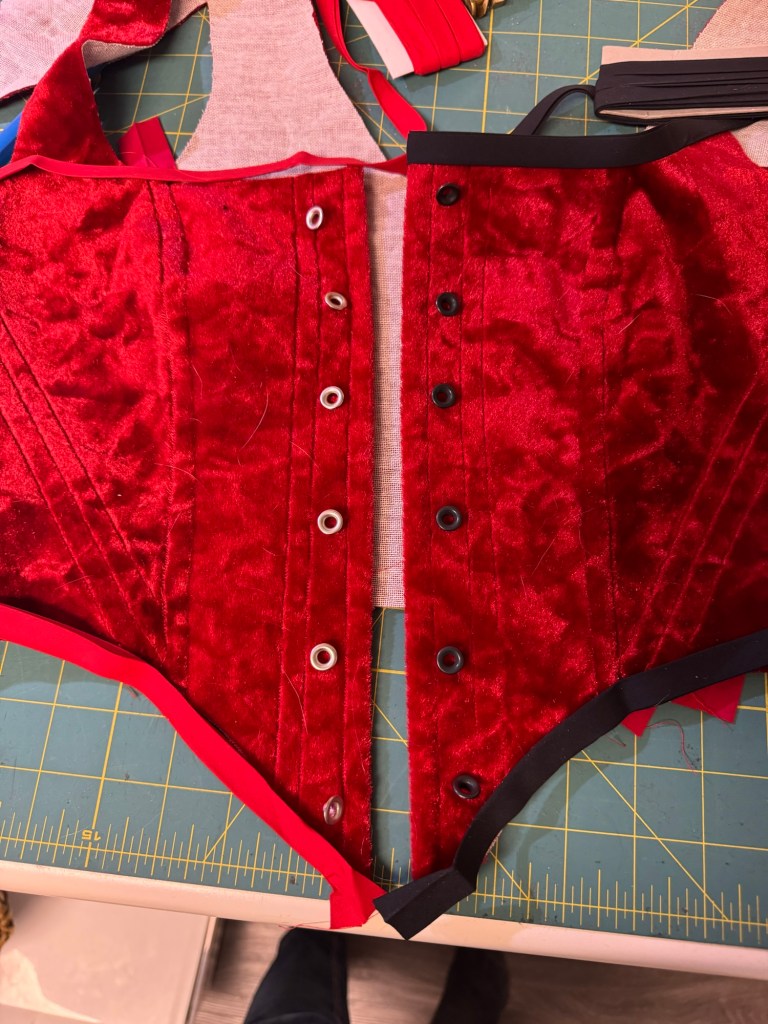
The fabric I picked was scraps of some kind of crushed red velvet upholstery fabric that’s been lurking in stash for aeons, I think a hand-me-down from someone else’s stash. I picked it because I wasn’t too attached if the project didn’t work out, and part of it was already blockfused to interfacing. (Other parts of the scraps are not… I suspect this fabric has its own fascinating story as the interfacing looks like it was applied industrially)
At any rate it made for a quick and easy way to test the pattern out. I allowed for some extra seam allowance in case of fitting issues but didn’t end up using it except for adding boning to the seams. The 1cm seam allowances the pattern comes with aren’t wide enough to put the boning in using the seam allowances, it’s designed to have boning channels added or have the channels stitched between two strength layers. (Not sure which because I didn’t see the instruction video)
I spent some time agonizing over the finishing, neutral silver grommets with red binding or vampiric black grommets and binding. In the end I went the neutral route, hoping for a more flexible garment, although it feels perhaps just a little Mrs Claus. It still pairs nicely with black so I’m mostly content though.
River was very helpful with the grommets.
Construction-wise I did a terrible, half-ass job with the binding, which may have coloured my original impressions of the product. I didn’t want to use the velvet for a self-binding as it’s quite thick, and since this was mostly a quick tester I went with commercial bias tape. The colour match is good but the material itself just didn’t spark joy and I did my second pass attaching it by machine which led to a fair bit of rippling. But it’s bothering me less as I get a bit more distance from it, though I might fix the ends at some point, especially at the front bottom where the angle isn’t at all right.
I might tweak a couple of things if I did it again, like lower the neckline a bit, maybe tweak the curve in the back to be a little wider, and maybe play with the princess seam curve at the bust. And take it in a wee bit. But, all in all, not a bad addition to the more frivolous side of my wardrobe.
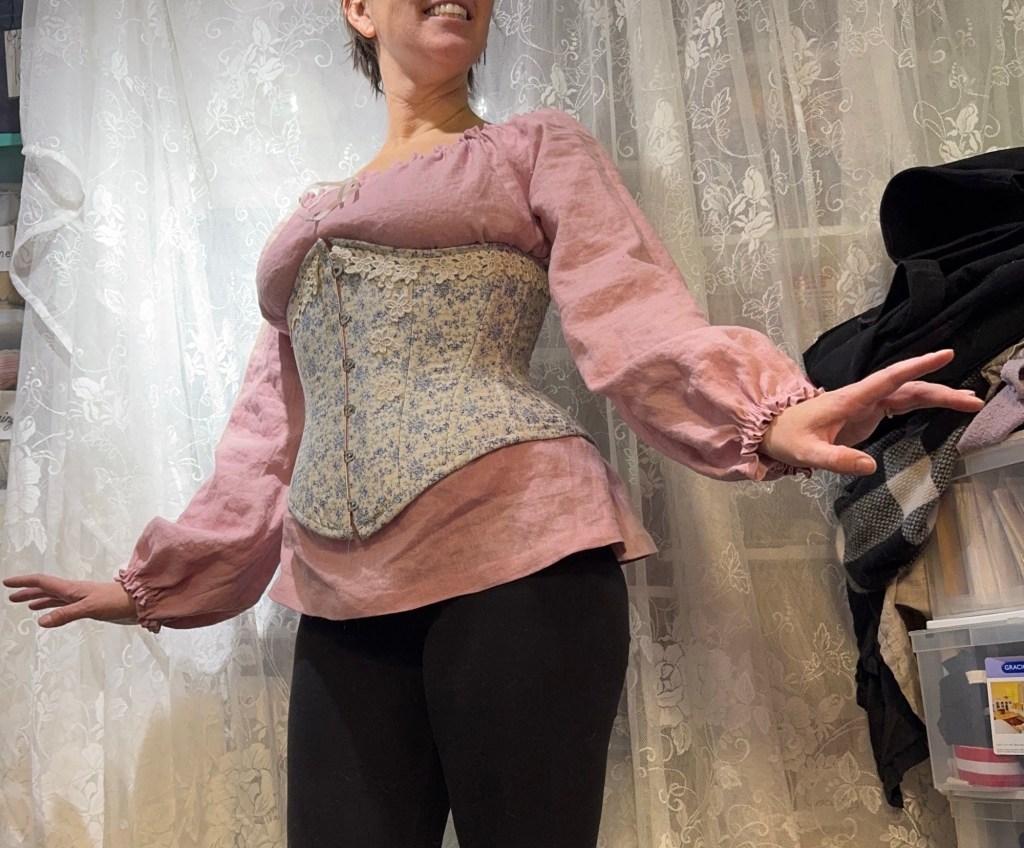
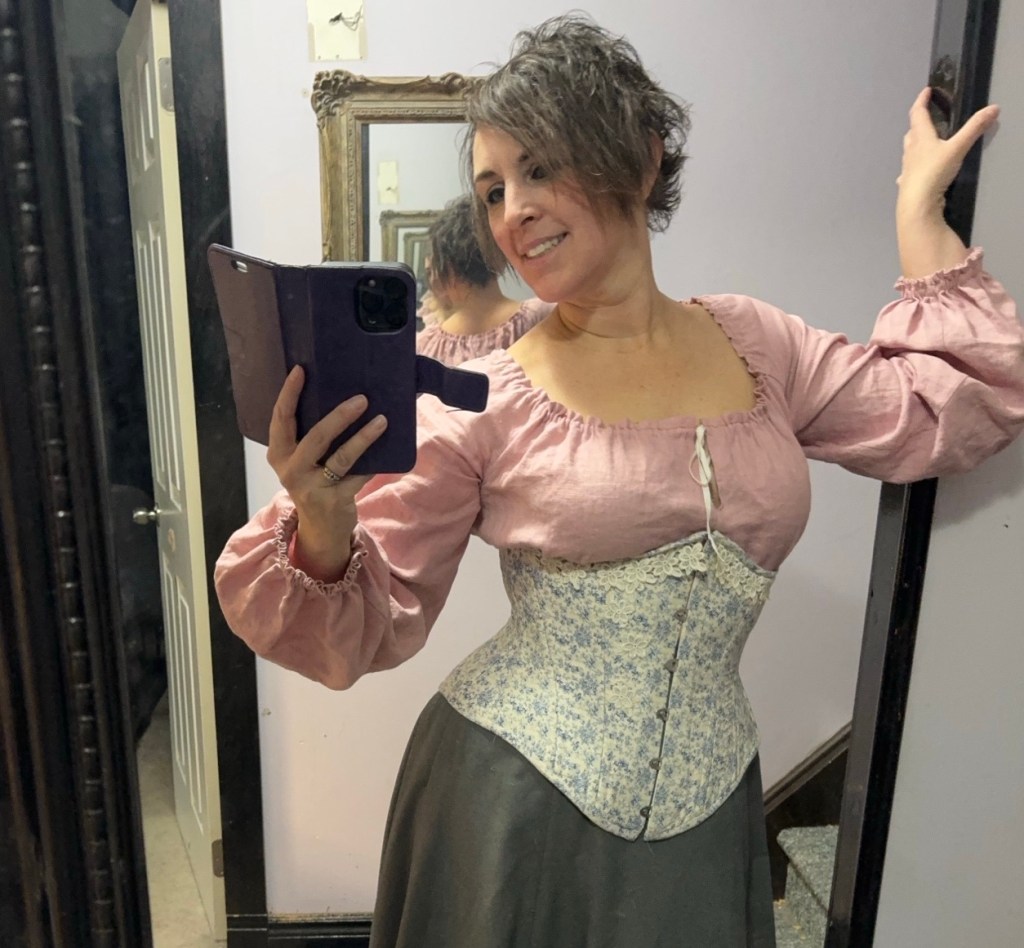
The first commercial pattern I ever sewed, the first thing I sewed for myself, in fact, was a peasant blouse. I’ve made the occasional one since then, usually for costume purposes, but none are in my wardrobe currently. But as soon as I made my corset-stays, I knew that was what I wanted to go under them; most of my other shirt necklines just weren’t quite right. So I dug out my stash of lightweight white linen, found a chunk left over from some other project (it actually might be the ramie left over from my Fiona dress, but visually it’s indistinguishable from the mass of featherlight linen I have hoarded over the years, just maybe not quite as soft in feel), and went to it.
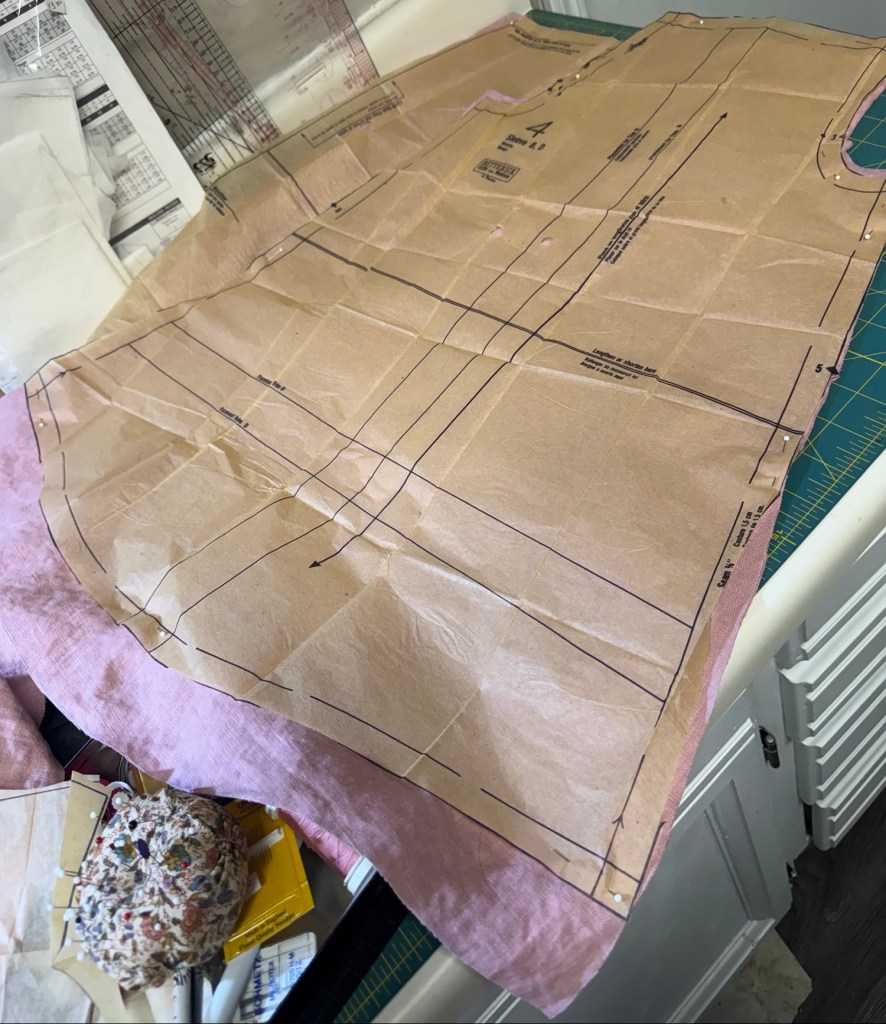
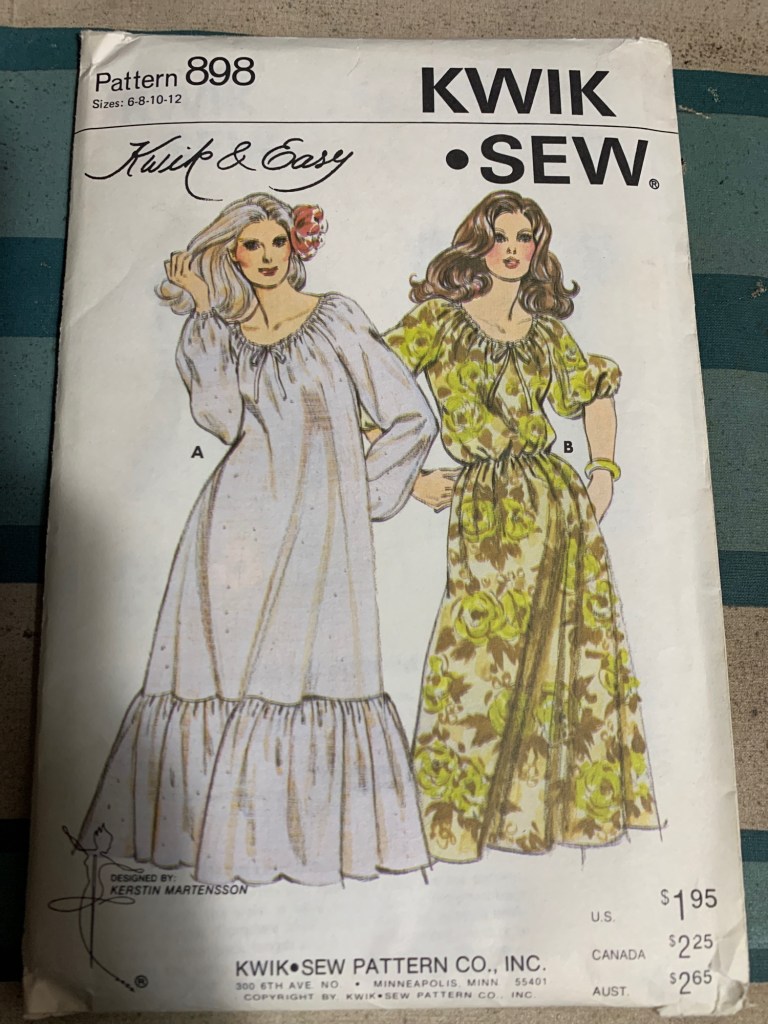
The pattern I selected was the vintage Kwik Sew 898. Now, you will observe from the illustration that a) this is a dress, and 2) the illustration looks far more voluminous than my final result. The envelope I have only goes up to a size 12 (which I am larger than), but when I opened it up it turns out it was also cut, to a size 8 (which is not only smaller than my current size by about 10”, but is smaller than I’ve ever been as an adult.) So obviously some on-the-fly grading was in order.
However, I had pretty much decided I was only going to sacrifice the one remnant (not much over a metre) of fabric to this project, at least until the pattern was tested and I knew if I liked it. So, without thinking to hard about it, I cut the sleeves as is from the irregular “had another project cut out of it” end, and then fitted the front and back body pieces onto the remainder, opting for a back seam to minimize any fabric waste. I “graded” the body simply by putting the pieces as far from the edges of the folded fabric as I could, which probably got me an extra 4” or 5” over the width of the whole project. Enough that it’s not skin tight, at least, but not the full 10” I’m lacking. So the lack of volume probably has more to do with inadequate grading. Oh, I did raise the underarm seam about two cm, but that’s pretty much a habit for me.
Once the cutting was done, the construction was simple, although it didn’t get accomplished quickly as I didn’t have much time. I French seamed the seams, and overlocked and then folded over the sleeve hems.
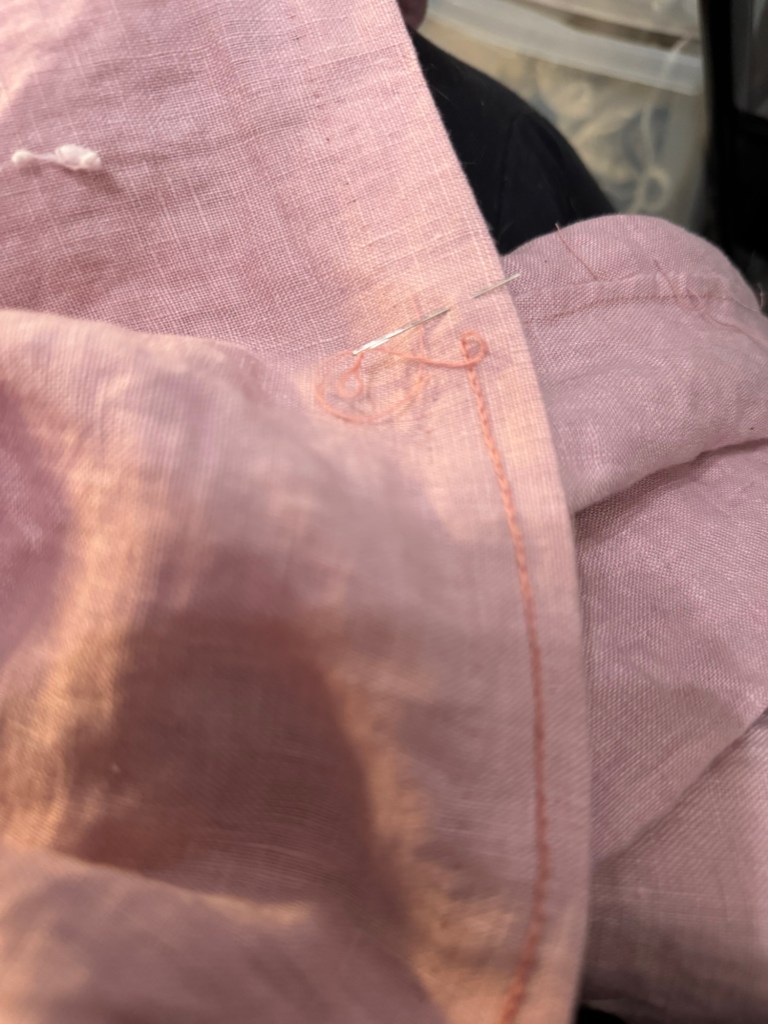
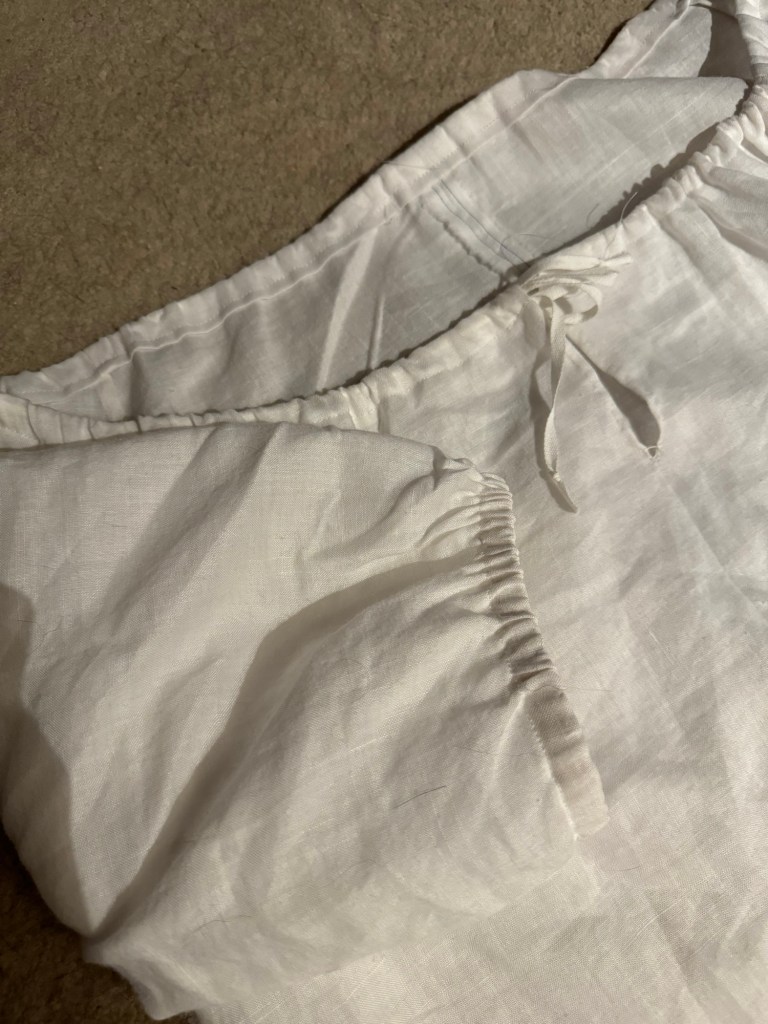
My main departure from the pattern was adding a short slit to the front, which I hand-finished, including adding that little thread-bar near the bottom that you see in 18th century shirts. This let me avoid adding eyelets or buttonholes to the neckline channel to let my drawstring (my favourite 1/4” stay tape) through. I also folded the neckline down rather further than the 1cm the pattern suggested, to create a more open neckline.
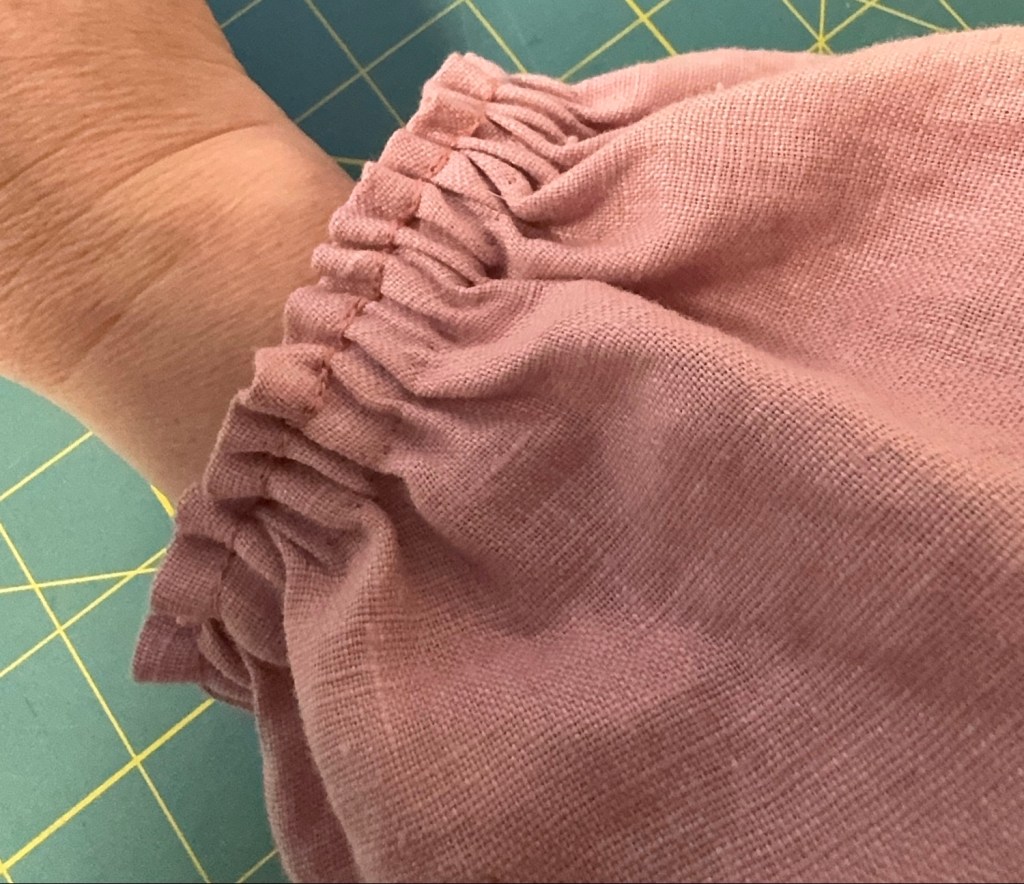
I added elastic to the ends of the sleeves, and that, pretty much, is that.
The total shirt length I ended up with, dictated purely by the length of fabric I had, actually comes to about my knees, almost a chemise length. I have toyed with the idea of adding some gathered tiers to the bottom to create a built-in petticoat effect, but I feel like I might just be better off making a separate linen petticoat/skirt (something that has been on my mental list all summer, in fact). Either way, I have to work up the stamina to tackle gathered tiers.
But in the meantime, this was a fun quick little project, and I think the result will actually fit quite nicely into my wardrobe.
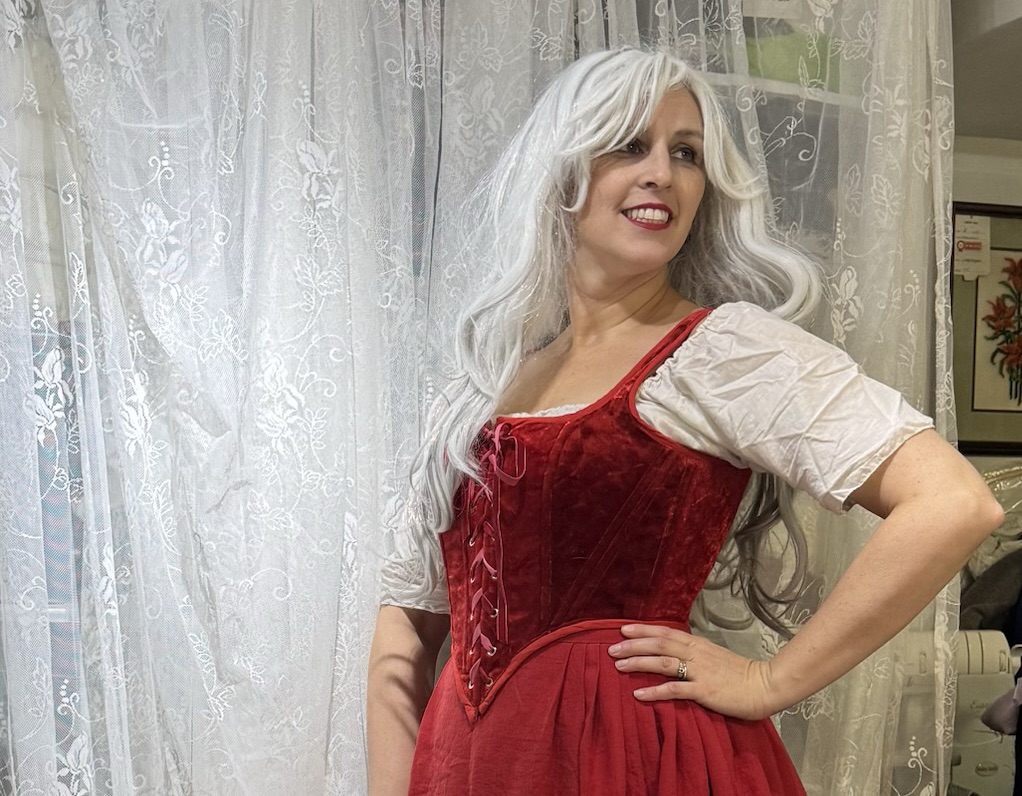
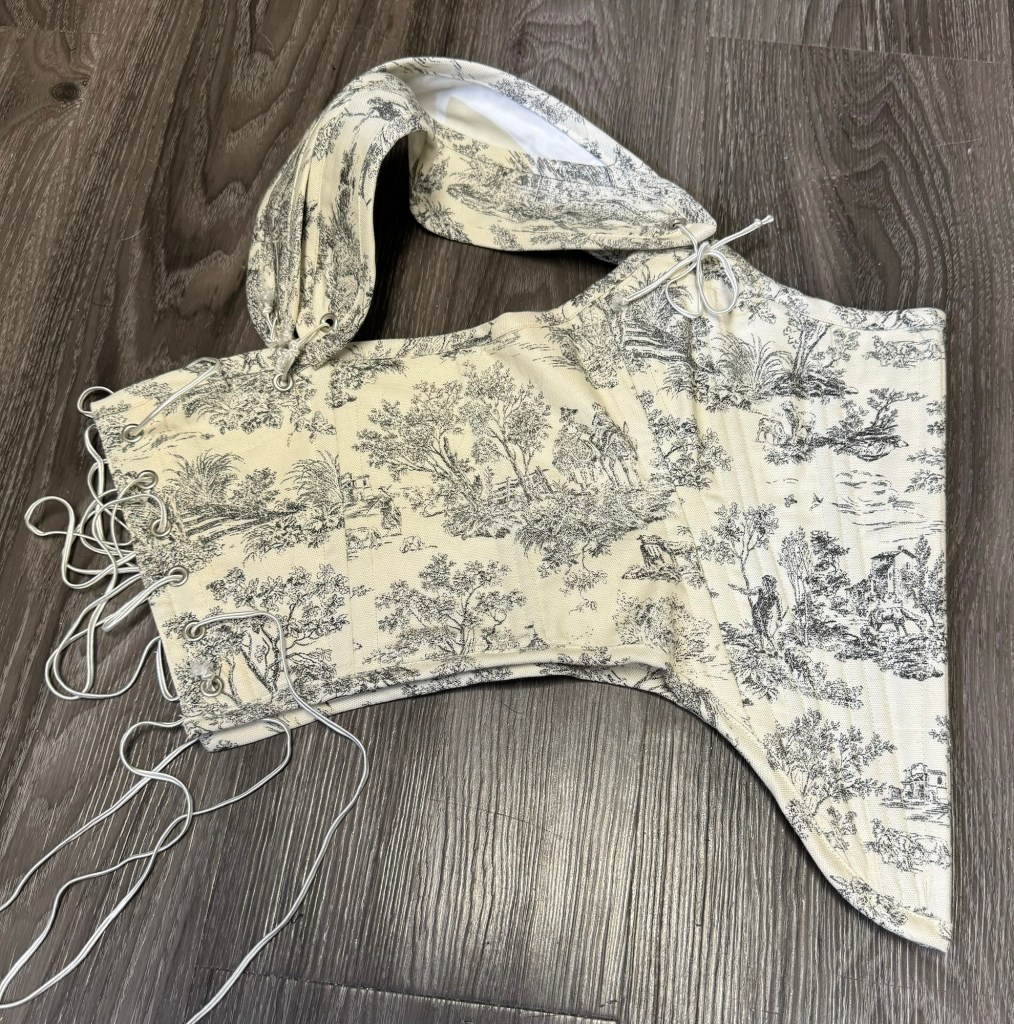
For the last year or so an urge has been building. To make… not exactly a corset, not exactly stays, but a boned, fantasy bodice. A little mediaeval tavern wench, a little bit Ren Faire… and, let’s face it, a lot cottagecore.
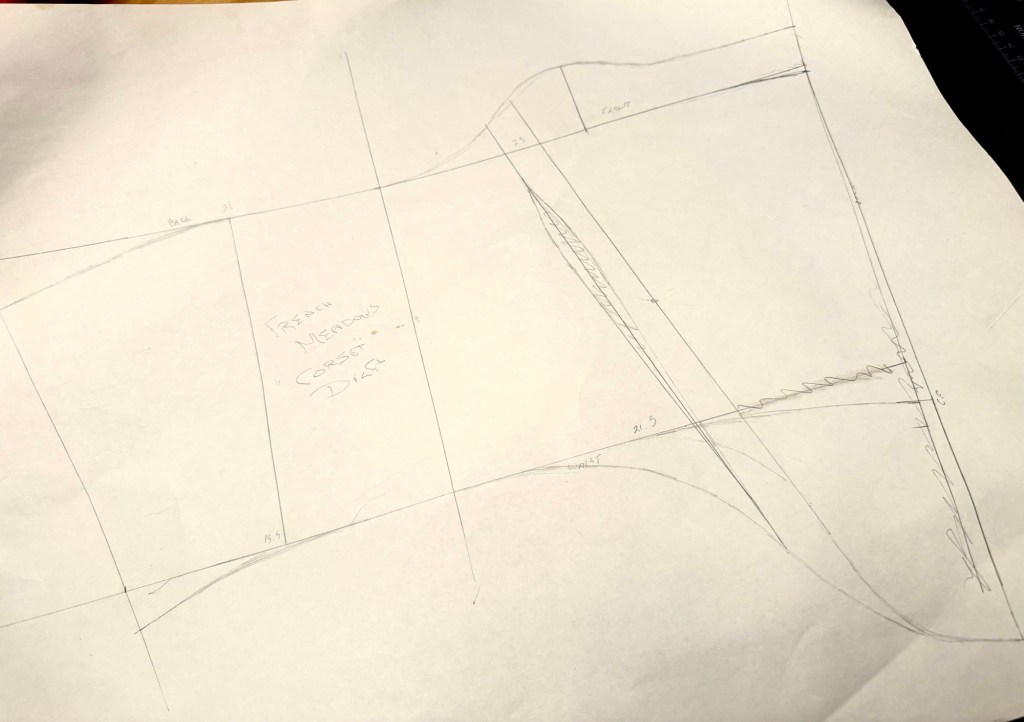
I couldn’t quite settle on a plan, however. What pattern? How historical do I want to be? I have Butterick B4254, the 18th century view of which I haven’t made. I have the Scroop Augusta Stays, which the internet at large seems to agree is an excellent pattern. But what I really wanted was something a little more romantic and whimsical. Outer wear, not underwear. Something a lot like the creations of French Meadows, whose Instagram posts help keep my feed suitably aspirational.
I have to say, her method (based apparently on instructions in Janet Arnold’s Patterns of Fashion 5, not one of the two volumes I own), worked pretty well. There’s a fair bit of art mixed in with the math of it all, but I can’t say I mind it. The draft itself just produces a kind of flared curve, which you then add details such as the front V, nubs for strap attachment, and other seams as desired.
Once I had it drafted out (which took a while since I have been so time-poor this summer), I decided to dive right in. I made extra-wide seam allowances and just went for it, figuring I could tweak the other features as I went.
As it turned out, my tweaks were quite minor: I added a bit more shaping to the side/bust seam, and I took in the side/back seam by about 1/4” on each side. When I make it again, I think I would narrow the front piece (and widen the side correspondingly) so that the seam is closer to a princess seam so I could add the shaping right there. It’s not historical but I do like the look for a fantasy piece like this. And I might add a bit of a swayback adjustment (raising the bottom of the center back), something French Meadows mentioned as an option but which I didn’t try.
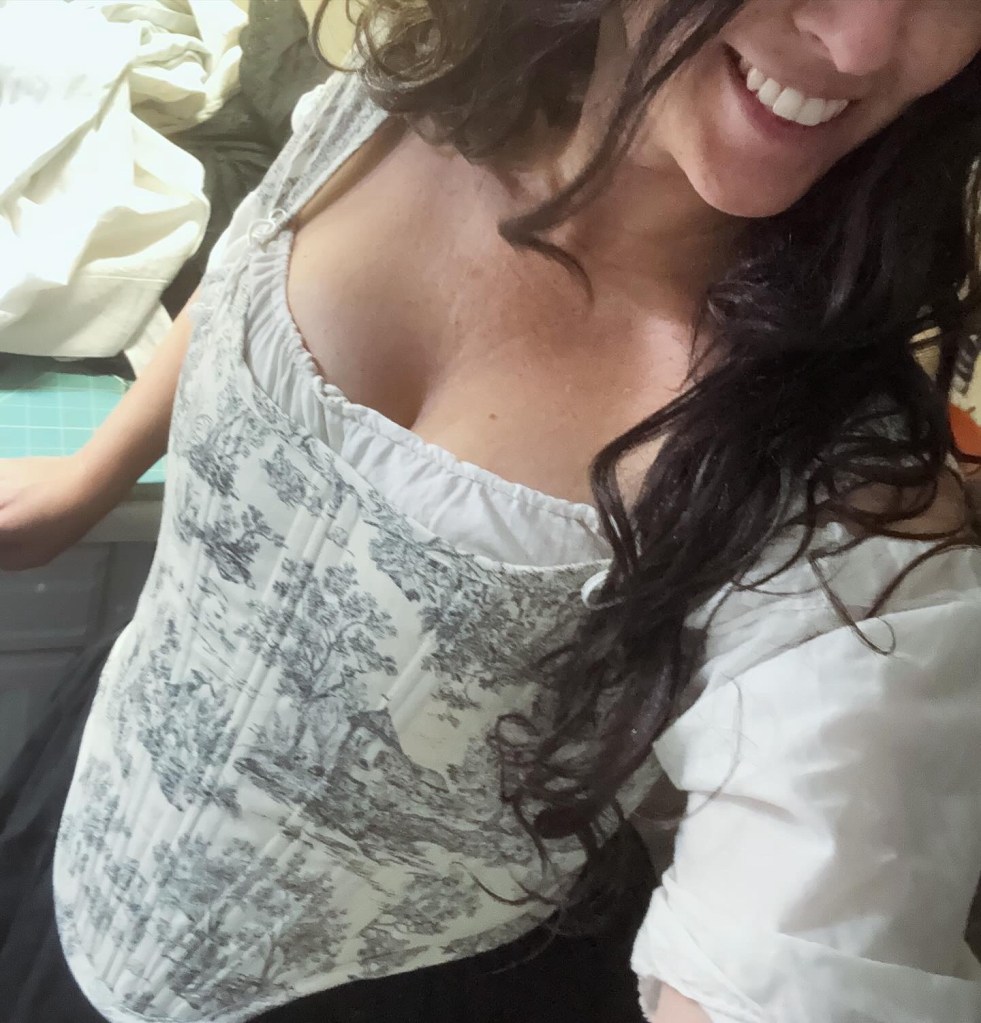
But all in all, considering how arbitrarily I added my style elements, I’m pretty darn happy with it. The nubs where the straps tie on are in a good place and the front V only needed very minor reshaping. I had initially raised the front about 1” above the bust line but I did drop it down a bit between the strap tie nubs.
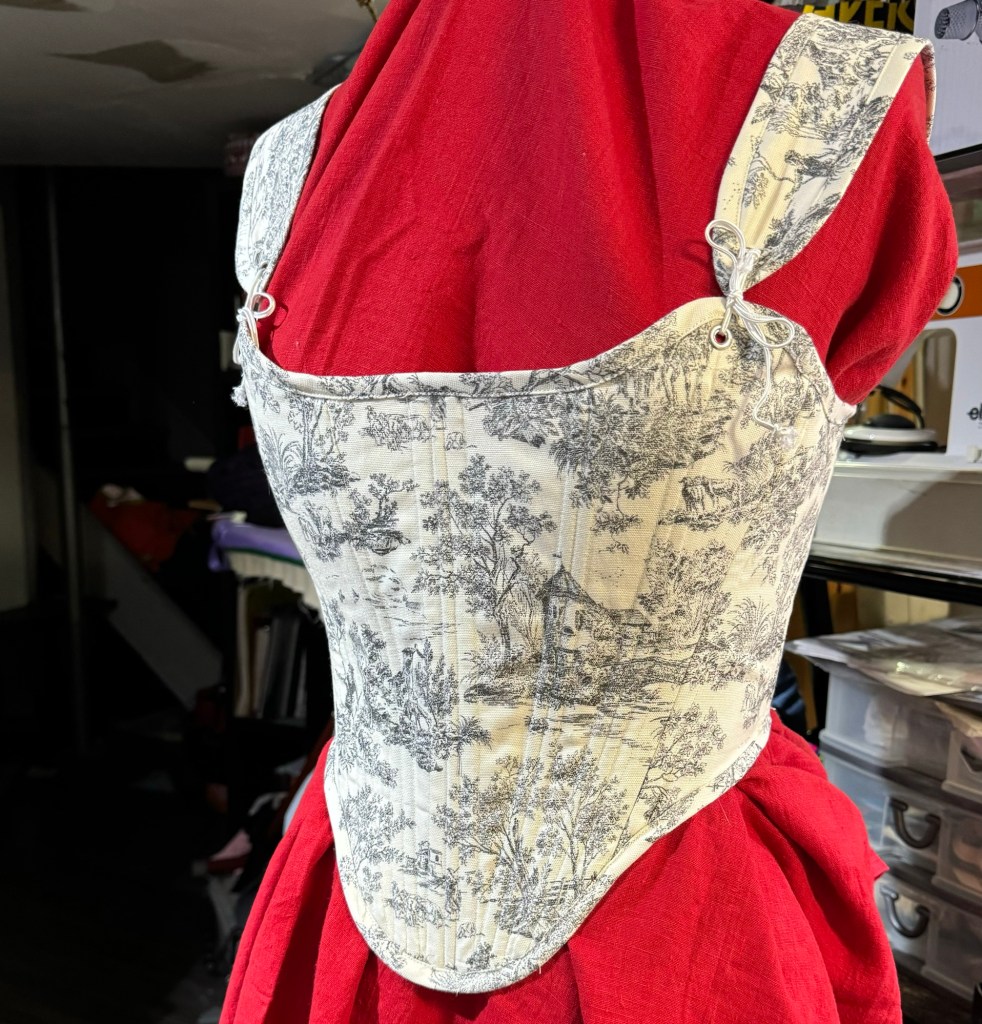
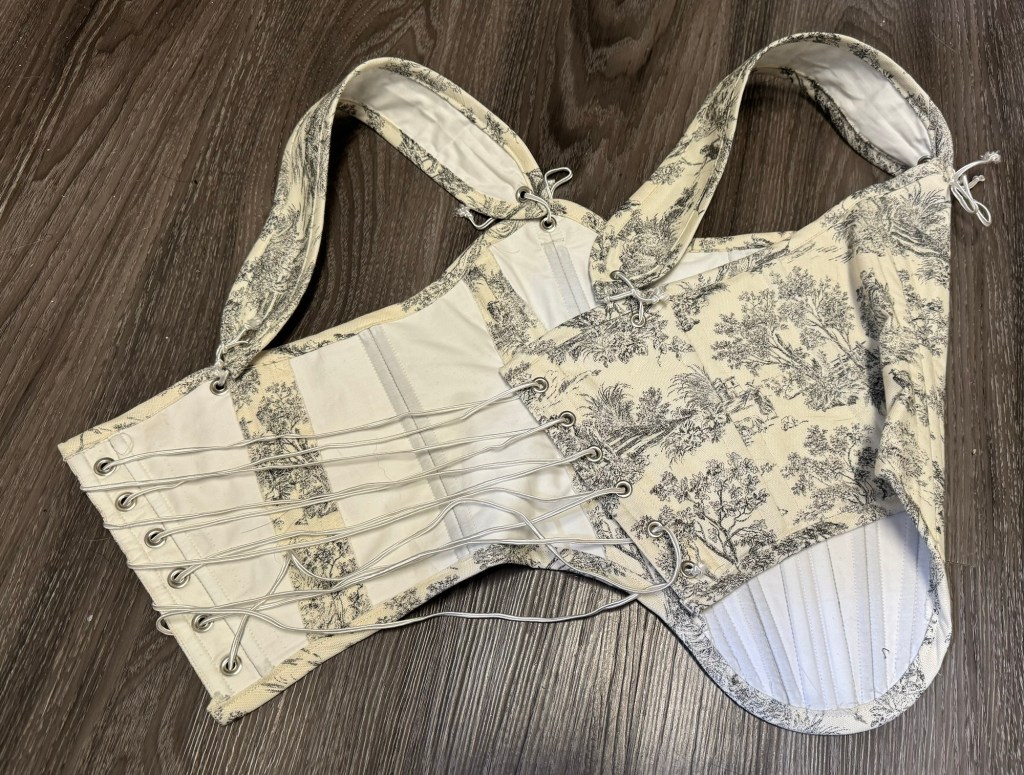
In terms of construction, I wanted to make something cute but not too precious. I opted for this toile de jouy print upholstery fabric (I thought it was cotton but it’s pretty soft and slippery and frays pretty badly… I should maybe do a burn test), with two layers of ticking as a backing. Ticking is nice for lightweight corsets and mockups as it doesn’t stretch, and two layers meant I could sandwich bones between the layers and add more channels on the fly as needed. (Turns out I needed an extra set of bones in the front). I used the same fabric for the bias binding, which I just attached in a single machine pass, rather than attaching the front by machine and finishing the back by hand. Again, for this fantasy piece the topstitching doesn’t bother me. And I managed to catch the back almost everywhere, which is always nice.
I did manage a decent mitered corner on binding on the front of the straps, so that turned out well.
I did initially play around with a wooden busk (aka ruler) for the front, but it seemed bulky so in the end for this non-historical piece I went with some of my heavier 6 mm spring steel boning for the front, which keeps it nicely flat, and spiral steels for the rest (except around the lacing, which is also spring steel, as usual).
I would like to swap out the soutache currently serving as strap ties and the back lacing, as it’s a little too slippery to hold how I would like. And I should make some slightly shorter versions of the straps so Syo and Tyo can wear as desired.
I am faced with a conundrum, however. For basically the first time in my life, I’m wanting skirts that are either gathered or pleated at the waist, as that seems to be the style that goes best with this kind of bodice. Mind blown. It’s not a style that works at all with my uncorseted body.
Oh, and I had to make it its own blouse to go underneath, but I’ll give that its own post.
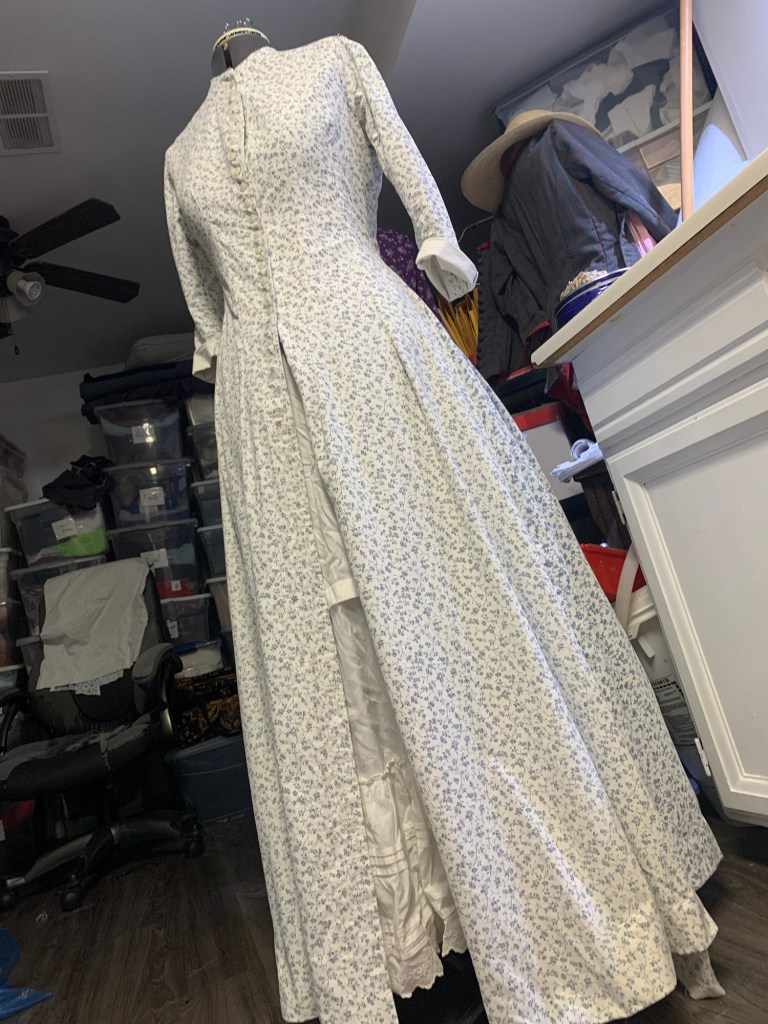
My Victorian Sewing Circle group put on a “Victorian chores” day back in July, so I needed some Victorian work clothes.
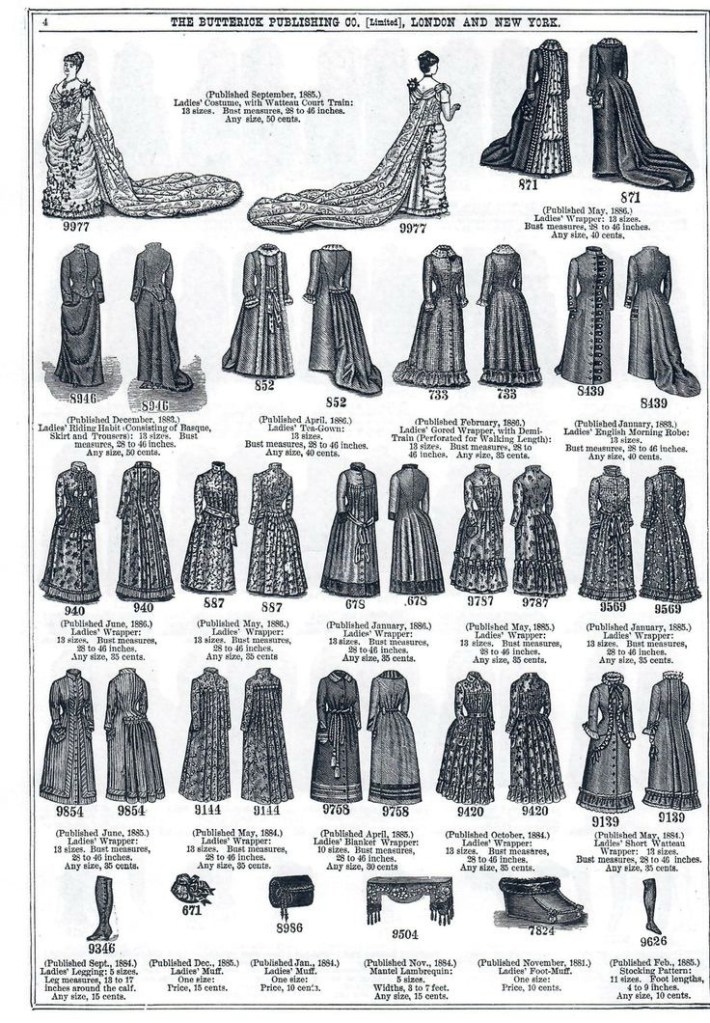
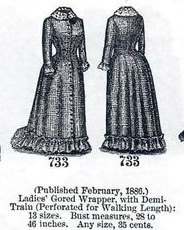
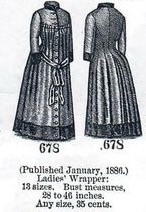
I could’ve gone with the Folkwear Prairie Dress of course, or even the pattern I worked out for the tea gown’s undergown, but instead I decided I needed a “Ladies gored wrapper”… something along the lines of #733 in this Butterick pattern catalogue page.
Ok, a kind of pared down version, anyway. I have a few scraps left that I could maybe turn into ruffles if I get ambitious.
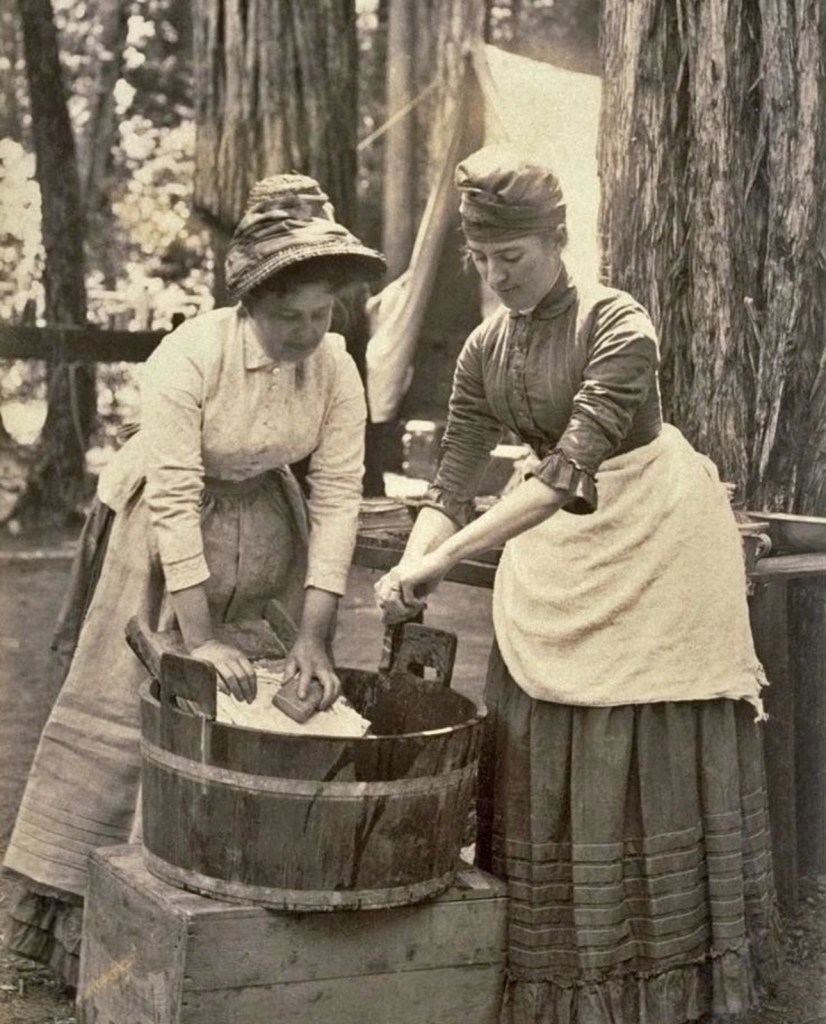
So, a work dress but not a complete sack. I’m inspired by this image, though again I can’t find a very good source:
(Though, I don’t think either woman is actually wearing a wrapper)
(But what is a wrapper, you ask? Well, aside from the things labeled “wrappers” in the advertisement above, this article has a quick section on them. Basically, it’s a one-piece dress, front fastening, looser than a going out dress and often adjustable. Key for my purposes, they are intended for wearing during breakfast and morning chores. They could also, probably not coincidentally, be worn easily while pregnant, although not so much the style I went with.)
For my pattern I used my same Truly Victorian bodice, but extended into a skirt like I did for the Elven tea gown. I used the diagram above (both pictures are off Pinterest with no particularly helpful source) as inspiration, except looking back I only used it for the front piece, for the back I basically used the tails of my pattern but extended into a full skirt length. (Like #678 in the page above).
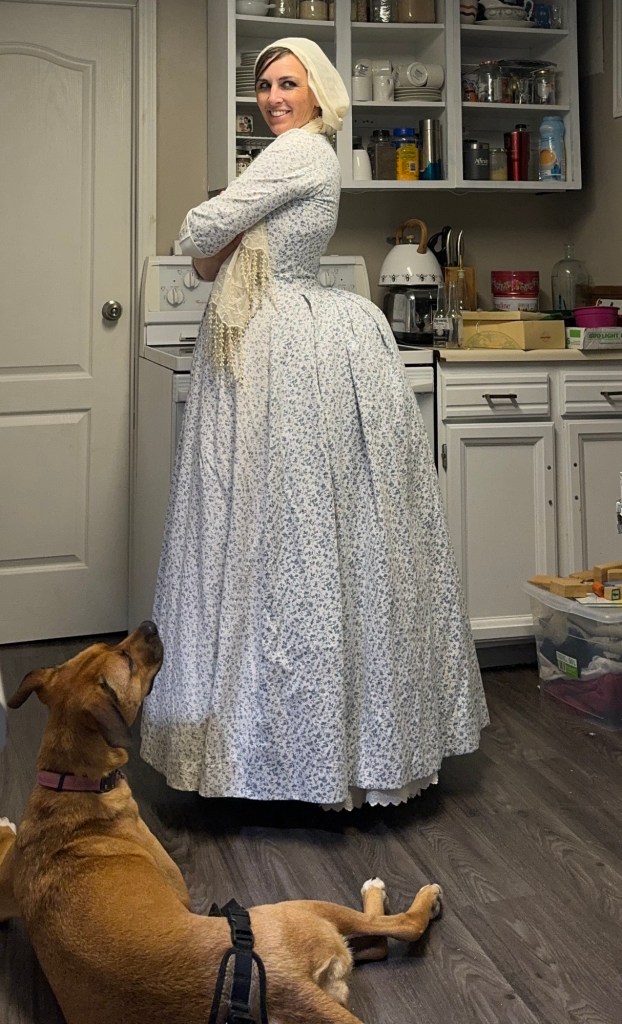
The outer fabric is a cotton Tyo found me a couple of years ago (I think at a thrift store). It came in the form of two panels (bedsheets? Table cloths?) someone had made from regular, probably quilting, cotton, by seaming two widths of narrower cloth together. There was some pretty marked wear on portions of the panels, and while it’s a pretty print and colour and old-fashioned-looking enough to be plausible (at least to me) I wasn’t sure how I would be able to use it for a “real” dress. But for a costume of a work dress it’s pretty much perfect, even if the worn patches don’t really line up with the kind of wear you’d get from being a work garment.
I realized 0.5 seconds after I cut it all out that I could’ve just as easily had the back pleat come all the way up on the outside and had a wateau back like several other dresses on the Butterick page… but anyway. I didn’t. Which probably makes it a better work dress, but a little less fun.
For my lining I used some old (and very, very worn) bedsheets that were really fit only for making muslins and then rags. There was a lot of piecing involved there due to tears and holes in the sheets, and I imagine this will be an ongoing issue in the life of the dress, or would be if it were an actual work dress instead of an impression of a work dress.
I was under a real time crunch making this dress so a lot of things I would normally finish by hand I did by machine, including the blind hem and the front facings, which I topstitched down. It isn’t noticeable on the busy print, fortunately.
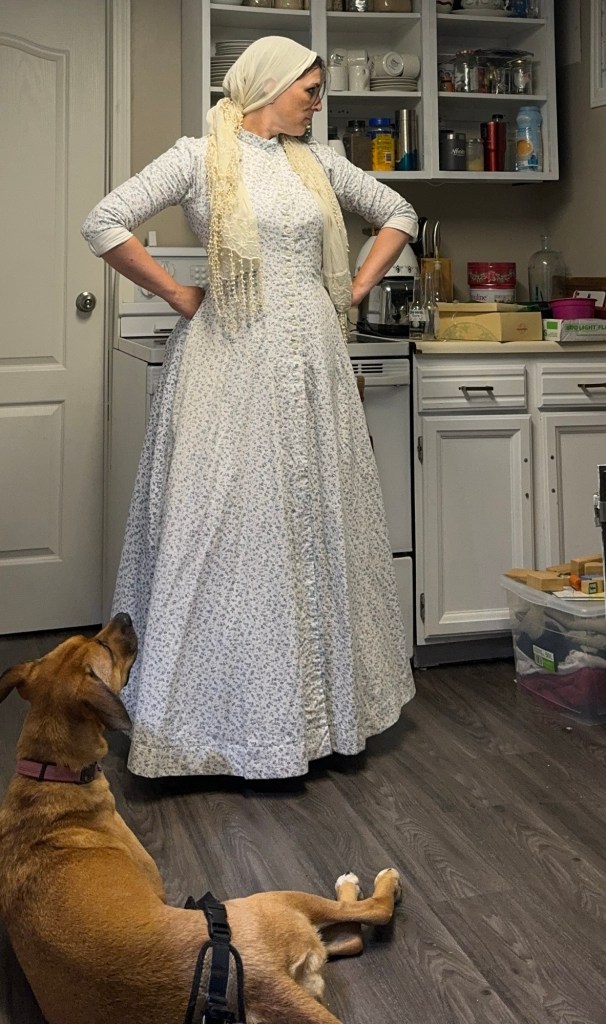
I even attached the buttons by machine, something I almost never do. I spaced the buttons pretty closely, which is period but I feel like I could’ve gotten away with just slightly further apart. I put on 24 buttons just between neck and hips (and then decided I would just wear my apron so the skirt could stay buttonless for now. Apparently leaving your wrapper skirt unbuttoned to show a bit of fancy petticoat was also a Look, although maybe not a work dress look.)
Unlike my other Victorian dresses, there is no boning in the seams, as this kind of dress needed to be washable. I did add a waist stay, as much to cover the raw insides of the skirt pleats as anything.
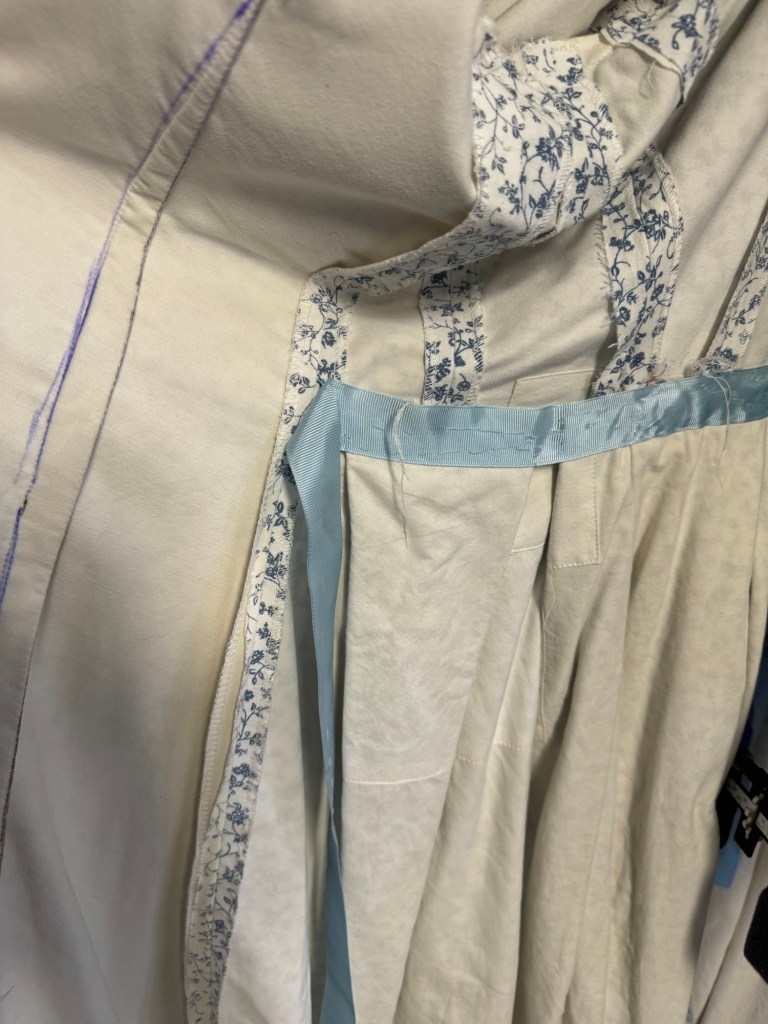
The dress as a whole does fit (snugly) without a corset, but I vastly prefer the look with corset. I also hemmed it to go over the bustle, since I mostly favour 1880s looks. Or I thought I hemmed it for a bustle, it looks like it curves up a bit in the back in these pics. While wearing a wrapper over all the undergarments you would need later in the day was apparently correct, I do rather wonder if a woman on laundry day would’ve bothered.
Other casualties of the hurry: I need to readjust the gathers at the tops of the sleeves. They are concentrated a little too far back which is creating some pulling. Also I didn’t have time to put in a pocket (unforgivable in a work dress), and the sleeves aren’t even hemmed, just rolled up. There is a moderate-sized rectangle of fabric left that I would like to turn into a little ruffle, for the bottom of the skirt if possible but the sleeves if not. (And yes, you’re reading this no earlier than September, so obviously some time has passed since I finished the dress. And have I gone back and fixed these niggles? Of course not!)
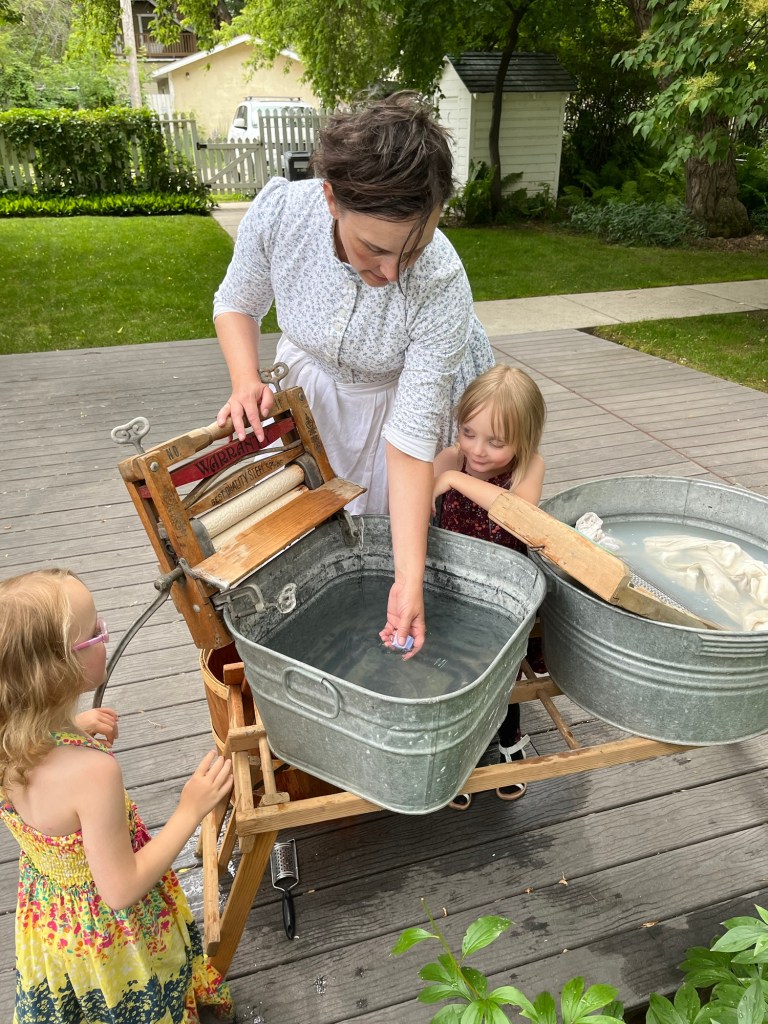
Laundry day itself was fairly successful, at least in that most of the stuff came out cleaner than it went in. It was the first laundry day done at the Marr Residence in ten or more years, I think, and there was a lot of cleaning of the washtubs and other equipment before it could be used to clean clothing. The mangle has a bit of rust in the mechanism that kept dripping reddish water across the rollers, so we had to be sure that was wiped away before running clothes through.
Adding bluing, sewn into a cloth, to the rinse.
The twins had the most fun, running a couple of rags through the mangle endlessly, as well as grating soap and scrubbing on the wash board. Several years of dirt got washed out of my petticoats, particularly the flannel one that I’ve been wearing in real life the last couple of winters. I also did a bit of starching, including testing out a “coffee starch” on my black petticoat, although I didn’t get as far as ironing any of it.
So all in all a successful day, and a nice addition to my 1880s wardrobe. Now I just need a work bonnet.
A few weeks ago, I had to entice Tris back from her auntie’s house with the bribe of sewing.
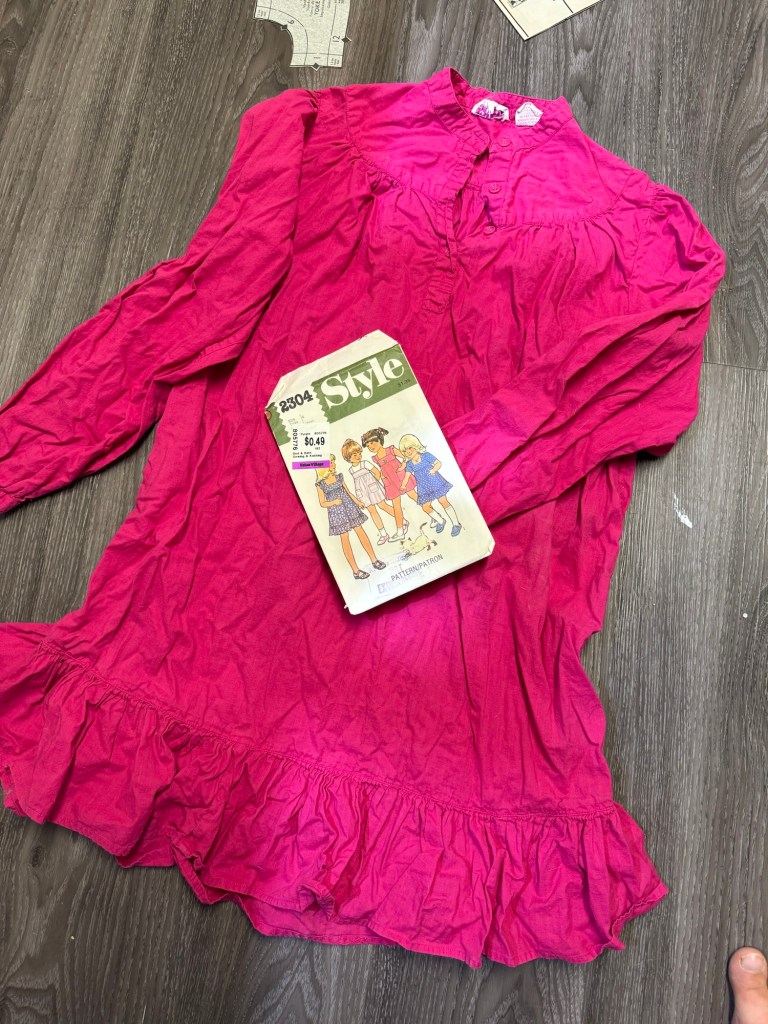
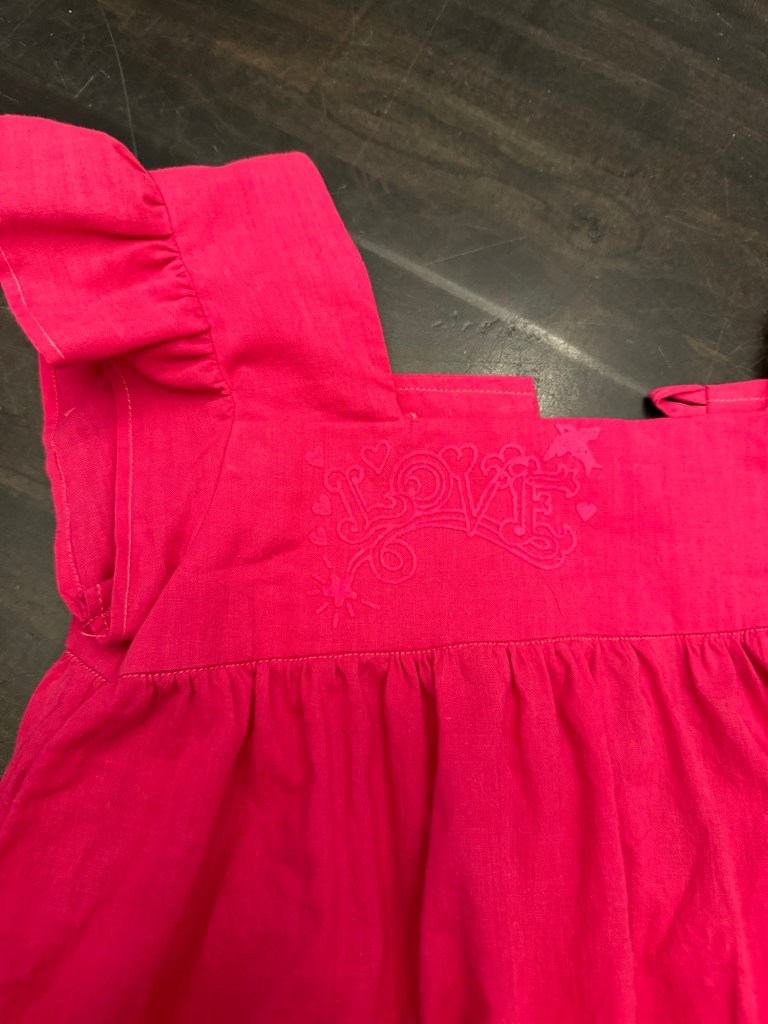
We settled, after much wrangling (four year olds are highly creative in their project concepts, but very low on practicality and, well, taste) on transforming this old, eye-wateringly hot pink, blouse (donated to the cause of children’s wear by my aunt), via a 1970s Style pattern:
I thank that long-ago pattern illustrator for including a bright pink version otherwise I would not have gotten her to go for it, I think.
I started by cutting the blouse off just below the armpits. This gave me a nice chunk for the skirt, with ruffle already attached! All I had to do was cut the bodice pieces out of the sleeves and remaining portion of the upper shirt. The fabric, by the way, is a really lovely soft light cotton, otherwise I would be far less excited about tackling this project. It was lovely to work with.
The colour hurts my camera sensor
It’s been a while since I sewed a 70s pattern and they really are the peak of pattern making. A zillion notches to keep everything lined up perfectly. Meticulously detailed instructions. (Can you tell I’ve been sewing with Victorian-grade instructions for a bit?) This pattern even has each seam numbered on the pattern pieces so you can sew them in order.
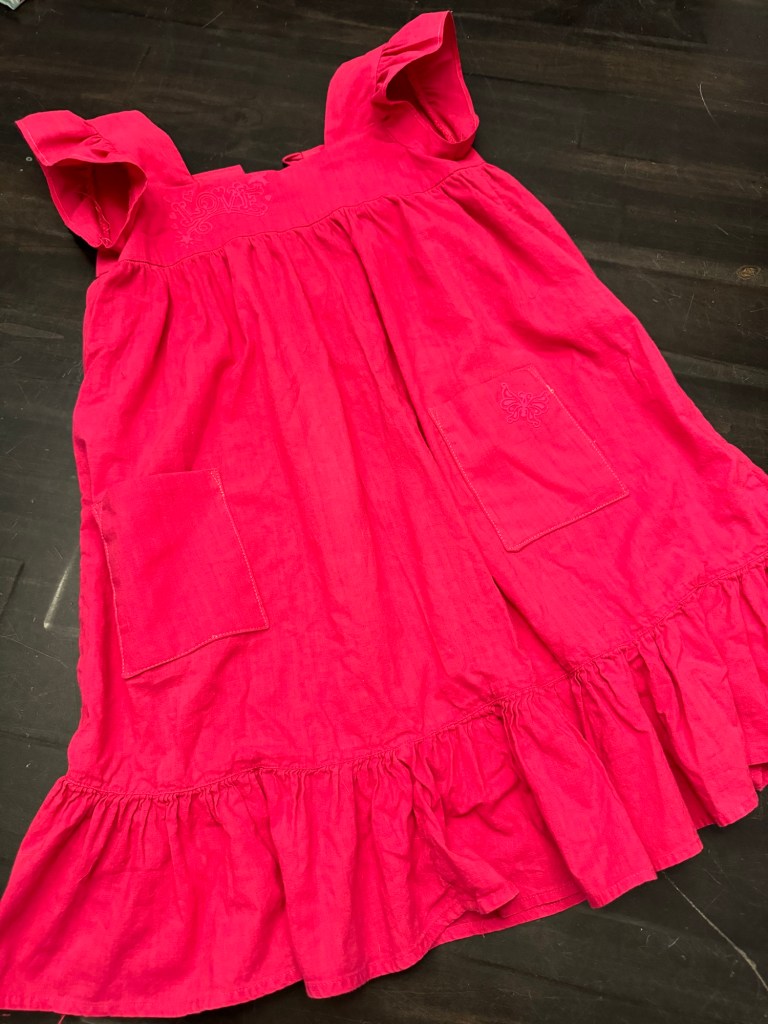
If you look close you can just barely see the hot-pink iron-on flocking motif on the bodice.
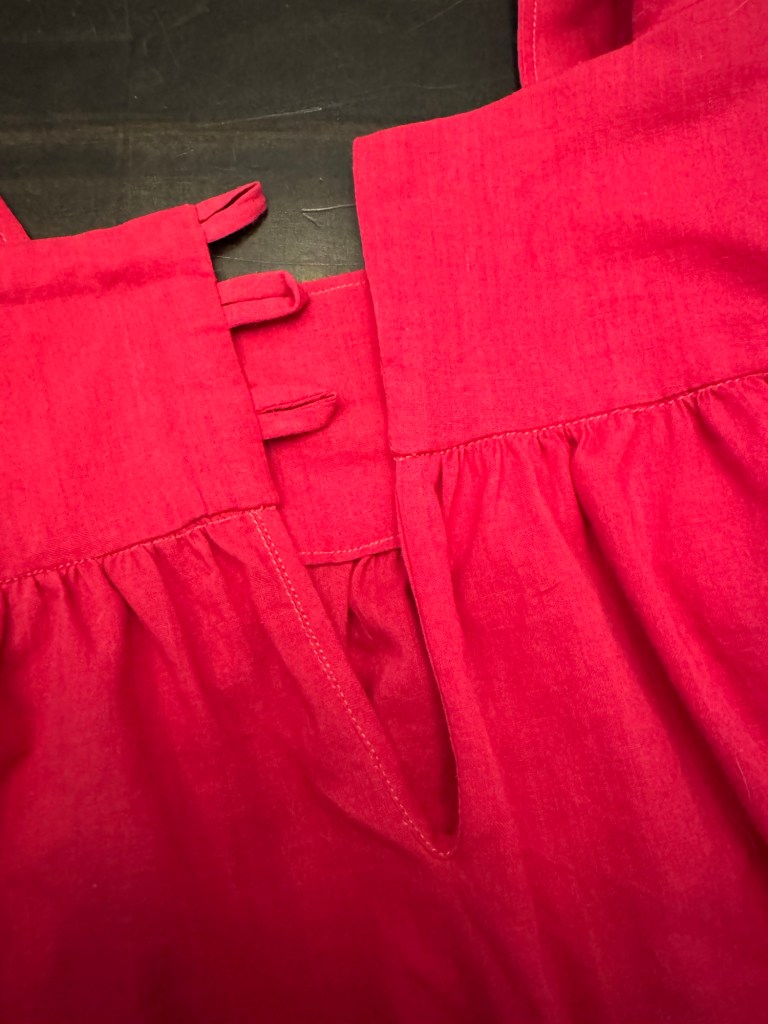
Now, I won’t say I followed all those instructions, but it’s lovely to have them. I spent a bit too much time trying to settle on the best way to line the bodice with the little ruffle sleevelets, which I originally thought were just shoulder ruffles but actually go all around the arm. In the end I did mostly follow the pattern, except for adding the button loops to the back instead of a zipper.
And, since my skirt didn’t have the back seam, I cut a little slit with a tiny bias placket to give it a little more opening room.
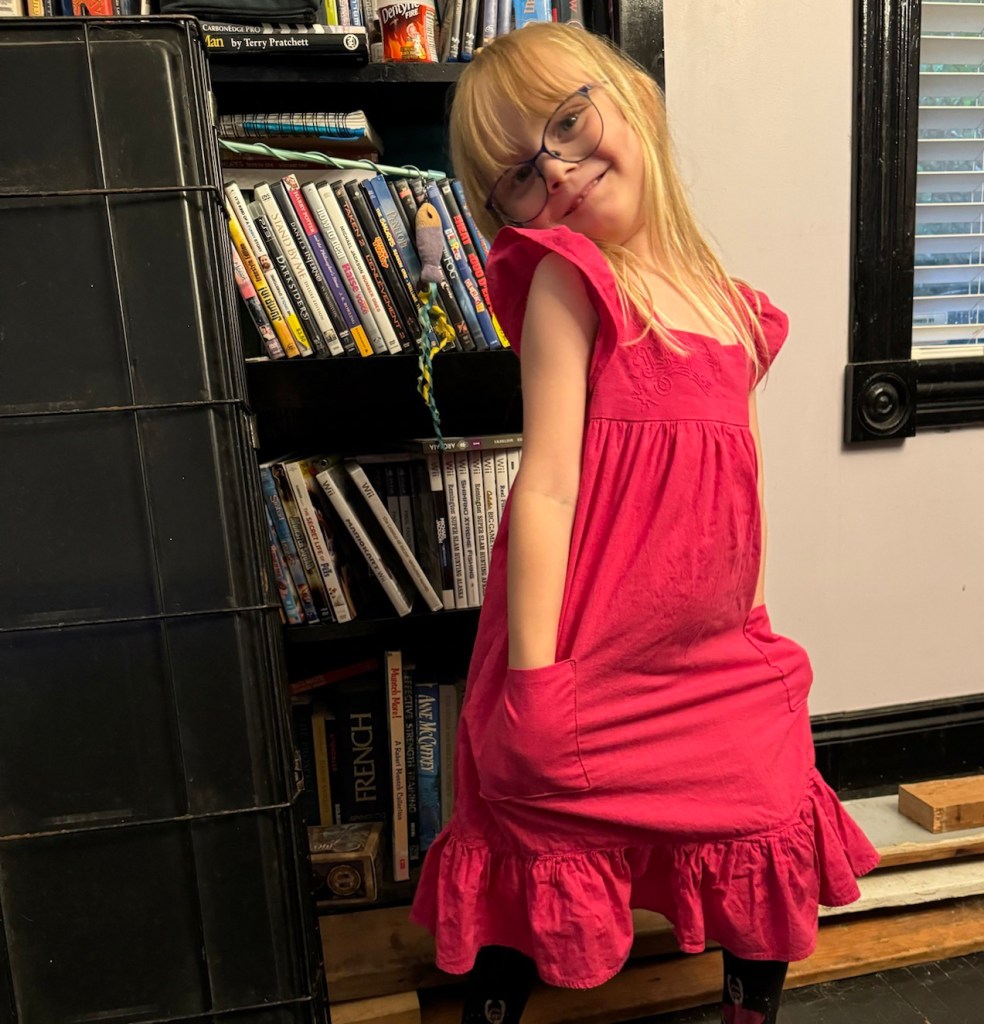
And then when I tried it on Tris (who is nearly five!) this size 4 pattern was massive! So to bring it in just a bit, I sewed the buttons on way over to the side, overlapping the back panels substantially. This looks a bit funny but the improved fit is worth it so it’s not constantly slipping off her shoulders.
Offset buttons create a bit of a pleat in the back. Worth it. And theoretically I can move them over as she gets bigger.
Also the button selection process was contentious. Tris was campaigning for purple buttons. I was looking for some cute little sugar skull buttons a friend gave me eons ago, that I think I may have foolishly destashed in last summer’s sewing room purge. In the end we settled on these sparkly white buttons. I didn’t have three in the larger size so the middle one is a bit smaller. Fortunately this dress is for Tris and she isn’t fussed.
More flocking!
I was able to just squeeze in the double-layered pocket pieces. It’s not my favourite method of making a patch pocket as they’re harder to get square, but double layering this fine fabric seemed like a good idea. You can, alas, see how my use of whatever thread we have on hand becomes a bit more of a problem when there is topstitching to be done.
At any rate, the recipient is happy with it and I’m not going to fuss over it any more. The pattern is used. The long-neglected shirt is living life as a functional garment again. Some of the iron-on novelty flocking got used. (Hopefully it holds up and doesn’t come off in patches on the first wash). And now I can move on to more fun projects for ME!
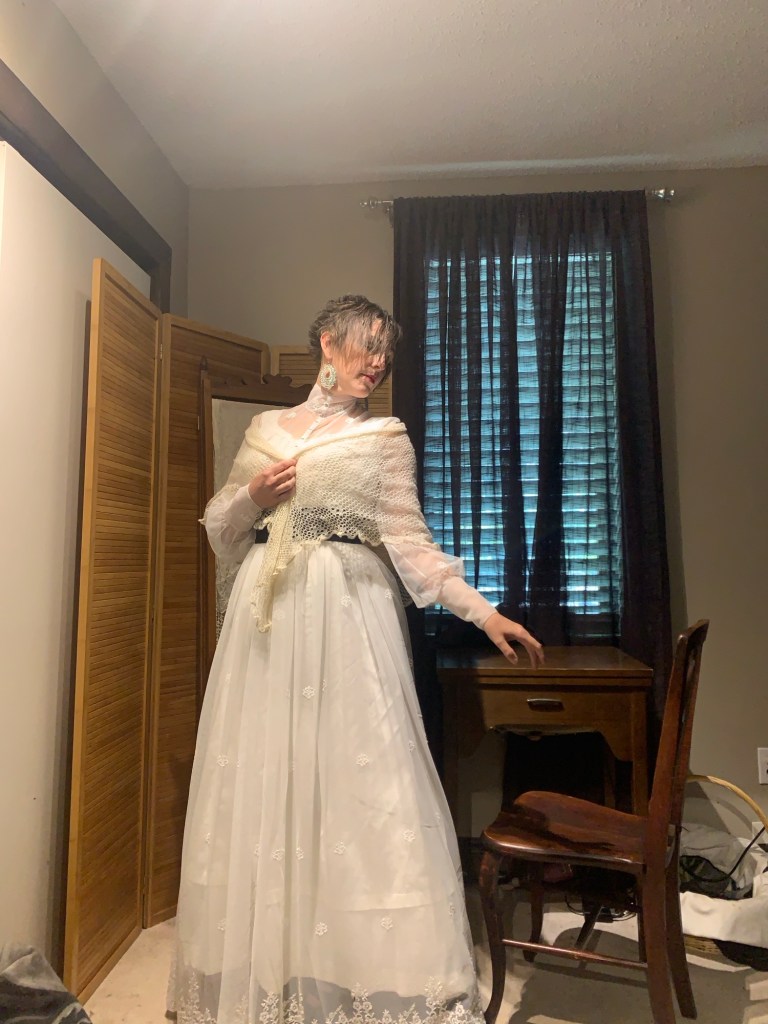
For the underneath portion of the tea gown of my last post, I waffled a bit. The classic tea gown (or at least, what those of us a century late to the party think of as a classic tea gown) looks as if it has an under dress and over gown (along the lines of a nightgown and a robe), but is actually a single cunning garment. But… 1) this is fundamentally a fantasy gown, 2) it might be fun to have different options for underneath, depending on the occasion, and 3) making an integrated half-garment actually seemed like as much or more work as doing a full separate garment.
So, eventually I decided to do an entirely separate nightdress, along the lines of a Victorian nightgown.
I could have gone with any number of patterns, not least among them the Folkwear Prairie Dress that I actually own (thanks to my mom having purchased it back in the 80s!!!). I also seriously considered the Sophie Dress from Ora Lin, but it doesn’t seem to come in A0 format and I’m not capable of that much cutting and gluing right now. But style wise it was exactly what I was looking for, with a pointed yoke front and back.
On the other hand, the pattern I used for my Edwardian blouse also had very much the right shape of back yoke, and it seemed like a pretty easy change to add a front yoke. I wasn’t terribly happy with my fitting the first time around, but surely that could serve as a bit of a wearable muslin, whereas a different pattern would be starting all over again.
In the end I don’t think I saved myself much (any?) labour, as it took me quite a bit of work to get the shoulder and collar fit right. I ended up making about two and a half muslins of the yoke and collar and tweaking them to fit. My shoulders are more square than standard and I was trying to hit that delicate balance of the collar between close fit and strangling myself.
I did however take a fair bit of inspiration from the Folkwear pattern as well, for the width of the final dress and the sleeves and armscye. I liked the cuffs from the Edwardian blouse, but was intrigued by the shaping and rear-thrown underarm seam of the Folkwear pattern.
The fabric I chose was also from stash, a gorgeous drapery lace again from my Fabricland days. It’s a fairly soft (polyester or nylon) mesh with scattered lace motifs and an intricate border. The sheerness isn’t historically accurate for any tea gown I’ve seen but is a lot of fun.
I spent some time playing with seam treatments, and also waffling about which portions to line. I was going to do a double layer for the yokes, for strength, but unpicking embroidered motifs from the net so as not to have them showing through was both incredibly time consuming and tricky to do without damaging the base net. So I only lined the collar and sleeves cuffs, smaller pieces where I could cut the inner piece to avoid or mostly avoid the scattered lace motifs.
For the seams, I determined I could topstitch right next to a seam and then trim off the remaining seam allowance. It looks fairly tidy.
The buttons I chose are these tiny mother-of-pearl ones that were some of my first online purchases back in 2007 or 2008. I think I bought a pack of 100 for decorating a dance costume, then discovered how much I don’t enjoy sewing on buttons. Anyway, it was exciting to finally use them as buttons. There was no way I was ever going to try putting this fabric through the machine for buttonholes, so I did them all by hand. They’re so tiny they didn’t take very long, especially compared to hand-tailoring the over robe. I didn’t fuss too much over them; the fabric doesn’t fray so they will do their job.
I left the front seam open, but will maybe stitch it up at some point.
And, since the lacy border means there’s no hemming, that’s about it!
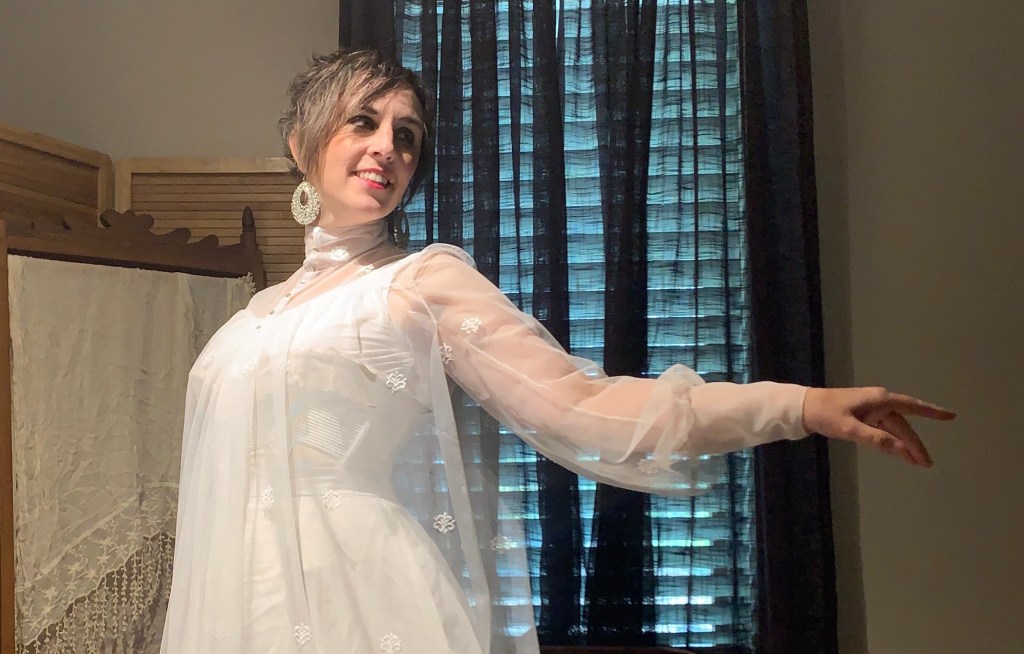
I am enjoying the sheerness and whimsy. And it’s exactly right for the underneath portion of the tea gown. I might have made the sleeves a little more full, but on the other hand they’re mostly hidden in the sleeves of the over-gown anyway.
Compared to the over gown, this was a quick and easy project. I do love how it came out, though. Now I just need the rest of my elven accessories…
A while ago, maybe a year, maybe more, Cation Designs dropped three words into my brain: “Elven Tea Gown”
And I suddenly couldn’t think of anything else.
In particular, she was thinking of a particular House of Worth tea gown from the early 1900s… but make it Elven. My own inspiration was a bit more all over the place—but I’m not at all mad about it.
Anyway, it’s been a minute since Cation and I sewed joint projects (like, I think, our Spider-Man dresses in 2012, which was basically a lifetime ago for both of us). And we took our time ramping up to this one. But finally, after last Christmas, we took the plunge. If a dive were to play out in the most excruciating slow motion you can imagine, anyway.
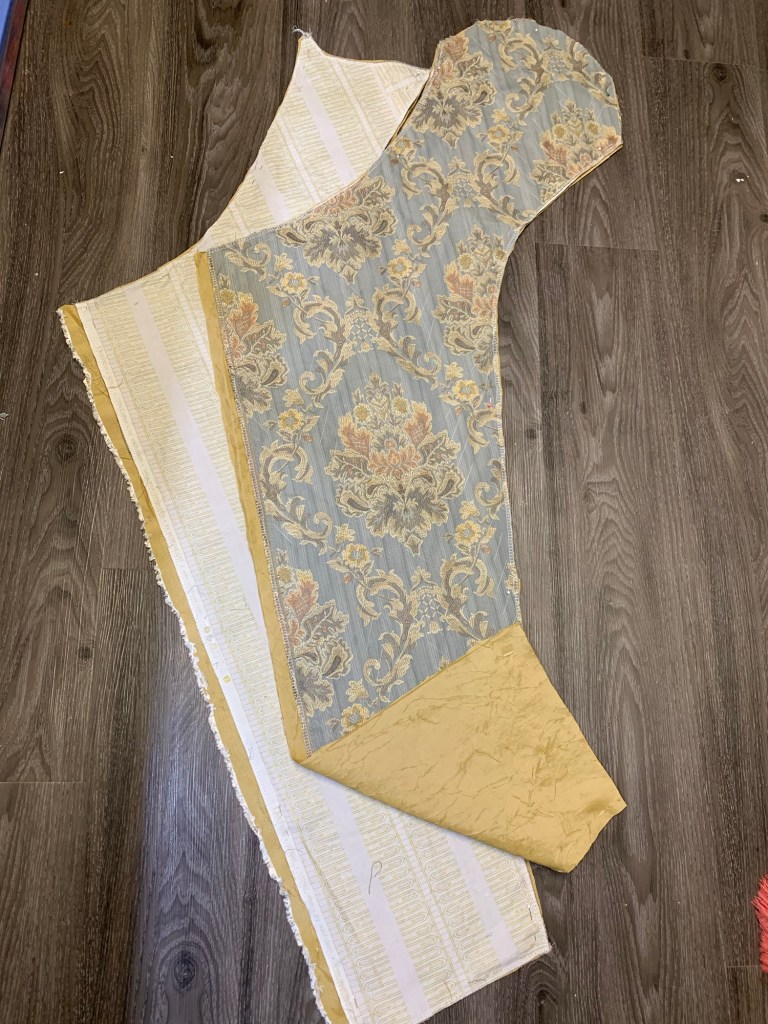
For fabric, I went with this gorgeous blue-grey upholstery jacquard I have been sitting on for YEARS since I got it on a steep sale at Fabricland back when I worked there and haunted all the sales. I did, however, have to go back to find a pale gold lining fabric, which I found in the bargain centre for three dollars/metre, so I’m not going to complain about that, either. The crinkly texture is utterly ahistorical but it’s fun and this is first and foremost a fantasy costume so we’re not going to dwell on it.
It’s all polyester, so this is in no way a light summer project, but it is what it is.
The first phase of planning, for me at least, involved a lot of Pinteresting of original tea gowns with features I liked, on the one hand, and costume things that come up when you search “elven dress” and things like that.
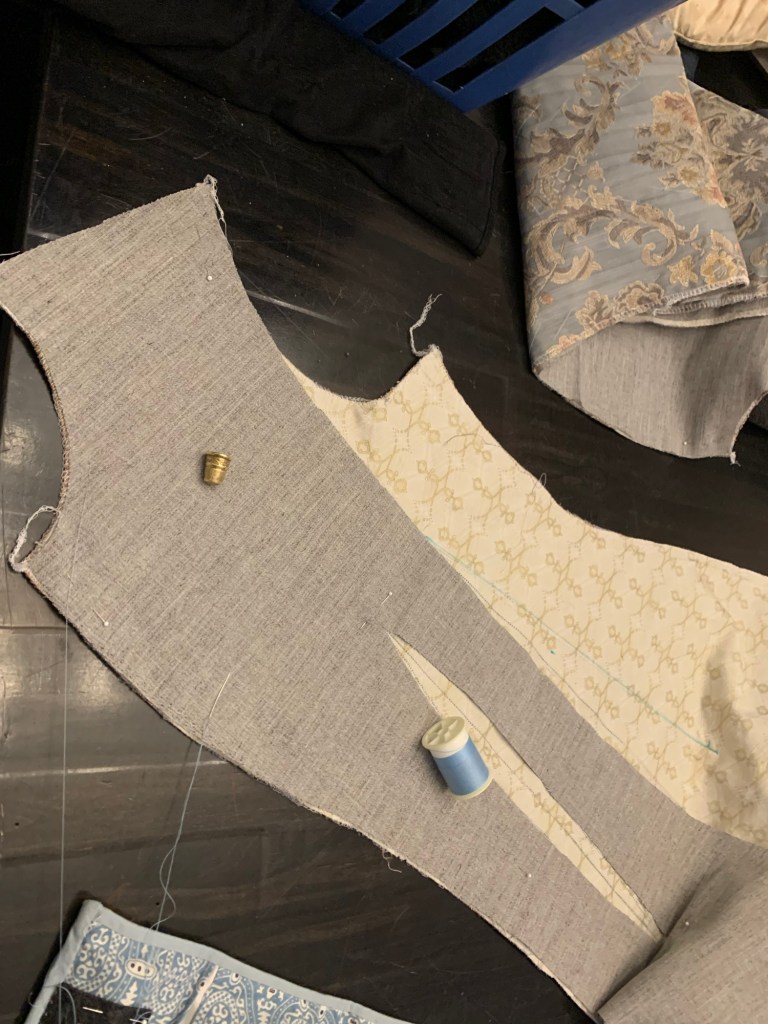
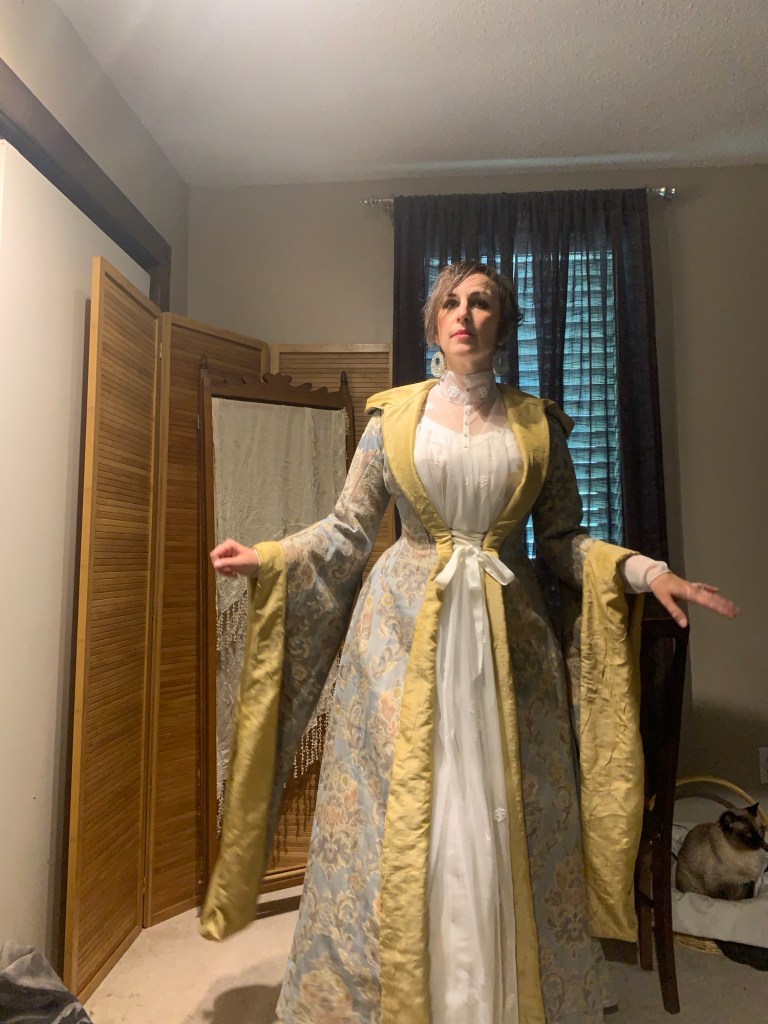
For the tea gown side of things, (and if you’re wondering what or why a tea gown is I’ll direct you to the Dreamstress’s excellent write-up) I wanted a princess-lined over gown using a classic Victorian pattern. After much waffling I decided to just run with my already-fitted Truly Victorian bodice and add a skirt to it. I wanted a slight train (my first ever!) and a Watteau back.
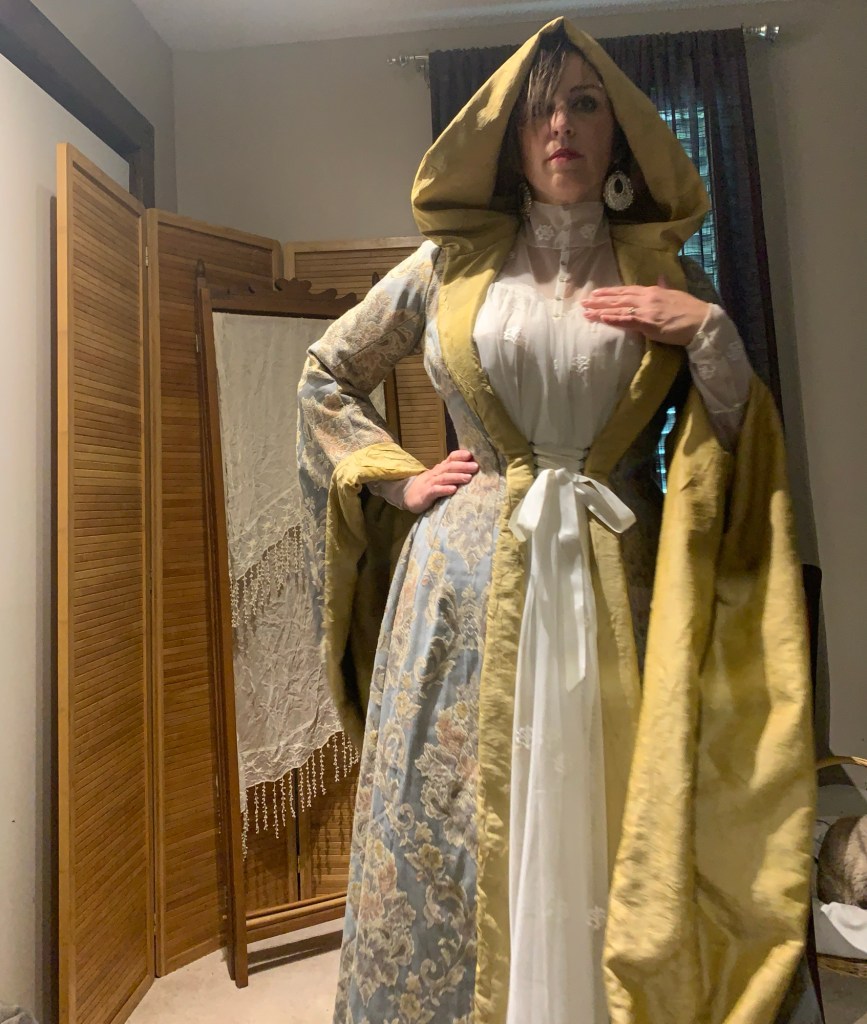
For the elven side of things I whittled it down to the following features: large dramatic sleeves, a laced closure across the front, and a dramatic hood.
Original tea gowns usually (always?) have the look of two garments, an over-robe and an under-gown, but are in fact one garment with the illusion of layers. After a fair bit of waffling I decided to construct mine as two separate garments, mainly for the flexibility of changing up the look in the future. Also because adding the second set of sleeves and collar and front yoke seemed like not significantly less work than making an entirely separate under-gown, although it would have saved me a bit of fabric. So this post will mainly discuss the over-gown.
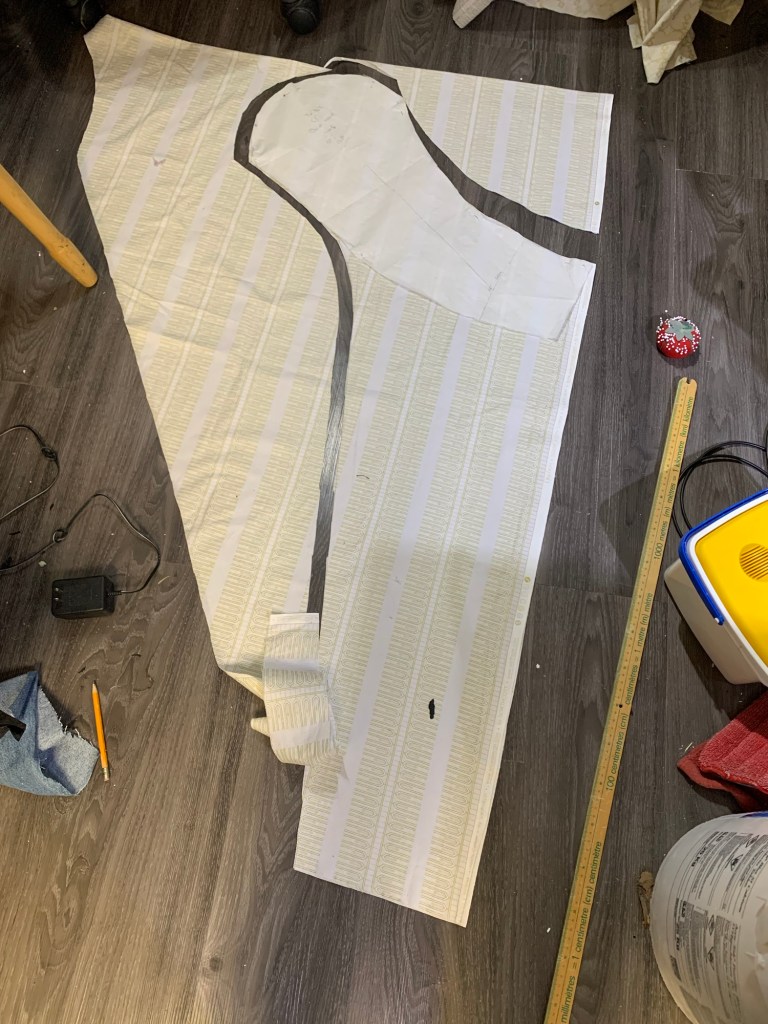
I decided to live dangerously and cut my skirt directly on the muslin fabric (which I was also hoping to use as my lining.) This worked out fairly well, except that my draft was a little short at the sides; I added extra fabric there when I cut the outer layer, figuring the gap would be covered by my final hem treatment. BUT, then I messed up: to save fabric I had pieced the side-back pieces of the muslin. No problem, except that then when ripping apart the muslin, the bodice portion of the piece got ripped off the skirt portion, and since I didn’t have notches or anything, I re-attached it wrong way around (since I made my gores historically asymmetrical). So I wound up adding my length in the wrong spot, or at least I would’ve needed twice the length I thought I did. So the whole damn thing just isn’t quite as long as I would’ve liked. And I was STILL short of fabric—I pieced several parts (so delightfully historically accurate!) and still had only scraps left. Anyway—-note to self, add 2-3 extra inches everywhere when drafting a skirt, at least you can trim it later!
I drafted the draping mediaeval-inspired sleeves using the two-piece sleeve that goes with my bodice, but extending it down to a long, tapered rectangle. I was completely making this part up, but with some tweaking to the top seam I was able to get it to sorta work, though I’m pretty sure sleeves like this are never actually drafted this way.
I borrowed the hood pattern piece from Simplicity 5794 that I made last fall, but one of the other views, which had an exaggerated point to the back of the hood. I usually avoid these but it felt appropriate for the elven thing. I would still like to find a nice heavy drapery tassel for the point.
I originally wanted it to blend smooothly into the lapels, the way I rather accidentally got the hood of my denim M6800 jacket to sit. Arguably I should just have dug out that pattern and used that (surprisingly excellent) hood, adding my own point if desired. Although I’m not sure if the issue is the hood itself or the angle of the lapels. Either is possible. Anyway, it’s not quite what I achieved but I have decided to embrace it for what it is.
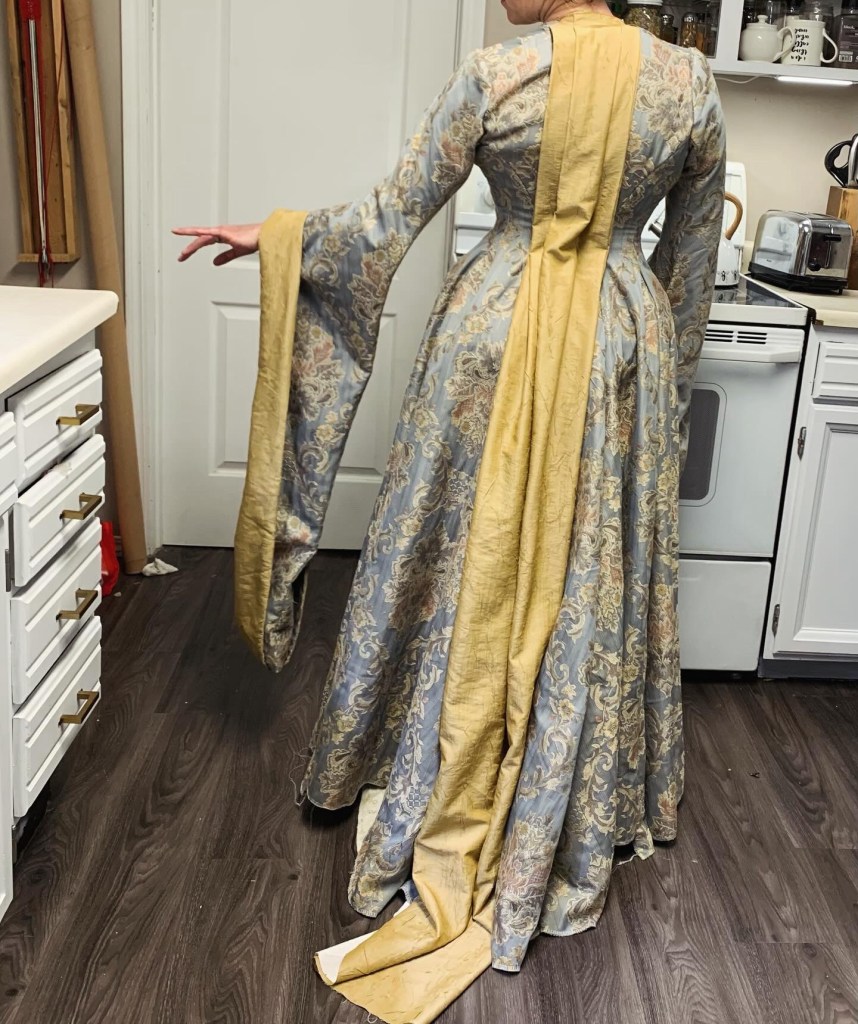
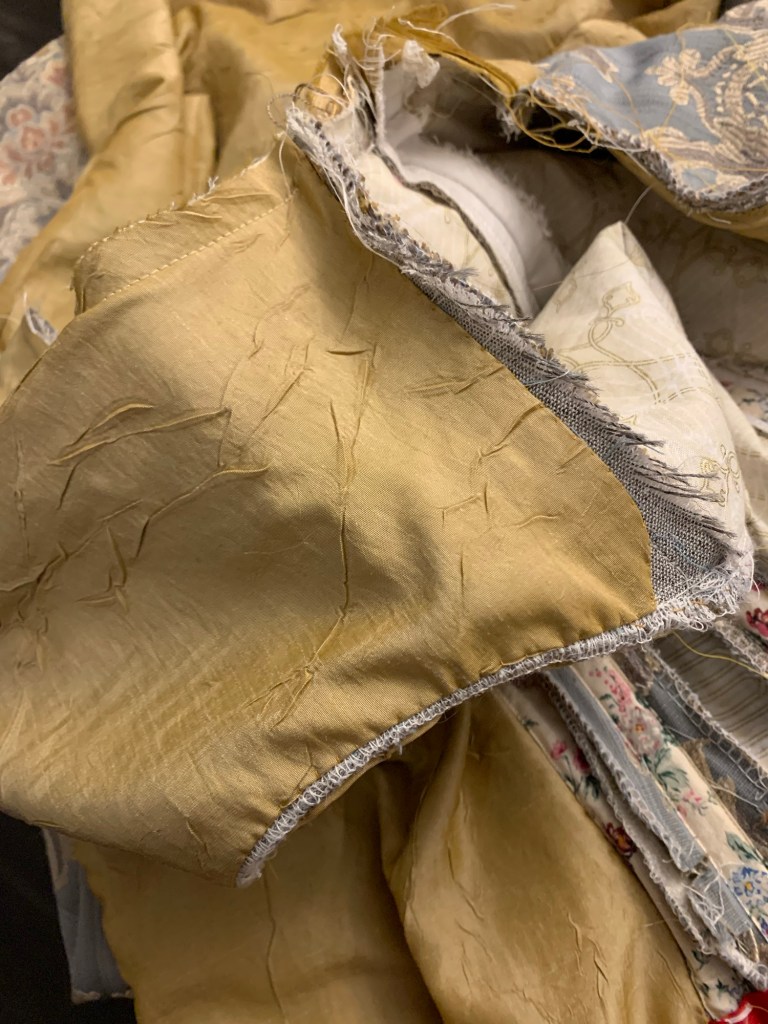
As I cut out my main fabric, it became tragically clear that I wouldn’t have enough for the Watteau pleating I so desperately wanted. However, some perusal of originals identified a few examples where the accent fabric was used to create the pleats, so once I had obtained my gold lining fabric I decided to use that. Initially I went with a full fabric width of pleating, because more is more, but eventually I decided that was just too much.
I ripped out the back seam, cut the excess fabric in half, and added an underlining of some kind of cotton sheeting to it to give it a heft a bit closer to other exterior fabric. At the moment I have the pleats hand-tacked down to keep them well-behaved (which seems typical of a lot of the originals I’ve looked at, or maybe it’s just how they’re arranged on the mannequins) but I might let that out at some point just to see. The only problem is the opulent hood covers a good chunk of it when it’s down.
I haven’t even started talking about all the handsewing I did on this project! Somehow I convinced myself early on in the project that I had to hand-baste the lining (aka underlining aka my muslin) to the outer fabric for construction. Then I talked myself into hand-tailoring the lapels, which meant hand tailoring a truly HUGE swath of hair canvas, since I wanted the lapels to go all the way down to the hem.
While I’m pretty sure these methods are period appropriate for tailored garments (give or take some quibbling—I should’ve used canvas, not hair canvas, but the canvas I have on hand is all really heavy), I’m not at all sure they’re appropriate for a tea gown, but anyway. I haven’t done a crazy amount of padstitching in at least a decade so I was due?
Pad-stitched, with taped edge and roll lines.
It took forever, but I love the shape I got, especially how it let me shrink in the edge of the turned back portion along the waist so that the roll line could bend to fall “properly”
Once the padstitching was done (which only took, oh, two months?) progress sped up a bit. Sewing up the actual garment didn’t take long. Adding in the lining pieces on the sleeves and the fronts took a little more time, especially hand-felling the front lining to the side seams.
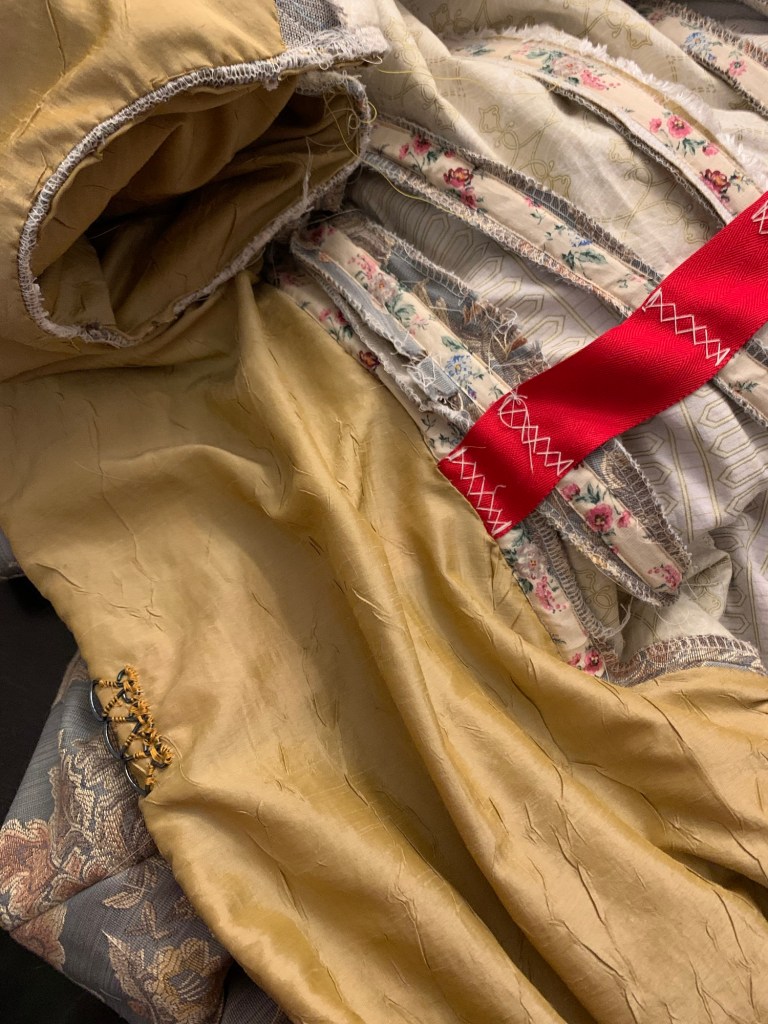
Tea gowns are typically soft garments and are often completely un boned, but of course I wanted boning in mine, because I’m going for a dramatic and structured fantasy look. So I added boning to the various side and back seams. And the waist stay, which runs underneath the front lining all the way to the roll line where the lacing eyes are anchored to it.
Extra width in the front lining because I didn’t sew the darts. Will probably just do a little tuck to control the fullness.
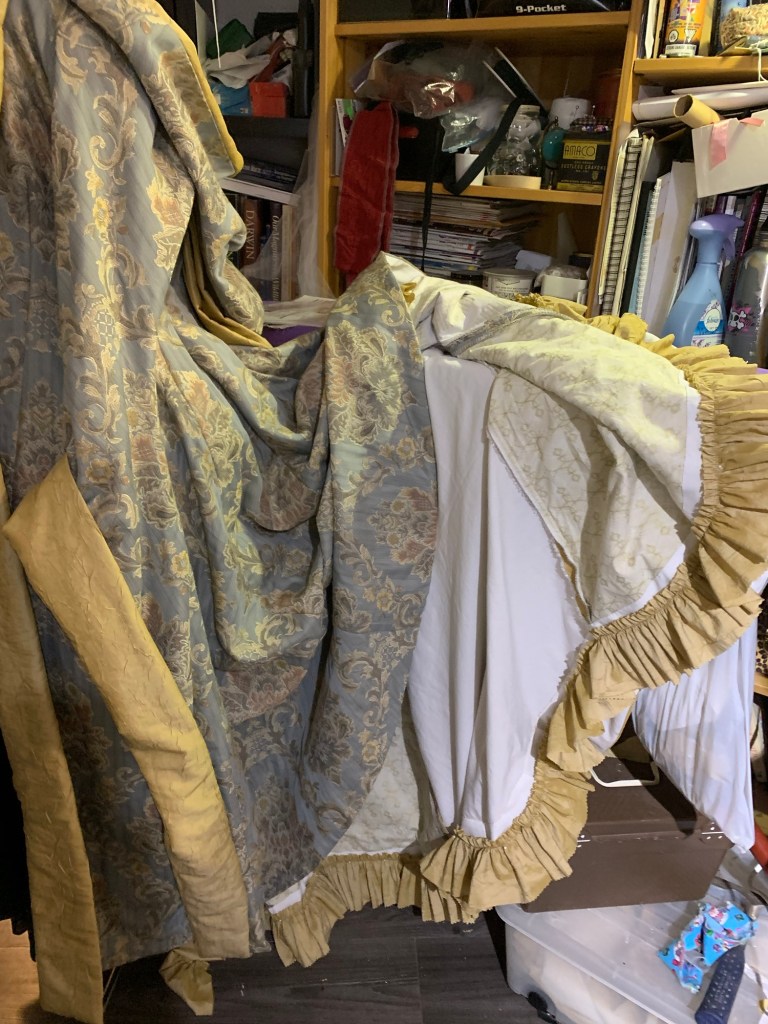
For the hem, I knew I didn’t have the length for a turned up hem. I was planning to use my leftover lining fabric for a facing but after the lining was in there actually wasn’t much left, and I decided to save the remainder for a dust ruffle for the train.
So I dug out some sturdy white polyester that I was happy to sacrifice to a purpose like this and made about a million miles of 5” wide bias tape and added a hem facing. It’s still shorter than I’d like in the front, but we’ll cry about that later.
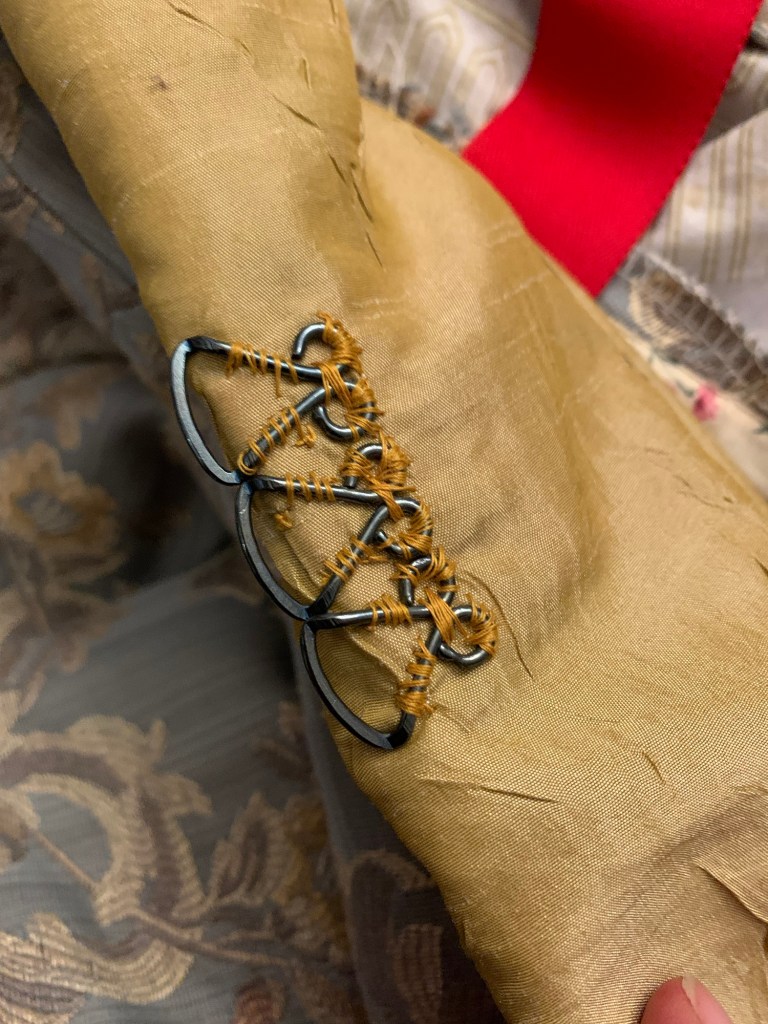
For the laced front, I sacrificed the “eye” side of some gorgeous ornamental hooks and eyes from Farthingales. Hopefully I can use their corresponding hooks with thread bars, or even make my own from wire. Or maybe I’ll find different eyes and swap them out sometime.
For a final touch, I broke out my pinking wheel to make a bunch of straight grain lengths of the lining fabric, gathered up and loosely tacked to the underside of the train as a dust ruffle.
And that, basically, was that. There are a few other touches I might add in the future—a tassel for the hood, trim of some kind, more Elven accessories, long flowing hair—but after all that work I’m so happy to be done. I’d change a few other things, like the fullness of the back skirt (which is a bit excessive), but all in all I’m just super excited to have created such a fun piece!
Next post will cover the under gown.
It was super fun to chat and plan this out together, and I’m so excited (and not a little surprised) that we pulled it off at least somewhat within our projected time frame!
And of course I could not resist abusing the power of photoshop to try to virtually join Cation in a couple of her beautiful photos (by Faes and Photos)! (And thank you Doug for mine!)
The only thing that would make this better would be sitting down for actual tea together! But until I someday get my trailing sleeves to California, I guess photoshop will have to do.